10 Ingenious Ways to Reuse Plastic Bottles in the Garden
Are you looking for creative, eco-friendly ways to enhance your garden while reducing waste? Look no further! This comprehensive guide will show you how to transform ordinary plastic bottles into indispensable gardening tools and features. From nourishing seedlings to protecting delicate plants, reusing plastic bottles in your garden is a sustainable practice that benefits both your plants and the planet.
[lwptoc]
Why This Matters for Your Garden and the Planet
Plastic pollution is a growing global crisis, with millions of tons of plastic waste ending up in landfills and oceans each year. By choosing to reuse plastic bottles in your garden, you’re actively participating in a solution. Not only does it divert waste from polluting our environment, but it also saves you money on gardening supplies and encourages a more resourceful, DIY approach to gardening.
Beyond the environmental benefits, integrating recycled plastic into your garden can lead to surprisingly effective and practical solutions. These humble bottles can provide vital water, protection, and even structure for your plants. It’s a testament to human ingenuity to see how a discarded item can find new life and purpose in nurturing life in the garden.
Embracing these hacks means less reliance on new manufacturing and packaging, further reducing your carbon footprint. Every bottle repurposed is a small but significant step towards a circular economy and a healthier planet. Plus, the satisfaction of creating something useful from “nothing” is incredibly rewarding.
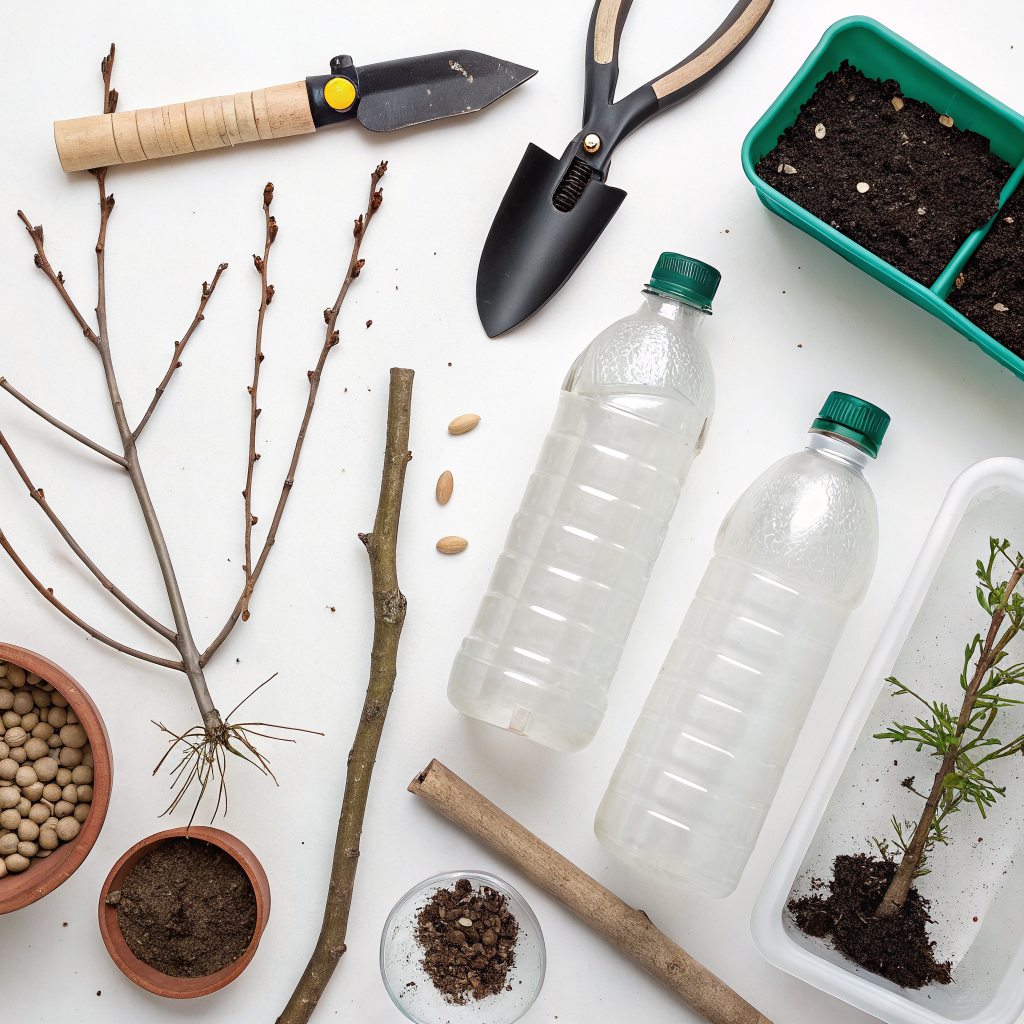
What You Need: Basic Tools and Materials
The beauty of these projects lies in their simplicity and accessibility. You likely already have most of the necessary items around your home. Here’s a quick rundown of what you’ll typically need:
- Plastic Bottles: A variety of sizes (2-liter soda bottles, milk jugs, water bottles) work best. Wash them thoroughly before use.
- Scissors or Craft Knife: For cutting and shaping the plastic. Always exercise caution.
- Utility Knife: Can be useful for tougher plastics or more intricate cuts.
- Drill or Awl: For creating drainage holes or small openings.
- Marker: For marking cut lines.
- Measuring Tape or Ruler: For precise measurements.
- Other optional items: String, twine, strong adhesive, potting soil, plant seeds or seedlings.
Safety first! When using sharp tools, always work on a stable surface and keep your fingers clear of the blade. If children are involved, adult supervision is crucial. These projects are excellent opportunities to teach kids about recycling and gardening in a hands-on way.
Step-by-Step Guide: 10 Clever Ways to Reuse Plastic Bottles
Let’s dive into the practical applications. Here are 10 fantastic ways to give those plastic bottles a second life in your garden, complete with detailed instructions.
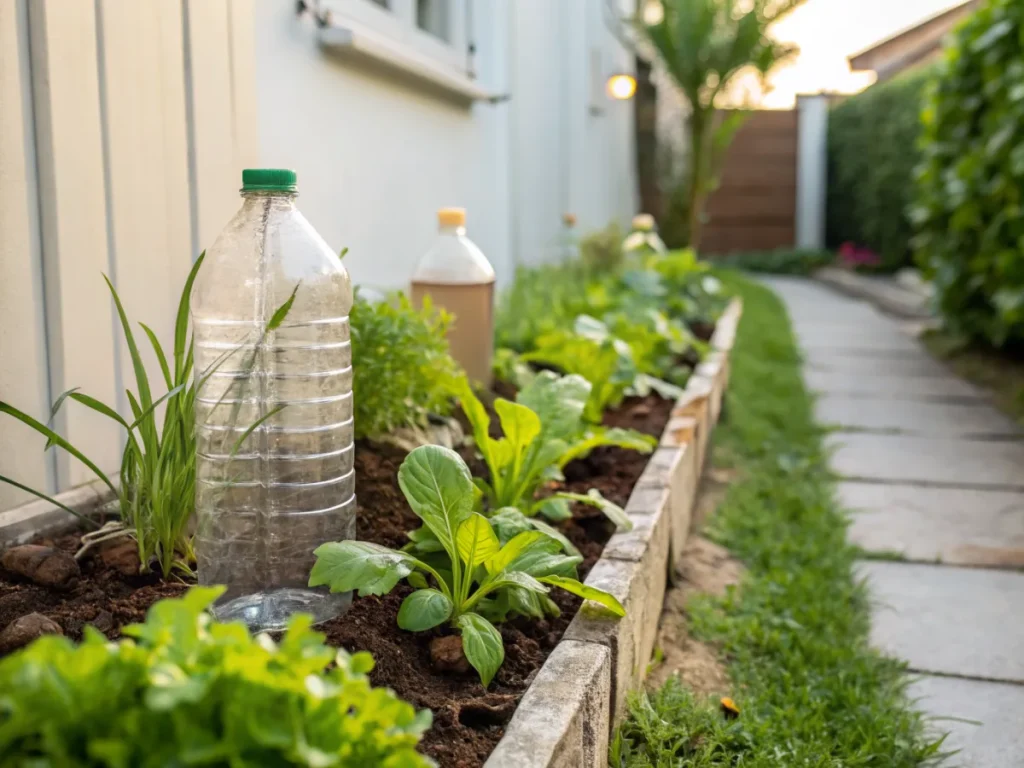
1. Self-Watering Seedling Planters
This is a classic and incredibly effective method for germinating seeds and maintaining consistent moisture. It’s perfect for busy gardeners or those prone to forgetting to water.
- Prepare the Bottle: Take a 2-liter plastic bottle and cut it in half, about two-thirds of the way up from the bottom. The top section with the neck will become your planter.
- Create the Wicking System: Invert the top section. Remove the cap, or if using a screw-on cap, drill a small hole through it. Thread a piece of absorbent wick (like an old shoelace, felt, or cotton string) through the bottle neck, leaving a few inches extending on both ends. This will draw water upwards.
- Assemble the Planter: Place a small layer of gravel or perlite in the inverted top section for drainage. Then, fill it with potting soil. Insert your seeds or small seedlings.
- Add Water: Fill the bottom half of the bottle with water, ensuring the wick submerged in it. The wick will continuously draw water up to the soil, keeping it moist.
- Monitor and Refill: Keep an eye on the water level in the reservoir and refill as needed. This system creates a mini-ecosystem, ideal for healthy plant growth.
This method drastically reduces the need for frequent watering, making it an excellent easy garden hack to save time and water.
2. Mini-Greenhouses or Cloches
Protect delicate seedlings and young plants from frost, pests, and harsh weather with these simple cloches. They create a warm, humid microclimate. This is a brilliant way to extend your growing season.
- Select Your Bottle: Choose a clear, large plastic bottle (2-liter soda bottles work well).
- Prepare for Placement: Cut off the bottom of the bottle. Ensure the cut is clean and straight.
- Install: Place the inverted bottle over your seedling, pushing it gently into the soil to secure it. If temperatures rise significantly, unscrew the cap for ventilation, or remove the cloche during the day.
- Secure if Needed: For windy areas, you might need to place a few stones around the base or use stakes to hold it down.
These mini-greenhouses are especially useful for early spring planting or protecting tender transplants. They also deter curious critters.
3. Drip Irrigation System
Efficiently water thirsty plants, especially those needing consistent moisture, directly at the root zone. This conserves water by minimizing evaporation.
- Prepare the Bottle: Take a plastic bottle (any size, but 1-liter to 2-liter bottles are good for individual plants).
- Create Drip Holes: Pierce several small holes into the bottle’s cap or directly into the base if you plan to bury it upside down. The number and size of holes will determine the drip rate.
- Placement Options:
- Option A (Above Ground): Cut off the bottom of the bottle. Bury the neck part of the bottle next to the plant, leaving the top open. Fill with water from the top.
- Option B (Buried Upside Down): Bury the entire bottle upside down, leaving the bottom (now the “top”) accessible for refilling. Ensure the dripper holes are facing the plant’s root area.
- Fill and Monitor: Fill the bottle with water. The water will slowly seep out, providing a continuous, gentle drip to the plant roots. Refill as needed.
This system is fantastic for managing water use, particularly in arid climates or for garden beds far from a hose. You can scale this up for larger areas by using multiple bottles.
4. Vertical Garden Planters
Maximize your garden space, especially in urban environments or on balconies. This creative approach allows you to grow herbs, strawberries, or small flowers in a visually appealing way.
- Select Bottles: Use sturdy plastic bottles, preferably 2-liter or larger.
- Cut Openings: Lie the bottle horizontally. Cut a rectangular opening along one side of the bottle, leaving enough plastic at the ends and bottom for structural integrity and soil containment. This will be your planting pocket.
- Add Drainage: Poke several small drainage holes in the bottom (the side opposite your planting pocket) of the bottle.
- Create Hangers: Pierce two small holes near each end of the bottle, along the top uncut edges. Thread strong string or wire through these holes to create hangers.
- Assemble the Garden: Fill each bottle with potting soil and plant your chosen herbs or small plants. Hang them vertically, either individually or in a staggered arrangement on a wall or fence.
Consider growing various herbs or shallow-rooted flowers. This setup also makes a great sustainable home decor idea for small spaces.
5. Seed Starters for Trays
No need to buy expensive seed starting trays! Plastic bottles can be easily repurposed into individual cell planters for successful germination.
- Prepare Small Bottles: Collect numerous small plastic bottles (e.g., individual water bottles, yogurt drink bottles).
- Cut and Drain: Cut off the top section of each bottle, leaving a cup-like bottom. Poke drainage holes in the base of each “cup.”
- Sow Seeds: Fill each cup with seed-starting mix, plant your seeds, and water gently.
- Arrange in Trays: Place these individual seed starters into a larger, shallow tray (which can also be repurposed from plastic packaging) to catch excess water.
This method allows for easy transplanting as you can simply lift out individual seedlings without disturbing others. It’s perfect for giving each seedling ample room to start strong.
6. Watering Cans with a Twist
For fine watering of seedlings or small plants, a repurposed bottle makes an excellent gentle watering device. It’s especially useful for precise application.
- Choose a Bottle: Any plastic bottle with a screw-on cap will work.
- Puncture the Cap: Using a drill or awl, carefully make several small holes in the bottle cap. The smaller the holes, the finer the water stream.
- Fill and Water: Fill the bottle with water, screw on the perforated cap, and gently tilt to water.
This inexpensive “watering can” gives you fantastic control, preventing overwatering or disturbing young plants with a heavy pour. It’s a great lightweight option for children too.
7. Plant Labels to Keep Track
Durable, waterproof, and free plant labels! What more could a gardener ask for? This is a simple but invaluable organizational tool.
- Collect Bottles: Use any type of plastic bottle, preferably one with a flat, smooth surface.
- Cut into Strips: Cut the bottle into strips or shapes that resemble traditional plant labels. You can make them pointed at one end to easily stick into the soil.
- Write Labels: Use a permanent marker to write the plant name, date planted, or any other relevant information.
- Insert: Place the labels next to your plants.
These labels are weather-resistant and will last much longer than wooden or store-bought plastic versions. You can even cut them into fun shapes for a decorative touch.
8. Pest Barriers/Snail Traps
Protect your precious plants from crawling pests like slugs and snails without resorting to chemicals. This eco-friendly deterrent is remarkably effective.
- For Barriers: Cut the top and bottom off a large plastic bottle to create a cylinder. Place this cylinder around the base of young plant stems, burying it slightly into the soil. This forms a physical barrier.
- For Snail Traps: Cut a plastic bottle in half horizontally. Dig a small hole in your garden and bury the bottom half of the bottle so its rim is flush with the soil surface. Pour a small amount of beer or a sugary yeast solution into the trap. Slugs and snails will be attracted to the liquid, fall in, and won’t be able to escape.
Regularly check and empty the traps for best results. This allows you to manage pests responsibly and sustainably.
9. Funnels for Fertilizer/Water
A simple but effective tool for precise application of liquids or fertilizers, minimizing spills and waste. This ensures your nutrients go exactly where they’re needed.
- Choose a Bottle: Any plastic bottle with a relatively wide mouth will work, depending on the size of funnel you need.
- Cut and Shape: Cut off the bottom of the bottle. The remaining top section, including the neck, forms your funnel. Trim the edges if they are sharp.
- Use: Place the narrow end into a container or directly into the soil near your plant roots, and pour liquids or granular fertilizers through the wider opening.
This is extremely handy for refilling self-watering systems or applying liquid feed selectively to individual plants. No more juggling messy bags or bottles!
10. Bulb Planters / Storage Bins
Protect newly planted bulbs from rodents or use larger bottles to store small gardening items. This dual-purpose hack supports both planting and organization.
- For Bulb Planters: Cut the top and bottom off a large plastic bottle to create a cylinder retainer. Dig a hole, place the cylinder in the hole, plant your bulb inside, and then backfill. This protects the bulb from being dug up by squirrels or other critters.
- For Storage Bins: Cut off the top section of larger plastic bottles or milk jugs to create open-top bins. Use these to store small hand tools, gloves, seed packets, or plant labels. You can even label the outside for better organization.
These storage bins are particularly useful for keeping your shed or potting bench tidy, ensuring small items don’t get lost. The bulb protectors are a game-changer for gardeners troubled by hungry wildlife.
Pro Tips and Common Mistakes to Avoid
To ensure your plastic bottle gardening projects are successful and durable, keep these tips in mind and avoid common pitfalls.
- Cleanliness is Key: Always thoroughly wash bottles with soap and water, especially if they contained sugary drinks, to prevent attracting pests or mold growth.
- Ventilation for Cloches: Remember to vent your cloches on warm days by unscrewing the cap or removing them entirely. Too much heat can “cook” your plants.
- Drainage is Vital: For any planter, always ensure adequate drainage holes. Without them, roots can rot.
- Safety First with Tools: When cutting plastic, always use sharp tools and cut away from your body. Consider wearing gloves to protect your hands.
- Beware of BPA: While most modern plastic bottles are BPA-free, older or non-food-grade plastics might leach chemicals. Stick to food-grade bottles (usually marked with recycling symbols #1 PET or #2 HDPE) for edible plants, or just be mindful of your source. However, the risk of significant leaching into plants used for food is generally considered low, especially with proper cleaning.
- Structural Integrity: Don’t cut away too much material from bottles used for vertical gardens or self-watering planters, as they need to hold soil and water without collapsing.
- Weathering: Plastic can degrade over time in sunlight, becoming brittle. Prepare to replace your recycled items periodically.
Eco-Friendly Variations and Enhancements
Taking your eco-conscious gardening a step further, consider these variations:
- Decorate Your Creations: Paint your plastic bottle planters or cloches (using non-toxic, weather-resistant paint) to add a decorative touch to your garden. This can transform discarded items into charming garden art.
- Combine Materials: Use reclaimed wood or old pallets to build frames for your vertical gardens, incorporating your plastic bottle planters into a larger recycling project. This enhances stability and aesthetic appeal.
- Rainwater Harvesting: Set up a larger system to collect rainwater, then use your repurposed watering cans or drip irrigation systems to distribute it. This closes the loop on water usage. Learn more about rainwater harvesting.
- Compost Bins (Smaller Scale): For small-scale composting, large plastic jugs can be modified. Cut off the bottom and part of the sides, then bury them in the garden. Fill with kitchen scraps; the plastic helps retain moisture and warmth for decomposition directly in the soil.
These enhancements not only boost the functionality of your repurposed plastic but also add character and personal flair to your garden space.
Seasonal Considerations
The utility of your repurposed plastic bottle items can vary with the seasons:
- Spring: Cloches and self-watering planters are invaluable for starting seeds early and protecting tender seedlings from late frosts. This gives your plants a head start.
- Summer: Drip irrigation systems become essential for conserving water during hot, dry spells. Vertical gardens thrive in full sun, showcasing their bounty.
- Autumn: Cloches can extend the growing season for cool-weather crops, shielding them from early chills. Use larger bottles as storage for harvested seeds or small tools.
- Winter: While outdoor gardening slows, this is a great time to clean and prepare your plastic bottles for next spring’s projects. Some cloches can offer protection for overwintering hardy plants.
Thinking seasonally helps you maximize the benefit and lifespan of your repurposed items, making your gardening efforts more efficient year-round.
Expert Resources for Sustainable Gardening
For more in-depth knowledge and advanced techniques in sustainable gardening and waste reduction, consult these valuable resources:
- Gardening Know How: An extensive resource for all gardening questions, including organic methods and sustainable practices. Their articles cover a vast range of topics from pest control to plant care.
- Royal Horticultural Society (RHS): A leading horticultural charity providing inspiration and advice for gardeners. Their website offers scientific research, plant profiles, and gardening tips focusing on ecological gardening.
- University of Minnesota Extension: Offers research-based information on home gardening, pest management, and environmental stewardship, often featuring practical guides for eco-friendly practices.
These organizations provide credible and detailed information that can further enhance your understanding and practice of sustainable gardening.
Conclusion
Reusing plastic bottles in your garden is more than just a clever trick; it’s a tangible way to practice sustainability, save money, and foster creativity. Each bottle you repurpose contributes to reducing waste, conserving resources, and creating a more resilient and beautiful garden. From simple seedling starters to sophisticated drip irrigation systems, the possibilities are vast and limited only by your imagination.
Embrace this eco-friendly challenge and watch how these humble discarded items transform into invaluable gardening assets. Your plants, your wallet, and the planet will thank you. Start small, experiment, and enjoy the rewarding journey of sustainable gardening with recycled materials. Who knew plastic bottles could be so green?
FAQ: Reusing Plastic Bottles in the Garden
Q1: Is it safe to use all types of plastic bottles for gardening, especially for growing edibles?
A1: It is generally recommended to use plastic bottles made from PET (Polyethylene Terephthalate, recycling symbol #1) or HDPE (High-Density Polyethylene, recycling symbol #2) for gardening, particularly when growing edible plants. These plastics are considered food-safe and are less likely to leach chemicals compared to other types. Always wash bottles thoroughly before use.
Q2: How long will repurposed plastic bottles last in the garden?
A2: The lifespan of repurposed plastic bottles in the garden varies depending on the type of plastic, exposure to sunlight (UV degradation), and overall weather conditions. On average, you can expect them to last from one to several seasons. Sunlight will eventually make them brittle, so be prepared to replace or reinforce them over time.
Q3: What are the main benefits of using plastic bottles for drip irrigation?
A3: The main benefits of using plastic bottles for drip irrigation include water conservation (as water goes directly to the root zone, reducing evaporation), consistent moisture supply for plants, and cost-effectiveness. It’s also an excellent way to water plants when you’re away for a short period and reduces the stress on plants from inconsistent watering.
Q4: Can I use plastic bottles to protect plants from pests?
A4: Yes, plastic bottles can be very effective in protecting plants from certain pests. Cutting off the top and bottom to create a cylinder and placing it around young plant stems acts as a physical barrier against slugs, snails, and cutworms. Additionally, creating beer traps from the bottom halves of bottles is a classic, non-toxic method to catch slugs and snails.


