Clean, and, Oil, Tools – Sustainable Gardening for Bountiful, Resilient Results
Clean, and, Oil, Tools blends practical, low-cost techniques with real environmental impact. Use these eco-first methods to reduce waste, save water, build living soil, and support pollinators—all while keeping your garden beautiful and productive through the cold season.
[lwptoc]
Why Clean, and, Oil, Tools Matters This Season
Winter prep is when smart gardeners get ahead: leaves become mulch, rain becomes irrigation, and “waste” becomes soil food. With Clean, and, Oil, Tools, you set resilient foundations now—so spring growth is faster, healthier, and cheaper.
Core Materials & Tools for Eco-Gardening
Embarking on a sustainable gardening journey with the “Clean, and, Oil, Tools” philosophy means strategically selecting materials and tools that align with eco-conscious principles. This approach minimizes environmental impact, reduces costs, and fosters a healthier garden ecosystem. Here’s an in-depth look at the core materials and tools you’ll need, along with why they are essential for your sustainable gardening practices.
Essential Materials for Soil Building & Mulching
- Dry Leaves: These are gold for the eco-gardener. Instead of bagging them for municipal pick-up, collect and shred them. Shredded leaves are ideal for creating rich leaf mould, serving as an excellent mulch, and providing essential carbon for compost piles. They suppress weeds, retain moisture, and slowly release nutrients as they decompose, mimicking natural forest floor processes.
- Shredded Cardboard: A key component for no-dig gardening and sheet mulching. Cardboard acts as a weed barrier, breaking down over time to add organic matter to the soil. Ensure it’s plain, unprinted cardboard (or remove tape and labels) to avoid introducing unwanted chemicals.
- Twig Cuttings: Small branches and trimmings from your garden can be chipped or simply laid down to create a coarser layer beneath leaf mulch. This improves drainage, adds structure to the soil, and provides a long-term source of carbon as they slowly break down.
- Compost Setup: This is the heart of feeding your soil naturally.
- Compost Bin: An outdoor bin for larger quantities of kitchen scraps and garden waste. It’s where the magic of decomposition happens, turning “waste” into nutrient-rich humus.
- Bokashi: An anaerobic composting method for smaller spaces or for processing all food scraps, including meat and dairy. Bokashi ferments scraps, which are then buried in beds or added to a regular compost pile to decompose further.
- Worm Tower (for containers): For apartment dwellers or those with limited space, a worm tower in a raised bed or large container allows worms to process kitchen scraps directly, enriching the surrounding soil with their castings.
- Rain Barrel with Downspout Diverter: Capturing rainwater is a cornerstone of water conservation. A rain barrel hooked up to your downspout provides free, chlorine-free water for your plants, reducing reliance on treated tap water and lowering your water bill.
- Watering Can or Soaker Hose: These tools facilitate targeted and efficient watering. A watering can is perfect for precise delivery to individual plants, while a soaker hose delivers water directly to the root zone, minimizing evaporation compared to overhead sprinklers.
Sustainable Tools for Planting & Maintenance
- Reusable Pots (Terracotta/Metal/Wood): Ditch single-use plastic pots. Terracotta offers good drainage and breathability, metal containers are durable and stylish, and untreated wood planters blend beautifully with natural aesthetics. Choose materials that last for many seasons.
- Sturdy Seed Trays: Invest in high-quality, durable plastic or recycled material seed trays that can be reused year after year. Alternatively, explore alternatives like soil blocks or homemade newspaper pots.
- Hand Tools: The core of daily gardening.
- Stainless Trowel: Durable, rust-resistant, and easy to clean. A good trowel is indispensable for digging, planting, and potting.
- Pruners: Essential for shaping plants, removing dead growth, and harvesting. Keep them sharp and clean to ensure healthy cuts.
- Rake: For gathering leaves, leveling soil, and clearing debris. A leaf rake is invaluable for collecting your “gold” for composting and mulching.
- Simple Sieve: Perfect for refining compost or leaf mould, creating a fine, uniform medium for seed starting or top-dressing delicate plants.
Step-by-Step Method for Thriving Eco-Gardens
Implementing the “Clean, and, Oil, Tools” philosophy in your garden involves a series of interconnected steps designed to maximize ecological benefits and minimize external inputs. Each step builds upon the last, creating a synergistic system that promotes soil health, conserves water, and supports biodiversity. Follow this detailed guide to transform your garden into a resilient, productive, and beautiful space.
Step 1 — Build a No-Dig Base with Leaves: The Foundation of Fertility
No-dig gardening is a cornerstone of sustainable practice, preserving soil structure, enhancing microbial life, and significantly reducing weed pressure. This step leverages readily available organic materials to create a nutrient-rich, weed-suppressing base for your garden beds.
- Gather Your Materials: Collect plenty of cardboard (remove all tape and labels), shredded dry leaves, and a thin layer of finished compost or well-rotted manure.
- Prepare the Area: If your bed is currently weedy, you don’t need to dig them out. Simply mow them down or cut them close to the ground. The cardboard will smother them.
- Lay the Cardboard: Begin by laying a thick layer of cardboard directly over the soil where you intend to create your bed. Overlap the edges by 10–15 cm (4–6 inches) to prevent weeds from peeking through the gaps. This robust barrier establishes the no-dig foundation.
- Saturate with Water: Once your cardboard layer is down, water it thoroughly until it is completely saturated. This helps it settle, begins the decomposition process, and ensures it stays in place.
- Add Shredded Leaves: On top of the wet cardboard, spread a generous layer of 5–10 cm (2–4 inches) of shredded dry leaves. Leaves are a fantastic source of carbon and organic matter, breaking down to feed soil microbes and create rich humus. Shredding them helps them decompose faster and prevents them from blowing away.
- Apply a Thin Layer of Compost: Finish this base layer with a thin, even layer of finished compost or aged manure. This “activator” layer introduces beneficial microbes and nutrients, jumpstarting the decomposition of the leaves and cardboard, and creating an ideal environment for fungi—crucial for healthy soil. This entire no-dig base acts as a giant lasagna, suppressing weeds, buffering moisture fluctuations, and steadily enriching your soil for spring planting.
Step 2 — Capture Rain & Water Smarter: Conserving Precious Resources
Water is a finite resource, and smart water management is crucial for sustainable gardening. This step focuses on maximizing the use of natural rainfall and optimizing irrigation methods to reduce waste and conserve water.
- Install a Rain Barrel: If you haven’t already, install a rain barrel (or multiple) connected to one or more downspouts on your house or shed. A downspout diverter kit makes installation straightforward and allows you to easily switch between collecting rain and directing it to drainage. Rainwater is free of chlorine and other chemicals found in tap water, making it ideal for plants.
- Water Early or Late: Always water your garden in the early morning or late evening. Watering during the cooler parts of the day dramatically reduces evaporation, meaning more water reaches your plants’ roots where it’s needed most.
- Group Pots by Water Needs: When arranging container plants, group those with similar water requirements together. This allows for more efficient watering, preventing over- or under-watering of individual plants and saving time.
- Mulch Containers with Leaves: Just as with in-ground beds, mulching the top of your container pots with a layer of shredded leaves (2-3 cm or 1 inch) is incredibly effective. This mulch layer acts as an insulator, reducing water evaporation from the soil surface, stabilizing soil temperature, and suppressing weeds.
- Add Saucers with Gravel: For potted plants, place them on saucers filled with a layer of gravel or pebbles. This prevents the pot from sitting directly in standing water, which can lead to root rot. As the water in the saucer evaporates, it creates a localized humidity around the plant, further reducing water stress and helping to keep the air around the foliage slightly more moist – beneficial in dry climates.
Step 3 — Feed Soil Life Naturally: Nurturing Your Underground Ecosystem
Healthy soil is living soil, teeming with microorganisms, fungi, and invertebrates that are essential for nutrient cycling and plant health. This step emphasizes natural methods for enriching your soil, moving away from synthetic fertilizers that can harm this delicate ecosystem.
- Start a Cold Compost Pile: A cold compost pile is an easy, low-maintenance way to process organic materials slowly. Start with a mix of “greens” (nitrogen-rich, like coffee grounds, fresh plant trimmings, kitchen scraps) and “browns” (carbon-rich, like dry leaves, shredded paper/cardboard). Turn occasionally if you wish, but the key is to let nature do its work. This method is perfect for processing large quantities of autumn leaves and smaller kitchen scraps over the colder months.
- Utilize Bokashi Indoors: For all kitchen scraps (including meat, dairy, and oils that typically can’t go into a traditional compost bin), consider a bokashi system. This anaerobic fermentation process pickles your food waste. Once fermented, the “bokashi pre-compost” can be trenched directly into resting garden beds. Burying it prevents pests and allows it to break down rapidly, enriching the soil with both nutrients and beneficial microbes.
- Sieve Last Year’s Leaf Mould: If you’ve been making leaf mould (decomposed leaves), now is the time to harvest it. Pass last year’s leaf mould through a simple garden sieve (a piece of hardware cloth stretched over a frame works perfectly). The resulting fine, crumbly material is a silky, nutrient-poor but incredibly moisture-retentive and structurally beneficial medium. It’s ideal for mixing into your homemade seed-starting mix, improving soil structure, or top-dressing delicate seedlings.
- Brew Compost Tea: Instead of buying liquid fertilizers, make your own compost tea. Steep a bag of finished compost in unchlorinated water for 24-48 hours, aerating it if possible. The resulting liquid is a nutrient-rich elixir teeming with beneficial microbes. Dilute it and use it as a foliar spray or soil drench to give your plants a natural, healthy boost, enhancing their resilience to pests and diseases. This method directly feeds the soil food web, rather than just the plants, fostering long-term soil health.
Step 4 — Balance Pests with Habitat: Fostering a Biodiverse Ecosystem
Instead of waging war on garden pests, the “Clean, and, Oil, Tools” approach encourages creating a balanced ecosystem where natural predators keep pest populations in check. This step focuses on providing habitat and understanding the role of every creature in your garden.
- Keep Select Seed Heads for Winter Birds: As you clear your garden in late autumn, resist the urge to cut down every spent plant. Leave the seed heads of sunflowers, coneflowers, asters, and other seed-bearing plants standing. These provide a crucial food source for winter birds like finches and juncos, who in turn help manage insect populations throughout the year. The hollow stems can also provide shelter for overwintering beneficial insects.
- Bundle Stems into a Habitat Corner: Collect hollow plant stems (e.g., from bamboo, teasel, sunflowers, or ornamental grasses) and tie them into bundles. Place these bundles in a quiet, undisturbed corner of your garden, perhaps beneath a shrub or in a designated “bug hotel.” These provide overwintering sites for beneficial insects such as solitary bees (like mason bees) and lacewings, which are powerful pest predators. Include a pile of sticks, logs, and leaves to provide shelter for beetles, spiders, and other beneficial ground dwellers.
- Use Mild Soap, Neem, or Garlic Sprays Only When Necessary: Adopt a “least-toxic” approach to pest management. Before reaching for any spray, observe and identify the pest. Often, a strong jet of water can dislodge aphids, or hand-picking large caterpillars is sufficient. If a significant infestation occurs, use organic and mild solutions sparingly.
- Mild Soap Spray: A simple solution of dish soap (ensure it’s biodegradable and free of harsh chemicals) and water can suffocate soft-bodied insects like aphids and spider mites.
- Neem Oil: A natural botanical insecticide derived from the neem tree. It disrupts the feeding and breeding cycles of many pests but is relatively harmless to beneficial insects once dry.
- Garlic Spray: A homemade repellent that can deter a range of pests due to its strong odor.
Always test any spray on a small portion of the plant first to ensure no adverse reactions.
- Companion Plant Where Possible: Integrate companion planting into your garden design. Certain plants attract beneficial insects, repel pests, or improve the health and vigor of neighboring plants. For example, marigolds are known to deter nematodes, while dill and parsley attract predatory wasps and hoverflies. Interplanting herbs and flowers with your vegetables can significantly reduce pest problems naturally.
Environmental & Cost Impact of Clean, and, Oil, Tools
Embracing the “Clean, and, Oil, Tools” methodology goes beyond just gardening; it’s a commitment to a regenerative lifestyle that yields profound environmental and economic benefits. By integrating these practices, you’re not just growing plants; you’re cultivating a resilient ecosystem and a more sustainable household budget.
Significant Reduction in Waste and Emissions
- Landfill Diversion: With Clean, and, Oil, Tools, you can divert many bags of leaves and kitchen scraps from landfill. Annually, landscapes generate millions of tons of yard waste, and food waste accounts for a significant portion of municipal solid waste. By composting and mulching leaves, grass clippings, and food scraps, you dramatically reduce the volume sent to landfills. This, in turn, lessens methane emissions—a potent greenhouse gas generated by organic matter decomposing anaerobically in landfills.
- Reduced Manufacturing & Transport Emissions: By producing your own compost and leaf mould, you diminish the need for commercially produced potting mixes and fertilizers. This reduces the energy consumption and carbon emissions associated with manufacturing, packaging, and transporting these products to your local garden center.
- Less Plastic Waste: Reusing durable pots and seed trays, making soil blocks, and maintaining your tools properly means significantly less plastic waste ends up in landfills or polluting ecosystems.
Drastic Water Conservation
- Cut Irrigation Needs via Mulch: Mulching is perhaps the single most effective strategy for water conservation in the garden. By applying thick layers of leaves, shredded cardboard, or wood chips, you create a barrier that drastically reduces evaporation from the soil surface. This means your plants need less frequent watering, sometimes cutting irrigation needs by 50% or more.
- Rain Capture: Installing a rain barrel directly translates into using less tap water for irrigation. Rainwater is soft, free of chlorine and other chemicals, and perfectly suited for your plants. Depending on your roof size and local rainfall, a single rain barrel can collect hundreds of gallons of water annually, significantly reducing your water bill and demand on municipal supplies.
Enhanced Garden Biodiversity
- Simple Habitat Zones: By maintaining brush piles, leaving certain seed heads standing, and creating “bug hotels” from bundled stems, you provide crucial shelter, nesting sites, and food sources for a wide array of beneficial insects, birds, and other small wildlife. This fosters a natural balance, where predators like ladybugs, lacewings, and birds help control pest populations, reducing the need for chemical interventions.
- Healthy Soil Microbes: Focusing on building living soil through compost, leaf mould, and no-dig methods cultivates a vibrant underground ecosystem. These microbes are fundamental to nutrient cycling, disease suppression, and overall plant health, drawing in beneficial organisms from above ground.
- Pollinator Support: Planting native species, leaving areas a little wild, and avoiding pesticides directly supports local pollinator populations (bees, butterflies, moths, etc.), which are vital for ecosystem health and food production.
Significant Cost Savings
- Free Soil Amendments: Leaves, kitchen scraps, and cardboard are often free “waste” materials that become highly valuable soil amendments when composted or mulched. This eliminates the need to purchase expensive bags of potting mix, compost, and topsoil.
- Reduced Fertilizer and Pesticide Costs: A healthy, biodiverse garden fueled by natural inputs rarely needs synthetic fertilizers or chemical pesticides. The soil provides nutrients, and beneficial insects manage pests naturally.
- Lower Water Bills: Rain capture and efficient watering practices directly translate to tangible savings on your utility bills.
- Increased Yields & Plant Health: Healthy soil and a balanced ecosystem lead to stronger, more productive plants that are less susceptible to disease, yielding more food and flowers with less effort and fewer inputs.
In essence, adopting the principles of Clean, and, Oil, Tools transforms your garden from a resource consumer into a self-sustaining ecosystem. It’s an investment in the long-term health of your environment and your wallet, proving that greener gardening is not just an ideal, but a practical and impactful choice.
Advanced Eco Hacks for the Dedicated Gardener
Once you’ve mastered the foundational principles of “Clean, and, Oil, Tools,” you might be ready to explore more advanced techniques that further enhance sustainability, resilience, and productivity in your garden. These hacks leverage deeper ecological knowledge and innovative methods to push the boundaries of eco-friendly gardening.
Charge Homemade Biochar in Compost Tea Before Mixing into Beds
Biochar is a form of charcoal produced through pyrolysis (heating biomass in the absence of oxygen). It’s an incredible soil amendment that can significantly improve soil structure, water retention, and nutrient holding capacity, and provide long-term habitat for beneficial microbes. However, simply adding “empty” biochar to your soil might temporarily lock up nutrients.
- The Hack: “Charge” your homemade biochar (made from garden trimmings, wood scraps) by soaking it in nutrient-rich compost tea for several days or even weeks. The porous structure of the biochar will absorb beneficial microbes, enzymes, and nutrients from the tea.
- Why it Works: This charging process primes the biochar, turning it into a super-sponge for soil life and fertility right from the start. When you then mix this charged biochar into your garden beds, it immediately contributes to a more vibrant and nutrient-efficient soil ecosystem. It’s a long-term investment in soil health, acting as a permanent microbial hotel and nutrient reservoir.
Swap Plastic Seed Trays for Soil Blocks
Traditional plastic seed trays, even reusable ones, eventually wear out and contribute to plastic waste. Soil blocks offer an elegant, eco-friendly alternative.
- The Hack: Use a soil blocker tool to create self-contained blocks of compressed potting mix. Seeds are sown directly into these blocks.
- Why it Works:
- Eliminates Plastic: No more buying or disposing of plastic seed trays or small pots.
- Prevents Root Girdling: The air naturally “prunes” the roots as they reach the edge of the block, encouraging a dense, fibrous root system that avoids the circling common in small pots.
- Reduced Transplant Shock: Plants go directly from block to garden bed without being removed from a container, minimizing disturbance to their root system.
- Cost-Effective: Once you invest in a soil blocker, your only ongoing cost is for your potting mix.
You’ll need a specialized, somewhat heavier, seed-starting mix for soil blocking that holds its shape well.
Try Milk-Jug Winter Sowing for Hardy Perennials and Salad Greens
Winter sowing is a remarkably simple, low-cost method for germinating seeds outdoors, mimicking nature’s own stratification process.
- The Hack: Transform translucent plastic milk jugs (or similar containers) into miniature greenhouses. Cut the jug almost in half horizontally, leaving a hinge. Fill the bottom with 10-15 cm (4-6 inches) of potting mix, sow seeds, moisten, tape the jug shut (leaving the cap off for ventilation), and place it outdoors in a sunny spot for the winter.
- Why it Works:
- Natural Stratification: The freeze-thaw cycles and cold temperatures naturally stratify seeds that require it, leading to robust germination when conditions are right in spring.
- No Grow Lights or Heating Mats Needed: Saves significant energy compared to indoor seed starting.
- Hardy Seedlings: Plants grown this way are naturally hardened off to outdoor conditions from day one, resulting in stronger, more resilient seedlings less prone to transplant shock.
- Recycles Waste: Repurposes discarded plastic containers.
This method is particularly effective for hardy annuals, perennials, herbs, and many cool-season vegetables like lettuce, spinach, and kale.
Insulate Patio Pots with Cardboard Jackets and Leaf Fill to Protect Roots
Container plants are highly susceptible to root damage in freezing temperatures because their root systems are exposed to air on all sides. This hack provides crucial insulation.
- The Hack: For overwintering perennial plants or tender shrubs in patio pots, create a “cardboard jacket” around the exterior of the pot. Cut cardboard to the height and circumference of the pot, wrap it around, and secure it with twine or tape. Then, fill the gap between the cardboard jacket and the pot with a loose insulating material like dry shredded leaves, straw, or even crumpled newspaper.
- Why it Works:
- Root Protection: The air pockets within the cardboard and the loose fill material create an effective insulating layer that protects the pot’s contents from extreme cold, preventing the soil from freezing solid and causing root damage.
- Increased Survival Rates: Significantly improves the chances of tender plants surviving harsh winters outdoors.
- Utilizes Waste: Repurposes cardboard and dry leaves that might otherwise be discarded.
For extra protection, you can also group pots together, or place smaller pots inside larger, insulated ones.
These advanced eco-hacks demonstrate how a deeper understanding of natural processes, combined with creative repurposing of materials, can lead to exceptionally sustainable and successful gardening outcomes, further cementing the principles of Clean, and, Oil, Tools in your practice.
Design & Aesthetics (Keep It Beautiful) with Clean, and, Oil, Tools
Sustainable gardening doesn’t mean sacrificing beauty. In fact, a thoughtfully designed eco-garden can be even more captivating, imbued with a natural charm and a sense of purpose. The “Clean, and, Oil, Tools” philosophy encourages blending environmental responsibility with elegant design choices, creating spaces that are both productive and visually pleasing.
Embrace Natural Materials and Textures
- Recycled-Wood Edges & Raised Beds: Instead of new, treated lumber, source reclaimed wood for garden bed edging or constructing raised beds. Old fence posts, salvaged barn wood, or even fallen branches can be repurposed. The weathered look adds character and rustic charm, creating a grounded, natural aesthetic that connects to the earth. The variations in tone and texture tell a story, making your garden feel lived-in and authentic.
- Stone & Gravel Paths: Opt for natural stone pavers or locally sourced gravel for pathways. These materials offer permeability, allowing rainwater to soak into the ground rather than running off, and provide a timeless, organic feel that complements planting. The crunch of gravel underfoot adds an auditory dimension, while moss growing between pavers adds an aged, serene quality.
- Mossy Planters & Found Objects: Encourage moss to grow on terracotta pots or stone features. Moss signifies age and natural integration, giving planters a soft, velvety texture. Incorporate salvaged items like old wheelbarrows, enamel basins (with drainage holes added), or even old boots as quirky planters. These found objects add personality and a touch of whimsy, telling a story of reuse and resourcefulness.
Create a Cozy Nordic Feel with Lighting and Plant Palettes
- Warm Solar Path Lighting: Install solar-powered LED path lights. Their soft, warm glow provides gentle illumination for evening strolls and highlights key garden features without consuming electricity. Choose lights with minimalist designs or those that mimic natural elements (like lanterns) to enhance the serene, “hygge” ambiance. Strategic placement can define pathways, illuminate seating areas, and draw attention to specimen plants.
- Restrained Plant Palette: Instead of a riot of clashing colors, select a limited palette of harmonious colors—perhaps cool blues, lavenders, silvers, and greens, with touches of muted yellows or whites. This creates a more sophisticated and calming atmosphere, allowing individual plant forms and textures to shine. A restrained palette can also simplify decision-making and make the garden feel more cohesive and intentional.
- Repeat Textures for Cohesion: Texture is as important as color in garden design. Repeat certain textures throughout the garden to create visual rhythm and unity. For example, pair the feathery foliage of ferns with the structural blades of ornamental grasses, and echo these textures with the delicate tracery of a climbing vine or the fine leaves of a groundcover. This layering of textures adds depth and interest without relying on a busy mix of colors.
- Incorporate Evergreen Elements: For year-round interest, include a variety of evergreen shrubs, conifers, and groundcovers. Their consistent form and color provide structure and beauty even in the depths of winter, anchoring the garden design and offering a backdrop for deciduous plants.
- Thoughtful Placement of Hardscaping: Integrate elements like benches made from repurposed wood, stone bird baths, or small water features. These hardscaping elements act as focal points, provide places for rest and contemplation, and enhance the overall aesthetic appeal while contributing to the garden’s ecological function (e.g., water for birds).
By consciously integrating these design principles with your sustainable practices, your garden will not only thrive ecologically but also offer a deeply satisfying and beautiful experience. The “Clean, and, Oil, Tools” approach demonstrates that environmental responsibility and aesthetic appeal are not mutually exclusive; rather, they are complementary aspects of a truly well-cultivated space.
Common Mistakes to Avoid in Eco-Gardening
While the “Clean, and, Oil, Tools” philosophy makes sustainable gardening accessible, it’s easy to fall into old habits or misunderstand best practices. Being aware of common pitfalls can save you time, effort, and ensure your eco-efforts are truly impactful.
Using Peat Moss (Unsustainable—Choose Leaf Mould Instead)
- The Mistake: Many gardeners still rely on peat moss for seed starting, potting mixes, or soil amendment due to its excellent water retention and sterile nature. However, peat bogs are vital carbon sinks and delicate ecosystems that take thousands of years to form. Harvesting peat contributes significantly to carbon emissions and destroys unique habitats.
- The Eco-Solution: Make your own leaf mould! Collect fallen leaves in a bin or simply in black refuse sacks perforated for air circulation. Moisten them and leave them to decompose over 1-2 years. The resulting dark, crumbly leaf mould is a fantastic, sustainable alternative. It improves soil structure, enhances water retention, and is ideal for seed starting and amending garden beds. Alternatively, use coir (coconut fiber), although it has a higher carbon footprint due to transport, it’s a renewable resource.
Over-Tidying (Remove Hazards, Keep Habitat Zones for Allies)
- The Mistake: The traditional aesthetic of a “neat” garden often involves cutting back all spent perennials, raking up every leaf, and removing dead wood. While aesthetically pleasing to some, this hyper-tidiness removes crucial habitat for beneficial insects, pollinators, and overwintering wildlife. It leaves no food for winter birds and eliminates shelter for creatures that help balance your garden’s ecosystem.
- The Eco-Solution: Embrace a little wildness. Prune back only what is diseased, structurally unsound, or truly a hazard. Leave spent perennial stems and seed heads standing through winter (e.g., coneflowers, sunflowers, ornamental grasses) to provide food for birds and shelter for overwintering insects (like native bees). Create designated “habitat zones” with brush piles, log piles, or bundles of hollow stems. These undisturbed areas invite beneficial insects (ladybugs, lacewings, predatory wasps) and small wildlife that will help keep pests in check and contribute to biodiversity.
Watering at Midday (Evaporation Losses; Water Early/Late)
- The Mistake: Watering your garden in the middle of a sunny day, especially during warm weather, is highly inefficient. A significant portion of the water applied evaporates before it can penetrate the soil and reach plant roots. This wastes water and can lead to plants being underwatered despite seemingly sufficient irrigation.
- The Eco-Solution: Always water in the early morning or late evening.
- Early Morning (Best): The soil is cool, winds are typically calm, and water has ample time to soak in before the sun’s intensity increases. This reduces evaporation and allows foliage to dry before nightfall, minimizing fungal disease risk.
- Late Evening: Still better than midday, but it can leave foliage wet overnight, potentially encouraging fungal issues in some climates. However, it’s far more efficient than midday watering.
Combine this with mulching to further reduce evaporation and water retention.
Heavy Fertilizing in Cold Soils (Feed Microbes, Not Just Plants)
- The Mistake: Applying synthetic fertilizers heavily in cold soil conditions (early spring or late autumn) is often ineffective and potentially harmful. In cold temperatures, soil microbial activity is very low, meaning nutrients aren’t processed or made available to plants efficiently. Excess synthetic fertilizer can leach into waterways, causing pollution, or build up salts in the soil, damaging soil structure and root systems.
- The Eco-Solution: Focus on feeding the soil life, rather than just the plants, especially in colder months.
- Compost & Organic Matter: Instead of synthetic fertilizers, spread well-rotted compost, leaf mould, or aged manure over your garden beds. These materials feed the soil microbes, which then slowly release nutrients for plants as temperatures warm up. This creates a slow-release, balanced nutrient profile.
- Cold Soils & Microbes: Understand that cold soils are less active. Microbial activity ramps up with soil temperature. By adding organic matter, you’re not force-feeding plants; you’re building a healthy, living soil that will dynamically provide nutrients when plants need them most.
This approach cultivates a resilient soil ecosystem that naturally supports plant growth without the boom-and-bust cycles of synthetic inputs.
By consciously avoiding these common mistakes, your “Clean, and, Oil, Tools” garden will become more truly sustainable, resilient, and productive, reducing your workload while enhancing ecological health.
Storage & Winter Care for Your Clean, and, Oil, Tools Garden
As the gardening season winds down, proper storage and winter care are essential for maintaining the health of your garden, extending the life of your tools, and preparing for a vibrant spring. The “Clean, and, Oil, Tools” ethos emphasizes thoughtful preparation and preservation.
Protecting Your Water Harvesting System
- Cover Rain Barrels: Before hard frosts arrive, drain your rain barrel completely and disconnect it from the downspout diverter. Leave the spigot open to ensure all water drains out, preventing freezing and potential damage to the barrel. Cover the barrel with a tarp or a purpose-built cover to protect it from UV degradation and debris throughout the winter. If you have a particularly cold winter, consider insulating the barrel itself.
Maintaining Your Composting Systems
- Aerate Compost: Continue to turn and aerate your compost pile occasionally, even in colder weather. While decomposition slows significantly, aeration helps prevent anaerobic conditions and ensures the core remains somewhat active. Ensure your compost is covered to prevent it from becoming waterlogged, which can lead to odors and slow down decomposition. If using a bokashi system, ensure the fermented material is buried in the garden well before the ground freezes solid, so it has time to break down.
- Label Leaf-Mould Pens by Date: If you’re using separate bins or areas for leaf mould (which is an excellent practice), clearly label them with the date you started the batch. Leaf mould takes 1-2 years to fully decompose into a rich, friable soil amendment. Knowing the date helps you identify which batch is ready for use, ensuring you always have a supply of this valuable, peat-free material.
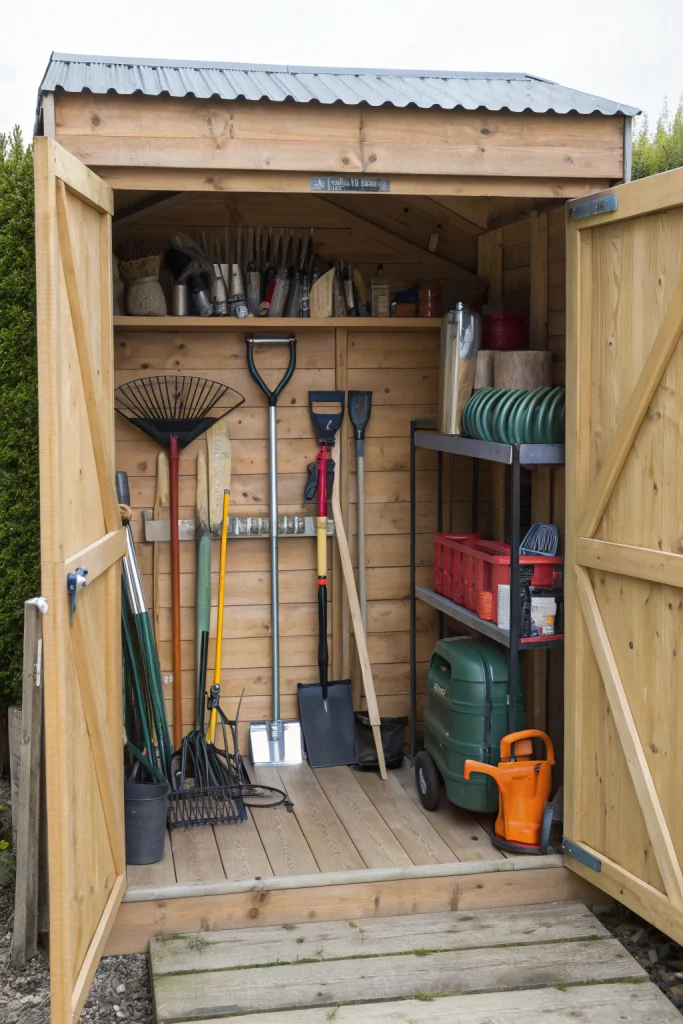
Caring for Your Essential Tools
- Oil Cleaned Tools: After each use (and especially before winter storage), take the time to clean your hand tools (trowels, pruners, spades). Remove all soil, sap, and debris using a wire brush or abrasive pad. Once clean and dry, apply a thin layer of protective oil (such as linseed oil, tung oil, or even vegetable oil) to all metal parts. This prevents rust, keeps moving parts (like pruners) functioning smoothly, and extends the life of your valuable tools. Store them in a dry place, ideally hung to prevent contact with moisture on the floor.
Preparing for Next Season’s Groundwork
- Store Dry Cardboard Flat: Collect and store any excess dry, unprinted cardboard flat in a dry area (garage, shed, under a tarp). This will be invaluable for quick sheet-mulch builds immediately when beds become free in early spring, or for suppressing weeds in new garden areas. Having it readily available saves you time and effort when you’re ready to expand or refresh your garden beds.
- Organize Seeds: Take inventory of your remaining seed packets. Check their viability dates and organize them for efficient access in early spring. Consider ordering new seeds for next season, prioritizing open-pollinated and heirloom varieties from reputable, ethical suppliers.
- Protect Tender Plants: For container plants that aren’t hardy enough to stay out, bring them indoors or into a sheltered location (garage, unheated shed). For those that can tolerate some cold, use the cardboard jacket and leaf fill method described in the advanced hacks section.
By diligently performing these storage and winter care tasks, you not only preserve your resources and tools but also actively prepare your garden for a seamless transition into the next growing season. This proactive approach embodies the sustainable principles of “Clean, and, Oil, Tools,” ensuring long-term success and vibrancy in your garden.
Conclusion
Clean, and, Oil, Tools proves greener gardening is easier, cheaper, and more resilient. Start with leaves, water capture, soil life, and habitat—your spring garden will repay you with vigor and fewer inputs.
The “Clean, and, Oil, Tools” philosophy offers a powerful pathway to a more sustainable, productive, and enjoyable gardening experience. It shifts the paradigm from fighting nature to working with it, transforming perceived garden “waste” into valuable resources. By beginning with simple, actionable steps—such as harnessing the power of fallen leaves for soil building and mulch, implementing intelligent rain capture strategies, nurturing the complex ecosystem of your soil, and consciously creating habitat for beneficial wildlife—you lay the groundwork for a garden that is inherently resilient.
This approach isn’t about expensive gadgets or complicated techniques; it’s about observation, sensible resource management, and a deep appreciation for the ecological cycles that underpin all life. It empowers gardeners to significantly reduce their environmental footprint by diverting organic waste from landfills, conserving precious water resources, and drastically cutting down on the need for external inputs like synthetic fertilizers and pesticides. These practices lead to a more vibrant and diverse garden ecosystem, where plants are healthier, pests are naturally managed, and pollinators thrive.
The profound beauty of the “Clean, and, Oil, Tools” methodology lies in its promise: the efforts you invest now in these eco-first practices will not only create a more harmonious environment but will also yield tangible rewards. Your garden will emerge in spring with renewed vigor, requiring fewer interventions, inputs, and costly quick fixes. It will be a testament to the power of thoughtful, sustainable practices—a resilient, productive, and truly beautiful living space that gives back more than it takes. Embrace these principles, and watch your garden, and your connection to it, flourish.
FAQ
- Can I start now? Yes—focus on leaves, rain capture, no-dig prep, and tool care. These are foundational steps that provide immediate benefits and set the stage for next season’s success.
- Only a balcony? Use worm towers/bokashi in planters and insulate pots with cardboard + leaves. Balcony gardening is perfectly suited for many eco-practices. Worm towers or bokashi systems efficiently process kitchen scraps in small spaces. Insulating pots with recycled cardboard and dry leaves protects roots in winter and helps retain moisture.
- Special tools required? No—rake, pruners, and a basic bin (or bags) are enough. While specialized eco-tools exist, the core “Clean, and, Oil, Tools” philosophy emphasizes using what you have and simple, durable hand tools. A good rake for leaves, sharp pruners, and a basic bin (or even just sturdy trash bags) for collecting organic matter are sufficient to start.
- Science behind this? See resources below. The principles of soil biology, hydrology, and integrated pest management underpin these practices. The provided links offer further reading on the scientific benefits of composting, no-dig gardening, biodiversity, and healthy ecosystems.
- Healthline — Growing food in limited space
- Harvard T.H. Chan — Plate & Planet (sustainability)
- Medical News Today — Health benefits of gardening


