Tool Organization — The Ultimate Guide to Sustainable Garden Results
Tool Organization blends practical, low-cost techniques with real environmental impact. Use these eco-first methods to reduce waste, save water, build living soil, and support pollinators—all while keeping your garden beautiful and productive through the cold season.
Why Tool Organization Matters This Season
Winter prep is when smart gardeners get ahead: leaves become mulch, rain becomes irrigation, and “waste” becomes soil food. With Tool Organization, you set resilient foundations now—so spring growth is faster, healthier, and cheaper.
Core Materials & Tools
Achieving sustainable garden results with efficient Tool Organization starts with selecting the right materials and tools that align with eco-friendly principles. Investing in durable, multi-purpose items not only reduces waste but also simplifies maintenance and long-term costs.
- Dry leaves, shredded cardboard, twig cuttings: These are your foundational layers for mulch and sheet-mulch. Leaves are abundant, free, and decompose into nutrient-rich leaf mould. Shredded cardboard suppresses weeds effectively and introduces carbon to the soil. Twig cuttings enhance soil structure and provide microhabitats. Collecting and organizing these materials efficiently is a key aspect of good Tool Organization.
- Compost setup: This is central to closing the loop on kitchen and garden waste. Options include a simple compost bin for larger gardens, a bokashi system for smaller spaces or indoor use, or a worm tower perfect for container gardening. Proper Tool Organization here means having your composting tools (forks, aerators) readily accessible.
- Rain barrel with downspout diverter; watering can or soaker hose: Water conservation is paramount. A rain barrel captures precious rainwater, reducing reliance on municipal water and lowering your water bill. A good watering can or a strategically placed soaker hose ensures efficient delivery, minimizing evaporation. Organizing these watering tools for easy access ensures you’re always ready to capture and utilize water.
- Reusable pots (terracotta/metal/wood) and sturdy seed trays: Ditch single-use plastics. Terracotta, metal, and wood pots are durable and aesthetically pleasing. Sturdy seed trays, ideally made from recycled materials or long-lasting plastic, will serve you for many seasons. Effective Tool Organization here involves cleaning and stacking these pots neatly for winter storage.
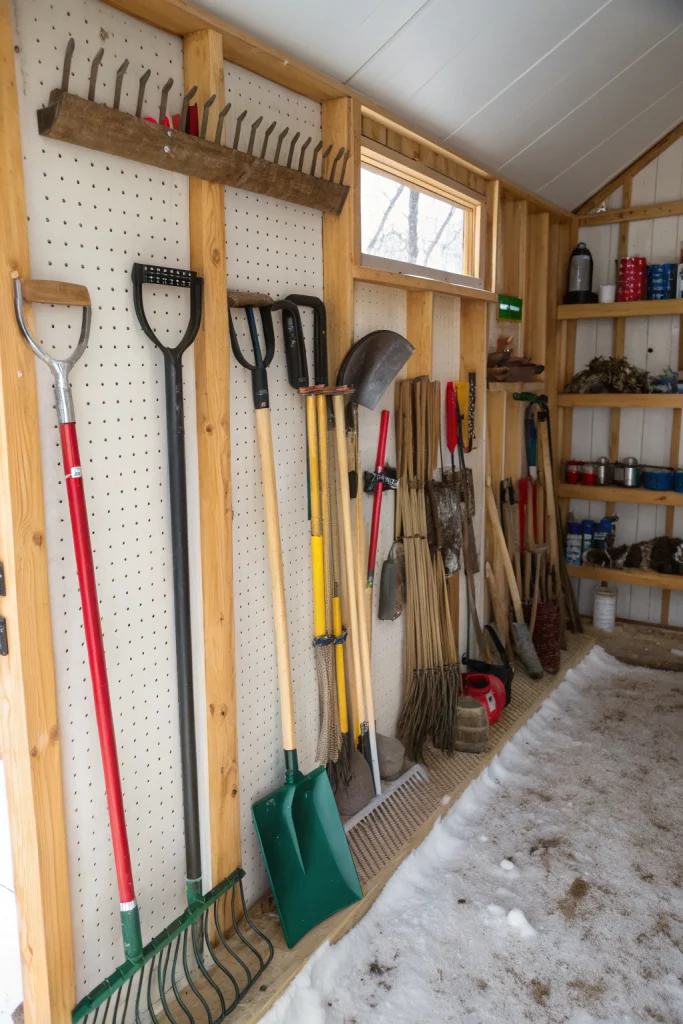
- Hand tools (stainless trowel, pruners, rake) and a simple sieve: Quality over quantity. A stainless steel trowel resists rust and lasts longer. Sharp, well-maintained pruners make clean cuts, promoting plant health. A good rake is essential for gathering leaves and debris. A simple sieve helps refine compost and leaf mould. Keep these essential tools organized on a pegboard or in a designated toolbox.
Step-by-Step Method
Implementing effective Tool Organization is more than just tidying up; it’s about integrating sustainable practices into every step of your gardening routine. Follow these steps to build a more resilient and productive garden.
Step 1 — Build a No-Dig Base with Leaves
This method is a cornerstone of regenerative gardening, reducing effort and enriching soil. Begin by laying cardboard directly on bare soil. Overlap the edges by 10–15 cm to prevent weeds from peeking through. Wet the cardboard lightly to help it settle and begin decomposing. Next, add a generous layer of 5–10 cm of shredded leaves. If leaves are whole, they will still work, but shredded leaves break down faster. Top this with a thin layer of finished compost. This sandwich technique suppresses existing weeds, creates a moisture-retentive buffer, and, most importantly, kickstarts the fungal networks that are vital for healthy soil in spring. Proper Tool Organization for this step includes having your rake, cardboard cutter, and watering can ready.
Step 2 — Capture Rain & Water Smarter
Water is a precious resource. Installing a rain barrel is a simple yet impactful way to reduce your water footprint. Connect it to a downspout diverter to collect rainwater from your roof. Water your garden early in the morning to minimize evaporation. This also allows foliage to dry before nightfall, reducing the risk of fungal diseases. For container plants, group them by their water needs; thirsty plants together, drought-tolerant ones separately. Mulch containers with a layer of leaves or small pebbles to retain moisture. Adding saucers with gravel beneath pots creates a microclimate that reduces evaporation and can offer a small reserve for roots. Efficient Tool Organization ensures your rain barrel is clean, the diverter is properly installed, and your watering can or soaker hose is easily accessible.
Step 3 — Feed Soil Life Naturally
Healthy soil is living soil. Start a cold compost pile using fallen leaves mixed with nitrogen-rich materials like coffee grounds and kitchen scraps. Cold composting is slower but excellent for large volumes of leaves. For smaller spaces or faster decomposition, consider a bokashi system indoors or a worm tower for container gardening. Bokashi ferments food scraps, which can then be trenched into resting beds, rapidly enriching the soil. Sieve last year’s leaf mould – a black, crumbly, earthy substance – to create a silky, nutrient-rich seed mix perfect for early sowings. This provides a gentle start for delicate seedlings. Good Tool Organization means your compost turners, sifters, and collection bins are neatly stored and ready for use.
Step 4 — Balance Pests with Habitat
A truly sustainable garden embraces biodiversity. Instead of immediately clearing all spent plants, keep select seed heads—such as those from coneflowers, sunflowers, and native grasses—for winter birds. These provide a crucial food source when other options are scarce. Create a “habitat corner” by bundling hollow stems (like those from elderberry or bamboo) and piling up sticks and leaves. This offers shelter for beneficial insects, solitary bees, and small wildlife throughout the colder months. Only resort to mild soap, neem oil, or garlic sprays when absolutely necessary, and always try companion planting first. For example, planting marigolds near vegetables can deter nematodes. Effective Tool Organization ensures your pruners are sharp for selective trimming and any organic pest deterrents are stored safely.
Step 5 — Prepare Tools for Winter Storage
Proper maintenance and storage of your gardening tools are paramount for longevity and readiness for the next season. This step is the literal embodiment of Tool Organization. After each use, especially before winter storage, clean all your hand tools thoroughly. Remove any soil, sap, or plant debris. A stiff brush and water work well. For stubborn sap, a little rubbing alcohol can help. Dry tools completely to prevent rust. Then, apply a thin coat of oil (linseed oil or WD-40 works) to all metal parts. This protects them from corrosion during dormant months. Wooden handles can benefit from a rub with linseed oil to prevent drying and cracking. Store tools in a dry place, ideally hung on a pegboard or in a dedicated cabinet. This not only keeps them organized but also prevents them from getting damaged or lost. Sharpening blades (pruners, hoes) before storage ensures they’re ready for spring. Labeling storage areas for different tool types also makes spring setup effortless. Investing this time in Tool Organization saves money and frustration in the long run.
Step 6 — Plan for Spring with Seed Inventory and Order
Winter is the perfect time for thoughtful garden planning, which is a key aspect of advanced Tool Organization. Go through your existing seed packets. Discard any that are too old (check viability dates) or have been improperly stored. Make a detailed inventory of what you have. Then, browse seed catalogs, both physical and online, with a focus on native plants, heirloom varieties, and pest-resistant options. Consider your garden’s specific conditions – sun exposure, soil type, and space availability. Plan your crop rotation to maintain soil health. Order seeds early to ensure availability, especially for popular varieties. Create a planting schedule that factors in expected last frost dates and seed germination times. Organize your new and existing seed packets in airtight containers, ideally with desiccants, in a cool, dark place. This preserves their viability. This proactive planning, facilitated by diligent Tool Organization of your seed library and records, will make spring planting smooth and efficient.
Step 7 — Insulate and Protect Perennials and Containers
Protecting vulnerable plants from harsh winter conditions is crucial for their survival and for ensuring they return strong in spring. For patio pots and containers, roots are much more exposed to freezing temperatures than those in the ground. Insulate them by wrapping the pots in burlap or old blankets, or by creating “jackets” from cardboard and filling the space between the pot and the jacket with dry leaves. Group pots together in a sheltered spot, such as against a warm wall, to maximize heat retention. For in-ground perennials, especially newly planted ones or those not fully hardy in your zone, apply a thick layer of mulch (leaves, straw, wood chips) around their base. This insulates the soil and protects roots from severe freeze-thaw cycles that can heave plants out of the ground. Proper Tool Organization involves having your insulation materials readily accessible and your rake handy for applying mulch.
Step 8 — Maintain and Recharge Your Composting Systems
Winter doesn’t mean your composting efforts cease; rather, it’s a time for ongoing maintenance and preparation for spring’s demands. If you have an active compost pile, continue to aerate it periodically, though decomposition will slow in cold weather. Turn the pile to introduce oxygen and expose different sections to the elements. Ensure your compost bin is covered to prevent it from becoming waterlogged by rain or snow, which can slow decomposition and lead to anaerobic conditions. For bokashi systems, continue to ferment kitchen scraps indoors. The fermented material can be stored in sealed bins until the ground thaws, at which point it can be trenched into garden beds. Worm towers, particularly those located outdoors, may need extra insulation if temperatures drop significantly. You can add layers of cardboard or straw around them. Regularly emptying finished compost from the bottom of your bins and enriching it with new inputs is vital. Good Tool Organization here means your compost fork, aerator, and collection buckets are clean and ready for continuous use.
Step 9 — Repair and Create New Garden Structures
Winter is an opportune time to focus on structural improvements and repairs within your garden, without the urgency of active growing plants. Inspect raised beds for any signs of rot or instability; reinforce sides or replace damaged boards as needed. Check trellises, arbors, and pergolas for loose joints, weakened supports, or flaking paint. Repair or repaint to protect them from further weather damage. This is also an excellent time to plan and build new structures, such as a sturdy new cold frame, an expanded composting area, or even a small shed for better Tool Organization. Using recycled or sustainably sourced materials like reclaimed wood or bamboo can reduce environmental impact and cost. Precisely organized hand tools, power tools, and building materials make these tasks efficient and enjoyable. Having a designated area for your saw, hammer, measuring tape, and screws streamlines the building process, embodying effective Tool Organization in a practical application.
Step 10 — Education and Community Engagement
Beyond the physical tasks, winter is an excellent season for intellectual growth and community connection, extending the concept of Tool Organization to knowledge and social networks. Read gardening books, subscribe to sustainable gardening magazines, or watch documentaries on permaculture and ecological restoration. Learn about new techniques, discover native plant varieties suitable for your region, or explore ways to further reduce your garden’s environmental footprint. Engage with local gardening clubs, online forums, or community workshops. Share your experiences and learn from others. Consider volunteering at a local community garden or urban farm. This not only expands your own knowledge base but also contributes to the collective wisdom of your community. Organizing your learning resources – books filed, websites bookmarked, community contacts saved – is a form of Tool Organization that enhances your gardening journey.
Step 11 — Winter Sowing for Early Spring Starts
One of the most exciting “advanced eco hacks” and a testament to efficient Tool Organization is winter sowing. This technique uses discarded milk jugs or other clear plastic containers as miniature greenhouses to start cold-hardy seeds outdoors during winter. It’s a fantastic way to get a jump start on spring without needing expensive grow lights or indoor space. Simply cut your plastic container, poke drainage holes, add a few inches of moist potting mix (ideally sifted leaf mould), sow your seeds (perennials, hardy annuals, salad greens), tape it back up, and place it outside. The containers naturally protect the seeds from extreme weather while allowing natural stratification and germination when conditions are right. This method produces strong, hardened-off seedlings perfectly adapted to outdoor conditions. Having your clean milk jugs, scissors, tape, and seed packets (all perfectly organized) ready makes this process incredibly simple and effective. It’s an excellent example of how clever Tool Organization and resourcefulness lead to sustainable results.
Step 12 — Implement Advanced Water Harvesting Solutions
While rain barrels are a great start, advanced water harvesting takes this a step further, requiring some innovative Tool Organization and planning. Consider installing multiple rain barrels to increase your storage capacity, especially if you have a larger roof area. Explore options for greywater recycling, such as diverting water from your washing machine (using biodegradable soaps) to irrigate non-edible landscape plants. This requires careful plumbing and adherence to local regulations but can significantly reduce your municipal water usage. For sloped gardens, creating small swales or berms can slow down rainwater runoff, allowing it to infiltrate the soil more effectively rather than eroding it. These earthworks act like mini-reservoirs. Even strategically placed downspouts that empty directly into garden beds rather than onto paved surfaces can make a difference. The Tool Organization for these projects might involve shovels, levels, and possibly pipe-cutting tools, all neatly stored and maintained.
Step 13 — Foster a Diverse Ecosystem with Native Plants and Pollinator Patches
A truly sustainable garden is one that supports local biodiversity, and this involves intentional plant selection and continuous effort in Tool Organization for planting and maintenance. Research native plants for your specific region, as these are best adapted to the local climate, soil, and ecosystem. Native plants often require less water, fertilizer, and pest control once established. Create dedicated pollinator patches by planting a variety of native flowers that bloom at different times throughout the growing season, providing continuous food for bees, butterflies, and other beneficial insects. Include host plants for butterfly larvae, such as milkweed for monarchs. Leave some areas a little wilder, with unraked leaves and standing dead stems, to provide overwintering habitat. Your Tool Organization for this task might include a set of hand tools for planting, watering cans for establishment, and perhaps a reference guide for native species, all kept in an easily accessible location.
Step 14 — Sustainable Soil Amendment Management
Beyond composting, thoughtful management of soil amendments is crucial for long-term soil health, a core principle of sustainable gardening and requiring continuous Tool Organization. Instead of relying on synthetic fertilizers, which can harm soil microbes and leach into waterways, focus on natural amendments. Build a dedicated leaf mould cage (a simple wire cylinder) to produce this valuable soil conditioner. Collect wood ash from clean wood burning (in moderation and only if your soil is acidic) as a source of potassium and trace minerals. Consider making biochar, a charcoal-like substance, from garden waste and “charging” it with compost tea or liquid fertilizer before adding it to beds. Biochar significantly improves soil structure, water retention, and nutrient availability over the long term. Your Tool Organization for this involves a separate area for storing bags of leaf mould, a dedicated space for wood ash, and a clean bucket for brewing compost tea. Labeling these amendments clearly ensures proper application.
Step 15 — Embrace Passive Solar Design Elements
Integrating passive solar design elements into your garden can extend growing seasons and create microclimates, demonstrating a higher level of environmental consciousness and requiring strategic Tool Organization for construction. Position raised beds and cold frames to maximize winter sunlight exposure. Use dark-colored rocks or bricks in strategic locations to absorb solar heat during the day and slowly release it at night, protecting tender plants from frost. A south-facing wall can provide excellent radiant heat for espaliered fruit trees or heat-loving herbs. Experiment with reflective surfaces, like old mirrors or white paint on fences, to bounce light into shadier areas, though be mindful of potential glare. Building these elements requires planning and a well-organized set of construction tools – levels, measuring tapes, and possibly masonry tools – exemplifying how effective Tool Organization supports more complex sustainable design choices.
Step 16 — Advanced Pest and Disease Prevention
True sustainable gardening preempts pest and disease problems through ecological balance rather than reaction, meaning better proactive Tool Organization. Focus on creating a robust, healthy ecosystem where natural predators keep pests in check. Plant diverse species to avoid monoculture vulnerabilities. Practice strict garden hygiene: promptly remove diseased plant material (do not compost it if you suspect a serious pathogen), and clean tools between tasks to prevent disease spread. Rotate crops regularly to break pest and disease cycles in the soil. Introduce beneficial insects if necessary, but primarily focus on attracting them naturally through habitat and diverse planting. Maintain healthy soil, as strong plants are more resistant to attack. Keep a garden journal to track recurring issues and observe patterns. Your Tool Organization here includes clean pruners, a dedicated “sick plant” debris bin, and records of problem areas for future reference.
Step 17 — Sustainable Lighting and Energy Use
Beyond the plants themselves, consider the energy footprint of your garden, which reflects on your overall sustainability and how you integrate tools for energy solutions. Opt for solar-powered path lights and decorative lighting, eliminating the need for electricity and wiring. If you need task lighting for shed or workbench, choose energy-efficient LED options. Maximize natural light in potting sheds and greenhouses through thoughtful orientation and window placement. Consider a small solar panel to power a low-voltage pump for a water feature or even a small fan in a greenhouse. Reducing energy consumption not only lessens your carbon footprint but also lowers utility bills. The Tool Organization for this might involve neatly storing solar lights, ensuring clear access to any panels for cleaning, and keeping electrical tools tidy if you’re installing low-voltage systems.
Environmental & Cost Impact
With Tool Organization, you can divert many bags of leaves from landfill, cut irrigation needs via mulch and rain capture, and increase garden biodiversity with simple habitat zones. Every leaf saved from a landfill reduces methane emissions, a potent greenhouse gas. By using rainwater and mulching heavily, you significantly decrease your reliance on potable water, saving money and a precious resource. Creating habitat zones not only supports local wildlife but also establishes a natural pest control system, reducing the need for chemical interventions. This holistic approach makes your garden a net positive for the environment, proving that thoughtful Tool Organization extends beyond mere tidiness to genuine ecological benefit.
Advanced Eco Hacks
- Charge homemade biochar in compost tea before mixing into beds. Biochar acts like a soil sponge, improving water retention and creating micro-habitats for microbes. Charging it first fills these pores with nutrients and beneficial microbes. This process is greatly aided by proper Tool Organization, ensuring you have the right vessels for brewing tea and mixing materials efficiently.
- Swap plastic seed trays for soil blocks. Soil blocking eliminates the need for plastic trays altogether! Special soil blockers create cubes of compressed soil, which hold their shape. Seedlings are then transplanted directly into the garden with minimal root disturbance. This is an excellent example of how specific tools, when well-organized, facilitate highly sustainable practices.
- Try milk-jug winter sowing for hardy perennials and salad greens. As mentioned earlier, this method uses recycled plastic containers as mini-greenhouses, allowing seeds to experience natural cold stratification outdoors. It reduces the need for indoor grow lights and hardening-off processes. Your collected and cleaned milk jugs, saved and organized through good Tool Organization, become valuable resources.
- Insulate patio pots with cardboard jackets and leaf fill to protect roots. Protecting container plants from freezing is vital. Cardboard is an excellent insulator, and filled with dry leaves, it creates a formidable barrier against cold. This simple, free method extends the life of your plants and containers, reducing waste. Efficient Tool Organization means having these materials readily available during fall prep.
Design & Aesthetics (Keep It Beautiful)
Blend sustainability with style: recycled-wood edges, mossy planters, and warm solar path lighting for a cozy Nordic feel. Choose a restrained palette and repeat textures for cohesion. A well-organized garden doesn’t mean sacrificing beauty. In fact, sustainable choices often enhance aesthetics. Imagine raised beds with edging made from reclaimed barn wood, their weathered surfaces adding character. Terracotta pots, allowed to age and develop a natural mossy patina, evoke a sense of timeless elegance. Solar-powered lanterns casting a gentle glow along paths create a magical ambiance without adding to your electricity bill. By selecting a limited color palette for flowers and foliage and repeating certain textures (e.g., feathery grasses, rough stone), you create a sense of calm and order. Even the visible aspects of your Tool Organization, such as a beautifully crafted wooden tool shed or neatly stacked terracotta pots, can contribute to the garden’s overall aesthetic appeal.
Common Mistakes to Avoid
Even with the best intentions, some common pitfalls can hinder sustainable gardening efforts. Good Tool Organization can help prevent many of these.
- Using peat moss (unsustainable—choose leaf mould instead): Peat extraction destroys vital wetland ecosystems and releases stored carbon. Leaf mould, on the other hand, is a byproduct of your own garden and provides superior benefits to soil. Make sure your soil amendment tools are clearly marked for leaf mould, not peat bags.
- Over-tidying (remove hazards, keep habitat zones for allies): While cleaning up is good, a sterile garden is a lifeless garden. Resist the urge to cut back every spent stem or rake every single leaf. Leave some for wildlife habitat. Your Tool Organization should include a “habitat reserve” area where you intentionally leave some natural debris.
- Watering at midday (evaporation losses; water early/late): Watering when the sun is high leads to significant water loss through evaporation. Early morning or late evening watering ensures water reaches the roots. Ensure your watering tools are positioned for easy access during the cooler parts of the day.
- Heavy fertilizing in cold soils (feed microbes, not just plants): Cold soils have less microbial activity, meaning plants can’t efficiently use synthetic fertilizers, which can then leach away. Focus on feeding the soil life with compost and organic matter. This emphasizes the need for composting tools over chemical fertilizer spreaders in your Tool Organization plan.
- Ignoring tool maintenance: Letting tools rust or become dull not only makes gardening harder but also shortens the lifespan of your equipment, leading to more waste and expense. Regular cleaning, sharpening, and oiling are crucial. Your Tool Organization space should include a dedicated cleaning station and sharpening stones.
- Overlooking soil testing: Guessing your soil’s pH and nutrient levels can lead to incorrect amendments, wasting resources and potentially harming plants. Invest in a simple soil test kit. Knowing your soil’s needs for precise feeding is a form of information Tool Organization.
- Planting non-native species exclusively: While exotic plants can be beautiful, a reliance on them often means they require more water, fertilizer, and pest control, and offer little benefit to local wildlife. Prioritize native plants that thrive in your climate. Your seed and plant procurement, a part of Tool Organization, should always consider native selections first.
Storage & Winter Care
Proper storage and winter care are crucial for maintaining your sustainable garden infrastructure and tools, embodying the very essence of Tool Organization. Cover rain barrels to prevent ice damage and accumulation of debris, and disconnect downspout diverters to avoid freezing pipes. Aerate compost piles regularly throughout winter, even if activity slows, to prevent anaerobic conditions. Label leaf-mould pens by date so you know which batch is ready for use in spring. Clean and oil all hand tools before storing them in a dry, protected area; consider hanging them on a pegboard to save space and prevent damage. Store dry cardboard flat in a shed or garage, ready for quick sheet-mulch builds when garden beds become free in early spring. This meticulous approach to Tool Organization ensures everything is protected, functional, and ready to go for the next growing season, minimizing replacement costs and environmental impact.
Conclusion
Tool Organization proves greener gardening is easier, cheaper, and more resilient. By embracing strategies like building no-dig beds with leaves, capturing rain, nurturing soil life, creating critical habitat, and diligently maintaining your tools, you establish a garden that thrives with fewer external inputs. These eco-conscious practices not only reduce waste and conserve resources but also foster a more vibrant and biodiverse ecosystem. Start with these foundational elements—leaves, water capture, soil life, and habitat—and your spring garden will repay you with vigor, beauty, and significantly lower costs and effort. Ultimately, effective Tool Organization is the unseen backbone of a sustainable, productive, and joyous garden.
FAQ
- Can I start now? Yes—focus on leaves, rain capture, no-dig prep, and tool care. These are timeless activities that immediately enhance your garden’s sustainability, regardless of the season. Effective Tool Organization will make these initial steps much smoother.
- Only a balcony? Use worm towers/bokashi in planters and insulate pots with cardboard + leaves. Even small spaces can be highly productive and eco-friendly with smart choices and careful Tool Organization of containers and resources.
- Special tools required? No—rake, pruners, and a basic bin (or bags) are enough. While specialized tools can be helpful, the core principles of sustainable gardening rely more on ingenuity and readily available materials than expensive equipment. Good Tool Organization means making the most of what you have.
- Science behind this? See resources below. The practices outlined are rooted in ecological science, promoting soil health, biodiversity, and resource conservation.
- How do I get enough leaves? If your own yard doesn’t produce enough, ask neighbors if you can rake theirs or check with local municipal leaf collection programs. Many are happy for them to be repurposed! Organize leaf collection with large tarps and sturdy bins.
- Is sheet mulching permanent? Not entirely. It’s a fantastic long-term soil builder, but you might need to refresh layers of leaves and compost periodically as they decompose. It dramatically reduces weeding and watering over time, making future Tool Organization for weeding less demanding.
- What if I have clay soil? The no-dig method with layers of organic matter is incredibly beneficial for clay soil, improving its structure, drainage, and aeration over time. The carbon from shredded cardboard and leaves helps break up heavy clay.
- Can I use wood chips for mulch? Yes, wood chips are excellent, especially for perennial beds and paths. They break down slower than leaves and provide long-lasting weed suppression and moisture retention. Just avoid mixing large amounts directly into annual vegetable beds, where they can temporarily tie up nitrogen during decomposition.
- How often should I turn my compost? For a hot compost pile, every few days to a week will speed decomposition. For a cold compost, once a month is sufficient, or even less frequently as it’s a slower process. Consistent Tool Organization of your compost tools makes this easier.
- Where should I store my seeds? Keep seeds in a cool, dark, and dry place. An airtight container in the refrigerator is ideal for long-term storage. Labeling and dating your seed packets is a crucial aspect of seed Tool Organization.
- Healthline — Growing food in limited space
- Harvard T.H. Chan — Plate & Planet (sustainability)
- Medical News Today — Health benefits of gardening