Seed Storage — The Ultimate Guide to Sustainable Garden Results
Seed Storage blends practical, low-cost techniques with real environmental impact. Use these eco-first methods to reduce waste, save water, build living soil, and support pollinators—all while keeping your garden beautiful and productive through the cold season.
[lwptoc]
Why Seed Storage Matters This Season
Winter prep is when smart gardeners get ahead: leaves become mulch, rain becomes irrigation, and “waste” becomes soil food. With Seed Storage, you set resilient foundations now—so spring growth is faster, healthier, and cheaper.
Core Materials & Tools for Sustainable Seed Storage and Gardening
Effective Seed Storage and sustainable gardening practices rely on a few key, often repurposed, materials and simple tools. Embracing these helps reduce your carbon footprint and reliance on store-bought solutions.
- Dry leaves, shredded cardboard, twig cuttings (mulch & sheet-mulch layers). These are fundamental for no-dig gardening and creating nutrient-rich, weed-suppressing layers.
- Compost setup (bin, bokashi, or worm tower for containers). Diverting kitchen and garden waste into rich compost is central to building living soil.
- Rain barrel with downspout diverter; watering can or soaker hose. Capturing rainwater is a cornerstone of water conservation.
- Reusable pots (terracotta/metal/wood) and sturdy seed trays. Opt for materials that last many seasons, avoiding flimsy plastics.
- Hand tools (stainless trowel, pruners, rake) and a simple sieve. Durable tools reduce consumption; a sieve is invaluable for refining compost and leaf mould.
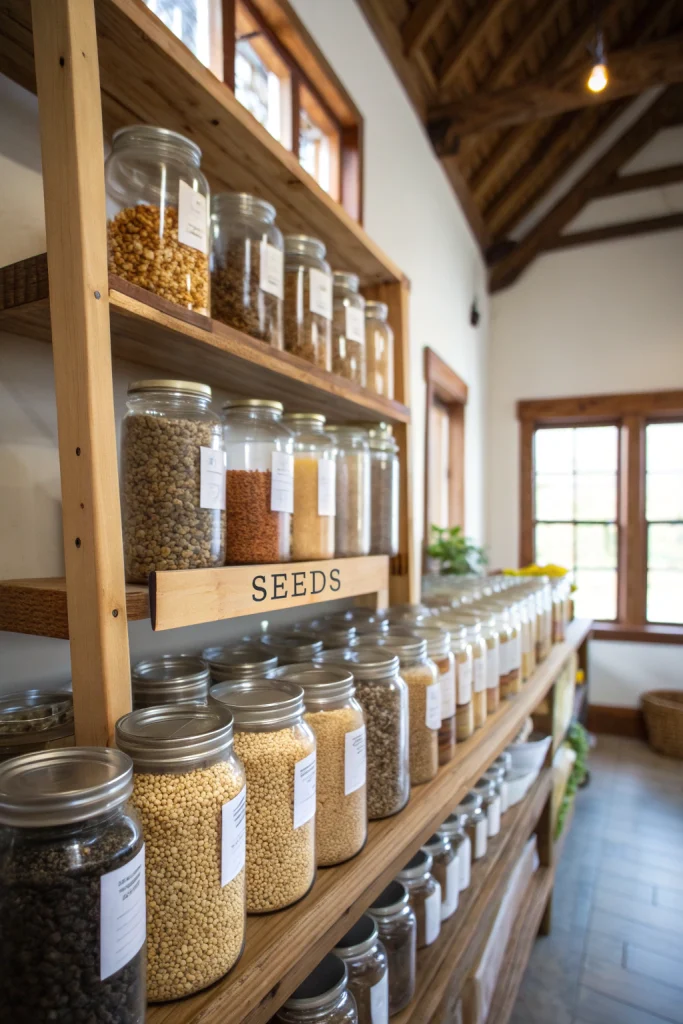
- Airtight containers (glass jars, metal tins) for physical seed storage. Dry, dark, and cool conditions are crucial for seed longevity.
- Silica gel packets or small amounts of powdered milk. These help absorb moisture, extending the viability of stored seeds.
- Labels (waterproof) and a permanent marker. Essential for remembering what you’ve stored and when.
Step-by-Step Method for Integrated Seed Storage and Sustainable Gardening
Step 1 — Build a No-Dig Base with Leaves (Indirectly Supports Seed Storage)
A healthy garden bed is the ultimate destination for your future seeds. This step creates the perfect foundation. Lay cardboard on bare soil, overlap edges by 10–15 cm, wet lightly, then add 5–10 cm of shredded leaves and a thin layer of compost. This suppresses weeds, buffers moisture, and jumpstarts fungi for spring. The healthier your soil, the more vigorous your plants, and the higher quality seeds you can save for future seed storage.
Step 2 — Capture Rain & Water Smarter
Install a rain barrel and water early. Group pots by water needs, mulch containers with leaves, and add saucers with gravel to reduce evaporation. Efficient water management ensures your soil remains consistently moist, supporting the growth of strong plants from which you might later collect seeds. It also provides a sustainable water source for starting those seeds.
Step 3 — Feed Soil Life Naturally for Optimal Seedling Growth
Start a cold compost (leaves + coffee grounds) or use bokashi indoors, then trench it into resting beds. Sieve last year’s leaf mould to craft a silky seed mix for early sowings. This nutrient-rich, friable mix is ideal for germinating seeds, whether they are from your seed storage or new purchases. Healthy soil microbes are vital for nutrient cycling that benefits all plant growth.
Step 4 — Balance Pests with Habitat, Preserving Seed Stock
Keep select seed heads for winter birds; bundle stems into a habitat corner with sticks/leaves. Use mild soap, neem, or garlic sprays only when necessary—companion plant where possible. A balanced ecosystem reduces pest pressure naturally, leading to healthier plants and, crucially, healthier seeds for collection and seed storage. Protecting your plants organically means avoiding chemical residues that could compromise seed viability or future harvests.
Step 5 — Collecting and Preparing Seeds for Storage
This is where the direct practice of seed storage begins.
- Choose Your Plants Wisely: Select open-pollinated (OP) or heirloom varieties to save true-to-type seeds. Hybrids (F1) often don’t breed true.
- Harvest Seeds at Peak Maturity: For dry seeds (beans, peas, corn, lettuce, calendula), allow pods/heads to dry on the plant until brittle. For wet seeds (tomatoes, cucumbers, squash), harvest from fully ripe fruits.
- Clean Seeds Thoroughly:
- Dry Seeds: Crush or rub pods/heads to release seeds. Winnow by gently blowing away chaff in a shallow tray, or use a sieve to separate.
- Wet Seeds (Fermentation for Tomatoes, Cucumbers): Scoop seeds into a jar with a little water. Cover loosely and let ferment for 2-3 days, stirring daily, until a white mold forms on top. This process removes germination inhibitors and kills seed-borne diseases. Rinse thoroughly until seeds are clean.
- Dry Seeds Completely: This is critical for successful seed storage. Spread cleaned seeds in a single layer on screens, paper plates, or coffee filters in a warm, dry, well-ventilated area out of direct sunlight. Stir daily. Smaller seeds may dry in 1-2 weeks, larger ones up to 4 weeks. Seeds should be bone-dry and brittle before storage. Test by trying to bend a large seed—if it bends, it’s not dry enough.
Step 6 — Optimal Conditions for Long-Term Seed Storage
Once your seeds are thoroughly dry, proper seed storage conditions are paramount for maintaining their viability. The key factors are low temperature, low humidity, and darkness.
- Airtight Containers: Use glass jars with tight-fitting lids, metal tins, or Mylar bags. Avoid paper envelopes for long-term storage as they are not airtight and can absorb moisture.
- Moisture Control: Even bone-dry, seeds can absorb ambient moisture. Add a desiccant like silica gel packets or a spoonful of powdered milk (wrapped in a tissue or coffee filter) to each container. Replace desiccants annually or when they feel heavy.
- Temperature: Seeds last longest in cool, consistent temperatures. A refrigerator (not freezer, unless specifically prepared for very long-term, specific seeds) is ideal. Basements or unheated closets can also work if they maintain a stable cool temperature. Avoid attics or garages where temperatures fluctuate wildly.
- Darkness: Light can degrade seeds over time. Opaque containers are best, or store clear containers in a dark place.
- Labeling: Crucial for effective seed storage. Label each container with the plant name (variety), date of harvest, and any specific notes (e.g., from your best tomato plant). This helps you rotate stock and plant seeds at their optimal time.
Environmental & Cost Impact of Eco-Friendly Seed Storage
By implementing sustainable practices alongside mindful seed storage, you achieve significant environmental and financial benefits. You can divert many bags of leaves from landfill, drastically cut irrigation needs via mulch and rain capture, and increase garden biodiversity with simple habitat zones. Saving your own seeds reduces reliance on seed companies, cuts down on packaging waste, and connects you more deeply to the agricultural cycle. It fosters local plant adaptation and preserves genetic diversity, critical in a changing climate. The cost savings are cumulative: less on water bills, less on soil amendments, less on pest control, and significantly less on annual seed purchases.
Advanced Eco Hacks Beyond Basic Seed Storage
Take your sustainable gardening and seed storage game to the next level with these innovative techniques:
- Charge homemade biochar in compost tea before mixing into beds. Biochar improves soil structure, water retention, and microbial activity, creating an ideal environment for seeds and seedlings.
- Swap plastic seed trays for soil blocks. Soil blocks reduce plastic waste, promote healthier root development by air-pruning, and eliminate transplant shock.
- Try milk-jug winter sowing for hardy perennials and salad greens. This low-cost method mimics natural stratification, providing a mini-greenhouse effect for early outdoor germination.
- Insulate patio pots with cardboard jackets and leaf fill to protect roots. This extends the growing season in containers and protects dormant perennials.
- Build a passive solar cold frame or mini hoop house to extend the growing season for seed starting and maturing.
- Experiment with making your own fermented plant extracts (FPEs) or comfrey tea for nutrient-rich, homemade plant food, reducing reliance on external inputs.
- Cultivate a native plant section specifically for beneficial insect habitat. These insects will naturally patrol your garden, reducing pest issues on your seed-producing plants.
- Learn rudimentary seed banking techniques for particularly valuable or rare seeds, potentially involving specific humidity control and colder temperatures than typical home seed storage.
Design & Aesthetics (Keep It Beautiful)
Sustainability doesn’t mean sacrificing beauty. Blend sustainable practices with style: use recycled-wood edges for raised beds, incorporate mossy planters for textural interest, and install warm solar path lighting for a cozy Nordic feel. Choose a restrained palette when selecting garden furniture or hardscaping materials. Repeat textures and forms for cohesion. Consider edible landscaping principles, where beauty and productivity meet. Tall, seed-producing plants like sunflowers or amaranth can serve as striking vertical focal points that also provide food for wildlife and valuable seeds for your collection. Thoughtful garden design can integrate biodiversity-friendly elements like brush piles or rockeries into attractive features, rather than looking like messy “habitat zones.”
Common Mistakes to Avoid in Sustainable Gardening and Seed Storage
Even with the best intentions, missteps can occur. Being aware of these common pitfalls can help refine your sustainable gardening and seed storage practices:
- Using peat moss: This is highly unsustainable. Peat bogs are slow-growing carbon sinks. Opt for leaf mould, coir, or other composted materials instead.
- Over-tidying the garden: While neatness has its place, an overly sterile garden removes vital habitat for beneficial insects and overwintering pollinators. Remove hazards, but keep habitat zones (like perennial stalks or leaf piles) for allies.
- Watering at midday: This leads to significant evaporation losses. Water early in the morning or late in the evening to maximize water absorption by plants and minimize waste.
- Heavy fertilizing in cold soils: Cold soils have reduced microbial activity, meaning added nutrients sit unused, potentially leaching into waterways. Focus on feeding the soil microbes with organic matter, which then makes nutrients available to plants when they need them.
- Storing seeds before they are thoroughly dry: This is a primary cause of seed spoilage. Mold, fungus, and premature germination will ruin your entire batch of stored seeds. ALWAYS ensure seeds are bone-dry.
- Storing seeds in fluctuating temperatures: Wide temperature swings reduce seed viability rapidly. Consistency in storage temperature is more important than extreme cold, especially for home seed storage.
- Forgetting to label seeds: There’s nothing more frustrating than a container of anonymous seeds. Accurate and detailed labeling (plant name, variety, date collected) is non-negotiable.
- Collecting seeds from diseased or weak plants: You want to save seeds from the strongest, healthiest, and most productive plants to propagate those desirable traits.
- Buying hybrid (F1) seeds for saving: F1 seeds will not reliably produce plants like the parent. Stick to open-pollinated (OP) or heirloom varieties for predictable seed saving results.
Storage & Winter Care for Tools and Materials
Proper care extends the life of your tools and prepares your garden for the next season. Cover rain barrels to prevent debris accumulation and mosquito breeding. Aerate compost piles regularly to ensure efficient decomposition. Label leaf-mould pens by date to track their readiness. Oil cleaned tools annually to prevent rust. Store dry cardboard flat in a shed or garage for quick sheet-mulch builds when beds become free from previous crops. Consolidate your seed storage in a cool, dark, dry place, perhaps a dedicated box in the fridge or a cool closet, ensuring they are protected from rodents and extreme temperatures. Cleaning and sharpening pruners and trowels now saves time and effort in spring.
Conclusion
Seed Storage, when integrated with broader sustainable gardening practices, proves greener gardening is not only easier and cheaper but also profoundly more resilient. Start with optimizing the basics: leverage fallen leaves as mulch, implement smart water capture, cultivate vibrant soil life, and create vital pollinator habitats. These foundational steps reduce waste, conserve resources, and foster a healthier ecosystem. Your spring garden will unequivocally repay your efforts with vigor, abundance, and a reduced need for external inputs. By embracing these eco-first methods, from collecting open-pollinated seeds to creating your own seed-starting mix from leaf mould, you are actively participating in a cycle of sustainability that benefits your garden, your wallet, and the planet. This holistic approach ensures not just a beautiful garden, but a truly self-sustaining, productive, and future-proofed green space.
FAQ
- Can I start now? Yes—focus on leaves, rain capture, no-dig prep, and tool care. The sooner you implement these practices, the more benefit you’ll see. For seed storage, start planning which seeds you’ll save from this year’s harvest or next season’s.
- Only a balcony? Use worm towers/bokashi in planters and insulate pots with cardboard + leaves. You can still save seeds from container-grown plants. Look for dwarf or compact varieties specifically for small spaces.
- Special tools required? No—a rake, pruners, and a basic bin (or bags) are enough for composting and mulching. For seed storage, airtight jars or tins are usually already in your home.
- What types of seeds are best for home storage? Open-pollinated (OP) and heirloom varieties are ideal as they will grow true to type. Avoid F1 hybrids unless you are content with unpredictable results.
- How long do seeds last in storage? Viability varies greatly by seed type. Some, like corn or onions, only last 1-2 years. Others, like tomatoes or cucumbers, can last 5-10 years or more under ideal, dry, cool seed storage conditions. Proper drying and packaging are key.
- Science behind this? Healthy soil microbiology, water conservation physics, and plant biology principles for seed viability underpin these methods. See resources below for deeper dives into these fascinating areas.
- Healthline — Growing food in limited space
- Harvard T.H. Chan — Plate & Planet (sustainability)
- Medical News Today — Health benefits of gardening
- Mother of a Hubbard — How to Save Seeds (Detailed Guide)
- Seed Savers Exchange — Seed Saving Basics
- 7 Gardening Hacks That Work in 2025
- DIY Cold Frame Build
- Biodiversity-Friendly Fall Garden Tips
- The Complete Guide to Home Composting
- Rainwater Harvesting for Sustainable Gardens


