Raised Bed — A Sustainable Strategy for Bountiful, Eco-Friendly Gardens
Raised Bed blends practical, low-cost techniques with real environmental impact. Use these eco-first methods to reduce waste, save water, build living soil, and support pollinators—all while keeping your garden beautiful and productive through the cold season.
Why Raised Bed Matters This Season
Winter prep is when smart gardeners get ahead: leaves become mulch, rain becomes irrigation, and “waste” becomes soil food. With Raised Bed, you set resilient foundations now—so spring growth is faster, healthier, and cheaper. This proactive approach not only benefits your plants but also significantly reduces your ecological footprint. By focusing on natural cycles and upcycling available resources, you move beyond conventional gardening. The cold season becomes a crucial time for regeneration and planning, rather than dormancy. Think of it as an investment in next year’s bounty, ensuring vigorous plants that require fewer external inputs.
Core Materials & Tools
Embracing the Raised Bed philosophy means working with nature, not against it, which translates into simpler tools and relying on abundant natural materials. Here’s what you’ll need to get started:
- Dry leaves, shredded cardboard, twig cuttings (mulch & sheet-mulch layers): These are your foundational building blocks. Leaves provide carbon, cardboard suppresses weeds, and twigs add structure and slow decomposition. Collect these from your yard or local community rather than purchasing.
- Compost setup (bin, bokashi, or worm tower for containers): Composting is central to feeding your soil. A simple three-bin system for leaves, a sealed bokashi bucket for kitchen scraps, or a small worm tower for balcony growers will transform waste into black gold.
- Rain barrel with downspout diverter; watering can or soaker hose: Water conservation is paramount. A rain barrel captures vital moisture, reducing your reliance on treated tap water. Gravity-fed soaker hoses or a simple watering can ensure efficient delivery.
- Reusable pots (terracotta/metal/wood) and sturdy seed trays: Ditch flimsy plastic. Invest in durable, reusable containers made from natural materials that will last for years, minimizing waste.
- Hand tools (stainless trowel, pruners, rake) and a simple sieve: Quality, durable tools are an investment. Stainless steel resists rust, and sharp pruners make clean cuts. A sieve helps refine compost or leaf mould for seed starting. Focus on maintaining these tools to avoid frequent replacements.
The beauty of this approach is that many “materials” are literally falling from trees or existing in your recycling bin. This makes Raised Bed gardening an accessible and highly sustainable practice.
Step-by-Step Method: Building a Resilient Raised Bed Garden
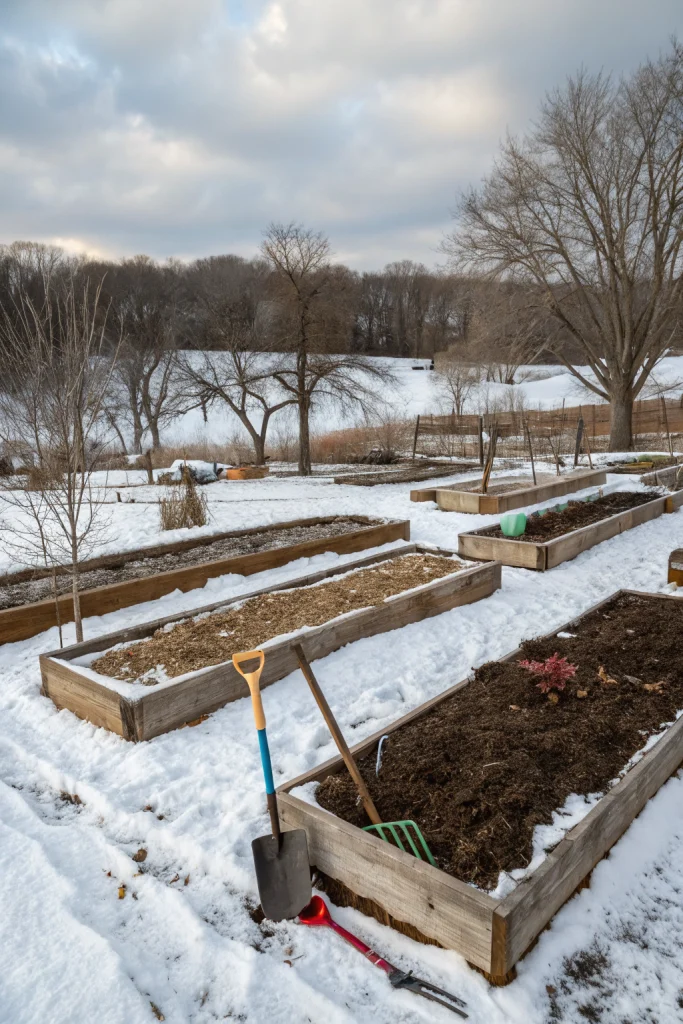
Step 1 — Build a No-Dig Base with Leaves for Your Raised Bed
This is the cornerstone of the Raised Bed method, focusing on building soil fertility from the ground up without disturbing existing soil structure. Start by clearing the chosen area, removing any aggressive weeds or turf. Then, lay cardboard directly on the bare soil. Ensure the cardboard pieces overlap by 10–15 cm (4-6 inches) to prevent weeds from finding gaps. Wet the cardboard layers thoroughly; this aids decomposition and helps to attract beneficial microbes. On top of this soaked cardboard, add a generous layer—5 to 10 cm (2-4 inches)—of shredded dry leaves. This acts as a carbon-rich layer, slowly breaking down to feed soil organisms. Finally, spread a thin layer of finished compost over the leaves. The compost introduces a burst of microbial activity and nutrients, kickstarting the decomposition process. This layered approach, known as sheet mulching, suppresses existing weeds by blocking light, buffers soil moisture by acting like a sponge, and most importantly, jumpstarts the fungal networks that are vital for future plant health and nutrient cycling. It’s a low-effort, high-impact way to prepare your beds for robust spring growth.
Step 2 — Capture Rain & Water Smarter for Your Raised Bed
Water is a precious resource, and efficient management is key to sustainable Raised Bed gardening. Begin by installing a rain barrel system. Connect a downspout diverter to one of your home’s downspouts, directing rainwater into a large barrel. This stored water is free from chlorine and other chemicals often found in tap water, making it ideal for plants and beneficial to soil microbes. Collect this water and use it manually with a watering can or connect it to a simple gravity-fed soaker hose system for targeted irrigation. When watering, do so early in the morning. This allows the plants to absorb the water before the heat of the day causes significant evaporation, and it helps prevent fungal diseases that can thrive in damp conditions overnight. For container plants, group them together according to their water needs; thirsty plants with thirsty plants, and drought-tolerant ones separately. This prevents overwatering some while underwatering others. Crucially, mulch all your containers and beds with a layer of leaves. This organic mulch acts as an insulating blanket, reducing evaporation by up to 70% and regulating soil temperature. Additionally, placing saucers with a layer of gravel under potted plants not only catches excess water, making it available for reabsorption, but the gravel layer also helps to reduce evaporation from the saucer itself, creating a slightly more humid microclimate around the plant.
Step 3 — Feed Soil Life Naturally for a Thriving Raised Bed
Healthy soil is living soil, and the Raised Bed approach prioritizes nurturing this complex ecosystem. Instead of relying on synthetic fertilizers, focus on building robust soil biology. Start a cold compost system using primarily carbon-rich materials like fallen leaves and wood chips, augmented with nitrogen sources like coffee grounds, vegetable scraps, and grass clippings. Cold composting is slower but requires less active management. For a faster, odor-free indoor option, consider a bokashi system. This fermentation method rapidly breaks down kitchen scraps, including meat and dairy, which can then be trenched directly into your resting garden beds. The fermented material acts as a powerful soil amendment, introducing beneficial microbes. Another excellent way to feed your soil and prepare for spring is to sieve last year’s leaf mould. Leaf mould is partially decomposed leaves, rich in fungi, and acts as an incredible soil conditioner. Sieve it through a fine mesh to create a light, fluffy, and nutrient-rich medium perfect for crafting a silky seed-starting mix for early sowings. This ensures your delicate seedlings get the optimal start in a sterile yet living environment, leading to stronger, healthier plants from day one. These methods create a nutrient cycle where waste is transformed into valuable resources, directly feeding the soil food web.
Step 4 — Balance Pests with Habitat in Your Raised Bed Garden
Rather than waging war on garden pests, the Raised Bed method promotes ecological balance, allowing nature to manage populations. The first step is to preserve habitat for beneficial insects and birds. As winter approaches, resist the urge to “tidy up” aggressively. Instead, leave select seed heads on plants like coneflowers, sunflowers, and ornamental grasses. These provide vital food sources for winter birds, which, in turn, will help manage pest populations in your garden. Create a designated “habitat corner” within or near your raised beds. This can be as simple as bundling hollow stems (from plants like elderberry or bamboo) together, stacking small logs, or piling up leaves and small sticks. These provide essential shelter for overwintering beneficial insects like ladybugs and predatory wasps, as well as small amphibians. When addressing pest outbreaks, always start with the least toxic methods. Mild soap sprays can deter aphids, neem oil works as a broad-spectrum organic insecticide, and garlic sprays can repel certain pests. Use these sparingly and only when absolutely necessary. Even better, practice companion planting. Strategic placement of plants like marigolds (repel nematodes), nasturtiums (trap aphids), or calendula (attract beneficials) can proactively deter pests and encourage predators, maintaining a healthy, self-regulating ecosystem within your Raised Bed.
Environmental & Cost Impact of Raised Bed Gardening
Adopting the principles of Raised Bed gardening extends far beyond your immediate plot, offering significant environmental and financial benefits. The most immediate impact is waste reduction. By actively collecting and composting fallen leaves, prunings, and kitchen scraps, you can divert hundreds of pounds of organic material from landfills. This not only reduces landfill volume but also prevents the creation of methane, a potent greenhouse gas, that occurs when organic matter decomposes anaerobically in landfills. Furthermore, the emphasis on rain capture and intelligent watering techniques drastically cuts down on irrigation needs. Mulching alone can reduce water evaporation by 50-70%, translating into substantial savings on your water bill and reducing the strain on municipal water supplies. By creating diverse habitat zones, even small ones, you contribute to local biodiversity, providing crucial food and shelter for pollinators, birds, and beneficial insects. This supports ecosystem health, which often extends beyond your garden boundaries. On the cost side, the results are equally impressive. You dramatically reduce the need for purchased inputs: no synthetic fertilizers, fewer pesticides, less bagged soil, and reduced water consumption. Many of the materials you need, like leaves and cardboard, are free. Over time, your garden becomes a self-sustaining system, producing healthy, organic food with minimal external costs, making Raised Bed gardening a truly sustainable and economical choice.
Advanced Eco Hacks for Your Raised Bed
To further amplify the environmental benefits and self-sufficiency of your Raised Bed system, consider integrating these advanced eco-hacks:
- Charge homemade biochar in compost tea before mixing into beds: Biochar is a highly porous charcoal created by heating biomass in a low-oxygen environment. When “charged” by soaking in nutrient-rich compost tea, it becomes a powerful soil amendment that improves drainage, water retention, and microbial activity. It acts like a permanent microbial hotel, holding nutrients and water in the soil for years.
- Swap plastic seed trays for soil blocks: Soil blocks are essentially compressed blocks of potting mix that form their own biodegradable “pot.” This eliminates the need for plastic seed trays, reducing plastic waste and simplifying transplanting, as the entire block can be planted directly into the bed with minimal root disturbance.
- Try milk-jug winter sowing for hardy perennials and salad greens: This ingenious method involves creating miniature greenhouses from recycled milk jugs. Cut a jug almost in half, fill the bottom with soil, sow seeds, tape it back up, and place it outdoors for the winter. The jugs protect seeds from harsh weather while allowing natural temperature fluctuations to stratify seeds. Ideal for hardy annuals, perennials, and cold-tolerant greens, it saves space indoors and creates super-tough seedlings.
- Insulate patio pots with cardboard jackets and leaf fill to protect roots: For container gardening in colder climates, root protection is crucial. Wrap the outside of your terracotta or plastic pots with layers of cardboard, securing it with twine or tape. Then, fill any gaps between the cardboard and the pot with dry leaves. This multi-layered insulation protects roots from freezing, allowing sensitive perennials to overwinter successfully and preventing frost heave in annuals.
- Implement a “chop and drop” mulching system: Instead of removing finished annuals or pruned perennial stems, chop them into smaller pieces and leave them directly on the soil surface in your Raised Bed. This provides immediate organic matter, reduces soil erosion, conserves moisture, and gradually feeds the soil as it decomposes.
- Utilize greywater for irrigation where safe and permissible: In some regions, filtered greywater (from showers, laundry, or sinks, without harsh chemicals) can be diverted to irrigate non-edible plants. Research local regulations and ensure any soaps used are biodynamic or plant-friendly. This can significantly reduce potable water consumption.
- Plant a cover crop in resting beds: During periods when a Raised Bed is not actively growing food plants, sow a cover crop like clover, fava beans, or annual rye. These crops protect the soil from erosion, suppress weeds, add organic matter when tilled under (or “chopped and dropped”), and many, like legumes, fix atmospheric nitrogen into the soil.
- Incorporate local, upcycled materials into your bed construction: Instead of purchasing new lumber for bed frames, look for salvaged wood, discarded bricks, or even large stones from construction sites (with permission). This reduces embodied energy and cost, making your Raised Bed truly circular.
Design & Aesthetics (Keep It Beautiful)
Sustainability doesn’t mean sacrificing beauty. In fact, a thoughtfully designed Raised Bed garden can be incredibly charming and evocative. The key is to blend functionality with a refined aesthetic, creating an outdoor space that feels both productive and peaceful. Consider using recycled-wood edges for your beds; the natural, weathered look adds character and warmth, creating a rustic yet elegant boundary. These can be reclaimed pallets (ensure they are heat-treated, not chemically treated), old fence posts, or timber salvaged from demolition projects. Mossy planters, perhaps terracotta pots allowed to age naturally or specifically encouraged to grow moss, add a touch of ancient charm and texture, connecting your garden to the natural world. For lighting, ditch harsh electric lights in favor of warm solar path lighting. These require no wiring, are energy-efficient, and cast a soft, welcoming glow that creates a cozy, Nordic-inspired ambiance, perfect for evening strolls through your garden. To achieve visual cohesion, choose a restrained color palette for your non-plant elements (e.g., natural wood, stone, muted greens, or charcoals). This allows the vibrant colors of your plants to truly pop. Repeat textures throughout your garden—the rough surface of reclaimed wood, the smoothness of river stones, the varied foliage of your plants—to create a sense of harmony and depth. A well-designed Raised Bed garden isn’t just about growing food; it’s about cultivating a beautiful, sustainable sanctuary that delights the senses and nurtures the soul.
Common Mistakes to Avoid in Raised Bed Gardening
Even with the best intentions, it’s easy to fall into common gardening pitfalls that undermine sustainability efforts. Being aware of these can significantly improve your Raised Bed garden’s health and productivity:
- Using peat moss (unsustainable—choose leaf mould instead): Peat bogs are vital carbon sinks and unique ecosystems. Harvesting peat moss is a destructive process that releases stored carbon and destroys habitat. Opt for readily available, renewable leaf mould or coir as a sustainable alternative for potting mixes and soil amendments.
- Over-tidying (remove hazards, keep habitat zones for allies): The urge to make a garden look “neat” can be detrimental. While it’s important to remove diseased plants or hazardous debris, resist cutting back all spent plant stalks or clearing every last leaf. These areas provide crucial overwintering sites for beneficial insects, pollinators, and other garden allies, which are essential for pest control and pollination. Create designated “messy” habitat zones.
- Watering at midday (evaporation losses; water early/late): Watering when the sun is high and temperatures are warm leads to significant water loss through evaporation. Most of the water dissipates into the air before reaching plant roots. The best time to water a Raised Bed is early in the morning or late in the evening. This allows the water to soak into the soil effectively, reaching the root zone with minimal loss.
- Heavy fertilizing in cold soils (feed microbes, not just plants): When soil temperatures are low, microbial activity slows down significantly. Applying strong synthetic fertilizers to cold soil is largely ineffective, as the nutrients aren’t readily available to plants, and much can leach away, polluting groundwater. Instead, focus on building healthy soil life with compost and organic matter, as these slowly release nutrients as soil warms up and microbes become active. You’re feeding the living soil ecosystem, which in turn feeds your plants.
- Ignoring soil testing: Guessing what your soil needs can lead to over or under-application of amendments. A simple soil test (available from garden centers or extension offices) provides valuable data on pH and nutrient levels, allowing for targeted and efficient soil improvements.
- Planting too densely: While maximizing space in a Raised Bed is tempting, overcrowding leads to poor air circulation, increased disease pressure, and competition for resources. Always check mature plant sizes and space accordingly to ensure healthy growth.
- Walking on beds: Compacting the soil negates many benefits of a raised bed, reducing aeration and drainage. Design your beds with walkable paths around them to avoid stepping on the planting area.
- Neglecting crop rotation: Planting the same crop in the same spot year after year depletes specific nutrients and can encourage the buildup of soil-borne diseases and pests. Rotate crops regularly, ideally on a 3-4 year cycle, to maintain soil health and vigor.
Storage & Winter Care for Your Raised Bed Tools and Resources
Proper winterization isn’t just about protecting your plants; it’s also about preserving your tools and materials, ensuring they’re ready for the next season. For your rain barrels, it’s crucial to cover them or drain them completely to prevent freezing and cracking, especially in regions with hard freezes. Disconnect any downspout diverters. Aerating your compost pile regularly is important even in winter, though decomposition will slow. Turn it occasionally to introduce oxygen and prevent anaerobic conditions, which can lead to foul odors. If you have multiple leaf-mould pens or bins, label them by date. This helps you know which batch is fully decomposed and ready to use in your Raised Bed for seed starting or soil amendment. Before storing your garden tools, clean them thoroughly of any soil and debris. Then, apply a thin coat of oil (linseed oil works well) to metal parts to prevent rust. Sharpen blades on pruners and hoes. Store tools in a dry, protected area, off the ground if possible. Finally, collect and store dry cardboard flat. This prepared cardboard will be invaluable for quick sheet-mulch builds when you create new beds or expand existing ones in the spring, or for suppressing early weeds. Taking these steps ensures that your gardening infrastructure remains in top condition, ready to support your sustainable Raised Bed efforts year after year.
Conclusion
Raised Bed gardening is more than just a technique; it’s a philosophy that proves greener gardening is inherently easier, cheaper, and more resilient. By embracing natural processes and prioritizing ecological health, you transform your garden into a thriving ecosystem. Start with the basics: leverage the incredible power of fallen leaves for no-dig bed building and rich leaf mould. Implement efficient rain capture systems to conserve precious water. Nurture the soil food web through composting and organic amendments. And finally, cultivate biodiversity by creating habitat for beneficial insects and birds. These foundational steps, integral to the Raised Bed approach, will empower you to create a garden that is not only beautiful and productive but also profoundly sustainable. Your spring garden will undoubtedly repay your efforts with increased vigor, reduced disease, and a significantly lower reliance on external inputs, making your gardening journey a rewarding and truly eco-conscious endeavor.
FAQ
- Can I start now? Yes—the cold season is the perfect time to begin. Focus on collecting leaves, setting up rain capture, planning your no-dig prep, and caring for your tools. These foundational tasks set you up for success in spring.
- Only a balcony? Absolutely! Raised Bed principles adapt well to small spaces. Use worm towers or bokashi systems for composting in planters. Insulate pots with cardboard and leaves to protect roots from temperature extremes. Focus on compact, high-yield plants.
- Special tools required? No—one of the beauties of this method is its simplicity. A sturdy rake for gathering leaves, a good pair of pruners for cutting back, and a basic compost bin (or even just dedicated bags for leaf mould) are usually enough to get started.
- Is this too overwhelming? Not at all. Pick one or two strategies to start with, like building a no-dig bed with leaves or setting up a rain barrel. Even small steps make a big difference and build confidence. You don’t have to do everything at once.
- Science behind this? Yes, the principles are rooted in soil science, ecology, and hydrology. No-dig gardening promotes fungal networks, rain harvesting reduces runoff and conserves resources, and habitat creation supports biodiversity, all proven ecological benefits. See resources below for more in-depth explanations.
- Healthline — Growing food in limited space
- Harvard T.H. Chan — Plate & Planet (sustainability)
- Medical News Today — Health benefits of gardening
- Oregon State University Extension – Sheet Mulching
- University of Florida IFAS Extension – Leaf Mold
- 7 Gardening Hacks That Work in 2025
- DIY Cold Frame Build
- Biodiversity-Friendly Fall Garden Tips
- Sustainable Compost Techniques for the Modern Gardener
- Eco-Friendly Pest Control: Natural Solutions for Your Garden


