Ultimate 10 Ways to Use Cardboard in the Garden for a Thriving, Eco-Friendly Space
Are you looking for ingenious, budget-friendly, and eco-conscious ways to enhance your garden? Look no further than the humble cardboard box! This readily available material, often discarded without a second thought, is a true unsung hero in the gardening world. From building healthy soil to suppressing weeds and even protecting delicate plants, cardboard offers a surprising array of benefits for both seasoned green thumbs and budding gardeners alike. By embracing cardboard garden uses, you can significantly reduce waste, save money on costly gardening supplies, and cultivate a more sustainable growing environment. Let’s delve into the fascinating world of repurposing cardboard to transform your garden into a flourishing haven.
[lwptoc]
Using cardboard in your garden isn’t just about saving a few dollars; it’s a powerful statement about sustainable living and responsible resource management. Every piece of cardboard you divert from the landfill and into your garden contributes to a healthier planet. Furthermore, incorporating cardboard introduces organic matter into your soil, fostering a vibrant ecosystem of beneficial microbes and earthworms. This practice, often referred to as “no-dig” gardening or “sheet mulching,” minimizes soil disturbance, which is crucial for maintaining soil structure and fertility. It’s a win-win: your garden thrives, and you reduce your environmental footprint simultaneously. The versatility of cardboard truly makes it a must-have for any eco-conscious gardener.
Why This Matters for Your Garden: The Power of Cardboard
The significance of integrating cardboard into your gardening practices extends far beyond simple recycling. Firstly, cardboard is a fantastic weed suppressant. Its opaque nature blocks sunlight, effectively starving weeds of the energy they need to grow. This drastically reduces the need for back-breaking weeding sessions or, worse, chemical herbicides, making your garden maintenance much easier and safer. Secondly, as cardboard breaks down, it enriches your soil with much-needed carbon, an essential component for healthy soil structure. This decomposition process also improves drainage in heavy clay soils and increases water retention in sandy soils, creating a more balanced and fertile growing medium.
Moreover, using cardboard can help regulate soil temperature. A layer of cardboard acts as insulation, keeping soil cooler in hot weather and warmer during cooler periods, which is beneficial for root development and overall plant health. It also provides a habitat for beneficial soil organisms, which are crucial for nutrient cycling and disease suppression. By opting for cardboard over plastic weed barriers or expensive landscaping fabric, you’re choosing a biodegradable and renewable resource that ultimately gives back to your garden. This natural approach fosters robust plant growth and a more resilient ecosystem, proving that simple solutions can yield profound results.
What You’ll Need: Essential Tools and Materials
Before you embark on your cardboard gardening adventures, gathering a few basic tools and materials will ensure a smooth and efficient process. The best part? Most of these items you likely already have or can acquire for free!
- Cardboard Boxes: The star of the show! Aim for plain, untreated cardboard without excessive glossy finishes, tape, or labels. Prioritize brown corrugated boxes. Avoid waxed cardboard or heavily printed boxes, as they may contain undesirable chemicals that can leach into your soil.
- Utility Knife or Box Cutter: Essential for cutting cardboard into various shapes and sizes. A sharp blade makes the job much easier and safer.
- Watering Can or Hose: Cardboard needs to be thoroughly moistened for most applications, especially for sheet mulching, as it helps initiate decomposition and keeps it from flying away.
- Organic Matter (for layering): This can include compost, shredded leaves, grass clippings, straw, or wood chips. These layers work in conjunction with the cardboard to build rich soil.
- Shovel or Spade: Useful for moving soil, compost, or other organic materials.
- Gloves: Protect your hands from cuts and dirt.
- Wheelbarrow or Tarp: Handy for transporting materials around your garden.
- Stones or Bricks (optional): For weighing down cardboard in windy conditions.
With these simple items, you’re well-equipped to unlock the full potential of cardboard in your garden. Always remember to remove all plastic tape, staples, and stickers from your cardboard before use, as these materials do not break down in the same way and can contaminate your garden.
Step-by-Step Guide: 10 Ingenious Cardboard Garden Uses
Let’s dive into the practical applications! Here are 10 fantastic ways you can integrate cardboard into your gardening routine, complete with actionable steps:
1. Sheet Mulching (No-Dig Gardening)
Sheet mulching is arguably the most popular and beneficial cardboard garden use. It’s a fantastic way to create new garden beds, suppress weeds, and build healthy soil without digging. It works by layering biodegradable materials over an existing area.
- Prepare the Area: Clear away any large debris or tall weeds. You don’t need to dig or remove existing vegetation.
- Lay Cardboard: Overlap plain cardboard pieces by at least 4-6 inches (10-15 cm) to ensure no light penetrates. Completely cover the desired area, removing all tape and labels. Wet the cardboard thoroughly.
- Add Organic Layers: Top the wet cardboard with 4-6 inches (10-15 cm) of organic material. This can be a mix of compost, shredded leaves, grass clippings, or straw.
- Repeat Layers (Optional): For very stubborn weeds or to build up the bed quickly, you can add another layer of wet cardboard followed by more organic matter.
- Planting: You can plant directly into the top organic layer, making a small hole in the cardboard below for the plant’s roots to access the soil. For best results, let the bed “cook” for a few weeks to a month before planting.
2. Weed Barrier Under Paths and Raised Beds
Cardboard provides an excellent, eco-friendly barrier against unwelcome weeds under pathways or within raised beds, significantly reducing maintenance.
- Clear the Area: Remove existing weeds and level the ground where your path or raised bed will be.
- Lay Cardboard: Place large, overlapping pieces of cardboard directly on the soil. Ensure a generous overlap to prevent weeds from finding gaps.
- Moisten: Lightly spray the cardboard with water to help it settle and begin decomposition.
- Cover: For paths, cover the cardboard with a thick layer of mulch like wood chips, gravel, or straw. For raised beds, fill directly with your chosen soil mix.
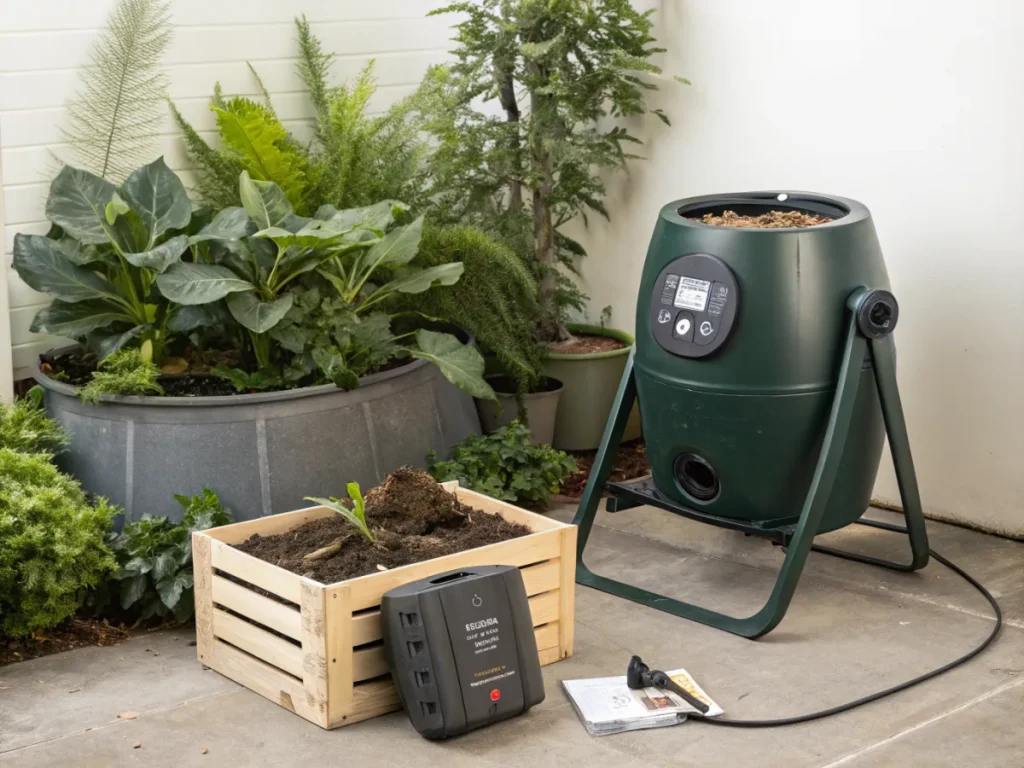
3. Compost Bin Layering Material
Cardboard is a fantastic “brown” material for your compost pile, essential for balancing out “greens” like kitchen scraps and grass clippings.
- Shred Cardboard: Tear or shred cardboard into smaller pieces (the smaller, the faster it decomposes).
- Alternate Layers: Add shredded cardboard as your “carbon” layer, alternating with “nitrogen-rich” materials like food scraps, green leaves, and grass clippings. Aim for a 2:1 or 3:1 ratio of browns to greens.
- Wet Thoroughly: Ensure the cardboard pieces are moist as you add them to the pile; dry cardboard decomposes very slowly.
- Turn Regularly: Turn your compost pile regularly to aerate it and speed up the decomposition process.
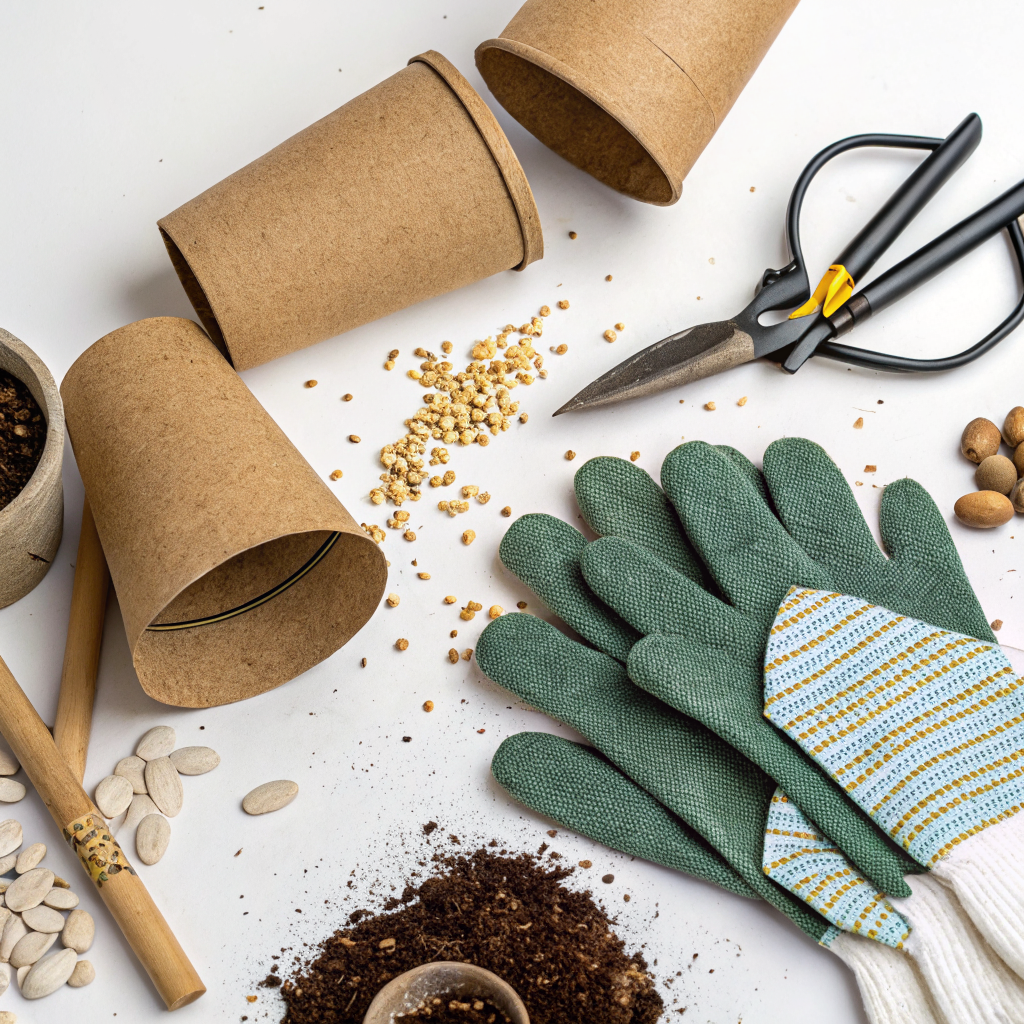
4. DIY Seed Starting Pots
Small pieces of cardboard can be transformed into biodegradable seed starting pots, eliminating plastic and making transplanting easier.
- Cut Cardboard Strips: Cut cardboard (toilet paper rolls work great too) into strips about 4-6 inches (10-15 cm) wide.
- Form into Cylinders: Roll the cardboard strips into cylinders and secure them with a small piece of biodegradable tape or by cutting small slits and interlocking them. For toilet paper rolls, you can fold and cut the bottom to create a base.
- Fill with Seed Starting Mix: Fill your cardboard pots with a high-quality seed starting mix.
- Sow Seeds: Plant your seeds as usual. When ready to transplant, simply plant the entire cardboard pot into the garden, as it will break down in the soil.
5. Protecting Young Seedlings
Cardboard offers a simple yet effective shield for delicate seedlings against pests, sun scorch, and even light frost.
- Cut Cardboard Collars: Cut cardboard into strips long enough to form a circle around your seedling’s stem.
- Secure Around Stem: Create a short “collar” or ring that sits around the base of your seedling. Secure the ends with tape or by tucking them into the soil.
- Protect from Sun/Pests: These collars deter cutworms and slugs from reaching the tender stems. Taller cardboard “shields” can also be placed on the sunny side to prevent scorching.
- Remove When Established: Once the plant is stronger and larger, the cardboard can be removed or left to decompose.
6. Garden Path Edging
For a temporary or rustic path edge, cardboard can be used to define boundaries and prevent grass or weeds from encroaching.
- Define Path: Mark out the edges of your desired garden path.
- Dig a Shallow Trench: Dig a shallow trench, about 2-3 inches (5-8 cm) deep, along the path edges.
- Insert Cardboard: Cut sturdy cardboard pieces to fit the trench vertically. Press them firmly into the trench.
- Backfill and Cover: Backfill the trench with soil, then cover the cardboard with mulch or gravel for the path surface. This creates a neat, biodegradable edge.
7. Emergency Cold Frame/Row Cover
A quick and easy way to protect plants from sudden cold snaps or scorching sun using cardboard.
- Gather Boxes: Find several large cardboard boxes.
- Form Shelter: Cut the flaps off boxes or cut large openings to form a tunnel or dome shape over your plants. You can use stakes to hold them in place.
- Position: Place the cardboard shelters over tender plants in the evening before a cold night, or during the hottest part of the day to provide shade.
- Remove Daily: Remove the covers during the day when temperatures are favorable to allow for sunlight and air circulation.
8. Suppressing Lawn in New Flower Beds
Converting a patch of lawn into a flower bed becomes effortless with cardboard.
- Mow Lawn: Mow the existing lawn as short as possible.
- Wet Area: Thoroughly soak the grass area with water.
- Lay Cardboard: Cover the entire area with overlapping layers of plain cardboard. Make sure there are no gaps for grass to sneak through.
- Water Again: Wet the cardboard thoroughly.
- Add Topsoil/Compost: Cover the cardboard with a generous layer (6-12 inches or 15-30 cm) of good quality topsoil or compost.
- Wait and Plant: Allow a few weeks for the cardboard to start breaking down, then you can plant directly into your new, weed-free bed.
9. Creating Worm Bins
Cardboard is an excellent bedding material for vermicomposting bins, providing carbon and structure.
- Shred Cardboard: Tear or shred cardboard into small, manageable pieces.
- Moisten: Soak the shredded cardboard in water. It should be damp like a wrung-out sponge.
- Layer in Bin: Place a thick layer of moist, shredded cardboard at the bottom of your worm bin.
- Introduce Worms: Add your composting worms (e.g., Red Wigglers).
- Add Food Scraps: Begin adding food scraps in small amounts, covering them with more shredded cardboard. Maintain moisture levels.
10. Temporary Weed Control in Unused Areas
If you have an area you plan to turn into garden space later, cardboard can keep weeds at bay in the meantime.
- Clear Area: Remove any large weeds or debris from the unused section of your garden.
- Lay Cardboard: Cover the entire area with overlapping sheets of plain cardboard.
- Weigh Down: Place stones, bricks, or a thin layer of wood chips on top of the cardboard to prevent it from blowing away.
- Maintain: Periodically check on the area. The cardboard will slowly break down, suppressing weeds and improving soil as it does. You can add more layers as needed.
Pro Tips and Common Mistakes to Avoid
Pro Tip: Always Remove Tape and Labels! This is perhaps the most crucial tip. Plastic tape and glossy labels do not decompose and will remain as unsightly and non-biodegradable debris in your garden. Take a few extra minutes to strip them off. Your garden will thank you.
- Use Plain Cardboard: Stick to unprinted, brown corrugated cardboard. While some colored inks are soy-based and generally safe, it’s difficult to be certain. Avoid glossy, waxed, or heavily printed cardboard as they may contain chemicals you don’t want in your soil.
- Overlap Generously: When laying cardboard for sheet mulching or weed suppression, overlap the edges by at least 4-6 inches (10-15 cm). This prevents weeds from finding gaps and growing through.
- Wet It Thoroughly: Always wet cardboard extensively after laying it down. This helps it cling to the ground, prevents it from blowing away, initiates the decomposition process, and makes it easier for worms and microbes to colonize.
- Layer with Nitrogen-Rich Materials: While cardboard is a superb “brown” (carbon) material, it needs “greens” (nitrogen) to break down efficiently. Layer it with compost, fresh grass clippings, or manure to create a balanced environment for decomposition.
- Be Patient: Cardboard takes time to break down, especially thicker pieces. While you can plant directly on top of sheet-mulched beds, the full benefits to soil structure and microbial activity develop over several weeks or months.
- Consider Airflow for Cold Frames: If using cardboard for temporary cold frames, remember to allow for some airflow on warmer days. Trapped humidity can lead to fungal issues.
Common Mistakes to Avoid:
- Using Waxed Cardboard: This will not break down and can introduce unwanted substances.
- Not Removing Tape/Labels: As mentioned, this is a common oversight that leads to plastic pollution in your garden.
- Laying Dry Cardboard: Dry cardboard is rigid, can blow away easily, and will not decompose effectively. Always soak it.
- Insufficient Overlap: Gaps between cardboard pieces are an open invitation for tenacious weeds.
- Only Using Cardboard: While powerful, cardboard works best in conjunction with other organic materials to create a balanced and nutrient-rich soil environment. It’s a component of a healthy system, not a standalone solution for soil building.
Eco-Friendly Variations and Enhancements
Maximizing the eco-friendliness of your cardboard garden uses involves thoughtful sourcing and strategic pairing with other sustainable practices.
- Source Locally and Responsibly: When collecting cardboard, prioritize local businesses or ask friends and family for their used boxes. This reduces the carbon footprint associated with transport. Ensure it’s clean and free from chemical spills.
- Combine with Composting: Elevate your cardboard’s impact by integrating it seamlessly into a robust composting system. Shredded cardboard adds essential carbon to your compost pile, resulting in nutrient-rich compost that then further enriches your garden soil. This creates a closed-loop system, minimizing waste and maximizing fertility. Learn more about composting from Gardening Know How’s guide to composting basics.
- No-Till/No-Dig Synergy: Cardboard is a cornerstone of no-till gardening. By laying it down instead of digging, you preserve soil structure, protect beneficial microorganisms, and create healthier soil over time. This approach also reduces erosion and water runoff. For further reading on the benefits of no-dig methods, refer to resources like the RHS’s information on no-dig gardening.
- Water-wise Gardening: When used as a mulch, cardboard acts as a fantastic moisture retainer. It reduces evaporation from the soil surface, meaning you’ll need to water less frequently, conserving precious water resources. This is especially valuable in drought-prone areas or during hot summer months.
- Biodiversity Support: As cardboard breaks down, it encourages earthworms, beneficial insects, and a diverse range of soil microbes. These organisms are vital for breaking down organic matter, cycling nutrients, and creating healthy soil structure, fostering a vibrant and resilient garden ecosystem.
- DIY Pest Control: Beyond providing physical barriers, cardboard can contribute to pest management. Slug traps can be made by placing damp pieces of cardboard near affected plants overnight; slugs will hide underneath, and you can remove them in the morning.
Seasonal Considerations for Cardboard in the Garden
The timing of your cardboard applications can significantly impact their effectiveness and benefits.
- Spring: This is an ideal time for sheet mulching to prepare new beds for the growing season. The cardboard will have several weeks to begin breaking down before planting, and it helps warm the soil earlier. Use cardboard collars to protect emerging seedlings from cutworms and early spring pests.
- Summer: Cardboard mulch is invaluable during hot summer months. It conserves soil moisture, reducing the need for frequent watering, and helps keep soil temperatures cooler, protecting delicate roots from heat stress. For temporary shade, cardboard boxes can be quickly deployed as emergency shelters for heat-sensitive plants.
- Autumn: A perfect time for “putting the garden to bed.” Lay cardboard as a base layer for next year’s garden beds, or to suppress perennial weeds over winter. Incorporate shredded cardboard into your compost pile with fallen leaves to create a balanced compost that will be ready by spring. If establishing new pathways, autumn is a great time to lay cardboard as a weed barrier before adding your final path material.
- Winter: Use cardboard to protect sensitive perennials or small shrubs from light frost. Large pieces of cardboard can also be laid in areas you plan to plant in next spring, allowing the natural freeze-thaw cycles and winter rains to help break down the cardboard and suppress overwintering weeds. This is also an excellent time to collect and store cardboard for spring projects, ensuring you have a steady supply. For more insights on soil health in different seasons, explore resources like the University of Minnesota Extension on soil health.
Expert Resources for Advanced Cardboard Gardening
To deepen your understanding and explore more advanced techniques, here are some excellent external resources:
- Gardening Know How: The Basics of Composting – An excellent resource for understanding how cardboard integrates into a balanced composting system.
- Royal Horticultural Society (RHS): No-dig Gardening – The RHS provides comprehensive guidance on no-dig gardening, where cardboard plays a vital role.
- University of Minnesota Extension: Soil Organic Matter and Soil Health – Learn why organic materials like cardboard are crucial for long-term soil fertility and health.
For more innovative gardening ideas and practical advice, be sure to visit: DIY Hacks to Transform Your Garden, explore our extensive collection of Eco-Friendly Hacks, and discover creative solutions for your outdoor space at 7 Easy Steps to Create an Eco-Friendly Backyard Paradise.
Conclusion: Embrace the Power of Cardboard for a Greener Garden
From the myriad of uses we’ve explored, it’s clear that cardboard is far more than just packaging material; it’s a versatile, sustainable, and incredibly effective tool for any gardener. By incorporating these cardboard garden uses into your routine, you’re not only saving money and reducing waste, but you’re actively contributing to healthier soil, more resilient plants, and a thriving ecosystem right in your backyard. The benefits are tangible: fewer weeds, better water retention, improved soil structure, and a reduction in the need for chemical interventions.
Embracing cardboard is a simple yet powerful step towards more sustainable and enjoyable gardening. It encourages a deeper connection with your environment and provides a sense of accomplishment in repurposing what would otherwise be discarded. So, the next time you receive a package, don’t just toss the box; envision its potential in your garden. Start small, experiment with different applications, and watch as this humble material transforms your gardening experience. Your plants, your wallet, and the planet will thank you.
Frequently Asked Questions About Cardboard in the Garden
Q1: What kind of cardboard is safe to use in the garden?
A1: Always use plain, unprinted, and unwaxed corrugated cardboard. Remove all plastic tape, labels, and staples. While some colored inks are soy-based, it’s safest to stick to brown cardboard to avoid potential chemical contamination.
Q2: Do I need to remove all the tape and labels from cardboard?
A2: Yes, it is highly recommended to remove all plastic tape, glossy labels, and staples. These materials do not decompose naturally and will persist in your garden as contaminants. Taking a few extra minutes to remove them ensures a truly eco-friendly application.
Q3: How long does it take for cardboard to break down in the garden?
A3: The decomposition rate of cardboard varies depending on its thickness, moisture levels, and the presence of soil microbes. Thin cardboard can break down in a few weeks to a couple of months, while thicker pieces, especially if dry, can take 6 months to a year or more. Keeping it moist and layered with nitrogen-rich materials (like compost or grass clippings) significantly speeds up the process.
Q4: Can cardboard attract pests like rodents or insects?
A4: While dry cardboard alone is unlikely to attract pests, when it’s damp and layered over attractive materials like seeds or food scraps, it can potentially provide shelter for slugs, snails, or pillbugs. For sheet mulching, laying cardboard directly on weed-filled ground and covering it immediately with a thick layer of organic material usually prevents pest issues. Regularly checking your garden and maintaining good practices will minimize any potential problems. In worm bins, moist cardboard is actually beneficial as it provides bedding for your composting worms.