The Ultimate Guide to Building a Trellis for Thriving Climbing Plants
Transforming your garden with vertical growth not only maximizes space but also adds aesthetic appeal and boosts plant health. Learning to build a trellis for climbing plants is a rewarding DIY project that offers endless possibilities for both food and floral enthusiasts. Whether you dream of cascading roses, bountiful pole beans, or prolific cucumbers, a well-constructed trellis is your secret weapon. This comprehensive guide will walk you through every step, from planning and material selection to construction and plant training, ensuring your garden reaches new heights.
[lwptoc]
Why a Trellis Matters for Your Garden: Benefits Beyond Beauty
Utilizing vertical space in your garden through trellises offers a myriad of benefits far beyond simple aesthetics. It’s a strategic move for any gardener, from urban dwellers with limited footprints to those with acreage looking to optimize their yields. Understanding these advantages can inspire you to embrace vertical gardening with enthusiasm.
One of the most immediate benefits is maximizing garden space. In smaller gardens or raised beds, horizontal space is a premium. By training plants upwards, you free up valuable ground area for other crops or simply reduce the overall footprint needed for your current plantings. This vertical expansion allows for a greater diversity of plants in a given area, making your garden more productive and visually rich.
Beyond space, trellises significantly improve air circulation around your plants. When plants sprawl on the ground, air movement is restricted, creating humid microclimates ideal for fungal diseases like powdery mildew or damping-off. Lifting plants off the ground allows air to flow freely, drying leaves quicker after rain or irrigation and substantially reducing the risk of disease. This leads to healthier, more robust plants that require less intervention.
Another crucial advantage, particularly for edible crops, is easier harvesting and improved fruit quality. Imagine harvesting cucumbers or tomatoes without bending over or searching through dense foliage on the ground. Trellised plants present their produce at a more convenient height, making picking quick and enjoyable. Furthermore, fruits and vegetables grown off the ground are less prone to rot, slug damage, and dirt contamination, resulting in cleaner, higher-quality harvests that last longer.
Trellises also play a vital role in plant support and structural integrity, especially for heavy fruit-bearing vines. Without proper support, plants like indeterminate tomatoes, melons, or squash can collapse under their own weight, leading to broken stems, damaged fruit, and stunted growth. A sturdy trellis provides the necessary framework, allowing plants to direct their energy into producing abundant yields rather than struggling to uphold themselves.
Finally, the aesthetic impact of a trellis cannot be understated. A well-designed trellis, draped with flourishing vines, adds a stunning focal point to any garden. It can define spaces, create living screens for privacy, or soften harsh architectural lines. Flowering climbers like clematis, climbing roses, or morning glories can transform a plain fence or wall into a vibrant tapestry of color and fragrance, elevating the overall beauty and ambiance of your outdoor living area. Building your own trellis allows for complete customization, ensuring it perfectly complements your garden’s design and your personal style.
Note: Not all climbing plants are created equal. Some, like pole beans, twine, while others, like clematis, use tendrils. Understanding your plant’s climbing mechanism will help you choose the most effective trellis design for optimal growth.
What You’ll Need: Tools, Materials, and the Right Climbing Plants
Embarking on a DIY trellis project requires a thoughtful selection of tools and materials. The right preparation ensures a smooth build and a durable structure. Furthermore, choosing the appropriate climbing plants for your trellis design is paramount to its success and your gardening satisfaction.
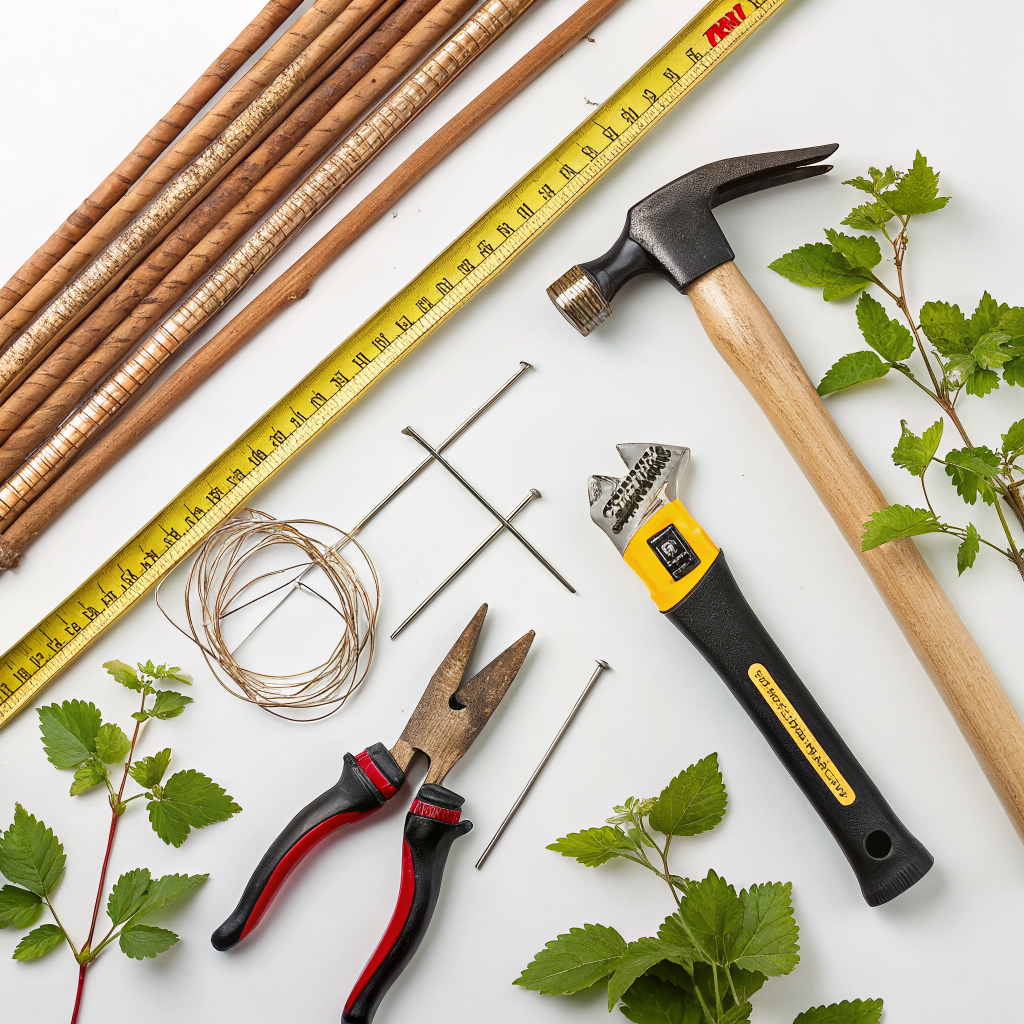
Essential Tools for Your Trellis Build:
- Measuring Tape: Accuracy is key for a stable structure.
- Saw: A hand saw, circular saw, or miter saw for cutting wood to size.
- Drill: Cordless or corded, for creating pilot holes and driving screws.
- Level: Ensures your trellis stands straight and true.
- Shovel or Post-hole Digger: For anchoring posts securely in the ground.
- Hammer: If using nails, or for general adjustments.
- Safety Glasses and Gloves: Always prioritize personal safety during construction.
- Pencil or Marker: For marking cuts and drill points.
- Wire Cutters/Pliers: If working with wire mesh or hardware cloth.
- Staple Gun: Useful for attaching netting or softer materials to a wooden frame.
Materials to Gather for a Sturdy Trellis:
The choice of materials will depend on your desired aesthetic, the plant’s weight, and your budget.
- Structural Posts:
- Wood Posts (e.g., 2x2s, 2x4s, or 4x4s): Cedar, redwood, or pressure-treated lumber are excellent choices for outdoor durability. Untreated wood can also be used but will require sealing or painting.
- Metal Poles (e.g., rebar, galvanized pipe): Extremely durable and long-lasting, though they can get hot in direct sun which might affect some tender plants.
- Climbing Surface Material:
- Lattice Panels: Pre-made wooden or plastic lattice offers a ready-to-use climbing surface.
- Wire Mesh or Hardware Cloth: Durable and provides excellent grip for tendril climbers. Choose appropriate mesh size for your plant’s tendrils.
- Garden Netting: Lightweight and inexpensive, ideal for annuals or lighter climbers. Made from nylon or synthetic fibers. Available at nouvelles-technologie.com/garden-netting-guide.
- Branches or Bamboo Stakes: An eco-friendly and rustic option, perfect for creating a natural aesthetic.
- Fasteners and Anchors:
- Screws: Exterior-grade wood screws (e.g., deck screws) resist rust.
- Nails: Galvanized nails if using wood, though screws offer superior holding power.
- Post Anchors or Concrete (optional): For extra stability, especially for tall trellises or in windy areas.
- Zip Ties, Garden Twine, or Plant Ties: For attaching climbing material to the frame and initially guiding plants.
- Protective Finishes (if using untreated wood):
- Exterior Stain or Paint: Protects wood from the elements and adds aesthetic appeal.
- Wood Sealer: Extends the life of your wooden components.
Choosing the Right Climbing Plants for Your Trellis:
A successful trellis project starts with understanding your plants’ needs and habits. Different climbers utilize different methods to ascend, and your trellis should accommodate these.
- Twining Plants (e.g., Pole Beans, Morning Glories, Honeysuckle): These plants wrap their stems or tendrils around supports. They need a support structure with something to wrap around, such as thin poles, twine, or netting.
- Tendril Climbers (e.g., Peas, Cucumbers, Grapes, Sweet Peas): These plants produce specialized tendrils that grasp onto thin objects. They thrive on netting, wire mesh, or thin branches.
- Scramblers/Ramblers (e.g., Climbing Roses, Bougainvillea): These plants don’t actively climb but have thorns or stiff stems that can be woven through or tied to a sturdy support. They need a robust trellis with large gaps or horizontal elements for tying.
- Suckering/Adhering Climbers (e.g., Ivy, Virginia Creeper, Climbing Hydrangea): These plants attach directly to surfaces with adhesive pads or aerial rootlets. While they can grow on a trellis, they are often better suited for walls or fences they can cling to directly. For trellises, they need a very close-knit structure or a wall behind the trellis.
Consider the mature size and weight of your chosen plant. A large, woody vine like wisteria will require a much more robust and permanent structure than annual sweet peas. Factor in sunlight requirements, planting zones, and desired harvest when selecting your green companions. Learning about specific plant care can be found at Gardening Know How.
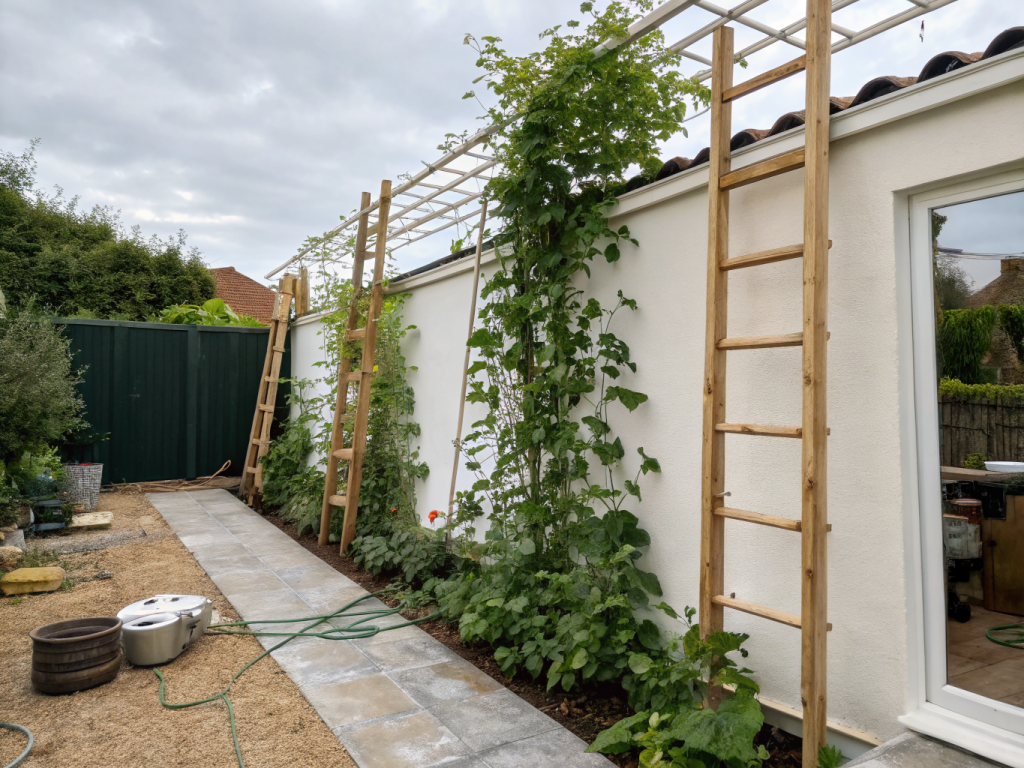
Step-by-Step Guide: Building Your Trellis for Climbing Plants
This detailed guide will walk you through constructing a robust and versatile wooden trellis, suitable for a wide range of climbing plants. We’ll focus on a freestanding A-frame or simple square design, which can be adapted to various sizes.
Step 1: Plan Your Trellis and Gather Materials
Before making any cuts, visualize your trellis. Determine its ideal height and width based on the plants you intend to grow and the space available. Measure your chosen location carefully, considering sun exposure and accessibility. Sketch out your design, marking all dimensions and potential cut points. This planning phase is crucial for ensuring you have all the necessary materials and avoid costly mistakes. For deeper insights into garden planning, check out nouvelles-technologie.com/garden-planning-software.
List all lumber, mesh, fasteners, and tools you’ll need. Ensure your wood is suitable for outdoor use, such as cedar, redwood, or pressure-treated lumber, to prevent premature rot. If using untreated wood, plan for sealing or painting. This step directly impacts the longevity and stability of your finished trellis.
Step 2: Prepare the Main Frame Components
Begin by cutting your structural wood posts to the desired lengths. For a standard trellis, you’ll need two main vertical posts and several horizontal cross-members. For an A-frame, you’ll need four identical vertical posts that form the “A” shape, plus horizontal supports. Use a saw to get clean, straight cuts, and double-check your measurements before each cut.
If you’re using pressure-treated lumber, it’s a good idea to seal any freshly cut ends with an appropriate wood protector. This prevents moisture from penetrating the exposed, untreated core of the wood. Lay out your cut pieces on a flat surface to ensure they all align correctly according to your design.
Step 3: Assemble the Trellis Frame
This is where your trellis takes shape. For a simple rectangular trellis, attach your horizontal cross-members to your vertical posts using exterior-grade screws. Pre-drilling pilot holes will prevent the wood from splitting, especially near the ends. Ensure connections are square and strong.
For an A-frame design, lay two of your vertical posts on the ground, spaced apart at what will be the base of one side of the ‘A’. Attach horizontal cross-members to create a ladder-like section. Repeat this for the second side. Then, stand both sections up and connect them at the top with a sturdy hinge or bolted joint, allowing them to form the ‘A’ shape. A strong top beam connecting the two ‘A’ sections will add significant stability.
Step 4: Attach the Climbing Surface
Once your frame is assembled and feels sturdy, it’s time to add the climbing material. If using lattice panels, simply screw or nail them directly to the frame. If using wire mesh or hardware cloth, cut it to size using wire cutters, leaving a slight overhang for attachment. Secure the mesh to the wooden frame using a staple gun or U-shaped nails, ensuring it’s taut. For wider spans, you might need to add intermediate support wires or small wooden dowels to prevent sagging.
Garden netting can be stretched and stapled or tied to the frame, ensuring good tension. If using natural branches or bamboo, strategically weave and tie them to the frame using garden twine. This step is critical as it provides the actual support structure for your plants.
Step 5: Install and Anchor Your Trellis
Transport your assembled trellis to its final location. For freestanding trellises, you’ll need to anchor the posts securely in the ground. Dig holes that are at least 1/3 of the height of the buried portion of the post and ideally extend below the frost line in colder climates. For example, for a 6-foot tall trellis, you’d want at least 2 feet buried. Place your posts in the holes, making sure they are perfectly level, then backfill with soil, tamping firmly around the base. For extra stability, especially for heavier plants or windy areas, consider using concrete to set the posts, following manufacturer instructions. For guidance on securing posts, see University of Minnesota Extension resources.
If your trellis is lean-to style, attach it securely to a fence or wall using appropriate hardware. Ensure all connections are tight and the trellis doesn’t wobble. A well-anchored trellis is essential for supporting the weight of mature, fruit-laden plants and for withstanding strong winds.
Step 6: Plant and Train Your Climbing Companions
With your trellis firmly in place, it’s time for the exciting part: planting! Plant your chosen climbing plants at the base of the trellis, ensuring they have good soil and adequate water. As the plants begin to grow, gently guide their tendrils or stems towards the trellis. For plants that don’t naturally twine, like climbing roses, you’ll need to periodically tie new growth to the trellis using soft garden ties or twine. Avoid tight ties that could constrict growth. Regular monitoring and guidance in the early stages will help your plants establish a strong vertical habit and ensure excellent coverage of your new trellis, leading to a thriving vertical garden.
Pro Tips and Common Mistakes to Avoid
Building a trellis is a straightforward project, but a few expert tips can elevate your results, while avoiding common pitfalls can save you time and frustration. Learning from others’ experiences ensures a more successful and durable outcome.
Pro Tips for a Superior Trellis:
- Consider Future Growth: Always build with the plant’s mature size and weight in mind. A small netting trellis might suffice for peas, but indeterminate tomatoes or heavy gourds demand a much sturdier, perhaps metal or thick wood, structure. Don’t underestimate the weight of a fully fruited vine.
- Orient for Sun and Wind: Position your trellis to maximize sunlight exposure for your plants, typically south-facing. Also, consider prevailing winds. A robust anchor system is critical in windy areas to prevent your trellis from toppling over with plants attached.
- Material Longevity: Invest in quality, weather-resistant materials from the start. Pressure-treated lumber, cedar, or galvanized metal will significantly outlast untreated pine. If using wood, consider sealing or painting exposed ends and surfaces to extend its lifespan.
- Easy Access for Maintenance: Design your trellis with enough space for you to reach plants for watering, pruning, and harvesting. Avoid making the climbing surface too dense or the gaps too small to reach through.
- Slope for Drainage (Raised Beds): If integrating your trellis into a raised bed, ensure the bed itself has good drainage. Waterlogged roots are a common plant killer. If using in-ground posts, ensure good drainage around the base of the posts to prevent rot.
- Pre-Drill Pilot Holes: Always pre-drill pilot holes when screwing wood together, especially near the ends of boards. This prevents splitting and ensures stronger, cleaner joints. Match the pilot hole size to the screw shank, not the threads.
- Use Exterior-Grade Fasteners: Common indoor screws and nails will rust and weaken outdoors. Use galvanized, stainless steel, or ceramic-coated exterior-grade screws and nails for all outdoor construction to ensure longevity and prevent unsightly rust stains.
Common Mistakes to Avoid:
- Underestimating Plant Weight: This is perhaps the most frequent mistake. A trellis that seems sturdy enough when empty can collapse under the weight of a mature, wet, fruit-laden plant. Always over-engineer rather than under-engineer the supports.
- Inadequate Anchoring: A trellis that isn’t firmly secured to the ground or an existing structure is a disaster waiting to happen. High winds or the sheer weight of plants can easily topple it. Dig deep, use concrete if necessary, or bolt securely.
- Choosing the Wrong Climbing Surface: A large-mesh netting is useless for thin tendrils that can’t grip it, while a small-mesh can become a tangled mess for a thick-stemmed twiner. Match the climbing material to your plant’s climbing mechanism.
- Planting Too Close: While vertical gardening maximizes space, planting too many climbers too close together at the base of a single trellis can lead to overcrowding, poor air circulation, and competition for nutrients. Give plants adequate room to spread their roots and grow up the support.
- Neglecting Protection for Untreated Wood: If you elect to use untreated wood for a more natural look, failing to seal or paint it will greatly reduce its lifespan, leading to rot and instability within a few seasons. Reapply protective finishes periodically.
- Ignoring Maintenance: Trellises, like any garden structure, require occasional maintenance. Check for loose fasteners, rotting wood, or damaged climbing surfaces yearly. Repair issues proactively before they become major problems.
Eco-Friendly Variations for a Sustainable Trellis
Embracing eco-conscious practices in your garden extends beyond just planting organic. Building a sustainable trellis involves choosing materials and methods that are gentle on the environment, reducing your carbon footprint, and often, saving you money. Here are some eco-friendly variations for your trellis project.
Reclaimed and Repurposed Materials:
- Scrap Wood: Before buying new lumber, check local construction sites (with permission!), salvage yards, or even your own garage for usable scrap wood. Old fence pickets, decking boards, or pallets (ensure they are heat-treated, not chemically treated – look for “HT” stamp) can be disassembled and repurposed into sturdy trellis frames. This reduces waste and gives materials a second life.
- Old Ladder or Swing Set: An old wooden or metal ladder can be stood upright or leaned against a wall to create an instant trellis. Similarly, a repurposed swing set frame provides a strong foundation for multiple climbing plants, perfect for creating a living archway or tunnel.
- Found Branches and Sticks: For a truly rustic and natural aesthetic, collect fallen branches, sturdy twigs, or bamboo stakes from your yard or local natural areas (again, with permission). Weave them together and secure with natural twine or wire to create a beautiful, biodegradable support structure. This is ideal for lighter climbers like peas or sweet peas.
- Metal Remnants: Old rebar, conduit pipes, or even bicycle wheel rims can be creatively used as structural elements or decorative climbing surfaces. Metal is durable and can be recycled at the end of its life.
Natural and Biodegradable Climbing Surfaces:
- Cotton or Jute Twine: Instead of synthetic plastic netting, opt for natural cotton or jute twine. These materials are biodegradable, breaking down at the end of the growing season and enriching the soil. They are perfect for annual vines like beans, cucumbers, and morning glories. You can weave them between posts or string them taut horizontally.
- Bamboo Canes: Bamboo is a rapidly renewable resource, making it an excellent choice for garden stakes and trellis components. It’s strong yet lightweight and adds an attractive Asian-inspired look to your garden.
Sustainable Sourcing Practices:
- FSC-Certified Wood: If you need to purchase new wood, look for products certified by the Forest Stewardship Council (FSC). This ensures the wood comes from sustainably managed forests, protecting biodiversity and supporting responsible forestry practices.
- Local Materials: Whenever possible, source your materials locally. This reduces transportation costs and the associated carbon emissions. Check with local sawmills or salvage yards before heading to big box stores.
Planting with Purpose:
- Native Climbers: Choose native climbing plants for your trellis. They are naturally adapted to your local climate and soil, requiring less water, fertilizer, and pest control. This reduces resource consumption and supports local ecosystems.
Note: When using salvaged materials, always inspect them for integrity, pests, and chemical treatments. For instance, avoid pressure-treated wood if you’re growing edibles unless you’re certain it’s a newer, safer treatment (ACQ/CA vs. CCA).
Seasonal Considerations for Your Trellis Garden
A trellis isn’t just a static structure; it’s an integral part of your garden’s seasonal rhythm. Understanding how the seasons impact your trellis and the plants it supports is crucial for long-term success and minimal maintenance. Different aspects require attention throughout the year, from initial setup to winter storage.
Spring: Installation and Initial Training
- Pre-Season Inspection: Before planting, thoroughly inspect your trellis. Check for any loose fasteners, rotting wood, or damaged climbing surfaces that may have occurred over winter. Make any necessary repairs or replacements.
- New Installation: If building a new trellis, aim to complete the construction before planting time. This allows you to focus on planting and early training without the distraction of construction.
- Early Planting: Plant your climbing vegetables or flowers at the base of the trellis as soon as soil temperatures allow and the risk of frost has passed.
- Initial Training: Begin guiding young plants to the trellis as soon as they develop their first true leaves or tendrils. Gently weave them through the supports or use soft ties to attach them. This early guidance sets the plants up for vertical growth.
Summer: Growth, Harvest, and Maintenance
- Vigorous Growth: Summer is the peak growth season for most climbers. Monitor your plants weekly to ensure they are staying on the trellis. Prune as needed to manage growth, encourage branching, and improve air circulation.
- Regular Watering: Trellised plants, especially those in full sun, can dry out faster than ground-level plants due to increased air exposure. Ensure consistent watering, particularly for fruiting plants.
- Nutrient Needs: Rapid growth demands nutrients. Consider a mid-season feeding with a balanced organic fertilizer, especially for heavy feeders like tomatoes and cucumbers.
- Harvesting: Harvest fruits or flowers regularly to encourage more production and prevent the trellis from becoming overburdened.
- Pest and Disease Monitoring: Good air circulation from trellising helps, but still inspect your plants for signs of pests or diseases. Address issues promptly.
Autumn: Winding Down and Preparation
- Final Harvests: Enjoy the last bountiful harvests before the first hard frost.
- Plant Removal: Once annual plants have finished their cycle and frosts arrive, remove the dead foliage from the trellis. This is critical for preventing the carryover of diseases and pests into the next season.
- Tidy Up: For perennial climbers, prune back any dead or diseased wood. Tie any new growth that needs support to prepare for winter dormancy.
- Trellis Inspection and Winterization:
- For permanent trellises, give them a good cleaning. Brush off any remaining plant debris and inspect for wear and tear. Make small repairs now to prevent bigger problems later.
- For lightweight or portable trellises, consider dismantling them or moving them to a sheltered location (e.g., shed, garage) to protect them from harsh winter weather, effectively extending their lifespan.
- If your trellis is wooden and exposed to extreme winter conditions, consider applying a fresh coat of sealant or paint to extend its life.
Winter: Dormancy and Planning
- Rest for Perennials: Perennial climbers will be dormant. Ensure their root zone is protected with a layer of mulch if needed, especially in zones with harsh winters.
- Planning for Next Season: This is an excellent time to evaluate your trellis’s performance. Did it support your plants well? Was it the right size? Note any improvements you want to make or new plants you want to try. Research new trellis designs or plant varieties for the upcoming spring.
Expert Resources for Advanced Trellis Techniques and Plant Care
Diving deeper into the world of trellising and plant care can significantly enhance your gardening success. These expert resources provide detailed information, research-backed advice, and specialized techniques to further refine your skills and knowledge.
- Royal Horticultural Society (RHS) – Plant Support and Training:
The RHS is a world-renowned gardening charity, offering an extensive library of information for gardeners of all levels. Their section on “Plant Support and Training” provides detailed guidance on various methods, including trellising, staking, and espalier. You’ll find specific advice tailored to different plant types, from fruit trees to flowering climbers, along with illustrations and best practices for optimal plant health and aesthetics.
- University Extension Offices – Gardening Resources:
University Extension offices across the United States are invaluable resources, providing research-based information specific to your local climate and planting conditions. They often have detailed guides on constructing various garden structures, including trellises. These resources cover material selection, construction techniques, and plant recommendations, often with a focus on practical, cost-effective solutions for home gardeners.
Explore University of Minnesota Extension Garden Structures (or search for your local state’s university extension gardening guide)
- Gardening Know How – Trellis and Vine Care Articles:
Gardening Know How offers a vast collection of articles specifically dedicated to trellises, arbors, and the care of climbing plants. Their content ranges from basic “how-to” guides for simple structures to more in-depth discussions on training specific vine types, troubleshooting common problems, and choosing the best support for a particular plant. It’s an excellent resource for practical advice and problem-solving.
- Books and Magazines on Vertical Gardening:
For a more in-depth exploration, consider investing in dedicated vertical gardening books or magazines. These often feature inspiring designs, detailed plans, and comprehensive plant lists. Look for titles focusing on small spaces, edible vertical gardens, or specific plant groups like roses or clematis for specialized knowledge.
- Online Gardening Forums and Communities:
Engaging with other gardeners online can provide practical tips, visual examples, and answers to specific questions about your trellis project or plant care challenges. Websites like Reddit (r/gardening, r/vegetablegardening), specialized gardening forums, or Facebook groups can connect you with experienced enthusiasts.
Conclusion: Elevate Your Garden, Harvest Your Rewards
Building a trellis for climbing plants is more than just a functional DIY project; it’s an investment in the health, beauty, and productivity of your garden. By taking the time to plan, select appropriate materials, and follow a step-by-step construction process, you create a lasting structure that will serve your plants for years to come. From the towering pole beans reaching for the sun to the graceful clematis adorning your garden wall, the benefits of vertical gardening are clear.
You’ve now learned how to choose the right materials, assemble a sturdy frame, and properly anchor your trellis. We’ve explored eco-friendly alternatives and seasonal considerations, equipping you with a holistic understanding. Remember to match your trellis design to your plant’s unique climbing habit, ensuring optimal support and growth. The satisfaction of watching your plants enthusiastically climb the structure you built is unparalleled, a testament to your hands-on effort.
So, gather your tools, unleash your creativity, and get ready to transform your garden. Whether you’re aiming for increased yields, enhanced aesthetics, or simply a more organized growing space, your new trellis will play a pivotal role. The rewards – bountiful harvests, vibrant blooms, and the joy of a thriving vertical garden – are well worth the effort. Happy building, and may your climbing plants flourish!
Frequently Asked Questions About Building a Trellis
Q1: What’s the best wood to use for an outdoor trellis?
A1: For maximum durability and longevity outdoors, cedar and redwood are excellent choices due to their natural resistance to rot and insects. Pressure-treated lumber is also very durable and typically more affordable, but ensure it’s rated for ground contact if your posts will be buried. If using untreated wood, apply a high-quality exterior stain or sealant to protect it from the elements. Avoid using woods prone to rot like untreated pine if you want the trellis to last more than a few seasons.
Q2: How deep should I bury the posts for my trellis?
A2: As a general rule, bury at least 1/3 of the total post length. For example, if you want your trellis to be 6 feet above ground, use an 8-foot post and bury 2 feet of it. In windy areas or for very tall trellises, consider burying posts even deeper or setting them in concrete for added stability. Always check local guidelines for frost line depths in your area, as burying below this line can prevent shifting due to freeze-thaw cycles.
Q3: Can I use chicken wire for a trellis?
A3: Chicken wire can be used for very light-duty, temporary trellises, especially for quick-growing annuals like peas. However, it’s generally not recommended for heavier plants or long-term use. The mesh is often too small for easy tendril gripping, and the thin wire can cut into plant stems. It’s also prone to rust and can become flimsy over time. Hardware cloth or sturdier garden netting with larger openings (e.g., 2×4 inch mesh) is a better, more durable alternative for most climbing plants.
Q4: How do I train my plants to climb the trellis?
A4: Start training when plants are young. For twining plants (like pole beans), gently wrap their stems around the trellis supports in the direction they naturally want to coil (most clockwise). For tendril climbers (like cucumbers), simply guide their tendrils to the netting or wire, and they will usually grip on their own. For scramblers (like climbing roses), you’ll need to periodically tie the stems to the trellis using soft garden ties, twine, or fabric strips, ensuring the ties are loose enough to allow for growth and prevent girdling. Consistent guidance in the early stages helps plants establish a strong vertical habit.


