The Ultimate Guide to Building Living Soil from Scratch: 7 Essential Steps for a Thriving Garden
Embarking on the journey to build living soil scratch is perhaps one of the most rewarding endeavors a gardener can undertake. It transforms your garden from merely a plot of land into a vibrant, self-sustaining ecosystem teeming with life. This comprehensive guide will walk you through every step, demystifying the process and empowering you to cultivate truly exceptional soil.
Imagine plants that are more resilient to pests and diseases, requiring less fertilization and watering, and producing abundant, healthier yields. This isn’t a gardener’s fantasy; it’s the reality achievable when you prioritize the unsung heroes beneath the surface: the microbes, fungi, and beneficial organisms that make up living soil. Get ready to ditch the chemicals and embrace the miraculous power of nature’s underground network!
[lwptoc]
Why Building Living Soil Matters for Your Garden (And the Planet)
The conventional approach to gardening often relies on synthetic fertilizers and pesticides, which can deplete soil health over time. These methods provide a temporary boost to plants but neglect the crucial biological foundation that supports long-term vigor. When you build living soil scratch, you’re not just feeding your plants; you’re feeding an entire ecosystem that, in turn, nourishes your plants naturally.
Living soil is rich in organic matter, acting like a sponge to retain water and nutrients, making your garden more drought-resistant and nutrient-efficient. This intricate web of life breaks down organic materials, making essential nutrients available to your plants in their most natural form. Moreover, healthy soil sequesters carbon, playing a vital role in combating climate change, making your gardening efforts beneficial for both your backyard and the broader environment.
Plants grown in living soil often develop stronger root systems, making them inherently more robust against environmental stressors and less susceptible to common garden ailments. Think of it as creating a symbiotic relationship where your plants, soil, and the microscopic world all work together in perfect harmony. The result is a garden that thrives with minimal intervention, offering both beauty and bounty.
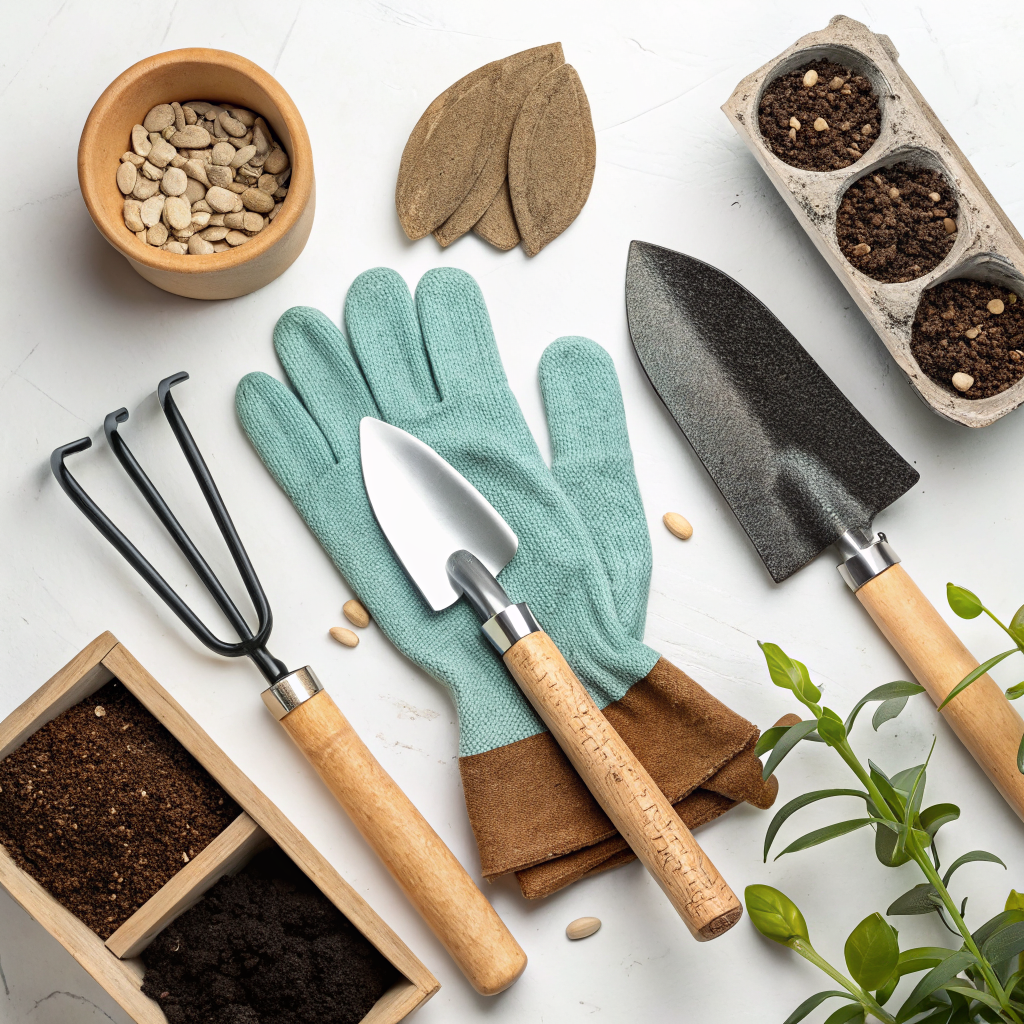
What You’ll Need: Tools, Materials, and the Right Mindset
Before you dive into the nitty-gritty of soil creation, it’s helpful to gather your essential supplies and prepare your approach. While some items are indispensable, others offer helpful advantages, and a patient, observant mindset is perhaps the most crucial tool of all. Remember, building living soil is an ongoing process, not a one-time project.
Essential Materials:
- High-Quality Compost: This is the cornerstone of living soil. Aim for well-aged, diverse compost made from a variety of organic materials. You can make your own or purchase it from reputable sources.
- Mineral Amendments: Rock dust (e.g., azomite, basalt dust), greensand, gypsum, and oyster shell flour provide essential trace minerals and micronutrients.
- Organic Matter: Leaf mold, coco coir, peat moss (sustainable sources preferred), or aged wood chips contribute to soil structure and water retention.
- Worm Castings: Often called “black gold,” worm castings are incredibly nutrient-rich and packed with beneficial microbes.
- Mycorrhizal Fungi Inoculant: These beneficial fungi form symbiotic relationships with plant roots, enhancing nutrient and water uptake.
- Beneficial Bacteria/Microorganism Inoculant: Products containing diverse bacterial strains can jumpstart biological activity.
- Cover Crops Seeds: For no-till approaches and continuous soil building.
- Water: Essential for activating microbes and maintaining moisture.
Useful Tools:
- Wheelbarrow or Tarp: For mixing large quantities of soil ingredients.
- Shovel and Trowel: Basic digging and mixing tools.
- Soil Test Kit: To understand your starting soil composition (pH, nutrient levels).
- Gloves: To protect your hands.
- Watering Can or Hose with a Gentle Sprayer: For even moisture distribution.
- Soil Thermometer (Optional): For monitoring compost decomposition.
The Right Mindset:
Approach this project with patience and a willingness to observe and learn from your soil. Understand that building truly living soil is a process that unfolds over time, and continuous nurturing will yield the best results. Embrace the idea of working with nature, not against it.
Step-by-Step Guide: How to Build Living Soil from Scratch
Creating vibrant, biologically active soil involves more than just mixing ingredients; it’s about fostering an environment where life can flourish. Follow these steps meticulously to lay the foundation for a truly thriving garden.
Step 1: Assess Your Existing Soil (The Foundation)
Before adding anything, it’s crucial to understand what you’re starting with. Dig a small hole and observe your soil’s texture. Is it sandy, heavy clay, or something in between? This will inform what amendments you need most.
A soil test kit can provide invaluable information about your soil’s pH, nutrient levels, and organic matter content. This initial assessment helps you tailor your approach and avoid unnecessary additions, especially for those looking to optimize their urban garden space.
Step 2: Start with the Bulk Foundation (Organic Matter & Base Minerals)
This step focuses on creating the physical structure and initial nutrient base for your living soil. Begin by layering or thoroughly mixing your primary organic matter components. For every cubic foot of soil you aim to build, consider a ratio of roughly 50-60% existing soil (if you have it), 30% quality compost, and 10-20% other organic amendments.
If you’re starting with a new bed, aim for a base of 50% high-quality compost and 50% other organic materials like coco coir or aged wood chips. Incorporate your base mineral amendments at this stage. Rock dusts, greensand, and gypsum slowly release essential trace elements over time, contributing to long-term soil fertility.
Step 3: Introduce the “Black Gold” (Worm Castings)
Once you have your bulk foundation, it’s time to enrich it with nature’s superfertillizer: worm castings. These digested organic materials are teeming with beneficial microbes and readily available nutrients. Aim for about 10-20% of your total soil volume as worm castings, mixing them thoroughly into your base layer.
Worm castings also help improve soil structure, aeration, and water retention, providing an ideal environment for plant roots. They are critical for boosting microbial diversity and fertility right from the start when you want to build living soil scratch effectively.
Step 4: Inoculate and Awaken the Microbes (Fungi & Bacteria)
This is where your soil truly comes alive! Mycorrhizal fungi and various beneficial bacterium inoculants are essential for kickstarting the biological processes in your new soil mix. Follow the specific application rates on your chosen product packaging.
Typically, these inoculants are sprinkled into the soil and gently mixed, or applied with water. These microscopic allies form symbiotic relationships with plant roots, expanding their reach for nutrients and water, and making your plants far more resilient and productive. For more insights on soil health, consider this resource from the Royal Horticultural Society on improving soil.
Step 5: Mulch, Cover, and Moisturization (The Protective Blanket)
Once your soil bed is mixed and inoculated, cover it with a generous layer of organic mulch. This could be straw, aged wood chips, leaves, or even grass clippings (ensure they are free of herbicides). Mulch serves multiple critical functions in a living soil system.
It helps retain moisture, suppresses weeds, regulates soil temperature, and provides a continuous food source for your soil microbes as it slowly breaks down. A consistent moisture level is vital for microbial activity, so keep your newly built soil consistently damp, not waterlogged, until planting. This protective layer is crucial for optimizing garden beds for maximum yield.
Step 6: Plant Green, Cover, and No-Till
If you’re not planning to plant immediately, consider sowing a cover crop. Cover crops protect the soil from erosion, outcompete weeds, and add organic matter when tilled under or “chopped and dropped.” Leguminous cover crops like clover or vetch also fix atmospheric nitrogen, naturally enriching your soil.
Embrace no-till principles as much as possible. Tilling disrupts the delicate soil structure and the fungal networks that you’ve worked so hard to establish. Instead, opt for broadforking or gentle loosening to improve aeration if needed. If you’re building raised beds, this step is even more straightforward. These practices are fundamental to a healthy, vibrant living soil ecosystem.
Step 7: Continuous Feeding and Observation
Building living soil isn’t a one-time event; it’s an ongoing process of nourishment and care. Continuously feed your soil with organic matter. Top-dress with compost, worm castings, and fresh mulch throughout the growing season. Use organic amendments like alfalfa meal, kelp meal, or bone meal sparingly as needed, based on plant observation and occasional soil tests.
Pay close attention to your plants and the soil itself. Healthy plants are a good indicator of healthy soil. Observe how well your soil retains moisture, how quickly worms and other beneficial insects appear, and how well your plants resist disease. This continuous feedback loop will guide you in refining your living soil practices.
Pro Tips and Common Mistakes to Avoid
While the process of building living soil is relatively straightforward, a few expert tips can significantly enhance your success. Equally important is understanding common pitfalls to avoid, which can hinder the development of a truly robust soil ecosystem. These insights will help you build living soil scratch with greater confidence and effectiveness.
Pro Tips for Success:
- Diversity is Key: Just like a healthy diet for humans, diverse organic matter creates a more resilient and nutrient-rich soil. Use a variety of compost inputs, mulches, and cover crops.
- Moisture is Life: Soil microbes need consistent moisture to thrive. Never let your living soil dry out completely. Mulch is your best friend for moisture retention.
- Think Long-Term: Building living soil is a marathon, not a sprint. While you’ll see improvements quickly, the full benefits accrue over several seasons. Be patient and persistent.
- Listen to Your Soil: Dig in occasionally, smell it (it should smell earthy and sweet, not sour), and feel its texture. Observe the amount of worm activity. These are all indicators of soil health.
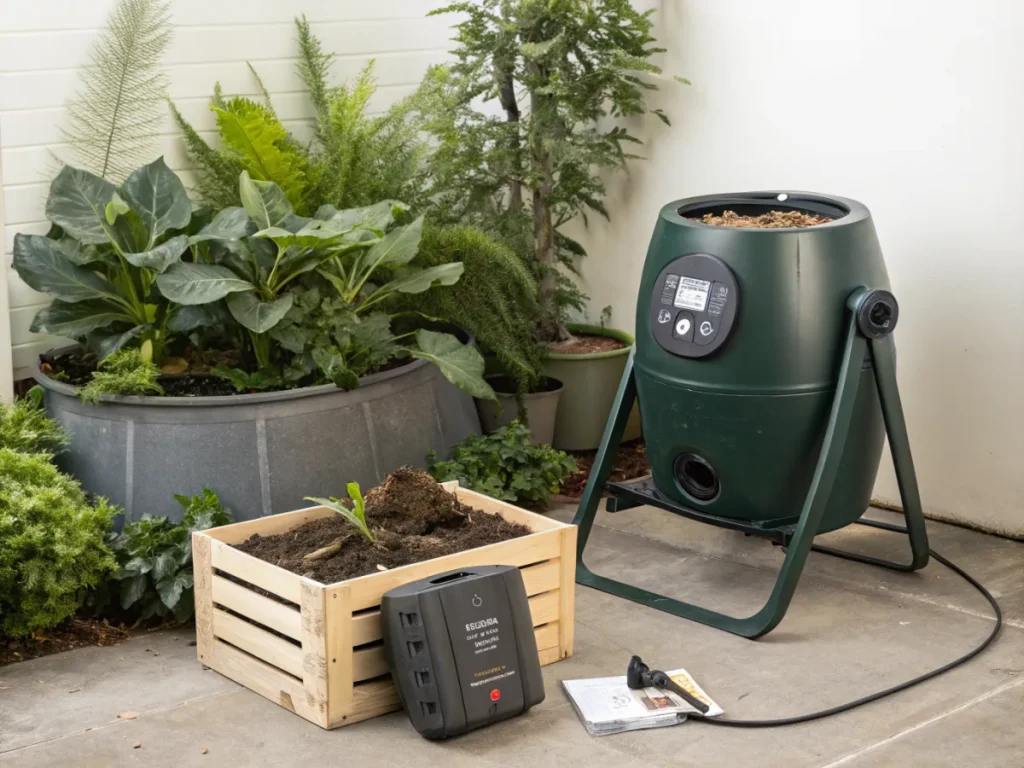
- Compost Tea Boost: Periodically apply compost tea as a soil drench or foliar spray. This introduces a fresh infusion of beneficial microbes directly to your plants and soil. For deeper insight into composting, check out this DIY composting bin tutorial.
Common Mistakes to Avoid:
- Over-tilling: This is perhaps the biggest destroyer of soil life. It breaks down soil structure, kills beneficial fungi, and releases carbon. Stick to no-till or minimal disturbance methods.
- Using Synthetic Chemicals: Pesticides, herbicides, and synthetic fertilizers kill or harm the very microbes and organisms you’re trying to cultivate. They disrupt the natural nutrient cycles.
- Leaving Soil Bare: Exposed soil is vulnerable to erosion, nutrient leaching, and extreme temperature fluctuations. Always keep it covered with mulch or living plants (cover crops).
- Not Enough Organic Matter: The foundation of living soil is organic matter. Without a continuous supply, the microbial ecosystem simply cannot thrive.
- Impatience: Expecting instant results can lead to frustration. True living soil takes time to establish its complex web of life. Give it time to flourish naturally.
Eco-Friendly Variations and Sustainable Practices
When you commit to building living soil from scratch, you’re inherently embracing a more sustainable and eco-conscious gardening approach. There are, however, specific variations and practices that can further enhance your garden’s ecological footprint and overall health.
- Hugelkultur Beds: This method involves burying large pieces of decaying wood at the base of a raised bed or mound. The wood slowly decomposes, providing nutrients, increasing water retention, and creating a long-lasting, self-fertile growing environment. It’s an excellent way to sequester carbon and utilize fallen timber.
- Compost in Place/Chop-and-Drop: Instead of removing plant debris, cut it down and leave it on the soil surface to decompose. This mimics nature’s process, returning nutrients to the soil and feeding the microbial life directly. This is a true no-till approach that minimizes disturbance.
- Biochar Integration: Biochar is a stable form of charcoal produced through pyrolysis of biomass. When added to soil, it acts as a permanent sponge, improving water retention, nutrient holding capacity, and providing a habitat for microbes. Ensure you use charged biochar, meaning it has been inoculated with nutrients or compost tea.
- Rainwater Harvesting: Using rainwater for irrigation instead of municipal water reduces your environmental impact and often provides healthier water for your plants, as it’s free of chlorine and other chemicals. Directing rainwater into your garden beds also helps to activate soil microbes.
- Perennial Planting: Incorporating perennial vegetables, herbs, and flowers into your garden reduces the need for annual soil disturbance and provides continuous root systems that help build and stabilize soil structure year-round. These deep roots interact beautifully with your growing microbial communities.
Seasonal Considerations for Living Soil
Understanding how living soil responds to seasonal changes is crucial for its continuous health and productivity. Your care routine will adapt throughout the year to support your microbial allies and plants.
Spring: Awaken and Feed
As temperatures rise, microbial activity in your soil will begin to accelerate. This is an ideal time to top-dress with a fresh layer of compost and worm castings. Gently work in any granular organic amendments if your soil test from the previous season indicated deficiencies. Plant cover crops if beds are to remain empty for a while. Ensure consistent moisture as new seedlings emerge and the weather warms.
Summer: Maintain and Protect
Summer can be challenging for soil life due to heat and potential drought. Maintain a thick layer of mulch to conserve moisture, keep soil temperatures stable, and provide continuous food for microbes. Water deeply and less frequently to encourage deep root growth. Avoid disturbing the soil, and manage weeds by cutting them at the soil line rather than pulling. Replenish mulch as needed.
Autumn: Harvest and Prepare
As harvests conclude, focus on replenishing your soil. Add a generous layer of compost and organic matter. Plant fall cover crops such as winter rye or clover to protect the soil over winter, prevent erosion, and add organic matter. Allow spent annual plants to decompose in place, or chop and drop them to feed the soil. This is the crucial time to prepare your soil for long-term health.
Winter: Rest and Renew
Microbial activity slows in cold temperatures, but it doesn’t stop entirely, especially in climates with milder winters. Dormant cover crops continue to protect the soil. If you have any bare beds, ensure they are covered with mulch to prevent compaction and erosion. Avoid walking on frozen or excessively wet soil. Use this time to plan for next season, collect leaves for leaf mold, and build your compost pile for spring. Your living soil is recharging for another productive cycle.
Expert Resources for Further Learning
To deepen your understanding and continue your journey in building living soil, explore these excellent external resources:
- Gardening Know How: Their extensive articles cover a wide range of gardening topics, including detailed guides on soil amendments and building healthy soil. Visit Gardening Know How
- Royal Horticultural Society (RHS): A world-renowned gardening charity, their website offers science-backed advice on all aspects of gardening, with a strong focus on soil health and sustainable practices. Explore the RHS Gardening Website
- University of Minnesota Extension: University extension services provide research-based information tailored to local conditions, often including in-depth guides on soil science, composting, and organic gardening. Access University of Minnesota Extension Resources
Conclusion: The Rewards of a Living, Breathing Garden
Successfully deciding to build living soil scratch is more than just a gardening technique; it’s a philosophy, a commitment to nurturing the intricate web of life that makes all plant growth possible. It shifts your role from simply a caretaker of plants to a steward of an entire ecosystem. The initial effort you invest will yield exponential returns in the form of healthier, more resilient plants, reduced need for external inputs, and a deeply satisfying connection to nature.
Your garden will transform into a vibrant, self-sustaining entity, humming with life both above and below the surface. You’ll observe increased biodiversity, witness more robust growth, and enjoy abundant harvests of nutritious produce. Beyond the tangible benefits, there’s the immense satisfaction of knowing you’re contributing to a healthier environment, one handful of rich, living soil at a time. Embrace this journey, learn from your experiences, and delight in the incredible power of your living soil.
Frequently Asked Questions About Building Living Soil
<p><strong>Q1: How long does it take to build living soil from scratch?</strong><br>
A1: While you can start to see improvements in soil health within a few months, building truly rich, mature living soil is an ongoing process that can take 1-3 years or even longer. Continuous feeding and minimal disturbance accelerate the process. </p>

<p><strong>Q2: Can I convert my existing garden soil into living soil?</strong><br>
A2: Absolutely! In fact, this is how most gardeners begin. By incorporating organic matter, quality compost, inoculants, and adopting no-till practices, you can gradually transform compacted, depleted soil into a thriving living ecosystem.</p>

<p><strong>Q3: Do I still need to fertilize plants in living soil?</strong><br>
A3: The goal of living soil is to greatly reduce or eliminate the need for synthetic fertilizers. Your plants will primarily get nutrients from the breakdown of organic matter by microbes. Occasional top-dressing with compost, worm castings, or organic amendments like kelp meal can provide a boost, but heavy fertilization becomes unnecessary.</p>

<p><strong>Q4: What if I don't have access to all the specific amendments listed?</strong><br>
A4: Don't let perfect be the enemy of good! The most critical components are high-quality compost, organic matter, and beneficial microbes. Start with what you can source, prioritize these essentials, and integrate other amendments as they become available. Even focusing on excellent composting and mulching will make a huge difference.</p>