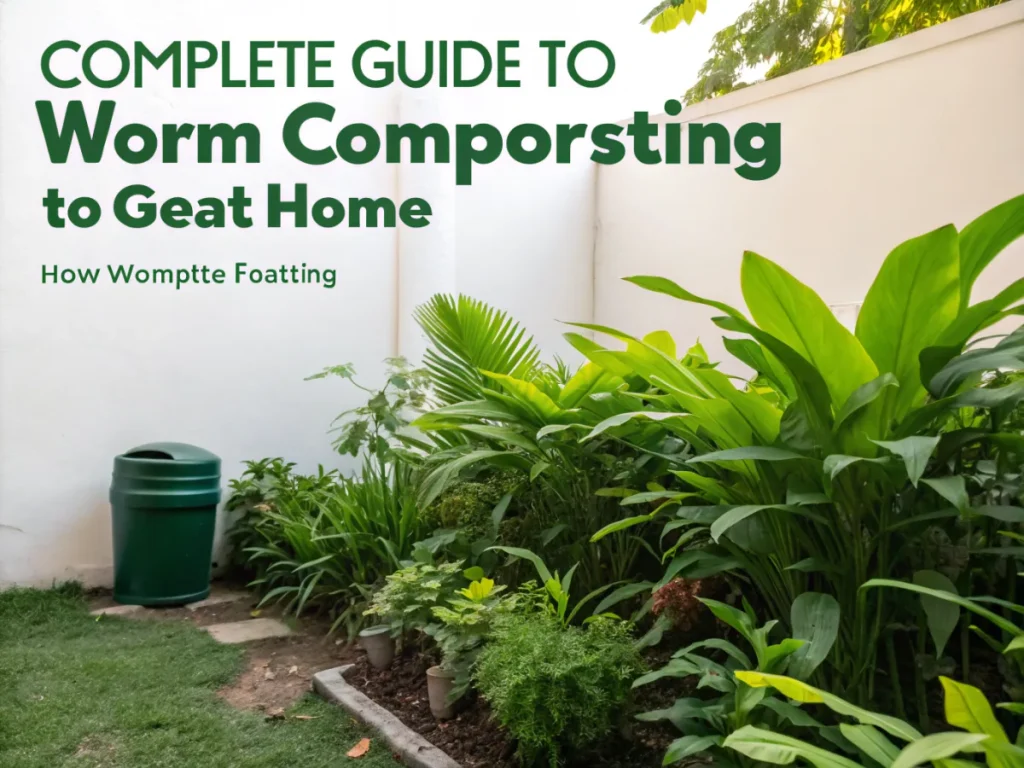
The Ultimate Guide to Worm Composting at Home: Transforming Waste into Garden Gold
Are you looking to supercharge your garden, reduce household waste, and embrace a truly sustainable lifestyle? Then welcome to the fascinating world of worm composting, also known as vermicomposting! This comprehensive worm composting guide home will walk you through everything you need to know, from setting up your first bin to harvesting nutrient-rich worm castings. It’s an incredibly rewarding process that benefits both your plants and the planet.
[lwptoc]
Worm composting is a natural, efficient, and odor-free method of transforming organic waste into high-quality soil amendments using specialized composting worms. Imagine turning your kitchen scraps, newspaper, and cardboard into a gardener’s black gold – teeming with beneficial microbes and essential nutrients. It’s not just about waste reduction; it’s about creating living soil that boosts plant health, improves water retention, and enhances overall garden productivity. Let’s dive in and discover how easily you can bring this eco-friendly practice into your home.
Why Worm Composting Matters for Your Garden and the Planet
The benefits of vermicomposting extend far beyond just diverting waste from landfills. It directly impacts the health and vitality of your garden, offering a sustainable solution to traditional fertilization methods. By incorporating worm castings into your soil, you’re not just feeding your plants; you’re nurturing the entire soil ecosystem.
Superior Soil Amendment: Worm castings are often referred to as “black gold” for a reason. They are rich in humic acids, micronutrients, and beneficial microbes that are readily available to plants. Unlike synthetic fertilizers that can leach away and harm the environment, worm castings slowly release nutrients, providing long-term benefits to your soil structure and fertility.
Enhanced Plant Growth and Health: Studies have shown that plants grown with worm castings exhibit better germination rates, increased root development, stronger stems, and improved disease resistance. The enzymes and hormones present in castings act as natural growth regulators, promoting robust and healthy plant growth. Your vegetables, flowers, and herbs will thrive like never before.
Improved Soil Structure and Water Retention: The unique structure of worm castings significantly improves soil aeration and drainage, while also enhancing water retention capabilities. This means your plants will be less susceptible to drought stress and waterlogging, making your garden more resilient and requiring less frequent watering. Healthy soil is the foundation of a thriving garden, and worm castings are key to building that foundation.
Waste Reduction and Environmental Impact: Every pound of kitchen scraps you divert into your worm bin is a pound less going to a landfill. Landfills are major contributors to methane gas emissions, a potent greenhouse gas. By vermicomposting, you’re actively participating in reducing your carbon footprint and promoting a circular economy within your home. It’s a small action with a significant environmental impact.
Educational and Engaging: Worm composting can be a fantastic educational tool for children and adults alike. It offers a hands-on way to understand natural cycles, decomposition, and the importance of sustainability. Watching the worms work their magic is not only fascinating but also incredibly rewarding, fostering a deeper connection to nature and environmental stewardship.
What You Need for a Thriving Worm Composting System
Getting started with vermicomposting is surprisingly simple, requiring only a few key components. The most important choice you’ll make is selecting the right worms and a suitable bin. Let’s break down the essential items you’ll need.
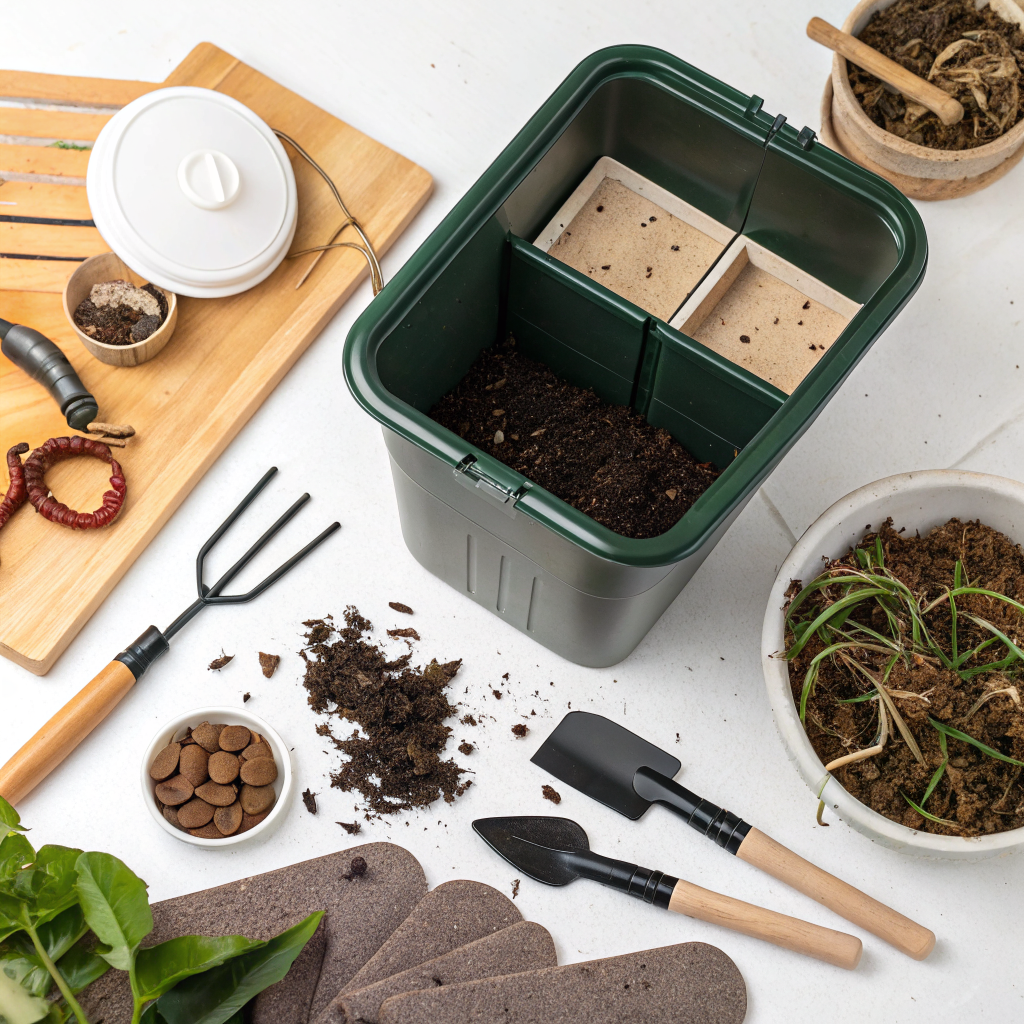
1. The Worm Bin: Your Worms’ New Home
You have several options for a worm bin, ranging from DIY solutions to commercially produced multi-tiered systems. The key is to provide a dark, moist, and well-ventilated environment that allows for efficient drainage.
- DIY Bins: Two stacked opaque plastic storage bins (8-10 gallon minimum) can work wonders. Drill plenty of small drainage holes in the bottom of the top bin and aeration holes around the sides and lid of both. The bottom bin acts as a liquid collection tray (for “worm tea” or leachate).
- Commercial Bins: Systems like the Worm Factory 360, Can-O-Worms, or a simple flow-through bin are designed specifically for vermicomposting. They often feature multiple trays, allowing for easy expansion and harvesting. These are excellent for beginners as they eliminate much of the guesswork. Consider dimensions appropriate for your estimated food waste volume – a good rule of thumb is one square foot of surface area per pound of worms.
- Materials: Ensure your chosen bin is made of opaque material to keep the worms in darkness. Plastic is common due to its durability and moisture retention, but wooden bins (untreated cedar or cypress) can also work, though they may require more attention to moisture levels.
2. The Worms: Red Wigglers (Eisenia fetida)
This is crucial: not just any ol’ earthworm will do! You need composting worms. Red Wigglers (Eisenia fetida) are the undisputed champions of vermicomposting. They are surface dwellers, thrive in decomposing organic matter, reproduce quickly, and can consume half their body weight in food per day. Other suitable species include European Nightcrawlers (Eisenia hortensis), which are larger and can also break down more fibrous material.
- Where to Buy: You can purchase red wigglers online from reputable suppliers, at local bait shops, or sometimes from garden centers. Aim for at least 1-2 pounds of worms to start (approximately 1000-2000 worms) for a typical household bin.
- Quantity: A good starting ratio is 1-2 lbs of worms for every 1-2 lbs of food waste you generate per week. Don’t worry, they will reproduce to match the food supply.
3. Bedding Material: Their Dining Room and Playground
The bedding is essential. It provides a living environment, helps maintain moisture, and is also part of their diet. It should be light, airy, and absorbent.
- Shredded Newspaper/Cardboard: Black and white newspaper (avoid glossy or colored inserts), corrugated cardboard (remove tape and labels), and egg cartons are excellent choices. Tear or shred them into 1-2 inch strips.
- Coconut Coir: This is a fantastic moisture-retentive bedding. Pre-soak it thoroughly before adding.
- Peat Moss: Can be used, but ensure it’s sustainably sourced.
- Aged Manure/Leaf Mold: If available, these can kickstart beneficial microbial activity.
- Preparation: Moisten the bedding until it’s damp like a wrung-out sponge. Never use dry bedding.
4. Food Scraps: Their Feast
This is what you’re composting! A balanced diet for your worms is key to a healthy bin.
- “Greens” (Nitrogen-Rich): Fruit and vegetable scraps (non-citrus), coffee grounds and filters, tea bags, bread and pasta scraps (in moderation).
- “Browns” (Carbon-Rich): Shredded newspaper, cardboard, dried leaves. While these are part of the bedding, the worms also eat them.
- Avoid: Meat, dairy, oily foods, citrus peels (large quantities), spicy foods, pet waste, glossy paper, and chemically treated wood. These can attract pests, create odors, or harm your worms. Find more tips on what to feed in our guide to natural plant fertilization.
5. Tools: Simple and Handy
- Small Hand Trowel or Fork: For burying food scraps and gently turning bedding.
- Watering Can or Spray Bottle: To maintain moisture levels.
- Scrap Bucket with Lid: For collecting kitchen scraps between feedings.
- Gloves: Optional, but recommended for hygiene.
Step-by-Step Guide to Setting Up and Maintaining Your Worm Bin
Follow these steps to successfully establish your home vermicomposting system. Patience and consistency are your best allies.
Step 1: Prepare Your Worm Bin
- Assemble Your Bin: If using a DIY bin, ensure all drainage and aeration holes are drilled. If using a commercial system, follow the manufacturer’s instructions for assembly. Place the collection tray underneath if your system has one.
- Choose the Location: Place your bin in a cool, dark, and accessible location. Ideal temperatures for red wigglers are between 55-77°F (13-25°C). Garages, basements, laundry rooms, or shaded outdoor areas are excellent choices. Avoid direct sunlight or extreme temperature fluctuations.
Step 2: Create the Bedding
- Shred Materials: Tear or shred about 6-8 inches worth of newspaper, plain cardboard, or other suitable bedding materials. The smaller the pieces, the faster the decomposition.
- Moisten Thoroughly: Place the shredded bedding into a large bucket or tub. Add water slowly, mixing until it’s damp like a wrung-out sponge – moist but not dripping.
- Add to Bin: Fill your worm bin about two-thirds full with the moistened bedding. Fluff it up slightly to ensure good aeration. This is the foundation of your worm’s new home.
Step 3: Introduce Your Worms
- Acclimation: Gently place your worms on top of the bedding. Leave the bin lid off or slightly ajar for about 30 minutes to an hour. The worms are light-sensitive and will naturally burrow down into the bedding to escape the light. This helps them acclimate.
- Initial Feeding (Optional): You can offer a small amount of food (about a cup of fruit/veg scraps) by burying it in one corner of the bedding after the worms have burrowed. This helps them settle in.
- Put on the Lid: Once the worms have burrowed, secure the lid.
Step 4: Feeding Your Worms
- Start Small: For the first week or two, feed very lightly. Your worms need time to adjust to their new environment and begin processing. Starting with too much food can lead to anaerobic conditions and odors.
- Burial Method: Always bury your food scraps. Push aside some bedding, place the scraps in the depression, and cover them completely with bedding. This helps prevent fruit flies and odors.
- Rotate Feeding Locations: For subsequent feedings, choose a different spot in the bin each time. This encourages the worms to move throughout the bin and helps ensure even decomposition. You can create a mental grid or imaginary sections.
- Monitor Consumption: Observe how quickly your worms are consuming the food. If food is still around from the previous feeding, wait a day or two before adding more. Overfeeding is the most common mistake for beginners. A good rule of thumb is to feed 1-2 times per week.
Step 5: Maintaining Optimal Conditions
- Moisture: The bin should remain consistently moist, like a damp sponge. If it starts to look dry, lightly mist with water. If it’s too wet, add more dry shredded newspaper or cardboard.
- Aeration: Gently fluff the bedding once a week or every two weeks with your trowel. Be careful not to disturb the worms too much. This introduces oxygen and prevents compaction.
- pH Balance: Worms prefer a neutral pH (6.0-7.0). Adding a sprinkle of crushed eggshells (rinsed and dried) can help buffer pH and provides grit for the worms’ gizzards. This is a great way to use sustainable gardening practices.
- Monitor for Pests: A healthy bin shouldn’t have many pests. If you notice fruit flies, reduce moisture, bury food deeper, and add a layer of dry shredded paper on top. Ants can be deterred by placing the bin legs in shallow dishes of water.
Step 6: Harvesting Worm Castings
After 3-6 months, your bin will be largely converted into rich, dark worm castings. There are several methods to harvest:
- Migration Method: This is the easiest. Push all the finished castings to one side of the bin. Add fresh bedding and food to the other side. Over a few weeks, the worms will migrate to the new food and bedding. Once most have moved, you can scoop out the finished castings from the empty side.
- Light Method: Dump the contents of your bin onto a plastic tarp or newspaper in several small cones. As the worms burrow down to escape the light, gently scrape off the top layers of castings. Repeat this process until you have mostly castings, and a clump of worms at the bottom of each cone.
- Screening Method: For larger bins or faster processing, use a mesh screen (1/4 to 1/2 inch hardware cloth) to separate worms and larger debris from the fine castings.
- Continuous Harvest (for multi-tiered bins): In stacked systems, the worms naturally migrate upwards to new food in higher trays. Once the bottom tray is mostly castings, you can remove it for harvest.
Once harvested, use your castings immediately or store them in a breathable container (like a cloth bag) in a cool, dark place. They’re excellent for enriching new garden soil amendments.
Pro Tips and Common Mistakes to Avoid
Even with the best intentions, beginners can encounter challenges. Here are some pro tips and common pitfalls to help you succeed.
Pro Tips for Success:
- Chop Food Scraps: Smaller pieces break down faster. Worms don’t have teeth; they rely on microbes to soften food for them.
- Diversify Food Sources: Offer a variety of fruit and vegetable scraps for a balanced diet and richer castings.
- Maintain “Sponge-Like” Moisture: This is perhaps the most critical factor. Too wet leads to anaerobic conditions; too dry slows processing.
- Aeration is Key: Periodically fluffing the bedding prevents compaction and ensures oxygen supply, preventing odors.
- Listen to Your Worms: If they’re exploring the lid or trying to escape, something is off (too wet, too dry, overfed, or not enough air).
- Keep a Worm Composting Journal: Note down feeding times, amounts, observations, and any issues. This helps you learn and adapt.
Common Mistakes to Avoid:
- Overfeeding: This is the number one cause of odors and pest infestations. Worms can only eat so much, and excess food will decompose anaerobically, creating unpleasant smells.
- Adding Prohibited Foods: Meat, dairy, oily foods, and pet waste will attract pests, smell terrible, and can harm your worms.
- Insufficient Moisture: Dry bedding slows down decomposition and can kill your worms.
- Too Much Moisture: A soggy bin leads to anaerobic conditions (bad smells) and makes it difficult for worms to breathe.
- Lack of Aeration: Compacted bedding lacks oxygen, leading to similar problems as too much moisture.
- Direct Sunlight/Extreme Temperatures: Worms are sensitive to light and temperature extremes. Keep them in a comfortable, stable environment.
- Using the Wrong Worms: Garden earthworms won’t thrive in a compost bin. You need red wigglers!
Eco-Friendly Variations and Enhancements
Once you’ve mastered the basics, you might consider some variations to further enhance your vermicomposting journey.
- Continuous Flow Systems: These advanced bins allow for continuous addition of food from the top and collection of finished castings from the bottom without disturbing the worms. They are excellent for larger volumes of waste.
- Building Your Own Wooden Bin: For larger outdoor setups, untreated wooden bins (cedar, cypress) can be aesthetically pleasing and offer natural insulation. Ensure good airflow and drainage.
- “Worm Towers” in Garden Beds: Bury a perforated plastic container (like a nursery pot or a plastic pipe with holes) directly into your raised garden beds. Add worms and food scraps. The worms will travel into the surrounding soil, enriching it directly. This is an excellent way to integrate vermicomposting directly into your growing space.
- Composting with Black Soldier Fly Larvae (BSFL): While not worms, BSFL are incredible decomposers that can handle more challenging food scraps like meat and dairy. They are often used in conjunction with or as an alternative to vermicomposting for high-volume waste.
Seasonal Considerations for Outdoor Bins
If your worm bin is located outdoors, you’ll need to make some adjustments depending on the season.
- Winter Protection: In colder climates, worms need protection from freezing temperatures. Insulate your bin with burlap, straw, old blankets, or Styrofoam. You can also bury your bin partially or completely in the ground for natural insulation. A thick layer of bedding helps. If temperatures drop significantly, bringing the bin indoors (garage or basement) is often the best option.
- Summer Heat: High temperatures can be lethal for worms. Keep the bin in a shaded area, out of direct sunlight. Ensure good airflow and maintain adequate moisture levels. You can place frozen water bottles inside the bin on very hot days to help cool it down. Ensure the bin doesn’t overheat, as this can cook your worms.
- Rainy Seasons: Ensure outdoor bins have adequate drainage to prevent waterlogging. A lid is essential to prevent excessive rain from entering the bin. If using a DIY bin, elevate it slightly to prevent water from seeping up.
Expert Resources for Deeper Learning
To further your knowledge and troubleshooting skills, here are some excellent external resources:
- Gardening Know How: What Is Vermicomposting – Beginner’s Guide To Worm Composting This article offers a great overview and practical tips for getting started.
- Royal Horticultural Society (RHS): Wormeries & Composting A reliable source for UK gardeners, providing detailed information on wormery setup and maintenance.
- University of Minnesota Extension: Vermicomposting University extension offices often provide science-backed, localized advice on sustainable practices like vermicomposting.
Conclusion: Your Journey to Garden Gold Starts Now!
Worm composting is far more than just a way to handle kitchen waste; it’s a profound step towards true soil health and environmental stewardship. By embracing this practice, you’re not only creating the finest amendment for your garden – nutrient-rich worm castings – but also reducing your ecological footprint, one banana peel at a time. The initial setup is simple, the maintenance is low-effort, and the rewards are immense.
Imagine your vibrant plants thriving on the sustenance created right in your home. Vermicomposting empowers you to close the loop on organic waste, turning potential landfill fodder into living, breathing soil. So, gather your supplies, order your worms, and embark on this rewarding journey. Your garden, and the planet, will thank you for it!
FAQs About Home Worm Composting
Q: Do worm bins smell?
A: A well-maintained worm bin should not smell. If you notice an unpleasant odor, it’s usually a sign of overfeeding, too much moisture, or insufficient aeration. Reduce feeding, add more dry bedding, and gently aerate the bin. Avoid adding prohibited food items.
Q: How much food can I feed my worms?
A: As a general rule, worms can eat approximately half their body weight in food per day. So, 1 pound of worms can consume about half a pound of food daily. Start slowly and observe; if food is still present from the last feeding, wait to feed again. For a typical household with 1-2 lbs of worms, 1-2 lbs of scraps per week is a good starting point.
Q: What is “worm tea” and how do I use it?
A: “Worm tea” or leachate is the liquid that drains from the bottom of your worm bin. It’s rich in nutrients and can be used as a liquid fertilizer for your plants. However, ensure your bin has good drainage so the liquid doesn’t just sit in the bottom. Dilute it with water until it looks like weak tea (1:10 dilution) before using it on plants, as it can be quite concentrated. It’s important to distinguish this from properly brewed worm compost extract, which is made by steeping castings in aerated water.
Q: Can I use regular garden earthworms for composting?
A: No, regular garden earthworms are not ideal for composting bins. They are deep burrowers and prefer mineral soil, unlike Red Wigglers, which are surface dwellers that thrive in decomposing organic matter. Using the right species like Red Wigglers (Eisenia fetida) is crucial for a successful vermicomposting system.


