Ultimate Guide: 7 Steps to a DIY Drip Irrigation System for Raised Beds
Do you dream of a flourishing raised bed garden but dread the constant watering chore? Imagine a system that delivers water precisely where your plants need it, saving you time, water, and effort. Building a DIY drip irrigation system for raised beds is not only achievable but also incredibly rewarding, transforming your gardening experience.
This comprehensive guide will walk you through everything you need to create an efficient, automated watering solution using readily available and affordable components. Get ready to cultivate a healthier, more vibrant garden with less hassle. Let’s dig in!
[lwptoc]
Why a DIY Drip Irrigation System Matters for Your Raised Bed Garden
Raised bed gardening offers numerous benefits, from better soil control to easier access. However, like any garden, consistent and efficient watering is key to success. This is where a DIY drip irrigation system truly shines.
Traditional watering methods, such as hand-watering or overhead sprinklers, often lead to significant water waste through evaporation and runoff. They can also encourage fungal diseases by wetting plant foliage. Drip irrigation, conversely, applies water slowly and directly to the soil where plant roots can absorb it most effectively.
For raised beds, this precision is even more critical. Confined soil spaces can dry out faster, and nutrients can leach away with excessive overhead watering. A drip system ensures your plants receive consistent moisture without over-saturating the soil or washing away valuable amendments. It’s an eco-conscious choice that saves you money on water bills and conserves a vital natural resource.
Beyond water conservation, a DIY drip system in your raised beds saves you precious time. No more standing with a hose or constantly checking soil moisture. Once set up, it can be automated with a simple timer, freeing you to enjoy other gardening tasks or simply relax. This makes gardening more enjoyable and less of a chore, promoting healthier plants and a more productive harvest.
What You’ll Need: Tools and Materials for Your DIY Drip Irrigation Raised Beds System
Before you begin, gather all the necessary tools and materials. Many of these items can be found at your local hardware store, garden center, or online. Planning ahead will make the installation process smooth and efficient.
Essential Tools:
- Utility Knife or Tubing Cutter: For cleanly cutting drip tubing.
- Hole Punch Tool: Specifically designed for creating holes in mainline tubing for emitters or smaller drip lines.
- Measuring Tape: To accurately measure your raised beds and tubing lengths.
- Marker: To mark cutting points.
- Gloves: To protect your hands.
- Screwdriver (optional): For securing a timer to a spigot, if using.
- Zip Ties or Stakes: For securing tubing within the raised bed (optional but recommended).
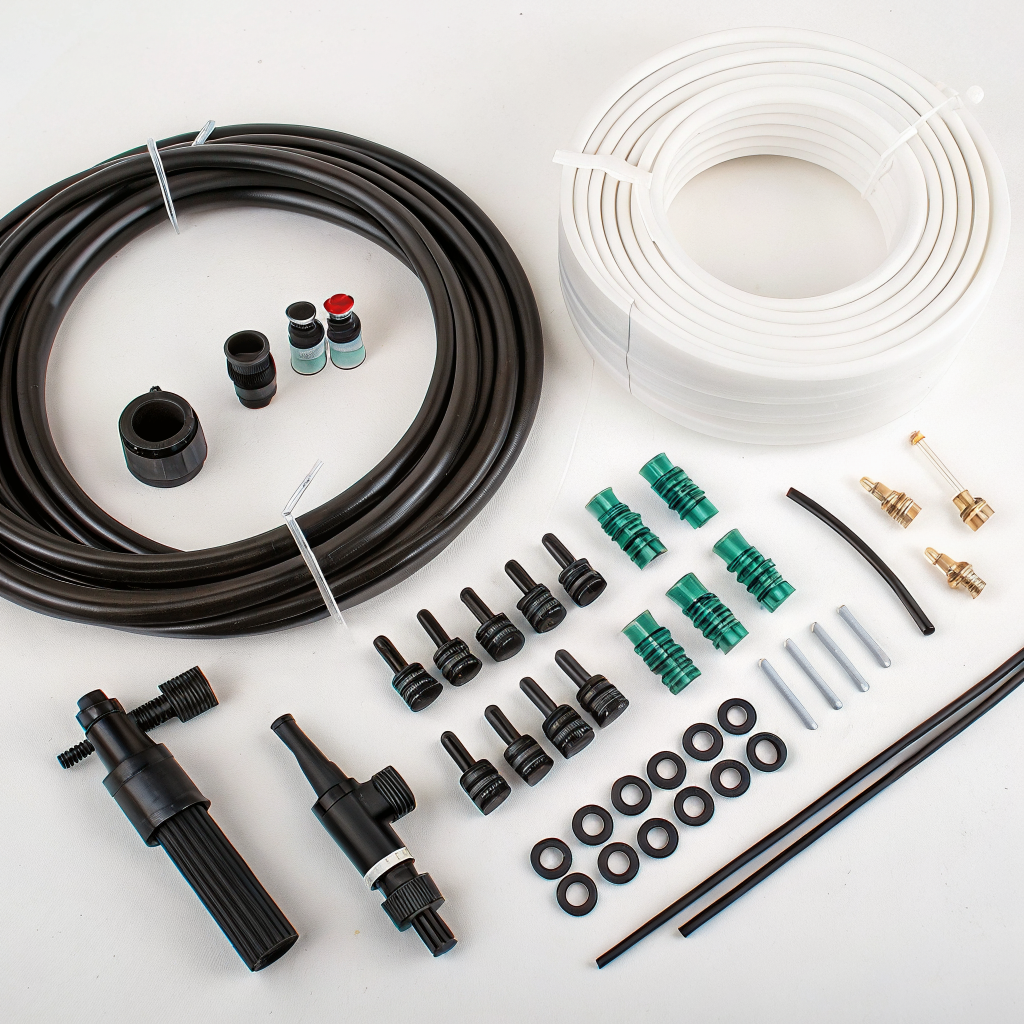
Key Materials:
- Water Source Connection:
- Hose Bib/Spigot Adaptor: Connects your garden hose to the drip system.
- Backflow Preventer: Essential for preventing irrigation water from re-entering your household water supply.
- Pressure Regulator (25 PSI recommended): Drip systems operate best at low pressure, protecting components from bursting.
- Filter: Prevents sediment from clogging emitters.
- Mainline Tubing (1/2″ or 3/4″): This is the primary line that carries water from your source to the raised beds. Choose UV-resistant poly tubing.
- Smaller Drip Tubing/Emitters (1/4″):
- 1/4″ Drip Line (with built-in emitters): Ideal for closely spaced plants or rows.
- Individual Drip Emitters: For targeted watering of individual plants, available in various flow rates (e.g., 0.5 GPH, 1 GPH).
- Micro-Sprayers/Sprinklers: For wider coverage in specific areas, though less water-efficient than emitters.
- Fittings and Connectors (appropriate for your tubing size):
- Connectors: To join tubing sections (straight, elbow, tee).
- End Caps/Figure-8 Closures: To seal the ends of mainline tubing.
- Goof Plugs: To seal accidental holes or removed emitters in mainline tubing.
- Insert Fittings (barbed): For connecting 1/4″ tubing to mainline.
- Hose Clamps (optional): For extra security on connections, especially at the water source.
- Automated Timer (optional but highly recommended): Connects to your spigot to automate watering schedules. Look for models with flexible programming options.
- Raised Bed: Of course, your existing raised bed! Consider its dimensions and plant layout.
Step-by-Step Guide: Building Your DIY Drip Irrigation System for Raised Beds
Here’s a detailed, seven-step process to construct your efficient drip irrigation system. Take your time with each step for a robust and leak-free setup.
Step 1: Plan Your Layout
Before cutting anything, visualize how the drip system will run through your raised bed. Consider the plants you have planted and their individual water needs. Do you have rows of vegetables or a mix of individual plants?
- Measure: Measure the length and width of your raised bed(s).
- Sketch: Draw a simple diagram of your raised bed. Mark where your water source will connect, the path of your mainline tubing, and the locations where you’ll place emitters or run 1/4″ drip lines. Aim to position emitters close to the plant base. For more info on optimal plant spacing, check out this guide on vertical gardening and plant density.
- Estimate: Calculate the approximate lengths of mainline and 1/4″ tubing you’ll need.
Step 2: Connect to Your Water Source Assembly
This is the foundation of your system, ensuring proper water pressure and preventing contamination.
- Attach the backflow preventer directly to your garden spigot.
- Screw the pressure regulator onto the backflow preventer. This crucial component protects your system from high water pressure, for example, read about drip irrigation and pressure regulators on gardeningknowhow.com.
- Attach the filter immediately after the pressure regulator to catch any debris.
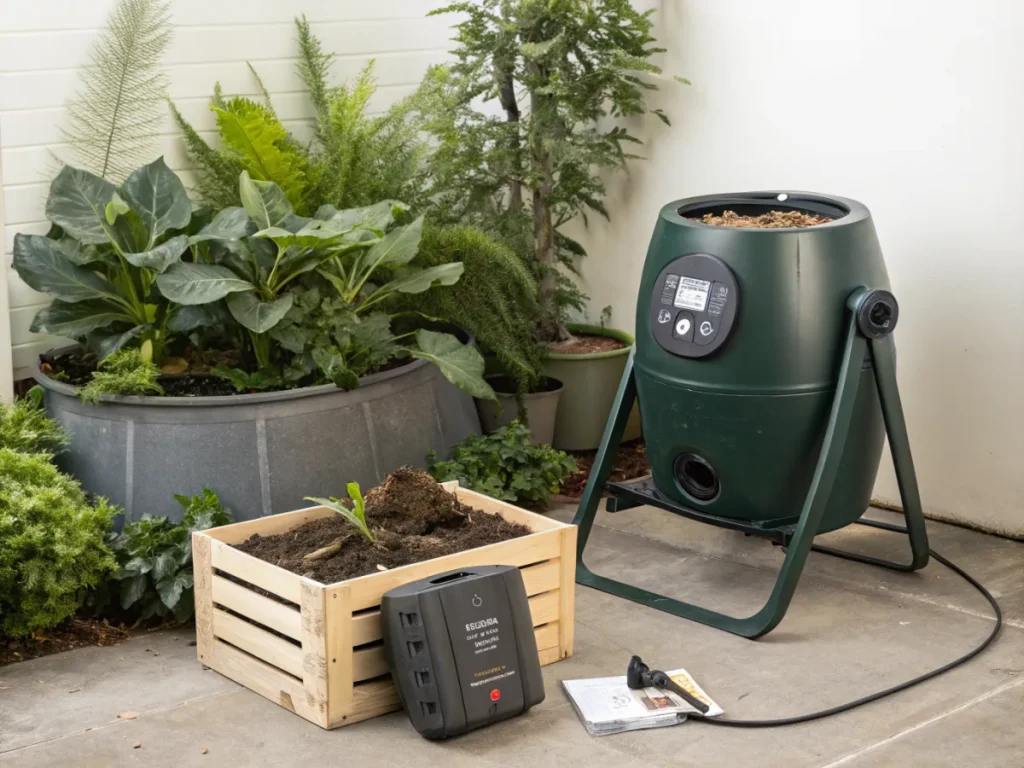
- If using an automated timer, attach it between the spigot and the backflow preventer, or after the filter, depending on the timer’s design. If you’re interested in smart home technology, consider integrating a smart home automation hub for garden irrigation control.
- Finally, connect your mainline tubing directly to the filter or timer’s output. You might need a specialized fitting (e.g., a swivel hose threaded fitting to 1/2″ poly tubing adapter).
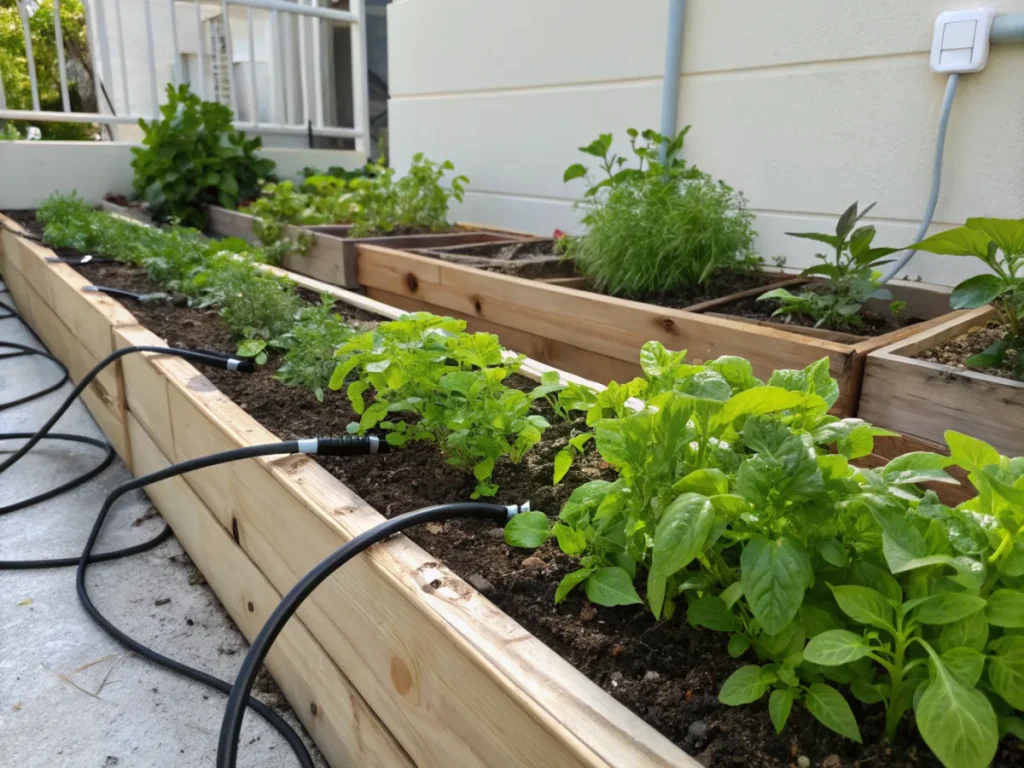
Step 3: Lay Out the Mainline Tubing
The mainline delivers water across your raised bed before distributing it to individual plants.
- Carefully unroll the 1/2″ or 3/4″ mainline tubing along the planned path in your raised bed. You can run it along the edge of the bed or down the center.
- Use a utility knife or tubing cutter to cut the mainline to the appropriate length.
- Cap the end of the mainline tubing with an end cap or a figure-8 closure. This builds pressure in the line, ensuring even water distribution.
Step 4: Install Drip Emitters and 1/4″ Tubing
This step brings water directly to your plants. This is where your planning from Step 1 becomes vital.
- Using a hole punch tool, create small holes in the mainline tubing at the planned locations for your plants. Make sure these holes are clean and evenly spaced.
- For individual emitters: Firmly insert the barbed end of an individual drip emitter into each punched hole in the mainline. You may need to wiggle it or gently twist for a snug fit.
- For 1/4″ drip line: Insert a 1/4″ barbed connector into the punched hole. Then, attach a section of 1/4″ drip line (either plain or with built-in emitters) to this connector. Run the 1/4″ line to the base of your plants. You can secure these smaller lines with irrigation stakes if needed.
- Ensure emitters are positioned close to the base of the plant, allowing water to soak directly into the root zone.
Step 5: Flush and Test Your System
Before burying anything or fully committing, it’s crucial to test for leaks and proper function.
- Remove the end cap from your mainline tubing.
- Slowly turn on your water source. Let the water run through the system for a few minutes to flush out any debris that might have entered during installation. This prevents clogging, a common issue in drip systems.
- Once flushed, turn off the water and replace the end cap.
- Turn the water back on and carefully inspect the entire system for leaks. Check all connections, fittings, and emitter inserts. Tighten connections or replace faulty fittings as necessary.
- Observe the emitters: ensure they are dripping evenly and providing sufficient water flow.
Step 6: Refine and Secure
Once you’re confident in your system’s integrity, it’s time for the finishing touches.
- Gently lay the mainline and 1/4″ tubing on the soil surface of your raised bed. You can lightly cover the mainline with a thin layer of mulch or soil to protect it from UV degradation and hide it esthetically.
- Use irrigation stakes or zip ties to secure the tubing if necessary, preventing it from shifting, especially in windy conditions or during replanting.
- Ensure all emitters are pointing correctly and aren’t being blocked by soil or mulch.
Step 7: Program Your Timer (if applicable) and Monitor
Automation is the cherry on top, but constant monitoring is still key.
- If you installed an automated timer, program it according to your plants’ water needs and local climate. Start with a conservative schedule (e.g., 15-30 minutes, 3-4 times a week) and adjust as needed.
- Monitor: For the first few weeks, regularly check your soil moisture levels. Dig down a few inches near plants to ensure the water is penetrating deeply enough. Adjust your timer’s duration or frequency as required. Different plants have different needs; for a specific guide on how to care for plants in varying climates, check out this urban gardening advice.
- Observe your plants for signs of over or under-watering. Wilting can indicate either, so always check the soil.
Pro Tips and Common Mistakes to Avoid
Beyond the steps, these insights can help you optimize your system and prevent headaches.
Pro Tips:
- Warm Up Tubing: If your poly tubing is stiff, leave it in the sun for an hour before installation. Warm tubing is much more pliable and easier to work with, especially when inserting fittings.
- Design for Zones: If you have multiple raised beds with varying plant needs (e.g., one for water-hungry vegetables, another for drought-tolerant herbs), consider creating separate zones, each with its own valve or timer, connected to a manifold from your main spigot.
- Regular Maintenance: Periodically check your filter and clean it. Flush the mainline end cap once a month during the growing season to remove any accumulated sediment.
- Seasonal Shut-off: In regions with freezing winters, completely drain and disconnect your system before the first frost to prevent ice damage. Store components indoors if possible.
- Adjust with Growth: As your plants grow, their water needs may change. Monitor soil moisture and adjust your timer or emitter flow rates accordingly.
Common Mistakes to Avoid:
- Insufficient Pressure Regulation: Not using a pressure regulator will lead to blown tubing and leaky connections. Drip systems are designed for low pressure.
- Skipping the Filter: Sediment, even in seemingly clean water, can quickly clog drip emitters, rendering your system ineffective.
- Poor Connections: If fittings aren’t inserted fully and snugly, you’ll have constant leaks. Ensure a tight fit.
- Over-watering: It’s a common misconception that drip systems mean you can’t over-water. Monitor your soil and adjust your timer. Soggy soil is detrimental to many plants.
- Ignoring Plant Needs: One size does not fit all. Group plants with similar water needs together within your raised beds to optimize emitter placement and flow.
- Guessing Water Duration: Instead of guessing, use soil moisture meters or simply dig a few inches into the soil to check moisture penetration after a watering cycle. Adjust as needed until water reaches the desired depth for your plant roots. For more information on plant needs, consider resources like the RHS Grow Your Own advice from rhs.org.uk.
Eco-Friendly Variations and Enhancements
Making your DIY drip irrigation raised beds system even more sustainable.
- Rainwater Harvesting Integration: Connect your drip system to a rain barrel or a series of rain barrels. This significantly reduces your reliance on municipal water and is an excellent way to conserve resources. You’ll need a pump to provide sufficient pressure from a rain barrel for a drip system, as gravity alone often isn’t enough.
- Solar-Powered Timers: Opt for a solar-powered irrigation timer instead of battery-operated ones. This reduces battery waste and reliance on grid electricity.
- Ollas (Clay Pot Irrigation): For small areas or individual plants, consider burying unglazed clay pots (ollas) that slowly release water into the soil. While not a “drip system” in the traditional sense, they offer highly efficient, localized watering with no external pressure needed. You could integrate these into a larger drip system for specific high-need plants.
- Mulching Heavily: Complement your drip system with a generous layer of organic mulch (straw, wood chips, shredded leaves). Mulch significantly reduces evaporation from the soil surface, suppresses weeds, and maintains a more consistent soil temperature, making your drip system even more efficient.
- Smart Sensors: For the tech-savvy gardener, integrate soil moisture sensors that communicate with your smart timer. This allows for hyper-efficient watering, only activating the system when the soil moisture drops below a pre-set threshold.
Seasonal Considerations for Your DIY Drip Irrigation System
Your drip system isn’t a “set it and forget it” tool; it needs seasonal adjustments.
- Spring Startup: In early spring, after the last frost, reconnect your system. Run a full flush to clear any winter debris. Check all lines and emitters for damage from freezing or pests (e.g., squirrels gnawing on lines). Replace any damaged components.
- Summer Adjustments: As temperatures rise and plants grow, their water needs will increase. Monitor soil moisture closely and adjust your timer frequency and duration. Consider watering in the early morning to minimize evaporation. Prolonged hot, dry spells will require more frequent watering than cooler periods. Think about how to adjust water requirements for specific plant needs, such as discussed about indoor gardening for specific cultivars.
- Fall Wind-Down: As the growing season winds down and temperatures drop, gradually reduce your watering schedule. Plants require less water as they approach dormancy.
- Winterization (Freezing Climates): This is critical to prevent damage.
- Turn off the water supply to the system.
- Disconnect all components from the spigot (timer, backflow preventer, pressure regulator, filter). Store these indoors.
- Remove end caps from all mainline tubing and allow water to drain completely.
- If possible, lift and drain any low spots in the tubing. Some gardeners use an air compressor (at low pressure) to blow out the lines.
- Leave mainline tubing open or with end caps removed over winter to allow any remaining water to escape and prevent freeze damage.
Expert Resources for Further Learning
To dive deeper into drip irrigation and gardening best practices, explore these authoritative resources:
- University of Minnesota Extension: Drip Irrigation Basics – Excellent detailed information on drip system design, components, and water management.
- Gardening Know How: Drip Irrigation Tips For The Home Garden – Practical advice tailored for home gardeners, covering common questions and helpful hints.
- RHS (Royal Horticultural Society): Plants for Pollinators – While not directly on drip irrigation, understanding plant health and ecological benefits is crucial. A healthy drip system contributes to a thriving ecosystem.
Conclusion
A DIY drip irrigation system for raised beds is a powerful investment in your gardening success. It saves water, conserves time, and promotes healthier plant growth by delivering precise hydration directly to the root zone.
By following these steps and incorporating the pro tips, you can build a robust and efficient system tailored to your specific garden needs. Enjoy the satisfaction of a thriving garden with less effort and a greater sense of environmental responsibility. Happy gardening!
Frequently Asked Questions about DIY Drip Irrigation Raised Beds
Q1: How do I know how long to run my drip system for?
A1: Start by observing. After running your system for 15-30 minutes, dig into the soil near a plant’s roots. You want the moisture to penetrate 4-6 inches deep for most vegetables. Adjust the duration until you achieve this depth. Factors like soil type, plant size, and weather will influence the ideal run time. Monitor soil moisture regularly, especially when you first set up the system.
Q2: My emitters are not dripping evenly. What could be the problem?
A2: Uneven dripping can be due to several issues. Check for clogs in the filter or individual emitters, and clean them. Also, ensure your pressure regulator is functioning correctly; too much or too little pressure can cause inconsistencies. Finally, make sure the mainline is capped at the end, as an uncapped line won’t build sufficient pressure for even distribution. Sometimes, low spots in the tubing can also affect flow.
Q3: Can I connect multiple raised beds to one DIY drip system?
A3: Yes, you can! You’ll need to run mainline tubing between the beds. However, be mindful of the total length of your system and the number of emitters, as this affects the required water pressure. If your total system becomes too large, you might need a higher GPH (gallons per hour) flow from your spigot, or you could consider dividing it into multiple “zones” if you have a multi-outlet timer.
Q4: How do I prevent critters like squirrels from chewing on my drip lines?
A4: This can be a persistent challenge. Lightly burying the mainline under a thin layer of soil or mulch can help deter some pests. Using heavier gauge, more rigid poly tubing might be an option, but it’s harder to work with. Some gardeners also try applying a cayenne pepper spray (reapply after rain) or placing barriers like chicken wire around vulnerable areas. Ensuring there’s no standing water attracting rodents can also help.