Ultimate Guide: 10 Ingenious Cardboard Garden Uses You Need to Try
Are you looking for sustainable, cost-effective, and remarkably versatile solutions to elevate your gardening game? Look no further than that stack of cardboard boxes hogging space in your garage or recycling bin! In the world of eco-friendly gardening, cardboard is a true unsung hero. From suppressing stubborn weeds to boosting soil health, and even creating protective barriers for delicate plants, its applications are vast and incredibly beneficial. This comprehensive guide will unveil ten ingenious ways you can repurpose this readily available material, transforming your garden practices and embracing a more sustainable approach. Prepare to rethink your recycling habits and discover the power of cardboard in cultivating a thriving, vibrant garden.
[lwptoc]
Why Cardboard Matters for Your Garden: More Than Just Recycling
Embracing cardboard in your garden is more than just a clever recycling hack; it’s a fundamental shift towards more ecological and sustainable gardening. This humble material offers a multitude of benefits that directly contribute to healthier soil, happier plants, and a reduced environmental footprint. By diverting cardboard from landfills, you’re actively participating in waste reduction, a cornerstone of sustainable living.
One of the most significant advantages of cardboard is its ability to decompose naturally. As it breaks down, it enriches the soil with organic matter, improving its structure, aeration, and water retention capabilities. This decomposition process also provides a feast for beneficial microbes and earthworms, turning your soil into a living ecosystem vital for plant growth. Instead of relying on synthetic weed barriers or expensive amendments, cardboard offers an organic, biodegradable alternative that works with nature, not against it.
Furthermore, using cardboard drastically cuts down on the need for chemical herbicides, especially when combating persistent weeds. Its physical barrier effectively smothers unwanted vegetation, preventing light from reaching them while allowing moisture and air to penetrate to the soil below. This creates a much healthier environment for your desired plants and significantly reduces your exposure to potentially harmful chemicals. It’s a win-win for your garden, your health, and the planet.
The cost-effectiveness of cardboard cannot be overstated. It’s typically free, readily available from local stores, or already in your home from online deliveries. This makes it an incredibly accessible resource for gardeners on any budget, enabling ambitious projects without breaking the bank. From creating new garden beds to protecting seedlings, cardboard proves to be an invaluable, eco-conscious tool for any gardener passionate about sustainability.
What You Need: Tools and Materials for Your Cardboard Garden Projects
Embarking on your cardboard gardening journey requires surprisingly few specialized tools or materials. The beauty of these projects lies in their simplicity and accessibility. Most of what you need can be found around your home or borrowed from a neighbor.
Essential Materials:
- Plenty of Cardboard: Prioritize unprinted, plain brown cardboard. Remove all tape, labels, and staples. Avoid glossy, waxed, or heavily dyed cardboard as these may contain harmful chemicals or additives. Large, flattened boxes are ideal for sheet mulching, while smaller pieces are perfect for collars or seed-starting.
- Water: Essential for dampening cardboard for better conformity and decomposition, especially for sheet mulching.
- Organic Material (Optional but Recommended): Compost, shredded leaves, grass clippings, wood chips, or straw. These layers will go on top of or beneath cardboard, enriching the soil and securing the cardboard in place.
- Soil or Potting Mix (for specific projects): Necessary for filling raised beds or creating seed-starting containers.
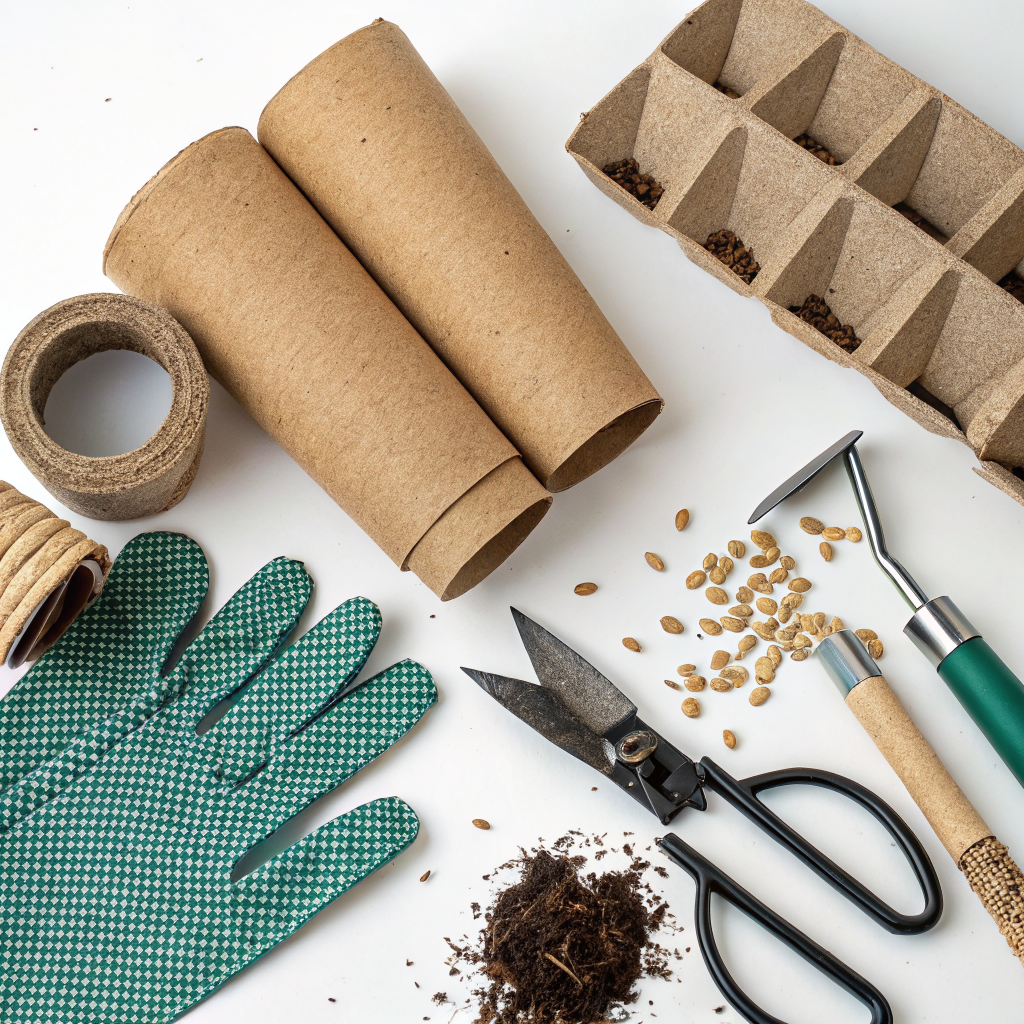
Basic Tools:
- Utility Knife or Box Cutter: Crucial for cutting cardboard to size or creating specific shapes. A sharp blade makes the job much easier and safer.
- Sturdy Scissors: Useful for smaller, more intricate cuts or trimming edges.
- Gloves: Protect your hands from cardboard edges, soil, or any debris.
- Wheelbarrow or Tarp: For moving organic materials or large quantities of cardboard.
- Rake and Shovel: For preparing the ground, spreading materials, and planting.
- Watering Can or Hose: For thorough watering of cardboard layers and plants.
For specific projects like cold frames, you might momentarily need a clear plastic sheet or old window panes. When building raised beds using cardboard, you might consider some basic lumber or stones to frame the bed boundaries initially. The key is to be adaptable and use what’s readily available. Remember, the less you buy, the more eco-friendly and cost-effective your project becomes. Gather your materials, prepare your space, and get ready to transform your garden with cardboard!
Step-by-Step Guide: How to Implement Cardboard in Your Garden
Here’s how to put cardboard to work in your garden, outlined in practical steps for various applications.
1. Sheet Mulching (Lasagna Gardening)
This is arguably the most popular and impactful use of cardboard. It’s excellent for creating new garden beds, suppressing weeds, and improving soil structure without digging. Learn more about lasagna gardening here.
- Prepare the Area: Clear any large debris, but don’t worry about removing all weeds; the cardboard will smother them.
- Lay the Cardboard: Overlap plain, undyed cardboard pieces to ensure no gaps. Make sure each piece overlaps by at least 6 inches to prevent weeds from peeking through. Wet the cardboard thoroughly as you go; this helps it conform to the ground and begin decomposition.
- Add Green Layers: On top of the damp cardboard, spread a layer of “green” nitrogen-rich materials like grass clippings, kitchen scraps, or fresh manure.
- Add Brown Layers: Follow with a “brown” carbon-rich layer such as shredded leaves, straw, or wood chips.
- Repeat & Water: Continue layering greens and browns until your bed is at your desired height (at least 12-18 inches is ideal). Water each layer thoroughly.
- Plant or Wait: You can plant directly into the top layer of compost, or let the bed “cook” for a few weeks to several months for optimal decomposition.
2. Weed Suppression Around Existing Plants
Cardboard acts as an effective, biodegradable weed barrier.
- Clear Weeds: Remove any existing weeds around your plants first.
- Cut & Fit: Cut pieces of cardboard to fit neatly around the base of your plants, making sure not to touch the stems. You might need to make a slit from the edge to the center to fit it around the plant.
- Lay & Water: Place the cardboard pieces, ensuring they overlap if using multiple pieces. Wet them down.
- Cover with Mulch: Cover the cardboard with a layer of aesthetically pleasing organic mulch like wood chips, straw, or pine needles. This also helps hold the cardboard in place and aids decomposition.
3. Boosting Your Compost Pile
Cardboard is an excellent “brown” material for composting.
- Shredding is Key: Tear or cut cardboard into smaller pieces (the smaller, the faster it breaks down).
- Balance Greens and Browns: Add shredded cardboard as a “brown” layer to your compost heap, balancing it with “green” materials like kitchen scraps and grass clippings. Aim for a 2:1 or 3:1 brown-to-green ratio.
- Moisture & Aeration: Ensure the pile remains damp (like a wrung-out sponge) and turn it regularly to aerate.
4. Creating Seed-Starting Pots
Biodegradable seed pots made from cardboard reduce transplant shock.
- Gather Materials: Collect toilet paper rolls or cut paper towel rolls into 3-4 inch sections.
- Prepare the Bottom: Make four cuts about an inch up from one end of the roll, evenly spaced. Fold these tabs inward to create a bottom for the pot.
- Fill & Plant: Fill with seed-starting mix and sow your seeds according to package directions.
- Transplant: When seedlings are ready, plant them directly into the garden with the cardboard pot. The cardboard will break down in the soil.
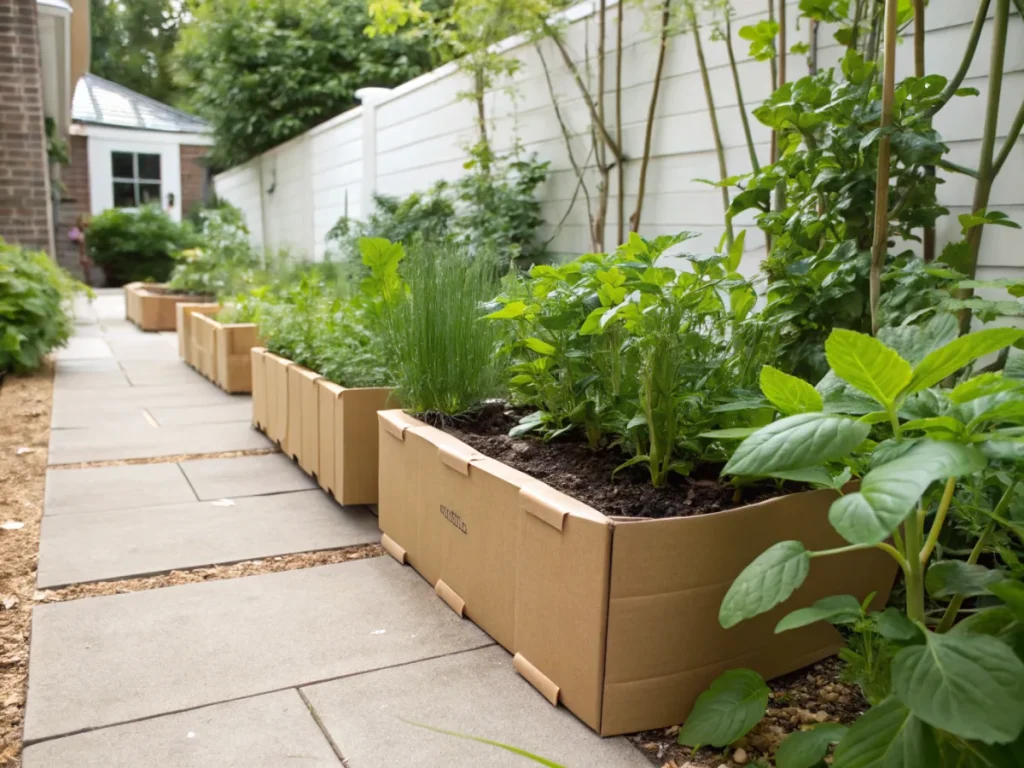
5. Raised Bed Liner
Lining the bottom of your raised beds with cardboard prevents weeds from growing up from below.
- Prepare Bed Area: Clear any large debris from the area where your raised bed will sit.
- Lay Cardboard: Line the entire bottom of the raised bed frame with a single layer of overlapped, plain cardboard.
- Wet Thoroughly: Soak the cardboard completely until it’s saturated.
- Add Soil: Fill your raised bed with a good quality raised bed soil mix. The cardboard will decompose over time, adding organic matter to the soil while preventing weeds.
Pro Tips and Common Mistakes to Avoid
Maximizing the benefits of cardboard in your garden involves a few key practices and awareness of potential pitfalls. Following these tips will ensure your projects are successful and contribute positively to your garden’s health.
Pro Tips:
- Remove All Non-Cardboard Materials: Before using any cardboard, meticulously remove all plastic tape, packing labels, staples, and any other non-biodegradable components. These materials will not decompose and can introduce microplastics or other undesirable elements into your soil.
- Prioritize Plain Brown Cardboard: Opt for unprinted, natural brown cardboard whenever possible. While most modern inks are soy-based and safe, heavily printed or glossy cardboard may contain dyes, waxes, or glues that are best avoided in an organic garden.
- Dampen Thoroughly: Always wet cardboard thoroughly, especially when sheet mulching or using it as a weed barrier. Damp cardboard is easier to work with, lays flatter, and initiates the decomposition process more quickly. It also prevents it from blowing away in the wind.
- Overlap Generously: When laying cardboard for weed suppression or bed creation, always overlap the pieces by at least 6-8 inches. This creates a solid barrier that prevents weeds from finding gaps and growing through.
- Layer with Organic Material: Always cover cardboard with a layer of organic material like compost, straw, wood chips, or shredded leaves. This not only makes the garden look tidier but also helps to hold the cardboard in place, provides additional nutrients as it decomposes, and encourages beneficial soil life.
- Allow for Decomposition Time: For new garden beds using sheet mulching, if possible, allow the bed to “cook” for several weeks to a few months before planting. This gives the cardboard and initial organic layers time to break down, creating a richer soil environment.
- Consider Airflow for Collars: When using cardboard as a plant collar or slug barrier, ensure it doesn’t create a breeding ground for pests by trapping excessive moisture or becoming too close to the plant stem. Leave a small gap and ensure it dries out periodically.
Common Mistakes to Avoid:
- Using Waxed or Glossy Cardboard: This type of cardboard is often coated with non-biodegradable materials that will not break down in your garden and can leach unwanted chemicals.
- Not Removing Tape/Labels: Forgetting to remove these small but significant items can result in plastic or adhesive residue in your soil, contaminating your garden over time.
- Laying Dry Cardboard: Dry cardboard is rigid, doesn’t conform to the ground, and can easily blow away. It also takes much longer to begin decomposing.
- Insufficient Overlap: Gaps between cardboard pieces are an open invitation for tenacious weeds to sprout. Be thorough in your overlapping.
- Not Covering Cardboard: Uncovered cardboard can look unsightly, dry out quickly, and be more prone to blowing away or attracting pests. A top layer is essential for both aesthetics and functionality.
- Planting Too Soon on New Beds: While you can plant immediately in some sheet mulch systems, if you’re building a truly rich new bed, giving it time to break down will yield better long-term results.
- Using Cardboard Directly for Water Retention (without aeration): While cardboard improves soil water retention, laying thick, dry, un-layered cardboard directly under plants may initially inhibit water penetration if not properly moistened and covered.
By keeping these tips in mind and avoiding common missteps, you can harness the full potential of cardboard as a valuable and sustainable resource in your garden. For effective water management, consider innovative irrigation techniques in combination with your cardboard mulching to keep all your layers moist. Another strategy is to combine cardboard use with no-dig gardening methods for optimal results.
Eco-Friendly Variations and Advanced Applications
Beyond the fundamental uses, cardboard can be integrated into more advanced eco-friendly gardening practices, further enhancing sustainability and resourcefulness.
1. DIY Cardboard Cold Frames/Cloches
For early season protection from frost or to extend your growing season, cardboard can form the sides of temporary cold frames or individual cloches.
- Construct the Frame: Cut large pieces of sturdy cardboard to create the sides of a box-like structure. Secure the corners with tape or garden stakes.
- Create a Lid: For individual cloches, cut a smaller piece of cardboard for the top or use a clear plastic sheet. For a larger cold frame, use an old window pane or clear plastic sheeting for the top, allowing sunlight to penetrate.
- Position and Secure: Place over young plants or seedlings. Ensure it’s secure against wind, especially for the larger cold frames. Lift during warm days for ventilation and monitoring.
2. Temporary Pathways and Erosion Control
Cardboard offers an immediate, biodegradable solution for garden pathways or areas prone to erosion.
- Clear and Lay: Clear the path area of any large debris. Lay thick, overlapped cardboard directly onto the ground.
- Cover: Immediately cover the cardboard with a generous layer of wood chips, straw, or gravel. This holds it in place and creates a durable, temporary pathway.
- Erosion Control: In sloping areas, the cardboard helps stabilize the soil and prevent wash-out while new plants or groundcovers establish.
3. Enhancing Soil Beds with “Deep Carbon” Layers
For long-term soil health improvement, cardboard can be part of a deeper, more substantial carbon layer.
- Excavate (Optional): For severe soil issues, you might dig down 6-12 inches. Otherwise, simply start on top of the ground.
- Initial Carbon: Lay down a thick layer of cardboard (double or triple layer) at the bottom.
- Layer Building: Add substantial layers of wood chips, logs (hugelkultur style), and other bulky carbon materials.
- Top Layers: Finish with your usual sheet mulching layers (compost, greens, browns) and topsoil. This creates a long-lasting, water-retaining and nutrient-releasing base for your garden.
4. DIY Slug/Snail Traps
Cardboard can be used to create simple, non-toxic traps for slugs and snails.
- Cut Small Pieces: Cut small squares or rectangles of plain cardboard, roughly 6×6 inches.
- Dampen & Position: Dampen one side of the cardboard. At dusk, place the damp side down near affected plants.
- Collect & Dispose: In the morning, flip the cardboard over. Slugs and snails will often congregate on the damp underside. Collect and dispose of them as preferred (e.g., relocation, salt, or adding to a hot compost pile).
Note: Creative Reuse
Cardboard’s strength and flexibility make it adaptable for many temporary garden structures. Think beyond just flat sheets – consider cutting shapes for plant markers (laminated if you want them to last), or even crafting temporary shade screens for newly transplanted seedlings on a hot day. Its biodegradability means less waste and more natural integration into your garden’s ecosystem.
Seasonal Considerations for Cardboard Use
The effectiveness and optimal application of cardboard in your garden can vary depending on the season. Understanding these considerations will help you deploy cardboard strategically throughout the year for maximum benefit.
Spring:
- New Bed Creation: Early spring is an ideal time for sheet mulching. Laying cardboard and organic layers now allows ample time for decomposition before summer planting.
- Weed Suppression: As dormant weeds begin to sprout, apply cardboard as a barrier around existing plants, or establish new weed-free zones early on. This minimizes competition for young seedlings.
- Seed Starting: Utilize cardboard rolls for starting seeds indoors. They can be directly transplanted outdoors when temperatures permit, reducing transplant shock.
- Pest Protection: Deploy cardboard collars around vulnerable seedlings susceptible to cutworms or early-season slug activity.
Summer:
- Moisture Retention: A layer of cardboard under mulch is invaluable during hot, dry summer months. It significantly reduces water evaporation from the soil, conserving moisture and reducing your watering needs.
- Continued Weed Control: Address any new weed outbreaks by carefully placing cardboard around established plants, ensuring deep watering beforehand to lock in moisture.
- Pathways: If setting up temporary paths for harvesting or access, cardboard covered with wood chips can keep dust down and mud at bay.
- Composting: Summer’s abundance of “green” materials (grass clippings, garden trimmings) makes it an excellent time to add “brown” shredded cardboard to your compost pile to maintain a healthy carbon-to-nitrogen ratio.
Autumn:
- Winter Bed Prep: Late autumn is perfect for creating new raised beds or sheet-mulched areas that will be ready for spring planting. The cardboard will have the entire winter to break down.
- Leaf Mulch Base: Use cardboard as the first layer before piling up fallen leaves to overwinter and enrich your garden beds.
- Cover Cropping Support: If planting a fall cover crop, use cardboard to define the planting area and suppress existing weeds, giving your cover crop a head start.
- Storage: Organize and flatten cardboard boxes you received throughout the year. Store them in a dry place, ready for spring projects.
Winter:
- Protection: For temperate climates, cardboard can be incorporated into temporary insulation for sensitive plants or even used to construct simple windbreaks.
- Planning and Preparation: While active gardening slows, winter is a great time to collect cardboard, removing tape and flattening boxes, preparing your stash for the busy spring season.
- Compost Booster: Add any collected shredded cardboard to your active or dormant compost pile as a carbon source, ensuring it stays damp.
- Cold Frames: Construct sturdy cardboard cold frames to protect winter crops or start cool-season seeds indoors or in a greenhouse.
By tailoring your cardboard applications to the specific needs and conditions of each season, you can maximize its benefits, streamline your gardening efforts, and continuously work towards a more sustainable and productive garden. Understanding the rhythms of your garden and how cardboard interacts with those rhythms is key to becoming a truly effective eco-gardener.
Expert Resources for Deeper Dives
For gardeners looking to deepen their knowledge and explore further, these authoritative resources offer comprehensive insights into various aspects of sustainable gardening, soil health, and the practical application of everyday materials like cardboard.
- Gardening Know How: This extensive online resource offers a vast library of articles covering almost every gardening topic imaginable, from pest control to plant care. Their practical, easy-to-understand guides are excellent for both beginners and experienced gardeners. You can find detailed information on using cardboard for weed control and soil improvement, providing additional perspectives and tips.
- Royal Horticultural Society (RHS): As one of the world’s leading horticultural organizations, the RHS provides scientifically backed advice on all aspects of gardening. Their website is a treasure trove of information on sustainable practices, composting, and organic gardening techniques. Explore their guides on soil health and composting strategies to understand the science behind why cardboard is so beneficial.
- University of Minnesota Extension: University extension programs are fantastic sources of research-based information tailored to local conditions. The University of Minnesota Extension, like many others, offers robust guidance on sustainable gardening, water conservation, and soil management. Their publications often include practical advice on sheet mulching and creating no-dig beds, illustrating how cardboard can be a cornerstone of these methods.
These resources provide credible, often research-backed information that can help you refine your cardboard gardening practices, troubleshoot issues, and expand your sustainable gardening repertoire. Consulting them regularly will keep your gardening knowledge current and your practices effective.
Conclusion: The Unsung Hero of the Sustainable Garden
As we’ve journeyed through the diverse applications of cardboard in the garden, it becomes undeniably clear that this humble material is far more than just packaging waste. It is, in fact, an unsung hero and a powerful tool in the arsenal of any eco-conscious gardener. From its unparalleled ability to suppress stubborn weeds, create burgeoning new garden beds through sheet mulching, and enrich your compost pile, to its innovative uses as biodegradable seed pots and protective cold frames, cardboard offers solutions that are both practical and profoundly sustainable.
Embracing cardboard in your gardening practices means choosing a path that reduces waste, minimizes reliance on synthetic chemicals, and actively contributes to the health and vitality of your soil. It fosters a richer habitat for beneficial organisms, conserves precious water resources, and ultimately leads to more resilient and productive plants. The financial savings, coupled with the profound environmental benefits, make cardboard an irresistible choice for both seasoned horticulturists and budding green thumbs alike.
By integrating these ten ingenious cardboard garden uses into your routine, you’re not just tending to your plants; you’re cultivating a deeper connection to sustainable living, transforming what was once considered trash into a valuable resource. So, the next time you receive a delivery, resist the urge to immediately discard that cardboard box. Instead, see it for what it truly is: a free, versatile, and eco-friendly key to unlocking an even more thriving and sustainable garden. Your plants, your soil, and the planet will thank you.
FAQ: Cardboard in the Garden
Q1: Is all cardboard safe to use in the garden?
A1: No, not all cardboard is equally safe. It’s best to use plain, undyed, unprinted brown cardboard. Always remove plastic tape, labels, and staples. Avoid glossy, waxed, or heavily dyed cardboard as these may contain harmful chemicals that can leach into your soil. Most modern inks are soy-based and generally safe, but plain is always preferred.
<h4>Q2: Do I need to remove tape and labels from cardboard before using it?</h4>
<p>A2: Yes, it is crucial to remove all plastic tape, packing labels, and staples. These materials are non-biodegradable and will not break down in your garden. They can leave undesirable plastic and adhesive residues in your soil over time, which goes against the eco-friendly principle of using cardboard.</p>

<h4>Q3: How long does it take for cardboard to decompose in the garden?</h4>
<p>A3: The decomposition rate of cardboard varies depending on several factors, including thickness, moisture levels, temperature, and microbial activity in the soil. Generally, a single layer of cardboard can begin to break down in a few weeks to a few months. Thicker layers or drier conditions will take longer, potentially up to a year or more to fully incorporate into the soil.</p>

<h4>Q4: Can cardboard attract pests like rodents or insects to my garden?</h4>
<p>A4: Cardboard alone is generally not a primary attractant for pests. However, if left exposed and damp, it can create a sheltered, moist environment that might appeal to slugs, snails, or pill bugs. If covered with an organic mulch layer (like wood chips or straw), this risk is greatly reduced. For rodents, ensuring there are no food scraps or nesting materials exposed within or beneath the cardboard layers is key, and regular turning of compost piles will also deter them.</p>


