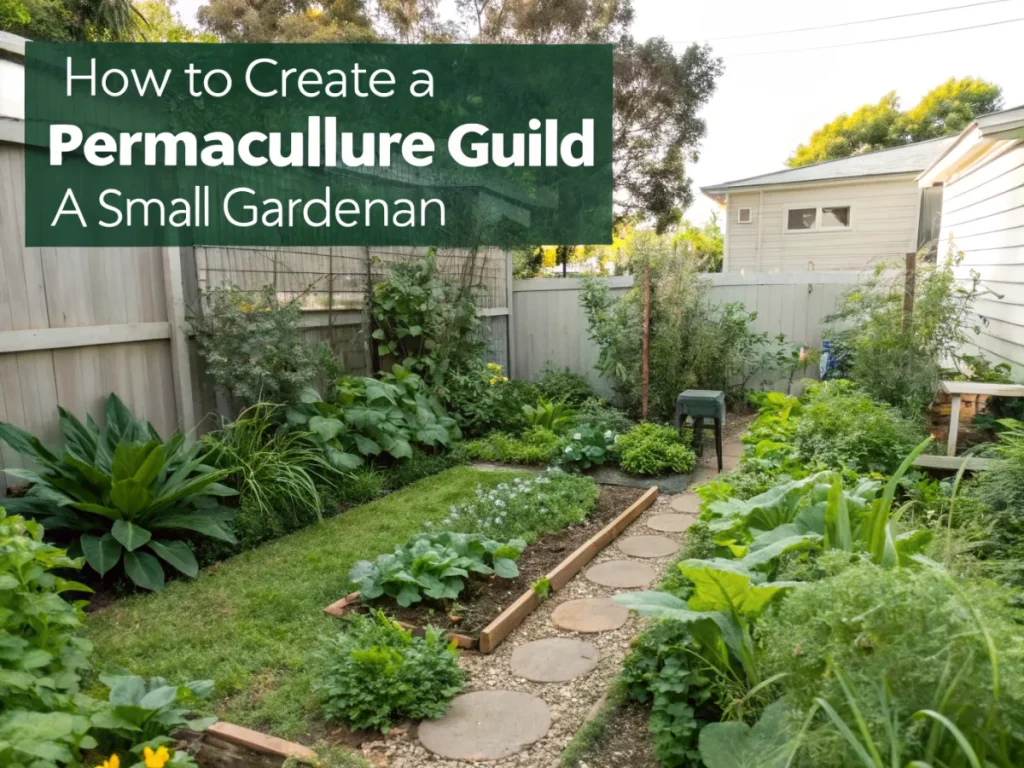
The Ultimate Guide to Creating a Permaculture Guild in a Small Garden
Are you dreaming of a thriving, self-sustaining garden even in a compact space? Imagine a miniature ecosystem where plants work together, support each other, and reduce your workload. This isn’t a fantasy; it’s the magic of a permaculture guild. In this comprehensive guide, we’ll dive deep into how you can design and implement a beautiful, productive permaculture guild in a small garden, transforming your urban patch into a powerhouse of biodiversity and bounty.
[lwptoc]
Why This Matters for Your Small Garden
Permaculture guilds are more than just pretty plant arrangements; they are intelligent, interconnected communities that mimic natural forest ecosystems. By thoughtfully selecting and placing plants, you create a symbiotic relationship where each element supports the others. This approach significantly reduces the need for constant human intervention, making it an ideal strategy for a busy urban gardener.
For a small garden, every inch counts. Guilds maximize space utilization by stacking functions both horizontally and vertically, allowing you to grow a surprising amount of food and other useful plants in a limited area. Think about growing a dwarf fruit tree surrounded by nitrogen-fixing plants, pest-deterring herbs, and groundcover edibles – all working in harmony. This dense planting also helps suppress weeds, retain soil moisture, and attract beneficial insects, creating a more resilient and vibrant garden.
Beyond the practical benefits, creating a permaculture guild for your small garden fosters a deeper connection with nature. You become an active participant in designing an ecosystem, observing the intricate interactions between plants, insects, and soil. This holistic approach not only yields delicious produce but also contributes to local biodiversity and ecological health, proving that even a small space can make a big impact.
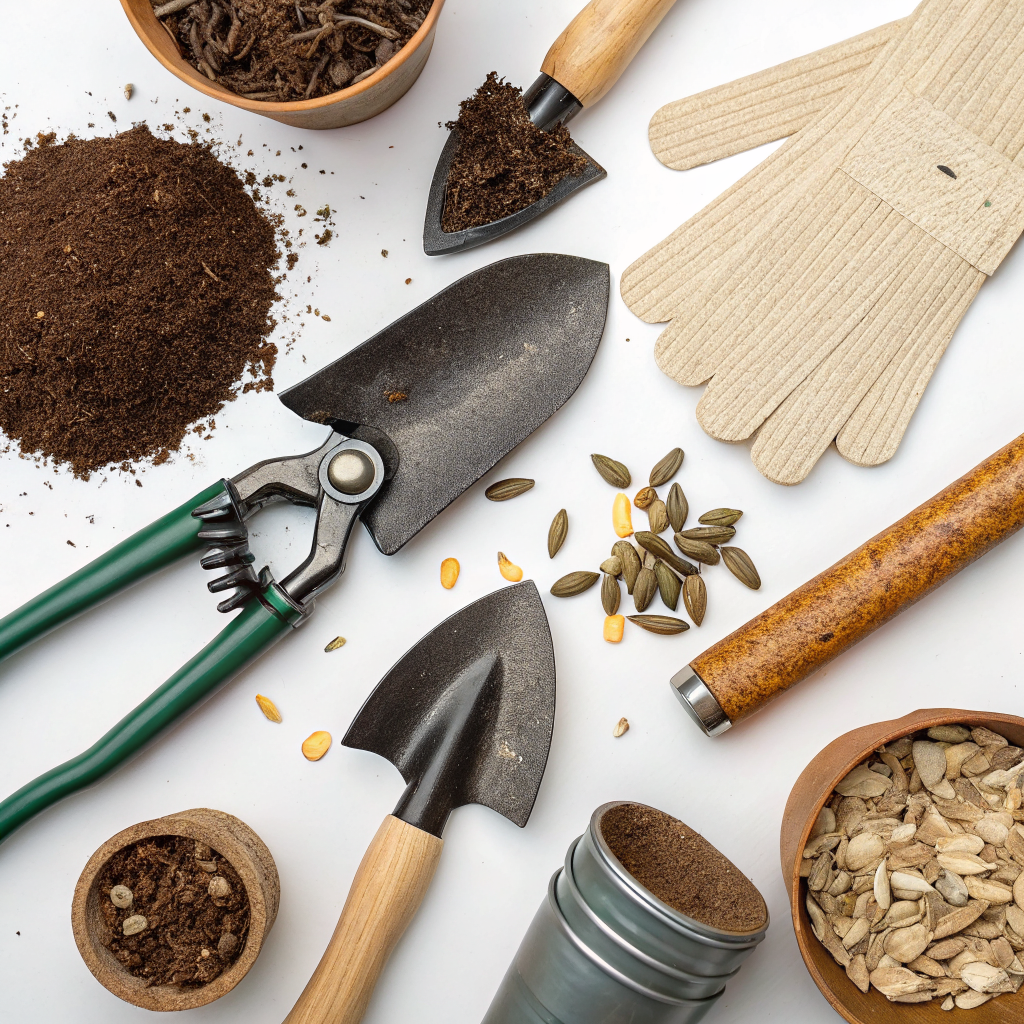
What You Need: Tools, Materials, and Plants
Before you dig in, gathering your resources will make the process smoother and more enjoyable. You don’t need a lot of specialized equipment for creating a permaculture guild, but a few basics are essential.
Essential Tools:
- Shovel or digging fork: For preparing the soil and planting larger specimens.
- Hand trowel: For planting smaller plants and herbs.
- Pruners: To maintain plant health and shape, especially for your central tree or shrub.
- Gardening gloves: To protect your hands.
- Watering can or hose with a gentle nozzle: For initial watering and ongoing hydration.
- Measuring tape: To plan your spacing effectively.
Key Materials:
- Compost or well-rotted manure: To enrich your soil and provide a healthy start for your plants.
- Mulch (wood chips, straw, shredded leaves): Crucial for moisture retention, weed suppression, and soil temperature regulation.
- Organic fertilizers (optional): If your soil needs an extra boost, but good compost often suffices.
- Garden plan: A sketch, even a rough one, will help visualize your guild.
Plant Selection (The Heart of Your Guild):
This is where the magic happens! Focus on plants that perform multiple functions and complement each other. Consider the following categories:
- Central Element (Tree/Shrub): A dwarf fruit tree (apple, pear, plum), a berry bush (blueberry, serviceberry), or a large perennial vegetable (rhubarb, artichoke). This is your anchor plant.
- Nitrogen Fixers: Plants that draw nitrogen from the air and store it in their roots, enriching the soil. Examples include peas, beans (bush or pole), clover, lupine, or Siberian pea shrub (Caragana arborescens) for larger guilds.
- Accumulators: Deep-rooted plants that bring up nutrients from lower soil layers, making them available to shallower-rooted plants when their leaves decompose. Comfrey, dandelions (yes, they have a use!), or yarrow are excellent choices.
- Pest Deterrents/Beneficial Insect Attractors: Aromatic herbs and flowers that either repel pests or draw in pollinators and predatory insects. Marigolds, calendula, nasturtiums, dill, fennel, yarrow, and chives are great options.
- Groundcovers/Mulchers: Plants that spread along the ground, suppressing weeds, retaining moisture, and sometimes providing edible produce. Strawberries, creeping thyme, oregano, or perennial spinach are good examples.
- Support Plants: Taller plants that can act as trellises for climbing vegetables. Sunflowers or sturdy amaranth can provide support for pole beans or small cucurbits.
Remember to choose varieties suitable for your climate and sun exposure. Start with a few well-researched plants rather than overwhelming yourself with too many options. You can always expand your guild over time.
Step-by-Step Guide to Creating Your Small Garden Permaculture Guild
Building a permaculture guild in a small garden is a deliberate process, but incredibly rewarding. Follow these steps to lay a strong foundation for your thriving ecosystem.
Step 1: Choose Your Central Element and Location
Your central element is the heart of your guild. For a small garden, this will likely be a dwarf fruit tree, a large berry bush, or even a robust perennial herb like rosemary if space is extremely limited. Select a plant that fits your sunlight conditions (most fruit trees need at least 6-8 hours of direct sun) and your desired yield. Mark its chosen spot in your garden. Ensure there’s adequate space for its mature size, remembering that it will be surrounded by other plants.
Consider the microclimate of your chosen location. Is it sheltered from strong winds? Does it get morning sun and afternoon shade, or full sun all day? These factors will influence your plant choices for the rest of the guild.
Step 2: Prepare the Soil
Healthy soil is the foundation of a successful guild. Dig out an area roughly 2-3 feet in diameter around where your central element will go, to a depth of about 1-1.5 feet. This helps aerate the soil and allows for thorough amendment. Mix in a generous amount of high-quality compost or well-rotted manure, integrating it well with your existing soil. This provides essential nutrients and improves soil structure, drainage, and water retention.
If your soil is particularly poor, you might consider adding some organic slow-release fertilizer or rock dust for trace minerals. A soil test can provide valuable insights into specific deficiencies. For practical guidance on improving soil, you can always refer to soil health tips for urban gardens.
Step 3: Plant Your Central Element
Carefully plant your chosen dwarf fruit tree or large shrub according to its specific planting instructions. Dig a hole wide enough to accommodate the root ball without bending. Place the plant in the hole so that the top of the root ball is level with the surrounding soil. Backfill with your amended soil, gently firming it around the roots to remove air pockets. Water thoroughly immediately after planting, ensuring the soil settles around the roots.
If you’re planting a bare-root tree, pay extra attention to spreading the roots evenly before backfilling. For container-grown plants, gently tease out any circling roots before placing them in the ground. Proper initial planting is crucial for the long-term health of your central plant.
Step 4: Layer in the Supporting Plants
Now, it’s time to build the layers around your central element. Work outwards, considering the specific roles of each plant. Plant your nitrogen fixers, dynamic accumulators, and pest deterrents/attractors within the drip line of your central tree.
- Inner Ring (closest to the central plant): Consider perennial herbs like chives or garlic that are relatively shallow-rooted and help deter pests. Nitrogen-fixing groundcovers like clover can also go here.
- Middle Ring: This is a good spot for your dynamic accumulators (comfrey, yarrow) and more insectary plants (calendula, marigolds, dill). If planting perennial vegetables, factor their mature spread.
- Outer Ring/Groundcover: Install your groundcover plants (strawberries, creeping thyme) on the outer edges. These will spread to cover bare soil, suppressing weeds and retaining moisture.
Remember to space plants according to their mature size, providing enough room for air circulation but maintaining a dense planting to fulfill guild functions. Strive for a balance of different plant heights and root depths to maximize your small space.
Step 5: Mulch Generously and Water Consistently
After all plants are in the ground, apply a thick layer (2-4 inches) of organic mulch over the entire guild area, avoiding directly touching the stems of your plants. Wood chips, straw, or shredded leaves are excellent choices. Mulch is absolutely critical in a permaculture system; it suppresses weeds, conserves soil moisture, regulates soil temperature, and slowly breaks down to enrich the soil. This drastically reduces your watering and weeding chores.
Water your newly planted guild thoroughly. For the first few weeks, consistent watering is essential to help the plants establish. After establishment, the mulch and cooperative planting will reduce your watering needs significantly, mimicking the self-sufficiency of a natural ecosystem. You can find more tips on water-wise gardening here.
Pro Tips and Common Mistakes
Even seasoned gardeners can benefit from a few extra insights when delving into permaculture. Here are some pro tips and pitfalls to avoid for your small garden guild.
Pro Tips for Success:
- Observe First, Design Second: Spend time observing your garden space before planting. Note sun patterns, prevailing winds, and existing soil conditions. This informs better plant choices.
- Start Small, Expand Slowly: Don’t try to implement a massive guild all at once. Start with a single, well-designed guild, learn from it, and then replicate or expand.
- Chop and Drop: Instead of removing pruned material or spent plant matter, chop it up and drop it right back onto the guild as mulch. This returns nutrients to the soil. Comfrey is particularly good for this.
- Incorporate Edible Weeds: Dandelions, purslane, and other “weeds” can actually serve functions in your guild, acting as dynamic accumulators or providing beneficial insect habitat. Learn to identify and utilize them.
- Integrate Verticality: Even in a small space, think upwards. Use sturdy plants like sunflowers as living trellises for climbing beans or even small gourds. Consider vertical gardening structures on nearby walls if possible.
- Diversity is Key: The more diverse your plant palette, the more resilient and productive your guild will be. Aim for a mix of root depths, flowering times, and plant functions.
- Learn to Prune Correctly: For your central fruit tree or shrub, proper pruning is essential for health, shape, and fruit production. Research specific pruning techniques for your chosen species.
Common Mistakes to Avoid:
- Overcrowding: While guild planting is dense, ensure plants still have enough room to grow to their mature size without competing excessively for light and nutrients. Read plant tags carefully.
- Ignoring Soil Health: Planting in poor, unamended soil is a recipe for failure. Invest time in preparing a rich, living soil base.
- Neglecting Water Needs: Especially during establishment, consistent watering is crucial. Don’t assume the guild is immediately self-sufficient.
- Planting Incompatible Species: Be aware of allelopathic effects, where some plants inhibit the growth of others (e.g., black walnut is a strong allelopath). Research plant compatibility.
- Lack of Mulch: Skipping mulch undermines many permaculture principles. It’s a foundational element for a reason.
- Expecting Instant Results: Permaculture guilds develop over time. Be patient, observe, and adjust as your mini-ecosystem matures.
- Ignoring Local Climate: Trying to grow tropical plants in a temperate zone without protection, or vice-versa, will lead to disappointment. Choose locally adapted species.
Eco-Friendly Variations for Urban Permaculture
Urban environments present unique challenges and opportunities for permaculture. Tailoring your guild design to these conditions makes it even more impactful and sustainable.
- Container Guilds: If you only have a balcony or patio, you can create smaller, themed guilds in large containers. Choose dwarf varieties of fruit trees or berries as your central element. For instance, a half-wine barrel can host a dwarf blueberry bush, surrounded by strawberries, calendula, and creeping thyme. Ensure good drainage and sufficient container size.
- Vertical Guilds: Utilize wall space with vertical planters. While not a true guild in the multi-layered sense, you can plant mutually beneficial herbs and small greens together. For example, mint (in its own pot to prevent spreading), parsley, and marigolds in a vertical stack.
- Guilds on Sloped Land: If your small garden has a slope, consider creating small terraces or swales (channels that catch water) along the contour. This helps manage water runoff and prevents erosion, creating perfect microclimates for guild planting. The swale itself can form the base of your guild.
- Rainwater Harvesting: Integrate your guild with a small rainwater harvesting system. Direct runoff from a roof or gutter into your guild area or a small rain garden. This conserves water and provides a consistent supply for your plants.
- Community Garden Integration: If you have a plot in a community garden, apply guild principles there. Coordinate with neighbors to share resources and knowledge. A collective approach can enhance biodiversity across the entire garden.
- Pollinator Focus: Design your guild with an even greater emphasis on attracting pollinators and beneficial insects. Include a wide variety of flowers with different shapes, colors, and bloom times. A healthy pollinator population means better yields for your fruit-bearing plants. Learn more about attracting pollinators at this resource.
- Waste Recycling: Implement a small composting system (worm bin, bokashi) adjacent to your guild. Your guild will benefit from the nutrient-rich compost, and you’ll reduce household waste.
Seasonal Considerations for Your Small Permaculture Guild
A permaculture guild isn’t a static structure; it evolves with the seasons. Understanding these shifts helps you maintain its health and productivity year-round.
Spring: The Awakening
- Planting: This is the prime time for planting your central tree/bush and most perennial supporting plants once the danger of frost has passed.
- Mulch Refresh: Check your mulch layer and top it up if needed. This helps suppress early spring weeds.
- Pruning: Perform any necessary dormant pruning on fruit trees.
- Observation: Watch for the emergence of pests or diseases after dormancy and address them organically.
- Sowing: Overseed with additional nitrogen-fixing annuals like bush beans if desired.
Summer: Growth and Abundance
- Watering: While mulch significantly reduces water needs, dry spells will require supplemental watering, especially for fruiting plants.
- Harvesting: Enjoy the bounty! Pick fruits, berries, herbs, and groundcover edibles as they ripen. Frequent harvesting encourages more production.
- Chop and Drop: Regularly chop and drop dynamic accumulators like comfrey. This provides a nutrient boost and prevents them from flowering excessively if you don’t want them to self-seed.
- Pest Patrol: Continue monitoring for pests. The diversity of your guild should help manage them, but intervention might be needed for severe infestations (e.g., hand-picking, organic sprays).
- Support: Provide stakes or supports for any climbing plants that need it.
Autumn: Winding Down and Preparing
- Last Harvests: Gather any late-season crops.
- Leaf Drop: Allow fallen leaves from your central tree to remain as part of the mulch layer, adding organic matter.
- Winter Mulch: Apply a thicker layer of mulch to protect the soil and plant roots from freezing temperatures.
- Planting Garlic/Perennials: Autumn is an excellent time to plant garlic and some hardy perennial herbs or spring-flowering bulbs within the guild.
- Seed Saving: Collect seeds from open-pollinated plants for next year.
Winter: Rest and Planning
- Dormancy: The guild will be largely dormant. Foot traffic should be minimized to avoid compacting a frozen or wet soil.
- Tool Maintenance: Clean and sharpen your gardening tools.
- Planning: Use this time to research new plants, refine your guild design on paper, and strategize for the next growing season. What worked well? What could be improved?
- Observation: Even in winter, observe the site. Note drainage patterns or areas that accumulate snow, providing insights for future adjustments.
Expert Resources for Deeper Learning
To further enhance your understanding and success with permaculture guilds, these expert resources offer invaluable information and practical advice:
- Gardening Know How: For a vast range of practical gardening articles covering everything from plant care to pest management, Gardening Know How is an excellent go-to. Their beginner-friendly guides are perfect for getting started with new techniques.
- Royal Horticultural Society (RHS): As a leading gardening charity, the RHS website provides authoritative advice on plant selection, cultivation, and sustainable gardening practices. Their plant finder tool is particularly useful for researching suitable species for your climate.
- University of Minnesota Extension: University extension offices are treasure troves of science-backed horticultural information tailored to local conditions. The University of Minnesota Extension, like many others, offers extensive resources on sustainable gardening, ecological design, and specific plant varieties that thrive in various regions.
Conclusion
Creating a permaculture guild in a small garden is not just about growing food; it’s about cultivating a resilient, beautiful, and self-sufficient ecosystem right outside your door. It’s a journey of observation, learning, and becoming a more connected steward of your little patch of earth. By embracing the principles of cooperation, diversity, and minimal intervention, you can transform your urban garden into a powerhouse of productivity and biodiversity.
Start small, be patient, and observe the incredible interactions that unfold. In time, your small permaculture guild will not only feed your body but also nourish your soul, demonstrating that even in the tiniest of spaces, nature’s wisdom can flourish.
FAQ: Permaculture Guilds in Small Gardens
Q1: How much space do I really need for a permaculture guild?
A1: Surprisingly little! While larger guilds spread, a small permaculture guild can be as compact as a 4×4 foot raised bed or even a large container (e.g., a half-wine barrel). The key is careful plant selection and compact varieties for your central element.
Q2: Can I use existing plants in my garden to start a guild?
A2: Absolutely! If you have an established dwarf fruit tree or a robust berry bush, this can become the central element of your guild. Then, you can strategically add the supporting layers around it, clearing grass or other competing plants as needed. This saves time and resources.
Q3: How long does it take for a permaculture guild to become self-sufficient?
A3: It varies, but typically a small permaculture guild takes 1-3 years to become well-established and truly self-sufficient. During the first year, consistent watering and some minor weeding (especially before the groundcover takes hold) are usually necessary. Patience and observation are key.
Q4: What if I have pets? Are all permaculture guild plants safe for them?
A4: This is an important consideration. While many common guild plants are safe, some can be toxic to pets (e.g., certain varieties of comfrey, specific flowering plants). Always research the toxicity of any plant you introduce to your garden if your pets have access to it. Choose pet-safe alternatives when in doubt.


