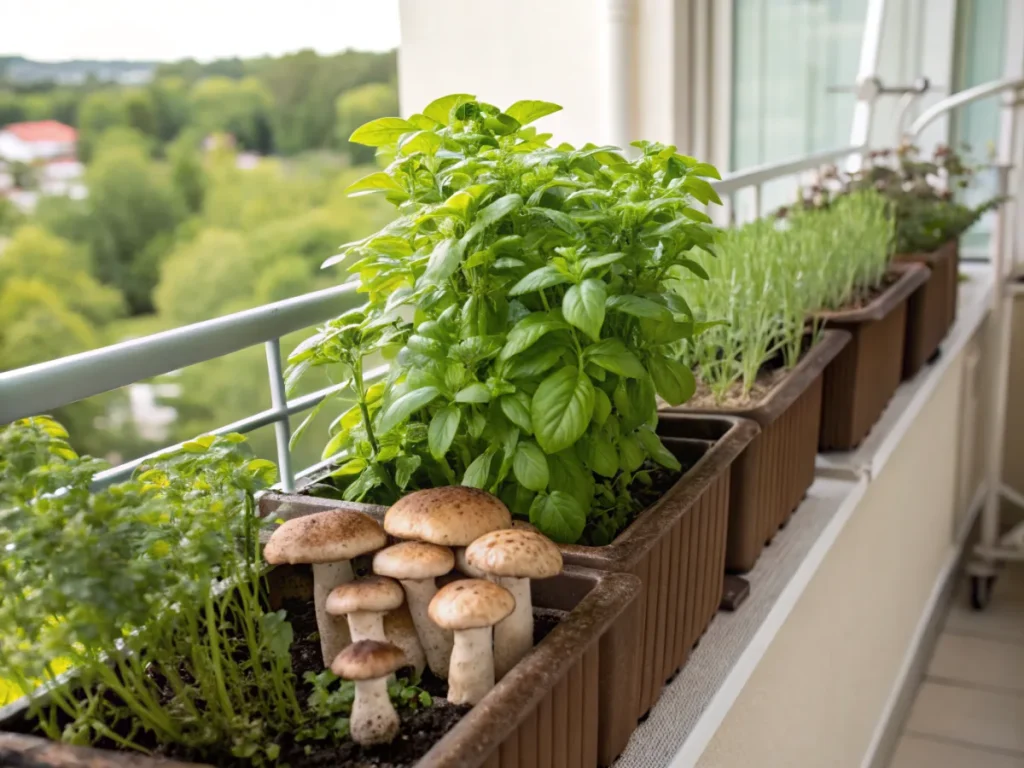
The Ultimate 10-Step Guide: How to Grow Mushrooms on Your Balcony
Dreaming of fresh, organic produce even in the heart of the city? Your balcony isn’t just for potted herbs anymore! Discover the rewarding world of urban mushroom cultivation, turning your small outdoor space into a thriving fungi farm. This comprehensive guide will walk you through everything you need to know to successfully grow delicious oyster and shiitake mushrooms right on your balcony, bringing the magic of the forest floor to your doorstep.
[lwptoc]

Why Growing Mushrooms on Your Balcony Matters for Urban Permaculture
Urban permaculture is all about creating self-sustaining, productive ecosystems within city limits, and balcony mushroom cultivation fits this philosophy perfectly. It allows you to produce highly nutritious food in a minimal footprint, reducing your reliance on industrial agriculture and its associated environmental costs. Growing your own mushrooms also connects you with nature, even in an urban environment, providing a sense of accomplishment and fresh, homegrown goodness.
Mushrooms are fantastic decomposers, playing a vital role in nutrient cycling and soil health – even when grown in a controlled environment. They offer a unique way to utilize organic waste materials, such as spent coffee grounds or sawdust, transforming them into valuable food. This practice aligns with zero-waste principles, making your balcony garden even more sustainable and eco-friendly.
Furthermore, fresh mushrooms from your balcony are unmatched in flavor and nutritional value compared to store-bought varieties. You control the growing conditions, ensuring a pesticide-free, organic crop. This direct connection to your food source is a cornerstone of urban permaculture, fostering resilience and food security in your own home.
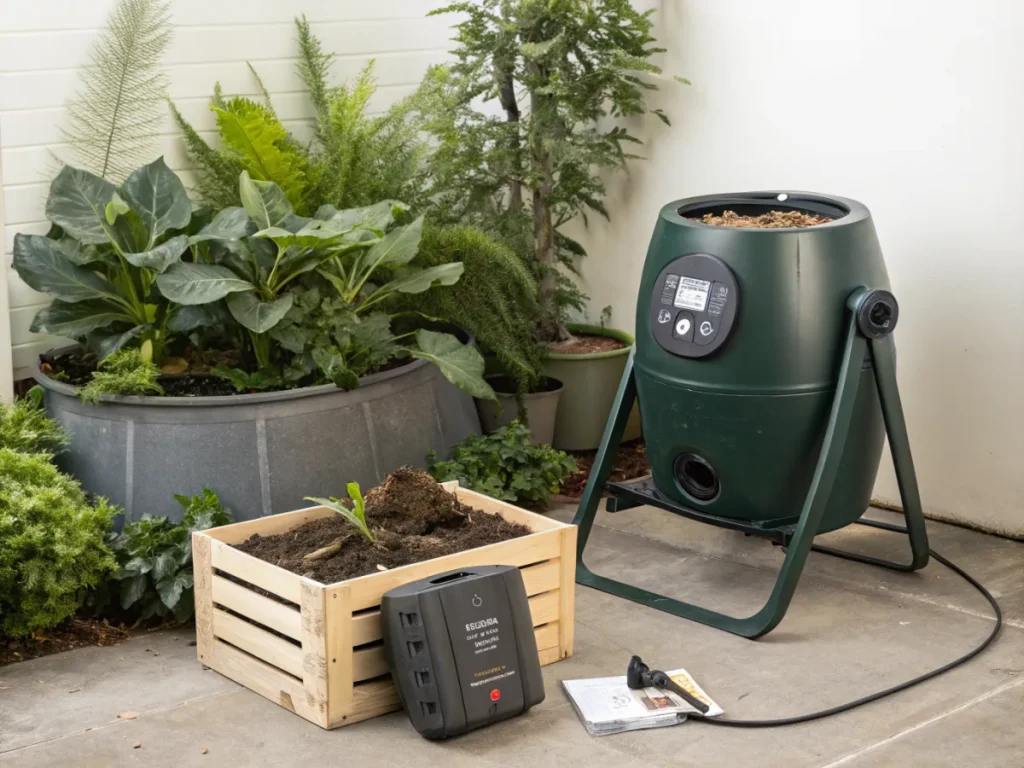
What You Need: Essential Tools and Materials for Balcony Mushroom Cultivation
To embark on your balcony mushroom-growing journey, you’ll need a few key items. Don’t worry, most are readily available and often reusable, making this a sustainable hobby. We’ll focus on oyster and shiitake mushrooms, as they are relatively forgiving for beginners and well-suited for balcony conditions.
1. Mushroom Spawn
- Oyster Mushroom Spawn: These are aggressive colonizers and adapt well to various substrates. You can find grain spawn or sawdust spawn.
- Shiitake Mushroom Spawn: Often found as plug spawn for logs, or sawdust spawn for sterile blocks.
- Where to Buy: Reputable online suppliers or local garden centers specializing in fungi.
2. Substrate Materials
The “food” for your mushrooms. Different mushrooms prefer different substrates.
- For Oyster Mushrooms:
- Straw: Chopped wheat or oat straw is excellent.
- Sawdust: Hardwood sawdust (oak, maple, beech) is ideal. Avoid treated wood.
- Coffee Grounds: A fantastic waste product to repurpose, especially for oyster mushrooms. Best used fresh from brewing.
- Cardboard: Can be used as a substrate or a layer in mixed substrates.
- For Shiitake Mushrooms:
- Hardwood Logs: Oak, maple, alder, birch are best. Freshly cut (within a few weeks) and healthy logs are crucial.
- Hardwood Sawdust Blocks: Pre-sterilized blocks are a convenient option if logs aren’t feasible for a balcony.
3. Growing Containers/Systems
- For Oyster Mushrooms (Sawdust/Straw/Coffee Grounds):
- Grow Bags: Specialized mycobags with filter patches are ideal for sterilization and gas exchange.
- 5-Gallon Buckets: Drill 1/2-inch holes around the sides and bottom.
- Laundry Baskets: Line with burlap or insect mesh for airflow.
- Fruiting Chambers: A clear plastic tote or storage container can be modified with air holes for humidity control.
- For Shiitake Mushrooms (Logs):
- No special container needed, but a shady, humid spot on your balcony is essential.
4. Basic Tools
- Gloves: To maintain hygiene during inoculation.
- Spray Bottle: For misting to maintain humidity.
- Drill with Inoculation Bit (for logs): Specific size for plug spawn.
- Hammer or Rubber Mallet (for logs): To tap in plug spawn.
- Waxes (for logs): Cheese wax or beeswax to seal inoculated holes.
- Large Pot or Cooler: For substrate pasteurization.
- Thermometer: To monitor pasteurization temperature.
- A Clean Workspace: Essential for preventing contamination.
Step-by-Step Guide: Cultivating Mushrooms on Your Balcony
This guide covers two popular balcony-friendly methods: mushroom bags/buckets for oyster mushrooms and log cultivation for shiitake.
Method 1: Oyster Mushrooms in Bags/Buckets (Sawdust/Straw/Coffee Grounds)
This method is excellent for beginners and allows for quick harvests.
Step 1: Prepare Your Substrate
Pasteurization is crucial to kill off competing molds and bacteria, giving your mushroom spawn the best chance. If using coffee grounds, make sure they are fresh (used within 24 hours). If using straw or sawdust, chop it into 1-2 inch pieces if not already chopped.
- Hot Water Pasteurization: Place your substrate (straw, sawdust) into a large pot or cleaner bucket. Pour boiling water over it until fully submerged. Let it sit for 1-2 hours, ensuring the temperature remains above 140°F (60°C) for at least an hour. Drain thoroughly once pasteurized and allow to cool completely to room temperature.
- Cold Water Pasteurization (for straw): Soak straw in cold water with hydrated lime for 12-24 hours. This raises the pH and inhibits contaminants. Rinse well afterward.
Ensure the substrate is moist but not dripping wet. The “squeeze test” is helpful: if you can squeeze out a few drops of water, it’s perfect.
Step 2: Inoculation
This is where you introduce the mushroom spawn to the prepared substrate. Work in as clean an environment as possible to avoid contamination.
- Mix Spawn and Substrate: In a clean tub or bucket, layer cooled, pasteurized substrate with your oyster mushroom grain or sawdust spawn. A general ratio is 5-10% spawn by weight of your wet substrate. Mix thoroughly by hand (wearing gloves) to distribute the spawn evenly.
- Fill Your Containers: Tightly pack the inoculated substrate into your chosen grow bags or buckets. If using buckets, make sure the pre-drilled holes are clear. For bags, tie off the top loosely to allow some air exchange.
Step 3: Incubation
This stage allows the mushroom mycelium (the root-like structure of the fungus) to colonize the substrate. This takes place in the dark and without too much disturbance.
- Dark, Warm Place: Place your sealed bags or buckets in a dark spot on your balcony that maintains a consistent temperature of 65-75°F (18-24°C). Avoid direct sunlight.
- Wait for Colonization: Over 2-4 weeks, you’ll see white fuzzy growth spreading throughout the substrate – this is the mycelium. The substrate should become solid and fully white.
Step 4: Fruiting (Harvesting)
Once fully colonized, it’s time to trigger fruiting, where the actual mushrooms appear.
- Introduce Light and Air: Move your containers to a spot on your balcony with indirect light (not direct sun) and good airflow. If using bags, cut small slits or X-shaped openings on the sides from which the mushrooms will emerge. For buckets, the pre-drilled holes serve this purpose.
- High Humidity: This is critical! Mist the openings and the surrounding air several times a day with a spray bottle. Aim for 85-95% humidity. You can create a mini “humidity tent” with a clear plastic bag draped loosely over the container, but ensure there’s still some airflow.
- Pinning: Within a week or two, you’ll see tiny mushroom “pins” forming at the openings. Continue misting.
- Harvest: When the mushroom caps begin to flatten out and their edges start to curl upward slightly, they are ready. Twist or cut the entire cluster close to the substrate. Do not pick individual mushrooms.
- Repeat: After harvesting, continue to mist and maintain humidity. You can usually get 2-3 “flushes” (harvests) from a single block or bucket.
Method 2: Shiitake Mushrooms on Logs (for a more traditional approach)
This method requires more patience but yields beautiful, flavorful shiitakes for years.
Step 1: Select and Prepare Logs
Choose freshly cut hardwood logs (oak, maple, sweetgum, poplar) that are 3-8 inches in diameter and 3-4 feet long. Logs should be healthy, unbarked, and free of decay or disease. Cut them within 2-4 weeks before inoculation.
Step 2: Inoculate Logs with Plug Spawn
This involves drilling holes and inserting the spawn plugs.
- Drill Holes: Using a drill with a 5/16″ or 1/2″ bit (matching your plug spawn size), drill holes about 1 inch deep. Space them 4-6 inches apart in a diamond pattern all around the log.
- Insert Plugs: Gently tap the plug spawn into each hole with a hammer or rubber mallet until it’s flush with the log surface.
- Seal Holes: Cover each inoculated hole with melted wax (cheese wax or food-grade beeswax) using a small brush or dauber. This protects the spawn from drying out and contamination.
Step 3: Incubation (Log Laying Yard)
This is the longest stage, where the mycelium grows through the log.
- Stack Logs: On your balcony, find a shady, moist spot. Stack the inoculated logs in a cross-hatch pattern or lean them against a wall to allow airflow while maintaining humidity. You can place them on bricks or a pallet to prevent direct contact with the ground, reducing pest issues.
- Maintain Humidity: During dry periods, mist the logs periodically or cover them loosely with burlap that you keep damp. This process can take 6-18 months, depending on the log type and environmental conditions.
- Signs of Colonization: You might see white mycelial growth appearing on the ends of the logs or around the inoculation sites.
Step 4: Force Fruiting (Optional, but speeds up harvest)
After a minimum of 6 months of incubation, you can encourage fruiting.
- Cold Shock: Soak the logs in cold (preferably icy) water for 24 hours. You can use a large tub or even your bathtub.
- Fruiting Conditions: After soaking, place the logs back in a shady, humid spot on your balcony. Continue to mist regularly.
- Harvest: Shiitake mushrooms will emerge in clusters. Harvest when the caps are fully open but before they become too flat. Twist them off gently.
Pro Tips and Common Mushroom Growing Mistakes
Successful mushroom cultivation often comes down to attention to detail and learning from potential pitfalls. Here are some insights to help you along the way.
Pro Tips for Balcony Success:
- Humidity is King: For fruiting, especially with oyster mushrooms, consistent high humidity is paramount. Consider a small, affordable humidifier or a DIY humidity tent using clear plastic.
- Indirect Light: Mushrooms don’t need direct sunlight; in fact, too much sun can dry them out or inhibit growth. Bright, indirect light is perfect.
- Airflow Matters: While high humidity is important, stagnant air can lead to contamination or straggly mushrooms. Ensure your balcony setup allows for gentle air circulation.
- Cleanliness: Always sterilize or pasteurize your substrate properly and work with clean hands and tools. Contamination is the biggest enemy of a mushroom grower.
- Strain Selection: Some oyster mushroom strains tolerate warmer temperatures better than others. Research varieties suited for your local climate and balcony conditions.
- Keep Learning: Join online forums, read books, and share experiences with other growers. The mycological community is vibrant and helpful. For more advanced tips, check out Gardening Know How and RHS Gardening.
Common Mistakes to Avoid:
- Under-Pasteurization/Sterilization: Leads to rampant contamination by molds, often appearing as green, black, or red patches.
- Insufficient Humidity During Fruiting: Results in small, cracked, or shriveled mushrooms, or no pins forming at all.
- Over-Saturating Substrate: Too much water can lead to anaerobic conditions and bacterial contamination, inhibiting mycelial growth.
- Poor Airflow: Causes “leggy” mushrooms with small caps as they stretch for oxygen, or invites mold growth.
- Improper Harvest Timing: Harvesting too early means smaller yields; too late, and the mushrooms might drop spores and decline in quality. Also, leaving mushroom “stumps” can invite rot and contamination for subsequent flushes.
- Ignoring Contamination: If you see colorful, furry mold, it’s usually best to discard the contaminated section (or the whole block, if severe) away from your growing area to prevent spread.
Eco-Friendly Variations for a Sustainable Balcony Grow Mushrooms Balcony
Embrace the permaculture principles of “produce no waste” and “use renewable resources” with these eco-friendly adaptations for your balcony mushroom cultivation. These methods help reduce your environmental footprint while yielding delicious fungi.
- Utilizing Spent Coffee Grounds: This is a fantastic zero-waste approach for oyster mushrooms. Collect fresh coffee grounds daily from local cafes or your own home. They are already pasteurized to an extent from the brewing process. Mix them with a small amount of straw or sawdust for better structure and use within 24 hours of brewing to prevent contamination.
- Cardboard Substrate: Recycle clean, unprinted cardboard boxes. Shred them, soak thoroughly, and then pasteurize. Cardboard can serve as a primary substrate for some oyster mushroom varieties or as a starter layer for other substrates. This is a great way to repurpose materials that would otherwise end up in recycling or landfill.
- Solar Pasteurization: Instead of boiling water, use the sun’s power! Place your substrate in black plastic bags, mix with water until moist, and seal them. Lay them out on your balcony in direct sunlight on a hot day. The sun’s heat can pasteurize the substrate, reaching temperatures sufficient to kill competitors. Monitor with a thermometer.
- Rainwater Harvesting: Set up a small system on your balcony to collect rainwater for misting your mushrooms and watering other plants. Rainwater is naturally soft and free of chlorine, which is beneficial for fungi. Even a simple bucket can collect enough for regular use.
- Composting Spent Substrates: After your mushroom blocks or logs are exhausted and no longer producing, don’t throw them away. Break them up and add them to your compost pile or worm farm. The spent substrate is rich in nutrients and organic matter, making excellent soil amendment for your other balcony plants. This completes the nutrient cycle on your own space.
- Vertical Growing Systems: Optimize your balcony’s limited space by implementing vertical grow systems for your mushroom bags or buckets. Hanging racks or tiered shelves can accommodate more containers without taking up valuable floor space, maximizing your yield per square foot.
By incorporating these eco-friendly variations, you’re not just growing food; you’re actively participating in a more sustainable and regenerative urban ecosystem right on your balcony. Each step contributes to a greener, more resilient lifestyle, proving that even small spaces can make a big environmental impact.
Seasonal Considerations for Your Balcony Mushroom Garden
Temperature and humidity are critical factors for mushroom growth. Understanding your local seasons will help you succeed in growing mushrooms on your balcony.
- Spring (Ideal for Most): Spring’s moderate temperatures and often higher humidity are perfect for incubating and fruiting most mushroom varieties, especially oyster and shiitake. If starting shiitake logs, this is an excellent time for inoculation so they can colonize during the warmer months.
- Summer (Tricky, but Possible): High summer heat can be challenging. Some oyster strains prefer cooler temperatures, but others (like certain warm-weather oysters) can thrive. The main battle is maintaining humidity and preventing your blocks from drying out or overheating. Consider moving blocks to shadier spots, increasing misting, and ensuring good air circulation to prevent mold.
- Autumn (Excellent for Fruiting): As temperatures cool and humidity often rises, autumn provides ideal conditions for mushroom fruiting, particularly for species that prefer cooler weather. This can be a very productive season for both oyster and shiitake logs.
- Winter (Dormancy or Specific Strains): For many regions, winter means a period of dormancy, especially for outdoor log cultivation. However, some cold-weather oyster strains can fruit even in chilly temperatures, and indoor fruiting chambers can provide a controlled environment. Protect logs from freezing solid if temperatures drop below zero. Consider moving blocks into a protected indoor area if your balcony is exposed to harsh elements.
Monitoring your local weather and adjusting your care routine accordingly is key to year-round success. This might involve moving blocks to different microclimates on your balcony or adjusting your misting frequency. A simple maximum/minimum thermometer can be a valuable tool to track ambient temperatures and help you decide the best placement.
Expert Resources for Further Learning
Dive deeper into the fascinating world of mycology with these trusted external resources:
- Gardening Know How: For general gardening advice and specific mushroom articles, GardeningKnowHow.com offers a wealth of practical information for home growers.
- Royal Horticultural Society (RHS): While primarily focused on plants, the RHS provides excellent guidance on composting and sustainable practices that apply to mushroom cultivation. Visit RHS.org.uk for broader ecological gardening insights.
- University Extension Programs: Many university extension services, such as University of Minnesota Extension, offer research-backed guides on various agricultural topics, including mushroom cultivation, often tailored to specific regional climates.
Conclusion: Your Balcony, Your Mushroom Farm
Transforming your balcony into a productive mushroom farm is an incredibly rewarding endeavor, blending the best of urban living with sustainable food production. From the first flush of oyster mushrooms to the long-term bounty of shiitake logs, you’ll gain not only delicious gourmet fungi but also a deeper connection to nature and a sense of accomplishment.
Remember, patience and observation are your best allies. Each mushroom block or log ecosystem on your balcony will teach you something new. Embrace the learning process, experiment with different substrates, and enjoy the journey of cultivating your own fresh, organic mushrooms. Your palate – and the planet – will thank you.
For more innovative urban gardening ideas, consider exploring smart irrigation solutions or DIY vertical hydroponics for your balcony. You can also learn about natural pest control methods to keep your fungi flourishing organically.
FAQ: Growing Mushrooms on Your Balcony
Q1: What are the easiest mushrooms to grow on a balcony for a beginner?
A1: Oyster mushrooms are by far the easiest for beginners on a balcony. They are aggressive colonizers, tolerate a wider range of conditions, and fruit quickly. Pink oyster and pearl oyster varieties are particularly forgiving.
<h4>Q2: How often do I need to mist my mushroom growing on my balcony?</h4>
<p><strong>A2:</strong> During the fruiting phase, you need to mist frequently – often 3-5 times a day – depending on your balcony's humidity and temperature. The goal is to keep the air around the developing mushrooms very humid (85-95%) without waterlogging the substrate itself. If the air feels dry, mist more.</p>

<h4>Q3: Can I grow mushrooms year-round on my balcony?</h4>
<p><strong>A3:</strong> It depends on your climate. In temperate zones, year-round balcony growth outdoors can be challenging, especially in harsh winters or scorching summers. However, by selecting cold-hardy or heat-tolerant strains, providing protection (like mini-greenhouses or moving blocks indoors temporarily), and using indoor fruiting chambers, you can extend your growing season significantly.</p>

<h4>Q4: What should I do if my mushroom block gets moldy?</h4>
<p><strong>A4:</strong> If you see green, black, or other brightly colored, fuzzy molds, your block is likely contaminated. Small, isolated patches might be carefully cut away, but generally, it's best to isolate the contaminated block from your other projects immediately. If the contamination is extensive, it's recommended to discard the block (compost it away from your growing area) to prevent spores from spreading. Prevention through proper pasteurization and hygiene is always the best approach.</p>