
The Ultimate Guide to Fixing Leggy Seedlings: 7 Proven Strategies for Stronger Plants
There’s a universal moment of triumph for every gardener: the first tiny sprout pushing through the soil. It’s a promise of future harvests, vibrant blooms, and the satisfaction of nurturing life. However, this joy can quickly turn to concern when those promising young plants start to stretch, lean, and become alarmingly spindly – a condition known as “legginess.” Leggy seedlings aren’t just an aesthetic problem; they’re a significant indicator that your young plants are in distress, leading to weaker stems, reduced vigor, and a diminished capacity to thrive once transplanted. Understanding why this happens and, more importantly, how to prevent and correct it, is crucial for fostering a resilient and productive garden from the very beginning.
[lwptoc]
This comprehensive guide delves deep into the often-overlooked causes of leggy seedlings and provides actionable, step-by-step solutions to ensure your indoor propagation efforts result in robust, healthy plants. We’ll explore everything from the subtle nuances of light intensity to the often-underestimated role of air circulation and proper watering. Our aim is to empower you with the knowledge and techniques to cultivate strong, stocky seedlings that stand proud, ready to conquer the challenges of your garden. Let’s transform those stretched, pale sprouts into sturdy green soldiers capable of delivering abundant rewards.
Why This Matters for Your Garden: The Domino Effect of Legginess
The health of your seedlings directly dictates the success of your entire growing season. Leggy seedlings, characterized by long, thin stems and small, pale leaves, are inherently disadvantaged. This isn’t just about appearance; it’s about fundamental structural and physiological weaknesses that impact every stage of the plant’s life cycle. A leggy seedling is like a building with a weak foundation – it’s constantly struggling to support itself.
Firstly, leggy plants are incredibly fragile. Their elongated stems are prone to snapping with the slightest jostle, making transplanting a perilous operation. Even a gentle breeze or a heavy raindrop can cause irreparable damage outdoors. This fragility means higher rates of seedling loss, wasting your precious seeds, time, and effort.
Secondly, tall and thin stems mean less energy is being channeled into developing a strong root system and robust foliage. Instead, the plant expends its limited resources stretching towards an inadequate light source. A compromised root system translates to poor nutrient and water uptake, weakening the plant further and making it more susceptible to diseases and pests. These plants often struggle to establish themselves in the garden, exhibiting stunted growth, delayed flowering, and reduced yields compared to their stockier counterparts.
Thirdly, leggy plants are less resilient. They have a harder time adapting to environmental stresses like temperature fluctuations, strong winds, or periods of drought. Their weak stems offer little support for future fruits or flowers, potentially leading to breakage under the weight of produce. By addressing legginess early, you are not just saving a few seedlings; you are investing in the long-term health, productivity, and resilience of your entire garden. Strong seedlings are the cornerstone of a thriving ecosystem, ready to face the challenges of the growing season head-on.
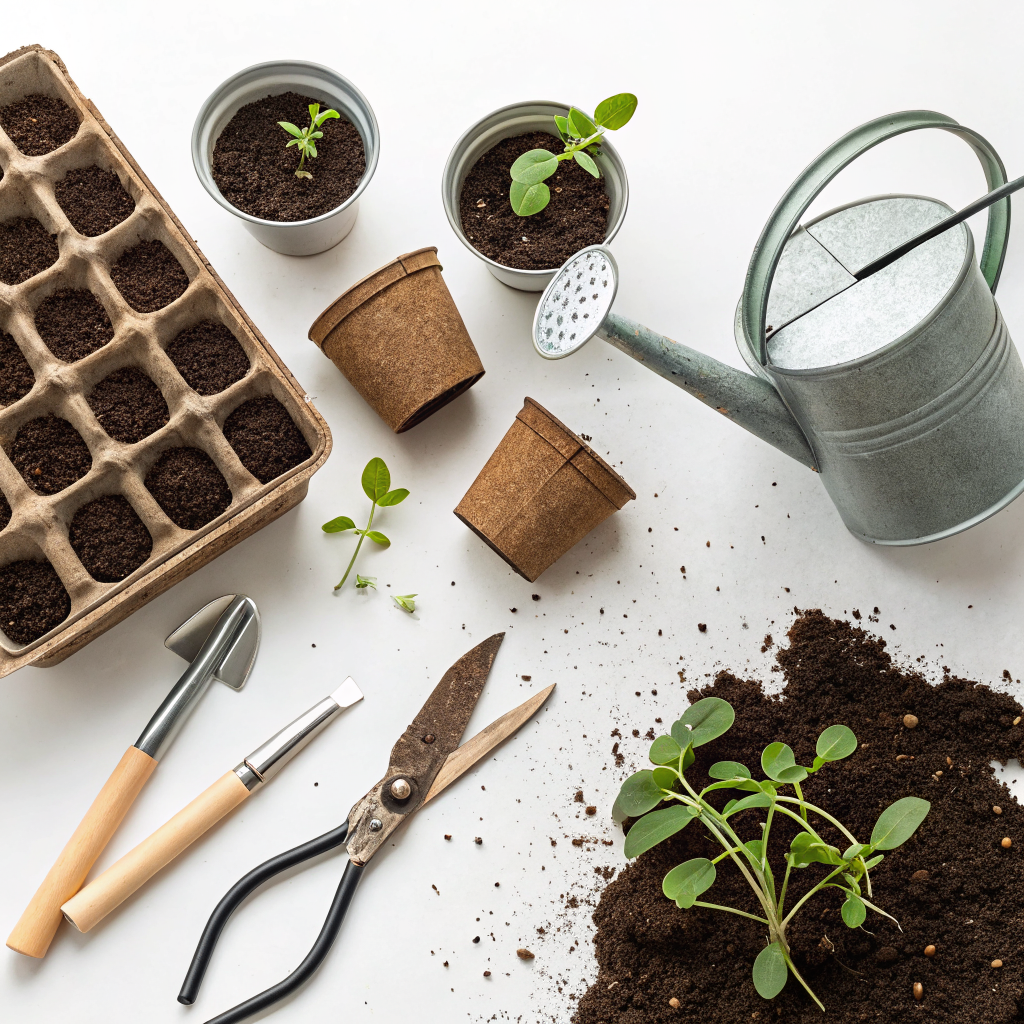
What You Need: Essential Tools and Materials for Stocky Seedlings
Cultivating strong, stocky seedlings doesn’t require an elaborate setup, but a few key items will significantly improve your success rate. Having the right tools on hand allows you to proactively prevent legginess and respond effectively if it begins to appear.
Essential Tools:
- Grow Lights: This is arguably the most crucial item for preventing legginess indoors. Full-spectrum LED or fluorescent shop lights (T5 or T8) are excellent choices. Look for lights that provide 2,000-3,000 lumens per square foot for optimal growth.
- Adjustable Chains/Hangers: To raise or lower your grow lights, ensuring they are always at the optimal distance from your seedlings. This dynamic adjustment is vital for consistent light exposure.
- Seed Starting Mix: A fine, sterile, and well-draining mix designed specifically for seedlings. Avoid heavy garden soil, which can compact and harbor pathogens.
- Seed Starting Trays/Pots: With drainage holes, of course! Cell packs, small pots, or even recycled containers (yogurt cups, toilet paper rolls) work well. Ensure they are clean.
- Watering Can/Spray Bottle: A fine rose watering can or a spray bottle helps deliver water gently without disturbing delicate seedlings or compacting the soil.
- Small Fan: A gentle oscillating fan (even a small desk fan) is excellent for mimicking outdoor breezes, strengthening stems, and improving air circulation.
- Labels and Marker: To keep track of what you’ve planted and when.
- Heat Mat (Optional but Recommended): For faster germination of some seeds, though not directly related to legginess, it can get your plants off to a stronger start.
- Pruning Shears/Scissors: For any necessary trimming or pinching when your seedlings get a bit larger.
Optional but Beneficial Items:
- pH Meter: To check the pH of your water and soil, although most seed-starting mixes are buffered appropriately.
- Thermometer/Hygrometer: To monitor ambient temperature and humidity around your seedlings.
- Reflective Material: Mylar or white reflective paint around your grow light setup can help maximize light distribution.
With these straightforward tools, you’ll be well-equipped to provide the ideal environment for robust, non-leggy seedling development, setting the stage for a truly successful gardening season.
Step-by-Step Guide: Preventing and Fixing Leggy Seedlings (leggy seedlings fix)
Addressing leggy seedlings requires a proactive approach and a clear understanding of their needs. Here’s a comprehensive, step-by-step guide to both preventing and correcting this common issue.
Step 1: Optimize Light (The Primary Cause)
Inadequate light is the number one reason seedlings become leggy. They stretch desperately towards perceived light, resulting in long, weak stems.
- Close Proximity: Place grow lights very close to your seedlings. For fluorescent lights (T5/T8), this typically means 2-4 inches above the plant tops. For LEDs, consult the manufacturer’s recommendations, but it’s often 6-12 inches, depending on their intensity. As seedlings grow, raise the lights to maintain this distance.
- Duration: Provide 14-16 hours of light per day. Use a timer for consistency. Giving seedlings a period of darkness (8-10 hours) is also crucial for their development and plant processes.
- Full Spectrum: Ensure your grow lights are “full spectrum” or mimic natural sunlight as closely as possible. Red and blue light wavelengths are particularly important for plant growth.
- Reflectivity: Maximize light by surrounding your seed-starting area with reflective materials like Mylar, white poster board, or aluminum foil. This bounces stray light back onto your plants.
Step 2: Ensure Proper Air Circulation
Just like plants outdoors, seedlings benefit immensely from gentle air movement. This might seem counterintuitive for leggy plants, but it’s a critical component of strengthening stems.
- Gentle Breeze: Place a small fan (an oscillating desk fan works perfectly) a few feet away from your seedlings. Set it on a low setting so that the leaves gently rustle, but don’t thrash. This mimics outdoor winds.
- Duration: Run the fan for several hours a day, initially starting with 15-30 minutes and gradually increasing to 4-6 hours.
- Benefits: Air movement helps thicken stems (a process called thigmomorphogenesis), making them more resistant to bending and breaking. It also reduces humidity around leaves, discouraging fungal diseases like damping-off.
Step 3: Bottom Watering and Avoiding Overwatering
Correct watering practices are vital for healthy root development and overall plant vigor. Overwatering can lead to shallow roots and contribute to legginess due to a lack of oxygen.
- Bottom Watering: Place your seedling trays in a larger tray filled with 1-2 inches of water. Let the seedlings absorb water from the bottom for 15-30 minutes, or until the top of the soil feels moist. This encourages roots to grow downwards.
- Check Soil Moisture: Always check the soil moisture before watering. Stick your finger into the soil up to the first knuckle. If it feels dry, it’s time to water. If it’s still damp, wait.
- Avoid Soggy Conditions: Never let seedlings sit in standing water for extended periods, as this can lead to root rot and damping-off disease. Ensure excellent drainage.
Step 4: Maintain Optimal Temperature
Temperature plays a role in seedling stretch. While warmth is good for germination, excessive heat once sprouts emerge can encourage rapid, leggy growth.
- Cooler Temperatures Post-Germination: Once seeds have germinated, slightly cooler temperatures (e.g., 65-70°F / 18-21°C) can help slow down upward growth and promote sturdier development. This is especially true overnight.
- Avoid Extremes: Protect seedlings from cold drafts or sudden temperature drops, which can stress them. Conversely, avoid placing them directly above heat vents or in excessively warm locations.
Step 5: Potting Up (When and How) and Burying Stems
If your seedlings have already become leggy, potting up is often the best solution. Many plants, particularly tomatoes and peppers, have the amazing ability to grow roots from their buried stems.
- Timing: Pot up when seedlings have developed at least two sets of true leaves (the leaves that appear after the initial “cotyledons”). Don’t wait too long, as crowded or root-bound seedlings can also become leggy.
- Deep Planting: When moving leggy seedlings to larger pots, bury the elongated stem. Plant them deeply so that only the top set of true leaves is above the soil line. For tomatoes and peppers, remove the lower leaves before burying the stem. The buried portion of the stem will send out new roots, strengthening the plant.
- Larger Pots: Choose pots that are only slightly larger than their current home (e.g., 2-4 inches in diameter). Too large a pot can lead to excess moisture and root rot.
Step 6: Gentle “Brushing” or “Petting”
This simple technique, like the fan, mimics outdoor conditions and encourages thicker stems.
- Regular Contact: Gently run your hand or a piece of cardboard over the tops of your seedlings several times a day.
- Mechanism: This light physical stress encourages the plant to produce hormones that promote stockier growth and stronger cell walls, effectively making them less leggy.
Step 7: Harden Off Before Transplanting
Hardening off is the gradual process of acclimating indoor-grown seedlings to outdoor conditions. Skipping this step can shock your plants, causing them to struggle and even die.
- Gradual Exposure: Over 7-14 days, progressively expose your seedlings to increasing periods of outdoor sunlight, wind, and cooler temperatures. Start with an hour in a shaded, sheltered spot, then gradually increase time and exposure to direct sun.
- Evening Retreat: Always bring seedlings indoors at night during the hardening-off process, especially if temperatures are still cool.
- Benefits: This process toughens cell walls, preventing transplant shock and ensuring your hardened-off, stocky seedlings can thrive vigorously in their new garden home. This preparation makes them far less susceptible to environmental stressors. Learn more about successful hardening off on our guide to hardening off.
Pro Tips and Common Mistakes to Avoid
Even with the best intentions, new and experienced gardeners alike can fall into common traps that lead to leggy seedlings. Here are some pro tips and crucial mistakes to sidestep on your journey to robust plant starts.
Pro Tips for Success:
- Germination Station vs. Growing Area: Consider separate areas if possible. Seeds often germinate best in warmer, higher humidity conditions. Once they sprout, moving them to a cooler, brighter area is ideal to prevent stretching.
- Rotating Trays: If your light source isn’t perfectly even, regularly rotate your seedling trays. This ensures all plants get equal exposure and prevents leaning towards the light.
- Fertilize Sparingly (if at all): Seed starting mixes typically contain enough nutrients for the first few weeks. Over-fertilizing young seedlings can burn delicate roots and encourage rapid, weak growth. If you do fertilize, use a very diluted, balanced liquid fertilizer (1/4 strength) only after true leaves appear.
- Sanitation is Key: Always use clean pots and sterile seed-starting mix. Sterilizing reusable pots (a bleach solution or boiling water) prevents diseases like damping-off, which can wipe out entire trays of seedlings.
- Read Seed Packets: Every seed packet contains valuable information regarding light, temperature, and depth for that specific plant. Following these guidelines will give your seedlings the best start.
- Embrace Technology: Simple timers for grow lights are inexpensive and invaluable for ensuring consistent light schedules, freeing you from daily manual adjustments. Explore smart gardening technology to make your life easier.
Common Mistakes to Avoid:
- Relying on Windowsills: While providing some light, windowsills rarely offer the intensity or duration required for strong seedling growth, especially during shorter winter days. Windowsills are a primary culprit of leggy seedlings.
- Forgetting About Airflow: A sealed, still environment creates stagnant air, encouraging fungal issues and weakening stems. Always provide gentle air circulation.
- Planting Too Thickly: Overcrowding causes competition for light, nutrients, and space, leading to internal legginess as plants stretch over each other. Thin seedlings mercilessly if they come up too close together. It feels harsh, but it benefits the survivors.
- Inconsistent Watering: Letting soil dry out completely, then drowning the seedlings, stresses them and can lead to poor growth. Maintain consistent, but not soggy, moisture levels.
- Ignoring Signs of Stress: Pale leaves, yellowing, or excessive stretching are all cries for help. Address issues promptly rather than waiting for them to become severe.
- Skipping Hardening Off: Transplanting tender indoor seedlings directly outdoors without hardening off often results in shock, stunted growth, or death. This crucial step is not optional for robust plants. For tips on maximizing your indoor space, check out this article on optimizing indoor gardening space.
By integrating these pro tips and diligently avoiding common pitfalls, you’ll significantly increase your chances of cultivating vigorous, non-leggy seedlings ready to powerhouse your garden.
Eco-Friendly Variations for Sustainable Seed Starting
Gardening is inherently an act of sustainability, and your seedling starting practices can further enhance this eco-conscious approach. Incorporating eco-friendly variations not only benefits the planet but often leads to healthier plants and a more fulfilling gardening experience.
- Repurpose & Recycle Containers: Instead of buying new plastic starter trays, look around your home! Yogurt cups, toilet paper rolls (for tap-rooted plants like carrots), plastic clamshell containers from berries (with drainage holes added), or milk cartons cut in half all make excellent, free seed-starting pots. Just ensure they are thoroughly cleaned and have drainage.
- DIY Seed Starting Mix: While commercial mixes are convenient, making your own can reduce packaging waste and allow you to source local, sustainable components. A common recipe involves equal parts coco coir (a renewable alternative to peat moss), perlite or vermiculite, and compost. Ensure compost is well-sieved and mature.
- Harness Natural Light (with Caution): While artificial lights are often necessary, supplementary natural light from a south-facing window can reduce electricity consumption. Just remember that it rarely suffices on its own and often results in leggy seedlings reaching towards the window. Use it to augment, not replace, dedicated grow lights.
- Compost Tea for Nutrients: Instead of synthetic fertilizers, use diluted compost tea as a gentle, organic nutrient boost once true leaves appear. This closes the loop in your garden system and introduces beneficial microbes.
- Long-Lasting Grow Lights: Invest in energy-efficient LED grow lights. While the initial cost might be higher, they consume significantly less electricity and last much longer than fluorescent bulbs, reducing waste and energy usage over time. Their focused spectrum also offers superior growth.
- Water Harvesting: If possible, collect rainwater for watering your seedlings. Rainwater is free of chlorine and other chemicals found in tap water, which can potentially harm delicate young plants. Even a simple rain barrel can make a difference.
- Biodegradable Pots: Consider using peat pots, coco coir pots, or newspaper pots that can be planted directly into the garden. This minimizes transplant shock and reduces plastic waste. While some peat pots can be problematic for moisture retention, coco coir options are a good alternative.
Embracing these eco-friendly methods not only helps cultivate robust seedlings but also aligns your gardening practices with broader environmental stewardship, fostering a healthier planet one plant at a time.
Seasonal Considerations for Indoor Seed Starting
The time of year you start your seeds indoors significantly impacts the challenges you’ll face regarding leggy seedlings. Understanding seasonal variations allows you to proactively adjust your setup and strategies.
- Winter Seed Starting (January-February): This is the most challenging time for preventing legginess.
- Light Intensity: Natural daylight is at its weakest and shortest during winter. Relying solely on windowsills is a guaranteed recipe for leggy plants. High-quality grow lights are absolutely essential and should be run for the full 14-16 hours.
- Temperature Control: Indoor temperatures can fluctuate more widely in winter, especially near windows. Be mindful of cold drafts that can stunt growth or overly warm spots near heaters that encourage rapid, weak development. A heat mat can aid germination, but remove it once sprouts emerge, aiming for slightly cooler ambient temperatures.
- Humidity: Winter air often has very low humidity, especially with indoor heating. Consider a humidity dome during germination, but remove it promptly once seeds sprout to improve air circulation and prevent damping off.
- Early Spring Seed Starting (March-April): As days lengthen, natural light improves, but grow lights remain crucial.
- Increasing Natural Light: While grow lights should still be the primary light source, seedlings will benefit more from ambient natural light during this period. Keep lights on for their full cycle, but note that the supplemental natural light is more effective now.
- Hardening Off: This is a critical period for hardening off. Start this process earlier in the spring as outdoor temperatures gradually become more hospitable. Monitor night temperatures carefully during this transition.
- Late Spring/Summer Seed Starting (May-July): For succession planting or specific heat-loving crops, indoor starting during warmer months has different considerations.
- Heat Management: Overheating can be an issue. Ensure good ventilation to prevent heat stress, which can also lead to elongated, weak growth. Fans are essential here for both stem strength and temperature regulation.
- Pest Watch: Warmer temperatures can mean more active indoor pests. Regularly inspect your seedlings.
- Light Intensity Outdoors: Natural light is abundant, making hardening off easier and quicker. However, initial direct sun exposure can still scorch tender leaves.
By factoring in the season, you can make informed adjustments to your light, temperature, and ventilation strategies, ensuring your seedlings receive optimal care regardless of when they begin their journey indoors.
Expert Resources for Further Learning
To deepen your understanding and refine your seedling cultivation skills, tapping into expert resources is invaluable. These institutions offer research-backed advice and practical guides.
- Gardening Know How: Gardening Know How – Saving Leggy Seedlings provides comprehensive articles on a wide range of gardening topics, including detailed advice on fixing leggy seedlings. Their practical approach is highly beneficial for home gardeners.
- Royal Horticultural Society (RHS): The RHS Guide to Leggy Seedlings offers authoritative information on seed starting and seedling care based on extensive horticultural research and experience. Their website is a treasure trove of knowledge for gardeners in temperate climates.
- University Extension Offices: Many universities across North America provide excellent, localized gardening advice through their extension programs. For example, the University of Minnesota Extension – Growing Seedlings Indoors offers science-backed recommendations tailored to specific regional conditions, often available at no cost. Search for your local university extension office for region-specific guidance.
These resources, combined with your hands-on experience, will transform you into a confident and successful seed starter, capable of nurturing the strongest, healthiest seedlings for your garden.
Conclusion: Cultivating the Foundation for Garden Success
Mastering the art of growing healthy, stocky seedlings is not merely a technical skill; it’s a foundational pillar for a thriving and productive garden. The journey from a tiny seed to a robust young plant is filled with challenges, and legginess stands out as one of the most common and easily preventable. By understanding the core principles – primarily adequate light, gentle air circulation, careful watering, and appropriate temperatures – you empower yourself to prevent elongation and cultivate sturdy, resilient plants from the outset.
Remember, those first few weeks of a plant’s life indoors are critical. They are a time of immense growth and vulnerability, where every environmental factor plays a decisive role in shaping the plant’s future vigor. Don’t be discouraged by initial leggy starts; instead, view them as valuable learning opportunities to refine your technique. With the actionable steps and insights provided in this guide – from optimizing your light setup and utilizing fans to practicing thoughtful potting up and consistent hardening off – you possess the knowledge to transform spindly sprouts into strong, stocky specimens.
Embrace the process, observe your plants closely, and be responsive to their needs. The reward for your diligence will be a garden brimming with health, vitality, and abundant harvests, all stemming from the strong, non-leggy foundation you built indoors. Happy seeding!
FAQ: Leggy Seedlings Fix
Q1: Can leggy seedlings still produce a harvest?
A1: Yes, leggy seedlings can still produce a harvest, especially if the legginess is minor and corrected early. However, they will likely be weaker, more susceptible to damage, and may produce a smaller or delayed yield compared to strong, stocky plants. Burying the stem when potting up can significantly help them recover and develop a stronger root system.
Q2: How far should my grow lights be from my seedlings?
A2: The optimal distance depends on the type and intensity of your grow lights. For fluorescent T5 or T8 lights, 2-4 inches above the plant tops is generally ideal. For LEDs, it can vary from 6-12 inches or more, so always consult the manufacturer’s recommendations. The key is to keep them close enough to prevent stretching without burning the delicate foliage.
Q3: What’s the biggest mistake people make that causes leggy seedlings?
A3: The single biggest mistake is providing insufficient light. Relying on a sunny windowsill, which offers much less intense and consistent light than direct outdoor sun or dedicated grow lights, is the primary culprit. Seedlings instinctively stretch and reach for any perceived light source, leading to their characteristic thin, elongated form.
Q4: Can I “save” leggy seedlings that are very tall and thin?
A4: Yes, often you can! For many plants (especially tomatoes, peppers, and some brassicas), the best fix is to “pot up” by planting them deeper into a larger pot, burying most of the elongated stem. New roots will typically form along the buried stem, providing the plant with a stronger foundation. Increasing light and adding gentle air circulation immediately after potting up will also help prevent further legginess.


