Ultimate 8-Step Guide: How to Grow Garlic in Pots on a Balcony for Bumper Harvests
Dreaming of fresh, homegrown garlic but limited to a small balcony or patio? Think it’s impossible to cultivate this pungent powerhouse without a sprawling garden plot? Think again! Growing garlic in pots on a balcony is not only achievable but incredibly rewarding, offering you access to fresh, flavorful cloves right outside your door.
[lwptoc]
Why Growing Garlic on Your Balcony Matters
Cultivating your own garlic transcends mere gardening; it’s a step towards self-sufficiency and a deeper connection to your food. For urban dwellers and those with limited space, a balcony garden transforms unused areas into productive oases. Freshly harvested garlic boasts a more intense flavor and aroma compared to store-bought varieties, elevating your culinary creations to new heights.
Beyond the culinary benefits, gardening offers a wealth of advantages for mental and physical well-being. The act of nurturing plants provides a meditative escape, reduces stress, and connects you with nature, even in the heart of a bustling city. Growing your own food also reduces your carbon footprint by cutting down on transportation and packaging, making it an eco-conscious choice.
Furthermore, knowing exactly what goes into your food—no pesticides, no strange chemicals—provides immense peace of mind. You control the entire growing process, ensuring wholesome, organic produce for your table. It’s an empowering experience that fosters a sense of accomplishment and culinary independence.

What You Need: Essential Tools and Materials for Balcony Garlic
Embarking on your balcony garlic journey requires a few key items. Fortunately, most are readily available and reusable, making this a sustainable and cost-effective endeavor. Investing in quality materials from the start will ensure a smoother growing process and healthier plants.
1. The Right Garlic Variety
- Hardneck vs. Softneck: Hardneck varieties produce a central flowering stalk (scape) and fewer, larger cloves, often preferred for their rich flavor and cold hardiness. Softneck varieties, on the other hand, have more numerous, smaller cloves and braid beautifully, ideal for warmer climates and storage. For balcony growing, both can work, but consider your climate and culinary preferences.
- Organic Seed Garlic: Do not plant garlic from the grocery store, as it’s often treated to prevent sprouting and may carry diseases. Purchase certified organic seed garlic from a reputable nursery or online supplier. This ensures healthy, disease-free starts and better yields.
- Local Adaptations: If possible, choose varieties known to thrive in your local climate. This increases your chances of success and often leads to more robust plants.
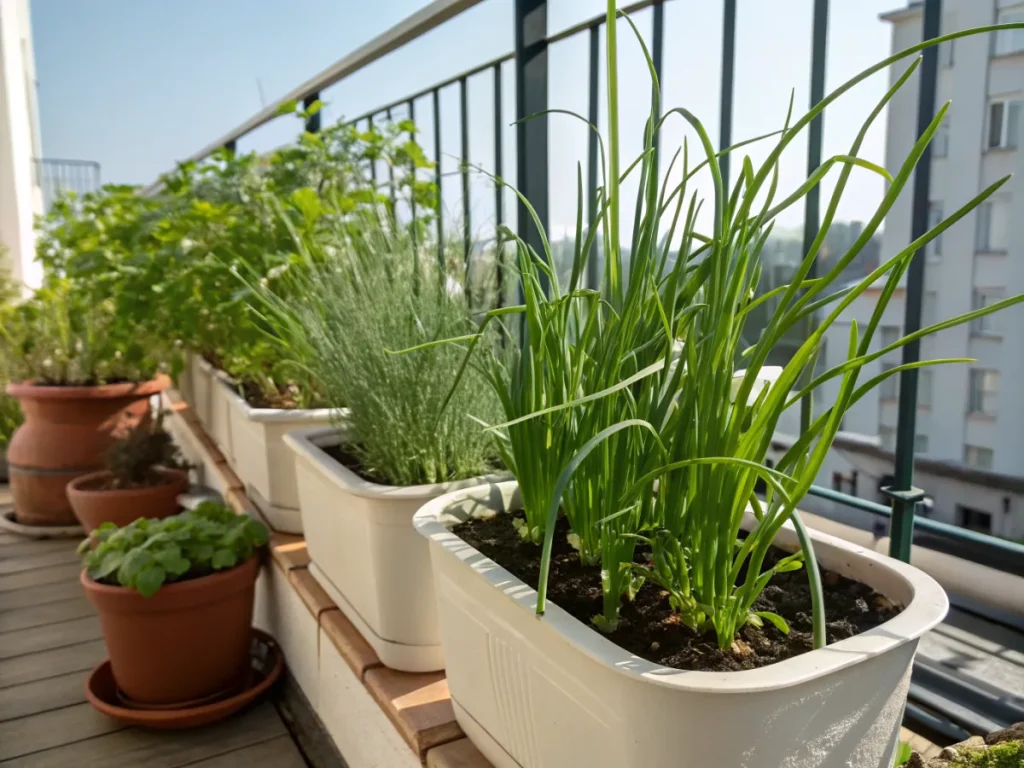
2. Suitable Pots and Containers
- Size Matters: Garlic needs depth for its roots. Choose pots that are at least 8-12 inches deep and 6-8 inches in diameter for a single plant, or larger containers (e.g., 18-24 inches wide) to accommodate multiple cloves. Terracotta pots, plastic containers, or fabric grow bags are all excellent options.
- Drainage Holes: This is non-negotiable. Garlic absolutely hates soggy feet, which leads to rot. Ensure all your pots have adequate drainage holes. If not, drill them yourself.
- Material Considerations: Terracotta breathes well but dries out faster. Plastic retains moisture but can heat up in direct sun. Fabric grow bags offer excellent aeration and drainage, preventing root circling, but may also dry out quickly.
3. Quality Potting Mix
- Well-Draining and Rich: A premium, well-draining potting mix is crucial. Avoid heavy garden soil, which compacts easily in pots. Look for mixes specifically formulated for containers, often containing peat, coir, perlite, and compost.
- Nutrient-Rich: Garlic is a heavy feeder. Amend your potting mix with a good quality compost or well-rotted manure to provide essential nutrients for strong growth. This builds a robust foundation for your plants.
- pH Level: Garlic prefers a slightly acidic to neutral pH (6.0-7.0). Most quality potting mixes will fall within this range.
4. Essential Tools
- Hand Trowel: For digging planting holes and working with soil.
- Gardening Gloves: To protect your hands.
- Watering Can or Hose with a Gentle Sprayer: Consistent, gentle watering is key.
- Small Clippers/Snips: For harvesting scapes (from hardneck varieties) and eventually the garlic itself.
- Optional: Fertilizer: A balanced liquid feed or slow-release granular fertilizer can be beneficial, especially if your potting mix isn’t heavily amended.
Step-by-Step Guide: Planting and Nurturing Your Balcony Garlic
Growing garlic is a long game, often taking 8-9 months from planting to harvest. Patience and consistent care are your greatest allies. Follow these steps for a successful balcony garlic patch.
Step 1: Choose Your Planting Time
Understanding when to plant your garlic is paramount, as it largely dictates success. Garlic is typically planted in the autumn for a summer harvest, allowing it to establish roots during the cooler months and then bulb up as temperatures rise in spring and early summer. The exact timing varies by climate zone.
- Cooler Climates (Zones 4-6): Plant in late September to October, about 4-6 weeks before the first hard freeze. This gives the roots time to develop before the soil freezes solid.
- Temperate Climates (Zones 7-8): Plant in October to November.
- Warmer Climates (Zones 9-10+): Plant in November to December, or even January, after the hottest summer temperatures have subsided. Softneck varieties often perform better in warmer regions.
The goal is to allow the cloves to develop a strong root system before winter dormancy, but not enough foliage to be damaged by severe frost. This vernalization period (exposure to cold) is crucial for bulb formation.
Step 2: Prepare Your Garlic Cloves for Planting
This critical step ensures each clove has the best chance to grow into a full bulb. Carefully separate the cloves from the garlic head, being gentle to avoid bruising the basal plate (the bottom, flat part where roots emerge).
- Break Apart Heads: Gently separate the individual cloves from the main garlic head just before planting. Do not separate them too early, as this can dry them out.
- Inspect Cloves: Choose the largest, healthiest, and firmest cloves. Discard any that are soft, shriveled, or damaged. Larger cloves generally yield larger bulbs.
- Keep the Wrapper On: Do not peel the papery skin off the cloves; this protects them from drying out and pests.
Note: Some gardeners experiment with soaking cloves in a weak seaweed solution or baking soda water for an hour before planting to boost germination and disease resistance. This is optional but can give your garlic an extra kickstart.
Step 3: Fill Your Pots and Plant the Cloves
Proper pot preparation and planting depth are vital for robust growth and bulb development. Ensure you leave adequate space for future growth and watering.
- Prepare the Pots: Fill your chosen containers with the well-draining, nutrient-rich potting mix, leaving about 1-2 inches of space from the rim. This prevents soil overflow when watering.
- Planting Depth and Spacing: Plant each clove pointed-side up, with the basal plate facing down. Bury them about 2-3 inches deep.
- Spacing: For single cloves in individual pots, ensure adequate depth. For multiple cloves in larger containers, space them about 4-6 inches apart to allow for bulb expansion. Avoid overcrowding, as this will lead to smaller bulbs.
- Cover Gently: Cover the cloves with more potting mix and gently pat down the surface.
Step 4: Initial Watering and Mulching
Consistent moisture and protection are key after planting. This step helps establish roots and provides insulation against temperature fluctuations.
- Initial Watering: Water thoroughly immediately after planting until water drains from the bottom of the pot. This settles the soil around the cloves.
- Apply Mulch: Apply a 1-2 inch layer of organic mulch (e.g., straw, shredded leaves, wood chips) over the soil surface. Mulching helps retain moisture, regulate soil temperature, suppress weeds, and provides some insulation against cold. Avoid excessively dense mulch that could hinder new shoots from emerging.
Step 5: Watering and Feeding Regime
Garlic has specific water and nutrient needs throughout its long growing cycle. Balancing these correctly will maximize your harvest. You can find more detailed information on watering techniques for container plants at nouvelles-technologie.com.
- Consistent Moisture: Garlic needs consistent moisture, especially during spring when bulbs are forming. Water deeply when the top inch of soil feels dry to the touch. Avoid overwatering, which leads to rot.
- Reduced Watering: Reduce watering as the leaves begin to yellow and die back, typically a few weeks before harvest. This aids in the curing process and prevents rot.
- Fertilize Regularly: Garlic is a heavy feeder. Begin fertilizing in early spring as new growth appears. Use a balanced liquid fertilizer (e.g., 5-1-1 or fish emulsion) every 2-4 weeks, or a slow-release granular fertilizer according to package directions. Discontinue fertilizing about a month before harvest.
Step 6: Sunlight and Balcony Placement
Sunlight is fuel for garlic. Your balcony’s orientation will play a significant role in your success.
- Full Sun Essential: Garlic requires at least 6-8 hours of direct sunlight per day to produce large, healthy bulbs. Position your pots in the sunniest spot on your balcony.
- Protection from Extreme Elements: While garlic tolerates cold, extreme winter winds can desiccate plants in pots. Consider temporarily moving pots to a more sheltered spot or providing a windbreak if your balcony is very exposed.
Step 7: Scape Management (Hardneck Varieties Only)
Hardneck garlic varieties produce a flower stalk called a “scape.” Managing these is crucial for maximizing bulb size.
- Identify and Remove: In late spring to early summer, hardneck varieties will send up a central, curly stalk (the scape). While beautiful, if left to grow, the plant will divert energy into seed production rather than bulb development.
- Harvesting Scapes: Once the scape forms a full curl (or two curls), snip it off near the base of the plant. This redirects the plant’s energy towards forming larger, plumper cloves below ground. Plus, garlic scapes are delicious! Use them in pestos, stir-fries, or roasted.
Step 8: Harvesting Your Balcony Garlic
Knowing when to harvest is another key to successful garlic growing. Timing is everything for good storage and flavor.
- Signs of Readiness: Garlic is typically ready for harvest in mid to late summer (July-August in the Northern Hemisphere). Look for the bottom 2-3 leaves to turn yellow and die back, while the upper leaves are still green. Don’t wait until all the leaves are dead, as this can cause the bulbs to split.
- Harvesting Process: Gently loosen the soil around the bulbs with a hand trowel. Carefully lift the entire plant from the pot, being mindful not to damage the bulbs. Shake off excess soil.
- Curing: Curing is essential for proper storage. Hang the garlic, still attached to its stalks and roots, in a cool, dark, well-ventilated area (e.g., a shed, garage, or shaded balcony corner) for 2-4 weeks. Avoid direct sunlight, which can cook the garlic.
- Storage: Once cured, the outer papery layers will be dry, and the necks will be tight. Trim the roots and stems (leaving about 1 inch of stem). Store your bulbs in a cool, dark, dry, and well-ventilated spot (50-60°F or 10-15°C) in mesh bags or open containers. Properly cured and stored garlic can last for many months. For more tips on storing garden produce, visit nouvelles-technologie.com.
Note: Some garlic varieties also produce bulbils (tiny, aerial cloves) on hardneck scapes. These can be planted to grow into larger cloves over 2-3 years, a fun long-term project!
Pro Tips and Common Mistakes to Avoid
Even seasoned gardeners can benefit from a few expert insights. Avoiding common pitfalls will ensure a smoother, more successful harvest for your balcony garlic.
Pro Tips:
- Crop Rotation in Pots: Even in containers, it’s good practice not to plant garlic in the same pot with the same soil year after year. Refresh your potting mix or sterilize it, or ideally, dedicate specific pots each year.
- Companion Planting: Consider companion plants known to deter garlic pests, such as chamomile or marigolds, in nearby pots.
- Feed the Soil: Regular additions of compost or organic matter will keep your potting mix healthy and vibrant, providing a continuous slow release of nutrients.
- Label Your Varieties: If planting multiple types, label your pots clearly to keep track of your hardnecks and softnecks, and their expected harvest times.
Common Mistakes to Avoid:
- Planting Grocery Store Garlic: As mentioned, this is a common rookie error. Always use certified seed garlic.
- Overwatering: The fastest way to kill garlic in pots is by overwatering, leading to root rot. Let the soil dry out slightly between waterings.
- Under-fertilizing: Garlic is a hungry plant. Starving it of nutrients will result in tiny, underdeveloped bulbs.
- Harvesting Too Early/Late: Pay close attention to the signs of readiness. Harvesting too early results in underdeveloped cloves, too late can lead to split bulbs that don’t store well.
- Insufficient Sunlight: Not enough sun means weak plants and small bulbs. Ensure your balcony offers at least 6-8 hours of direct light.
- Poor Drainage: Pots without adequate drainage are guaranteed to fail. Always ensure proper drainage holes.
Eco-Friendly Variations and Sustainable Practices
Gardening on your balcony offers numerous opportunities to embrace environmentally friendly practices. Every small act contributes to a healthier planet.
- Compost Your Scraps: Start a small balcony vermicomposting bin or a regular compost bin for kitchen scraps. The resulting compost can enrich your potting mix, reducing the need for purchased fertilizers.
- Rainwater Harvesting: Set up a small system to collect rainwater. Rainwater is free, unchlorinated, and excellent for plants. Even a simple bucket can collect enough for your pots.
- Recycle and Reuse: Repurpose old containers, buckets, or even sturdy grocery bags as planters (with added drainage holes, of course). Look for second-hand gardening tools.
- Natural Pest Control: Instead of chemical pesticides, use organic methods. Introduce beneficial insects, spray with neem oil, or make your own garlic/chili spray. Healthy, thriving plants are naturally more resistant to pests.
- DIY Fertilizers: Explore homemade liquid feeds like comfrey tea or nettle tea, full of essential nutrients for your plants.
Seasonal Considerations for Balcony Garlic Growing
Garlic’s long growing cycle spans multiple seasons, and understanding its needs throughout the year is essential for success, especially in a balcony environment.
Autumn: Planting Season
- Temperature Drop: This is when you plant your garlic. Ensure temperatures are consistently cool but before a hard freeze.
- Root Establishment: The primary goal is root development before winter. Mulch is crucial for insulation.
Winter: Dormancy and Protection
- Cold Protection: In colder regions, move pots closer to the building wall for warmth or wrap them in burlap for added insulation. Ensure they don’t freeze solid for extended periods, which can damage roots. Fabric grow bags can sometimes provide better insulation than terracotta in very cold snaps.
- Minimal Watering: Water sparingly during dormancy, only if the soil is completely dry. Overwatering in winter is a common cause of rot.
Spring: Growth Spurt
- Active Growth: As temperatures rise, garlic will vigorously sprout and begin leaf development. This is when feeding should begin.
- Consistent Watering: Increase watering frequency as the plant grows and temperatures warm.
- Scape Emergence: For hardnecks, watch for scapes to emerge in late spring to early summer; remove them promptly.
Summer: Bulbing and Harvest
- Bulb Formation: The plant diverts energy to forming the underground bulb. Continue regular watering and feeding.
- Signs of Readiness: Monitor the leaves for yellowing and dieback as a sign of impending harvest.
- Harvest and Cure: Harvest when ready, and thoroughly cure your garlic for long-term storage.
By understanding these seasonal nuances, you can proactively adjust your care routine and provide your balcony garlic with the optimal conditions for growth and a bountiful harvest.
Expert Resources for Further Learning
To deepen your knowledge and troubleshoot any specific issues, these reputable external resources offer excellent, research-backed information on growing garlic and general gardening practices.
-
Gardening Know How: Growing Garlic
This comprehensive guide covers everything from choosing varieties to pest control and harvesting, offering practical advice for gardeners of all levels.
-
RHS (Royal Horticultural Society): Grow Your Own Garlic
The RHS provides authoritative, detailed instructions on cultivating garlic, with a focus on best practices for successful yields and dealing with common problems.
-
University of Minnesota Extension: Growing Garlic in Home Gardens
University Extension services offer research-based information tailored to various climate zones, making them invaluable for understanding regional growing conditions and techniques.
Conclusion: Your Balcony, Your Garlic Journey
Growing garlic in pots on your balcony is a truly rewarding endeavor that brings the joy of homegrown produce to even the smallest spaces. It’s a testament to the fact that gardening isn’t limited by square footage, but by imagination and dedication. From the initial planting of a single clove to the satisfying harvest of plump, fragrant bulbs, each step offers a connection to nature and a sense of accomplishment.
Embrace the challenge, learn from your experiences, and savor the unique, robust flavor that only freshly harvested, home-grown garlic can provide. Your balcony garlic journey is more than just cultivation; it’s a sustainable, fulfilling, and delicious adventure that enriches both your kitchen and your lifestyle. Happy growing!
Frequently Asked Questions About Growing Garlic in Pots on a Balcony
Q1: Can I grow garlic indoors on a balcony year-round?
A1: While garlic needs a cold period (vernalization) to form a bulb, you can attempt to grow garlic in pots on a sheltered balcony year-round in very mild climates. In most regions, it’s a seasonal crop planted in autumn for a summer harvest. Indoors, it’s generally difficult to get full bulbs due to insufficient cold and light, though you can grow garlic greens from cloves.
Q2: How many garlic cloves can I plant in one pot?
A2: This depends on the pot size. For a 6-gallon (approx. 12-14 inch diameter) pot, you could plant 3-5 cloves, ensuring they are spaced 4-6 inches apart. For smaller, individual pots, one large clove per pot is ideal to give each bulb ample space to develop.
Q3: What are common pests or diseases for balcony garlic?
A3: Garlic in pots is generally less susceptible to ground-borne diseases. Common issues include rust (fungal disease appearing as orange spots) and occasionally thrips or onion maggots. Good air circulation, proper watering, and healthy soil can prevent most problems. If rust appears, remove affected leaves and ensure consistent watering. For insect pests, organic sprays like neem oil can be effective.
Q4: Can I use garlic greens (scapes) in cooking?
A4: Absolutely! Garlic scapes, the curly flower stalks from hardneck varieties, are a culinary delight. They have a milder, sweeter garlic flavor than the bulb itself and can be used in pestos, stir-fries, omelets, or roasted. Harvesting scapes also redirects the plant’s energy to bulb formation, leading to a larger garlic harvest.