The Ultimate Guide: 7 Proven Ways to Activate Store-Bought Compost
You’ve invested in bags of beautiful, dark compost, ready to enrich your garden and boost your plants. But have you ever considered that even premium bagged compost, while a good start, might not be teeming with life in the same way a freshly made, actively working compost pile is? The truth is, convenience often comes at a small cost: a reduction in the vibrant microbial diversity and activity that makes compost truly magical. This comprehensive guide will walk you through various simple yet powerful techniques to activate store-bought compost, transforming it from a good soil amendment into an extraordinary living ecosystem for your garden.
[lwptoc]
Why This Matters for Your Garden: The Power of Living Compost
Compost isn’t just about adding organic matter; it’s about adding life. A truly “activated” compost is a bustling metropolis of beneficial microorganisms – bacteria, fungi, protozoa, and even tiny invertebrates. These microscopic workers are the unsung heroes of your garden, performing countless vital functions that synthetic fertilizers simply cannot replicate.
When you introduce living compost to your soil, you’re not just feeding your plants; you’re feeding the soil itself. These microbes convert unavailable nutrients into forms plants can readily absorb, improve soil structure, enhance water retention, and even help suppress plant diseases. A thriving soil food web built upon active compost leads to healthier, more resilient plants, bountiful harvests, and a reduced reliance on chemical inputs.
Store-bought compost, while high in organic matter and nutrients, often undergoes processes like bagging, storage, and sometimes even pasteurization, which can deplete its microbial populations. By actively re-inoculating and waking up these bagged products, you unlock their full potential, ensuring your garden receives the maximum benefit from your investment.
What You Need: Tools, Materials, and Microbial Boosters
Activating your store-bought compost doesn’t require a complex laboratory. Most of what you need is readily available, and some “ingredients” you might even have lying around.
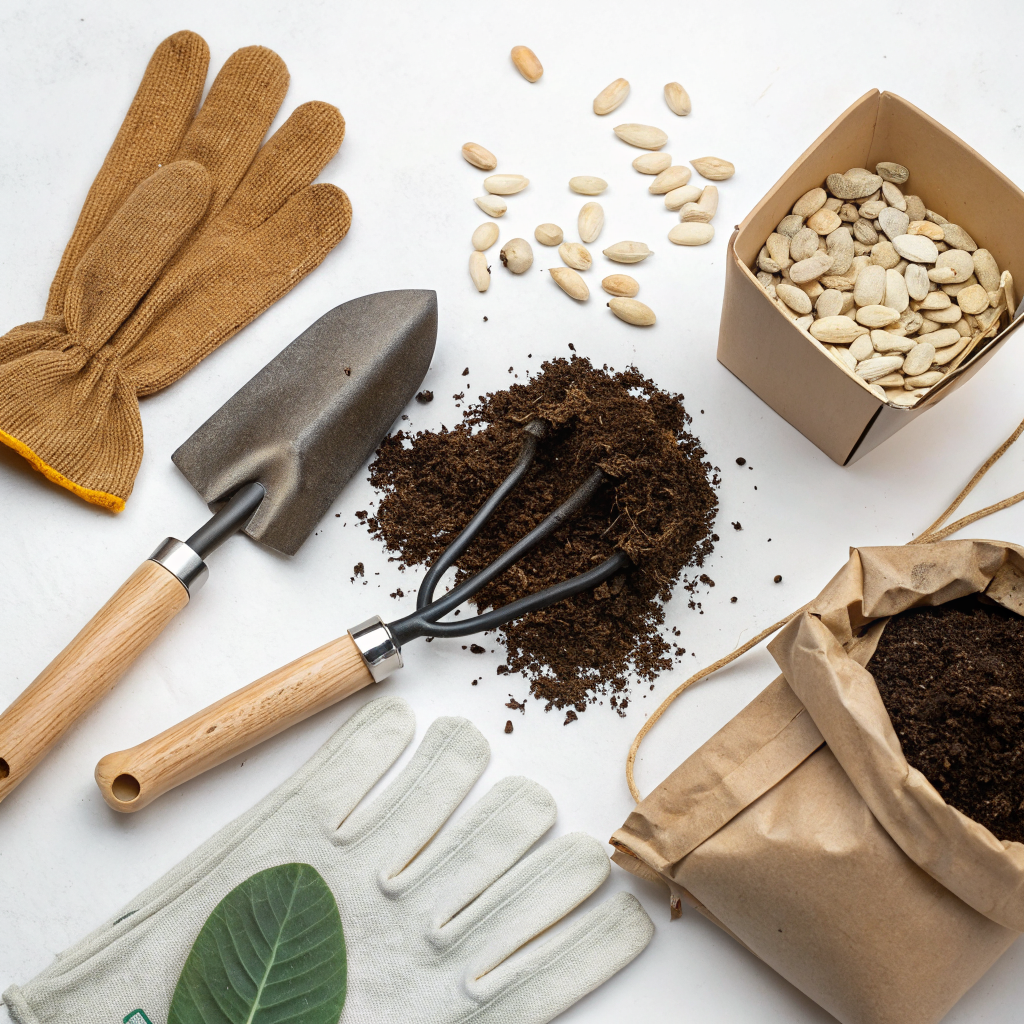
Essential Tools:
- Large container or tarp: For mixing and conditioning your compost. A wheelbarrow, large storage bin, or simply a clean tarp will work.
- Shovel or trowel: For easy mixing and turning.
- Watering can or hose with a gentle spray: To moisten the compost appropriately.
- Gloves: To keep your hands clean and protect them.
Key Materials for Activation:
- Store-bought compost: Your primary ingredient!
- “Starter” microbial inoculants: This is where the magic happens. Choose one or more from the following:
- Garden soil: A handful or two of healthy, living soil from your garden bed (especially if you’ve been composting or using organic methods) is a simple, effective inoculant.
- Homemade compost: If you have an active compost pile, a scoop of recent, finished compost is the absolute best activator you can get.
- Compost tea (liquid extract): Brewed from your own compost or purchased. This provides a liquid boost of microbes. Learn about making your own at how to make compost tea.
- Worm castings (vermicompost): Highly concentrated with beneficial microbes and nutrients. A little goes a long way.
- Agricultural molasses: A food source for microbes, encouraging them to multiply rapidly. Organic, unsulphured molasses is best.
- Kelp meal or seaweed extract: Rich in micronutrients and growth hormones that stimulate microbial activity and plant health.
- Commercial microbial inoculants: Available in powder or liquid form, these products are specifically formulated to boost soil biology. Always follow product instructions.
- Water: Non-chlorinated water is ideal. If using tap water, let it sit out for 24 hours to allow chlorine to dissipate.
Step-by-Step Guide: How to Activate Your Store-Bought Compost
Follow these steps to breathe new life into your bagged compost, creating a vibrant, microbe-rich amendment for your garden. Remember that consistency and patience are key.
Step 1: Choose Your Activation Method(s) and Gather Materials
Before you begin, decide which activation method(s) you’ll employ. You can use a single method or combine several for a synergistic effect. For example, you might combine garden soil with molasses, or worm castings with seaweed extract. Gather all your chosen tools and materials in one accessible location.
Having everything at hand will make the process smooth and efficient. Ensure you have enough space to work, especially if you’re activating multiple bags of compost.
Step 2: Prepare Your Compost Base
Empty your store-bought compost into your large container or onto your tarp. Break up any large clumps to ensure a uniform texture. This initial aeration is good for microbes and helps distribute inoculants evenly.
Inspect the compost for any foreign materials like plastic pieces or large wood chips that might have inadvertently made it into the bag. While rare, it’s a good practice.
Step 3: Introduce Your Microbial Inoculants
This is the core of activation. Depending on your chosen inoculant(s), apply them evenly over the compost pile.
- For garden soil or homemade compost: Sprinkle 1-2 cups of healthy soil or finished compost per cubic foot of bagged compost.
- For worm castings: Mix in about 1/2 to 1 cup of worm castings per cubic foot of compost.
- For molasses (diluted): Mix 1-2 tablespoons of unsulphured molasses into a gallon of non-chlorinated water.
- For kelp meal: Mix in according to package directions, typically 1/4 to 1/2 cup per cubic foot of compost.
- For commercial inoculants: Follow the manufacturer’s instructions precisely, as concentrations vary widely.
- For compost tea: Use the tea to moisten the compost in the next step.
Thoroughly mix these inoculants into the compost using your shovel or hands (with gloves). The goal is to distribute the beneficial organisms and their food sources throughout the entire batch.
Step 4: Moisten and Maintain Optimal Moisture Levels
Moisture is critical for microbial activity. Slowly add water (or compost tea if using) to the compost, mixing as you go, until it reaches a consistency similar to a wrung-out sponge. It should feel damp but not soggy, and you should be able to squeeze a few drops of water from a handful without it dripping excessively.
Water that is too dry inhibits microbial growth, while water that is too wet can lead to anaerobic conditions, which kill off beneficial aerobic microbes. Aim for that perfect balance.
Step 5: Aerate and “Cook” (Optional but Recommended)
Once moistened and inoculated, consolidate your compost into a loose pile. If possible, cover it lightly with a breathable material like burlap or a tarp to retain moisture and warmth while still allowing some airflow. This creates an ideal environment for microbial proliferation.
Over the next 1-2 weeks, ideally, turn the compost pile every 2-3 days. This reintroduces oxygen, distributes moisture, and ensures even microbial growth. You may even notice a slight increase in temperature, indicating active decomposition. If you’re short on time, even one thorough mix after a week will help significantly. The purpose of this step is to encourage the newly introduced microbes to multiply and spread throughout the compost, essentially “cooking” it to a higher level of biological activity.
Step 6: Integrate with Existing Soil or Use as a Top Dressing
After your activation period, your compost is now bursting with life! You can mix it directly into your garden beds to improve soil structure and fertility. For best results, aim for a 1-2 inch layer integrated into the top 6-8 inches of soil, depending on your soil structure and your gardening goals. Don’t be afraid to experiment with different ratios to find what works best for your specific plants and soil conditions.
Alternatively, use it as a generous top dressing around plants and trees. The nutrients and microbes will slowly leach into the soil with each watering, providing a continuous feed. This method is particularly beneficial for established plants and trees, providing a steady supply of nutrients without disturbing roots.
Step 7: Monitor and Replenish (Ongoing Garden Health)
The work doesn’t stop after initial application. Healthy soil is a dynamic, living system. Continue to monitor your soil’s health, and consider periodic applications of activated compost, especially before planting new crops or at the beginning of the growing season. Think of it as a continuous feeding program for your soil’s microbiome.
Regularly adding organic matter and promoting biodiversity in your garden through techniques like cover cropping, mulching, and minimizing soil disturbance will further enhance the benefits of activated compost. These practices mimic natural ecosystem processes, creating a resilient and productive garden environment.
Pro Tips and Common Mistakes to Avoid
Even simple processes have nuances. Here are some pro tips to maximize your success and common blunders to sidestep.
Pro Tips for Supercharging Your Compost:
- Diversity is Key: Don’t rely on just one type of inoculant. Combining garden soil, worm castings, and a splash of molasses provides a broader spectrum of microbes and food sources.
- Warmth Helps: Microbes thrive in warm conditions (but not excessively hot, which can kill them). If activating in cooler weather, try to do it in a sunny spot or even indoors in a garage for a few days.
- Consider Brewing Compost Tea: For a quick microbial boost that can be watered directly onto plants or used to moisten your bagged compost, learn how to make compost tea. For detailed instructions, check out compost tea for garden.
- Don’t Be Afraid of the Dark: Keep your compost covered during the activation period. While aeration is good, direct sunlight can dry it out and inhibit microbial activity on the surface.
- Layering for Efficiency: If activating a large batch, layer your compost with your chosen inoculants and then mix thoroughly. This helps ensure even distribution.
Common Mistakes to Avoid:
- Over-wetting: Too much water leads to anaerobic conditions, which produce foul odors and kill off beneficial aerobic microbes. Aim for that wrung-out sponge consistency.
- Ignoring Aeration: Forget to turn your compost, and the beneficial aerobic microbes will suffer. Regular turning is vital for oxygenation.
- Using Chlorinated Water: Chlorine can harm beneficial microbes. If you’re using tap water, let it sit in an open container for 24 hours to allow the chlorine to off-gas, or use rainwater.
- Expecting Instant Results: While activation is relatively quick, the full benefits of a microbe-rich soil amendment accrue over time. Patience is a virtue in gardening.
- Applying to Excessively Dry Soil: If your garden soil is bone dry, the microbes in your activated compost will struggle to establish themselves. Water your garden lightly before applying.
- Mixing with Chemical Fertilizers: Chemical salts in synthetic fertilizers can harm beneficial soil microbes. Stick to organic amendments when applying activated compost.
Eco-Friendly Variations and Sustainable Practices
Activating store-bought compost is inherently an eco-conscious practice, but you can take it a step further with these sustainable variations.
- Homemade Activators: Prioritize using inoculants you can make yourself or source locally. This includes homemade compost, worm castings from a home vermicomposting bin, and healthy garden soil. This reduces packaging waste and transportation emissions.
- Rainwater Harvesting: Collect rainwater for moistening your compost. It’s naturally chlorine-free and reduces your reliance on municipal water supplies. A simple barrel connected to a downspout can provide ample water.
- Closed-Loop System: Aim to create a closed-loop system in your garden. Use compost you activate, grow thriving plants, and then compost plant trimmings and kitchen scraps to create more homemade compost. This reduces waste and continuous input needs. For more on zero-waste gardening, check out zero-waste gardening tips.
- Mulching with Compost: After activation, use a layer of compost as mulch. This conserves moisture, suppresses weeds, and continuously feeds the soil as it slowly breaks down, fostering long-term soil health.
- Avoid Peat-Based Compost: While peat is a good growing medium, its harvesting can be environmentally damaging. Opt for coir-based or other sustainable alternatives for your base compost if possible.
Seasonal Considerations for Compost Activation
The time of year influences how you might approach activating your compost and how quickly it responds.
- Spring: This is an ideal time for activation. The warming temperatures encourage rapid microbial proliferation. Prepare your activated compost a few weeks before your main planting season to have it ready for eager young plants.
- Summer: Heat can be a double-edged sword. While microbes love warmth, excessive heat can dry out your compost quickly. Ensure consistent moisture and consider activating in a shaded area. Turnover is crucial to prevent overheating in direct sun.
- Autumn: A great time to prepare for next spring. Activate compost and gently incorporate it into your garden beds or use it as a top dressing. The microbes will continue to work slowly through the cooler months, conditioning your soil for an early spring start.
- Winter: Microbial activity slows significantly in freezing temperatures. While you can still inoculate, the “activation” process will largely pause until warmer weather returns. Focus on storing your finished compost properly or preparing it indoors if you have a warm space.
Expert Resources for Deeper Learning
To further deepen your understanding of compost, soil biology, and sustainable gardening, explore these reputable external resources:
- Gardening Know How: An excellent resource for practical gardening advice on a vast array of topics, including composting and soil health. Search their site for more insights into soil microbiology and organic amendments. Gardening Know How
- Royal Horticultural Society (RHS): The RHS provides science-backed information on all aspects of horticulture, including detailed guides on composting, soil improvement, and beneficial organisms. Their advice is invaluable for any gardener. Royal Horticultural Society
- University of Minnesota Extension: University extension offices offer research-based information tailored for local climates and conditions. Their publications on composting, soil testing, and sustainable gardening practices are highly reliable. University of Minnesota Extension
Conclusion: Unleash the Power of Living Soil
Activating store-bought compost is a small step that yields monumental results for your garden. By taking the time to inoculate and nurture your bagged compost, you’re not just adding nutrients; you’re infusing your soil with a living, breathing ecosystem of beneficial microbes. This microbial workforce works tirelessly to break down organic matter, cycle nutrients, improve soil structure, and protect your plants from diseases.
The benefits extend beyond thriving plants to a more resilient, sustainable garden ecosystem. You’ll reduce your reliance on synthetic inputs, encourage biodiversity, and foster a healthier environment. So, the next time you bring home a bag of compost, remember: it’s not just dirt in a bag; it’s a dormant powerhouse waiting for you to awaken its full potential. Embrace these techniques, and watch your garden flourish with unprecedented vitality.
Note: Always wear gloves when handling compost and wash your hands thoroughly afterward. While beneficial, compost can contain various microorganisms. If you have any health concerns, consult a medical professional.
FAQ: Activating Store-Bought Compost
Q1: How long does it take for store-bought compost to activate?
A1: The primary activation (where microbes begin multiplying) can take anywhere from a few days to two weeks, depending on the inoculants used, moisture, and temperature. For best results, allow at least a week before applying it to your garden.
<h4>Q2: Can I just add inoculants without turning the compost?</h4>
<p>A2: While adding inoculants without turning is better than doing nothing, regular turning (aeration) significantly speeds up microbial activity and ensures an even distribution of organisms and oxygen. For optimal results, aim to turn every 2-3 days for a week or two.</p>

<h4>Q3: Is it possible to over-activate compost?</h4>
<p>A3: You can't really "over-activate" compost in a harmful way. The microbes will multiply to their optimal levels given the conditions and then maintain that population. However, letting compost dry out or become waterlogged can hinder their activity. The goal is to maintain ideal conditions for a thriving microbial community.</p>

<h4>Q4: What if my activated compost starts to smell bad?</h4>
<p>A4: A foul, rotten smell indicates anaerobic conditions, usually caused by too much moisture and not enough oxygen. If your compost smells bad, it's too wet. Spread it out, introduce more air by turning it thoroughly, or mix in some dry materials like wood chips or shredded cardboard to absorb excess moisture. Then, re-cover and continue aeration.</p>