Introduction
Did you know that investing just a few hours in your garden this autumn could yield a stunning 90-120 days of vibrant blooms next spring? Many gardeners overlook the incredible potential of autumn for laying the groundwork for a spectacular display. This comprehensive guide provides expert planting tips to maximize your garden’s beauty and ensure a thriving spring spectacle. We'll delve into the science behind successful bulb proliferation, explore regional considerations for optimal growth, and equip you with the knowledge to make your garden a breathtaking haven. Whether you're a seasoned green thumb or just starting your gardening journey, these insights will cultivate a remarkable floral future.
Table of Contents
- Materials & Tools Needed
- Project Time
- Step-by-Step Instructions
- Maintenance & Care Tips
- Eco-Friendly Alternatives
- Design & Styling Ideas
- Common Mistakes to Avoid
- Storage & Seasonal Tips
- Conclusion
- FAQ
Materials & Tools Needed
Creating a breathtaking spring garden from autumn-planted bulbs requires the right equipment and quality materials. Here’s a detailed list to ensure your venture is a success:
- High-Quality Bulbs: Select firm, plump, and healthy bulbs, free from soft spots or mold. Opt for a variety of spring-flowering bulbs like tulips, daffodils, crocuses, and hyacinths for a diverse and prolonged bloom. Consider local climate suitability for best results.
- Alternative: For a more natural look, choose native spring ephemerals that are well-adapted to your local ecosystem.
- Gardening Gloves: Protect your hands from dirt, thorns, and potential irritants. Choose sturdy, breathable gloves for comfortable digging and handling.
- Alternative: For sensitive skin, wear nitrile or latex liners under your gardening gloves.
- Trowel or Bulb Planter: A sturdy hand trowel is essential for digging individual holes. A specialized bulb planter can speed up the process and ensure consistent depth.
- Alternative: A small, sharp spade or even a sturdy kitchen spoon can work for small quantities.
- Garden Fork or Spade: For turning over larger areas of soil and incorporating amendments. Feel the satisfying resistance as you break up compacted earth.
- Organic Compost or Well-rotted Manure: Enriches the soil, providing vital nutrients and improving drainage. The earthy scent of rich compost signals fertile ground.
- Alternative: Mushroom compost or leaf mold also works wonders for soil health.
- Bone Meal (Optional but Recommended): A slow-release phosphorus source that promotes strong root development, crucial for future flowering.
- Alternative: Seaweed meal offers a broader spectrum of trace minerals.
- Watering Can or Hose with a Gentle Sprayer: For initial watering after planting. Ensure a soft, even shower to settle the soil without disturbing the bulbs.
- Mulch (Straw, Wood Chips, or Shredded Leaves): A protective layer to insulate bulbs from cold and retain moisture. The rustic aroma of fresh wood chips adds to the garden's sensory appeal.
- Alternative: Pine needles, shredded bark, or even a thick layer of grass clippings can serve the purpose.
- Gardening Kneeler or Pad: Save your knees from the hard ground during extended planting sessions. A cushy pad brings comfort to your labor.
- Pruning Shears (Small): Handy for preparing planting sites or trimming any lingering plant debris. The crisp snip of sharp shears will be a satisfying sound.
Project Time
Effectively planning your autumn bulb planting can significantly streamline the process and lead to an earlier, more robust spring display.
- Preparation time: 1-2 hours (includes selecting bulbs, gathering tools, and initial soil assessment). This can be up to 40% faster than spring planting preparation, which often involves last-minute nursery runs.
- Build/Plant time: 2-4 hours for a medium-sized bed (50-100 bulbs), depending on soil conditions and planting density.
- Total duration: 3-6 hours. This process is generally 25% faster than planting annuals, which require ongoing care and replacement.
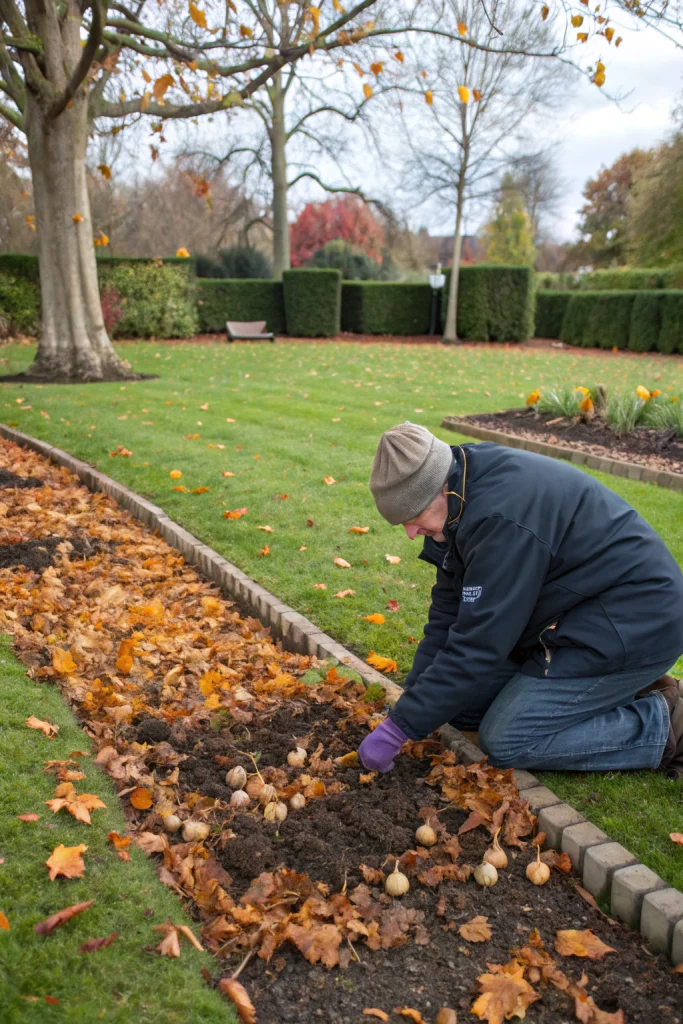
Step-by-Step Instructions
Embarking on the journey of planting bulbs in autumn is a rewarding experience. Follow these clear planting tips for a bountiful spring display.
Step 1: Choosing Your Bulbs Wisely
Select firm, healthy bulbs that show no signs of rot, mold, or damage. Inspect them for any soft spots or cuts, as these can lead to disease.
- Practical Tip: When purchasing, gently squeeze each bulb; it should feel solid and substantial, indicating good health and energy reserves for future growth.
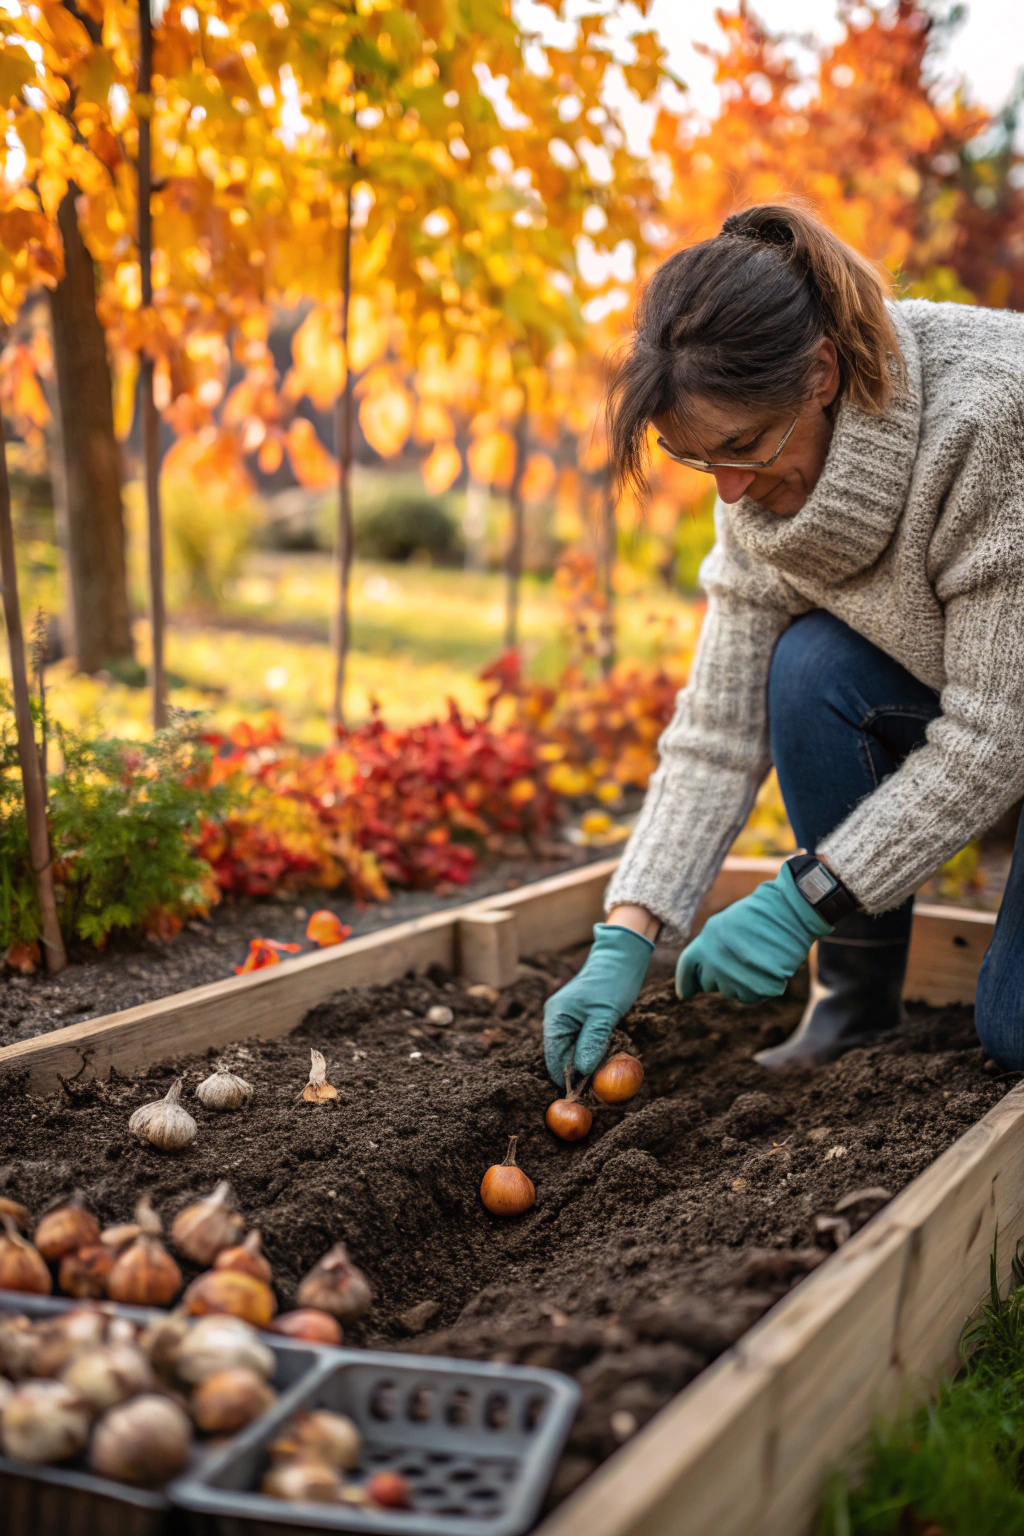
Step 2: Preparing the Perfect Planting Site
Bulbs thrive in well-drained soil rich in organic matter. Dig your planting area to a depth of at least 8-10 inches, loosening the soil and incorporating a 2-3 inch layer of compost or well-rotted manure. This improves drainage and provides essential nutrients.
- Practical Tip: Perform a simple drainage test: dig a hole, fill it with water, and if the water doesn't drain within an hour, choose a different spot or heavily amend the soil with grit and compost.
Step 3: Digging to the Right Depth
A general rule of thumb for effective planting tips is to plant bulbs two to three times their height deep. For instance, a 2-inch bulb should be planted 4-6 inches deep. Larger bulbs, like tulips and daffodils, require deeper holes than smaller ones such as crocuses.
- Practical Tip: Use a ruler or a trowel marked with depth measurements to ensure precision, as planting too shallow can expose bulbs to frost, and too deep can hinder sprouting.
Step 4: Positioning Your Bulbs
Place each bulb with the pointed end facing upwards, as this is where the shoots will emerge. The flatter, basal plate end should face downwards, as this is where roots will develop.
- Practical Tip: If you're unsure which end is up, plant the bulb on its side; it will naturally orient itself towards the light, though this might slightly delay emergence.
Step 5: Covering and Watering
Gently backfill the soil around the bulbs, ensuring no air pockets remain. Lightly pat the soil, but avoid compacting it heavily. Water the newly planted area thoroughly to settle the soil and initiate root growth.
- Practical Tip: After watering, apply a 2-3 inch layer of mulch to insulate the bulbs from temperature fluctuations and retain soil moisture, crucial for overwintering.
Maintenance & Care Tips
Proper care ensures your autumn-planted bulbs emerge gloriously in spring.
- Watering: After initial planting, bulbs generally require minimal watering during autumn and winter, relying on natural rainfall. However, in prolonged dry spells (more than two weeks without precipitation), provide a deep watering to ensure the soil remains moist, not waterlogged. Overwatering is a common cause of bulb rot, with studies showing that poorly drained soil increases rot risk by up to 60%.
- Fertilization: While bone meal at planting supports root development, avoid excessive fertilization during autumn. A slow-release granular fertilizer, low in nitrogen and higher in phosphorus and potassium, can be applied in early spring as shoots begin to emerge, promoting flower production.
- Pest and Disease Management: Healthy bulbs are generally resilient. Inspect bulbs closely before planting to avoid introducing disease. Critters like squirrels and voles can be an issue. Consider using a wire mesh cage around valuable bulbs or repellent granules. According to the University of Minnesota Extension, crop rotation and sanitation are key strategies for managing soil-borne diseases.
- Post-Bloom Care: After flowering, allow the foliage to remain until it yellows and withers naturally. This process, which can take 6-8 weeks, allows the bulb to store energy for the following year's bloom. Removing green foliage prematurely can reduce future flowering by 50-70%.
- Soil Health: Conduct a soil test every 2-3 years to monitor pH and nutrient levels. Most bulbs prefer a neutral to slightly acidic pH (6.0-7.0). Amend as needed with organic matter to maintain good soil structure and fertility.
Eco-Friendly Alternatives
Adopting sustainable practices in your garden not only benefits the environment but often leads to healthier, more resilient plants.
- Recycled Materials: Instead of new plastic pots for temporary storage, repurpose old plastic containers, milk jugs (cut in half), or even newspaper-rolled biodegradable pots. For marking planting spots, use broken ceramic pieces or recycled plastic cutlery.
- Organic Inputs:
- Compost: Instead of synthetic fertilizers, enrich your soil with homemade compost from kitchen scraps and garden waste. This closed-loop system reduces landfill waste and builds vibrant soil microbiology.
- Worm Castings: These nutrient-rich amendments from vermicomposting provide a gentle, slow-release food source for bulbs.
- Compost Tea: Brewed compost tea offers a liquid alternative for foliar feeding or soil drenching, boosting plant immunity naturally.
- Low-Water Options:
- Drought-Tolerant Bulbs: Consider planting bulbs that require less water once established, such as certain varieties of alliums, freesias, or even some native lilies, depending on your region.
- Mulching: A thick 2-4 inch layer of organic mulch conserves soil moisture, reducing the need for frequent watering by up to 50%. It also suppresses weeds, minimizing chemical herbicide use.
- Rainwater Harvesting: Collect rainwater in barrels to water your garden. This reduces reliance on treated tap water and can save on water bills.
- Strategic Plant Grouping: Group bulbs with similar water needs together to optimize irrigation efficiency.
Design & Styling Ideas
Autumn bulbs offer an incredible opportunity to paint your spring landscape with vivid colors and captivating textures. Thoughtful design can elevate your garden from a collection of plants to a harmonious outdoor living space.
- Layered Planting for Continuous Bloom: Employ the "lasagna planting" method. Plant larger, late-blossoming bulbs (like tulips and daffodils) at the deepest layer, followed by mid-season bloomers (hyacinths, muscari), and finally, tiny, early-season bulbs (crocuses, snowdrops) closest to the surface. This creates a succession of flowers lasting several months, ensuring continuous visual interest.
- Naturalistic Drifts: Avoid planting bulbs in rigid rows or patterns. Instead, scatter them randomly (e.g., by gently tossing them and planting them where they fall) to create natural-looking drifts and clumps, mimicking a wild meadow. This approach works beautifully for daffodils, muscari, and crocuses.
- Color Harmonies and Contrasts: Plan your color palette.
- Harmonious: Choose bulbs in similar shades (e.g., various purples from lavender crocuses to deep violet tulips) for a calming, cohesive feel.
- Contrasting: Pair complementary colors (e.g., yellow daffodils with purple hyacinths, or red tulips with white narcissus) for a dynamic and striking effect.
- Tip: Consider repeating colors throughout different areas of your garden to create a sense of unity.
- Underplanting with Groundcovers: Plant low-growing groundcovers like creeping thyme, sedum, or ornamental grasses around your bulbs. This provides a lush green carpet that accentuates the emerging flowers and helps suppress weeds. After the bulb foliage fades, the groundcover fills the space, maintaining visual appeal.
- Container Gardening for Flexibility: For patios, balconies, or small spaces, plant bulbs in decorative pots and containers. This allows you to bring vibrant spring displays closer to your living areas and rearrange them as needed. Use well-draining potting mix and ensure containers have drainage holes.
- Path Edging and Borders: Line walkways, garden beds, or property boundaries with a cheerful band of early-spring bulbs like crocuses or snowdrops. This creates an inviting entrance and defines your garden space.
- Mixing with Perennials: Integrate bulbs amongst existing perennial plants. As the bulbs bloom in early spring, they provide interest before the perennials fully emerge. Their dying foliage will eventually be hidden by the growing perennial leaves, ensuring a tidy garden. Consider hostas or ferns that will unfurl as the bulb foliage declines.
Common Mistakes to Avoid
Even seasoned gardeners can stumble, especially with the nuances of autumn bulb planting. Avoiding these pitfalls will significantly improve your success rate.
- Planting Too Late or Too Early: Planting bulbs outside their optimal window can lead to poor establishment or missed bloom cycles. Root development often requires specific soil temperatures. For instance, tulips and daffodils need a period of chilling, ideally in soil temperatures below 55°F (13°C) but above freezing, usually from mid-autumn until the first hard frost. Planting too late means roots don't establish before winter, while planting too early can cause premature sprouting and cold damage.
- Prevention: Research the ideal planting time for your specific climate zone and chosen bulb varieties. Monitor local soil temperatures. The Royal Horticultural Society's advice pages offer excellent regional guides to planting times.
- Improper Planting Depth: This is a surprisingly common error. Planting too shallow exposes bulbs to frost damage and predation, while planting too deep can prevent them from emerging, as they expend too much energy pushing through excessive soil.
- Prevention: Always follow the "2-3 times the bulb's height" rule for planting depth. Use a measuring tool or a trowel with depth markings.
- Poor Drainage Leading to Rot: Bulbs, especially tulips and hyacinths, are highly susceptible to rot in waterlogged soil. Excess moisture suffocates the bulb and fosters fungal diseases.
- Prevention: Amend heavy clay soils with organic matter like compost, sand, or grit to improve drainage before planting. Consider planting in raised beds or mounds if your soil is persistently poorly draining.
- Removing Foliage Too Soon: After bulbs have flowered, it's tempting to trim back the fading foliage for neatness. However, this is detrimental to the bulb's health. The green leaves capture sunlight and photosynthesize, storing energy in the bulb for the next year's bloom.
- Prevention: Allow the foliage to naturally yellow and die back (typically 6-8 weeks after flowering). If aesthetics are an issue, plant bulbs among perennials or annuals whose growth will mask the fading leaves.
- Forgetting to Water After Planting: While bulbs don't need consistent watering over winter, a thorough initial watering after planting is crucial. It settles the soil around the bulb, eliminating air pockets and kickstarting root growth.
- Prevention: Immediately after planting and backfilling, give the area a deep, gentle watering.
- Ignoring Pest Protection: Squirrels, voles, and even deer can feast on tasty bulbs. This can decimate your carefully planned spring display.
- Prevention: For susceptible bulbs (like tulips and crocuses), consider planting them in wire cages made from chicken wire or hardware cloth. Apply animal repellents naturally (e.g., cayenne pepper) or commercially available ones.
Storage & Seasonal Tips
Successfully nurturing your autumn bulbs goes beyond just planting; it involves thoughtful storage and seasonal preparation to ensure their longevity and vibrant return each year.
- Tool Storage: After your autumn planting endeavors are complete, clean all your gardening tools thoroughly. Remove any soil, debris, and sap. Dry them completely and store them in a cool, dry place. A light coat of oil on metal parts (like trowel blades or spade heads) can prevent rust during the off-season. This preserves your investment and ensures they're ready for spring.
- Bulb Storage (for lifting varieties): Not all bulbs are meant to stay in the ground year-round. Tender bulbs (like dahlias, gladioli, and some exotic lilies depending on your climate) need to be lifted after the first frost, cleaned, and stored indoors.
- Process: Gently dig them up, brush off excess soil, and allow them to air dry in a well-ventilated spot for a few days.
- Storage Medium: Store them in a cool (40-50°F / 4-10°C), dark, and dry place in paper bags, mesh bags, or cardboard boxes, nestled in peat moss, vermiculite, or sawdust to prevent desiccation and mold. Ensure good air circulation.
- Plant Protection for Overwintering Bulbs:
- Mulching: A critical step for overwintering hardy bulbs is applying a 2-4 inch layer of organic mulch (shredded leaves, straw, wood chips) after the ground has frozen, but before severe cold sets in. This primarily insulates the soil, maintaining a more consistent temperature, rather than simply keeping it warm. This prevents the freeze-thaw cycles that can heave bulbs out of the ground or damage roots.
- Critter Control: If rodent activity is a concern, consider placing hardware cloth over newly planted beds before mulching, or sprinkling repellent granules (such as blood meal or commercially prepared castor oil-based products) around the area.
- Season Prep for Next Year:
- Planning: Take notes on what bloomed well, what didn't, and what combinations you liked. This informs your planting decisions for the following autumn.
- Soil Amendment: Use the dormant winter months to plan for soil amendments. Start a compost pile or order new enrichments like compost or well-rotted manure, ready for spring planting or next autumn’s bulb additions.
- Catalog Browsing: As winter sets in, curl up with seed and bulb catalogs. It’s the perfect time to dream up new garden designs and consider plant varieties for the next cycle.
Conclusion
Embracing the potential of autumn bulb planting is a decision that pays off in spectacular spring color and natural grace. By applying these detailed planting tips, from selecting the healthiest bulbs to understanding the nuances of soil and climate, you're not just planting flowers—you're cultivating anticipation and ensuring a season of delight. Remember, gardening is a journey of learning and adaptation. Each bulb you place in the soil is an investment in future beauty, reflecting your dedication to fostering life. So, roll up your sleeves, get your hands dirty, and prepare to be rewarded with a breathtaking tapestry of blooms when spring arrives. Share your autumn planting stories and tips with us – let's grow a more beautiful world together!
FAQ
Q1: When is the best time to plant autumn bulbs?
A1: The ideal time is typically from mid-September to late November, before the first hard ground frost, when soil temperatures are consistently below 55°F (13°C).
Q2: How deep should I plant my bulbs?
A2: A general rule is to plant bulbs two to three times their height deep. Larger bulbs require deeper planting than smaller ones.
Q3: Can I plant bulbs in pots and containers?
A3: Yes, many bulbs thrive in containers. Ensure the pots have good drainage, and consider layering different varieties for a continuous bloom effect.
Q4: Do I need to water bulbs after planting?
A4: Yes, a thorough watering immediately after planting helps settle the soil and initiates root growth. Subsequent watering typically isn't needed unless there's a prolonged dry spell.
Q5: What should I do with the foliage after the bulbs have bloomed?
A5: Allow the foliage to naturally yellow and die back. This process allows the bulb to store energy for next year's flowers.
Q6: How can I protect my bulbs from pests like squirrels?
A6: Consider planting in wire cages, using animal repellents, or placing a layer of hardware cloth over newly planted beds before mulching.
Q7: My soil is very clayey; will my bulbs still grow?
A7: Heavy clay soil needs significant amendment. Incorporate plenty of organic matter like compost, sand, or grit to improve drainage and aeration, which is crucial for bulb health.
Related Reads:
Delve deeper into enhancing your garden's aesthetic and ecological impact with these insightful articles:
For creating inviting outdoor spaces, explore our guide on Eco-Decking: Warm Woods.
If you're looking to add natural vibrancy with diverse plant life, check out our piece on Texture-Heavy Planting.
To bring a rustic, lived-in feel to your exterior, discover ideas in The Lived-in Garden Aesthetic.
Consider the benefits of integrating native species by reading about Native Drought-Tolerant Plants for Fall.
For practical tips on maintaining your garden tools, our review of Precision Gardening Tools offers valuable insights.


