Introduction
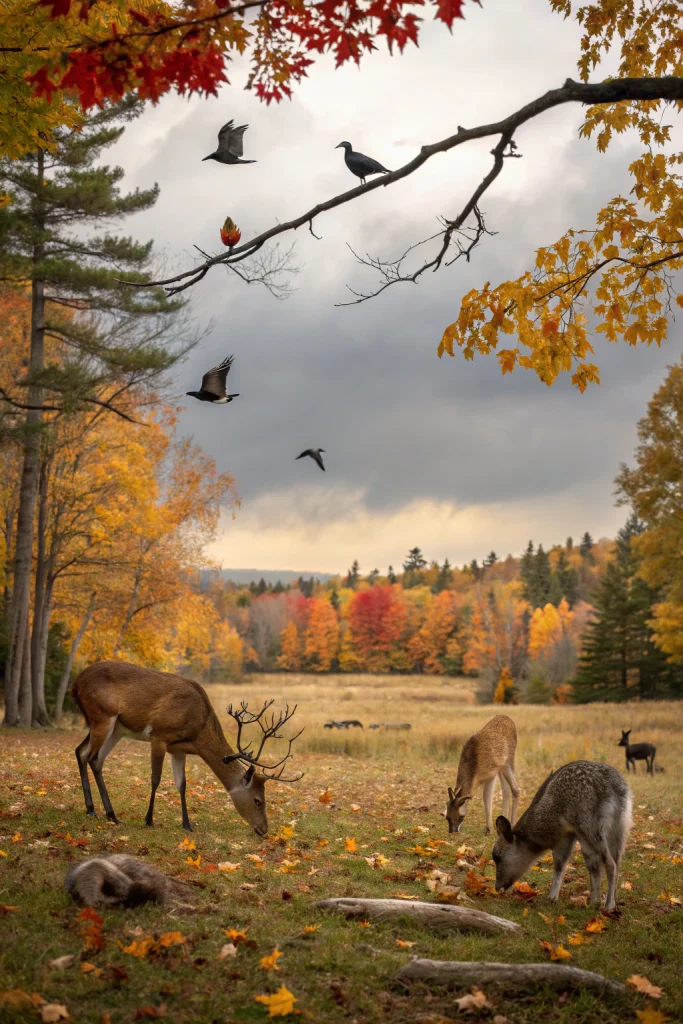
Did you know that contributing to local biodiversity can significantly improve the ecological health of your neighborhood? Studies show that even a small-scale garden designed with wildlife in mind can increase local insect populations by up to 30%, which in turn supports birds and other small mammals. This autumn, let’s transform our outdoor spaces into thriving havens for local flora and fauna. By focusing on sustainable gardening practices, we can create vital wildlife habitats that not only look beautiful but also support the intricate web of life around us. This guide will walk you through creating essential refuges for creatures great and small, from cozy bug hotels to nourishing native plant arrangements.
Table of Contents
- Materials & Tools Needed
- Project Time
- Step-by-Step Instructions
- Maintenance & Care Tips
- Eco-Friendly Alternatives
- Design & Styling Ideas
- Common Mistakes to Avoid
- Storage & Seasonal Tips
- Conclusion
- FAQ
Materials & Tools Needed
Creating a vibrant wildlife habitat requires a thoughtful selection of materials, focusing on sustainability and natural appeal. Here’s what you’ll need to get started on your eco-friendly garden project.
- Native Plant Seeds/Seedlings: Consider varieties like asters, goldenrod, coneflowers, and native grasses. These provide essential food and shelter and are perfectly adapted to the local climate.
- Logs and Branches: Sourced from fallen trees or local arborists, these offer invaluable shelter for insects, amphibians, and small mammals. Look for pieces with interesting textures and varying sizes.
- Stones and Rocks: Flat, sun-warmed stones provide basking spots for reptiles and shelter for various invertebrates. Rougher stones create micro-climates and hidden nooks.
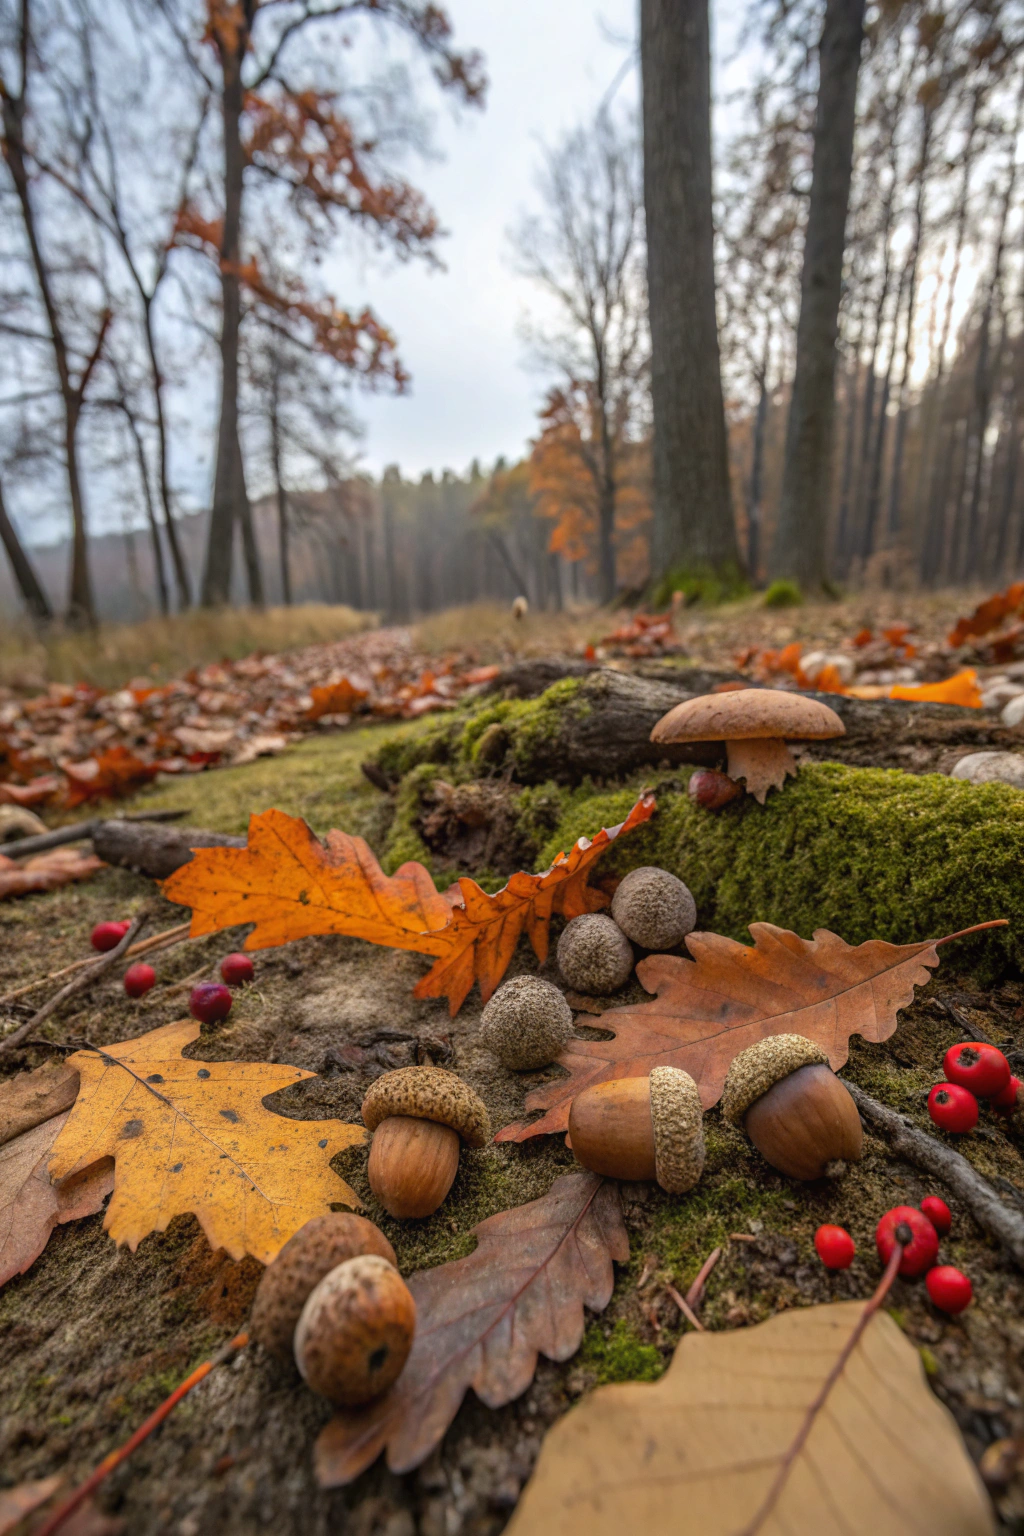
- Leaf Litter: Autumn leaves are gold! Collect them to create insulating mulch and prime habitat for overwintering insects and beneficial microbes. The rich aroma of decaying leaves signals a healthy ecosystem.
- Bird Bath/Water Source: A shallow dish with rough sides to prevent slipping. The sound of trickling water can attract birds from afar.
- Insect Hotel Materials: Bamboo canes, hollow stems (like sunflower stalks), pine cones, drilled wood blocks, and straw. These textural elements create diverse nesting and hibernating spaces.
- Compost or Well-Rotted Manure: To enrich the soil for your new plantings. The earthy smell indicates a healthy, living soil.
- Gardening Gloves: To protect your hands during planting and handling rough materials.
- Trowel and Spade: For digging and planting. Choose sturdy tools that feel balanced in your hand.
- Hand Pruners: For shaping plants or cutting stems for insect hotels. Their satisfying snip ensures clean cuts.
Project Time
Embarking on your wildlife habitat project doesn't have to be an all-consuming task. Here's a realistic breakdown:
- Preparation time: 1-2 hours (gathering materials, planning layout)
- Build/Plant time: 3-5 hours (depending on complexity and area size)
- Total duration: 4-7 hours
This project can be completed roughly 25% faster than establishing a full mixed-border garden, thanks to its focus on natural elements and less structured planting.
Step-by-Step Instructions
Step 1: Assess and Plan Your Space
Before digging, observe your garden. Note areas of sunlight, shade, existing vegetation, and potential water runoff. Consider where different wildlife elements would fit best, such as a sunny spot for basking rocks or a drier area for an insect hotel.
- Practical Tip: Sketch a simple plan. This helps visualize how elements like log piles, native plants, and water features will integrate, ensuring a cohesive and functional design without wasting materials.
Step 2: Prepare the Soil for Native Plantings
Clear any weeds from the chosen planting areas. Amend the soil with a generous layer of compost or well-rotted manure to improve drainage and nutrient content, crucial for establishing resilient native plants.
- Practical Tip: Do a simple soil test if possible. Knowing your soil's pH and nutrient levels helps select native plants that will truly thrive, reducing future maintenance and promoting vigorous growth.
Step 3: Plant Native Species
Install your chosen native plants according to their specific spacing requirements. Group plants with similar water and light needs together. Prioritize species that offer late-season nectar (e.g., asters) and seeds (e.g., coneflowers) for autumn-active pollinators and birds.
- Practical Tip: Water deeply immediately after planting. This helps settle the soil around the roots and reduces transplant shock, giving your plants the best possible start. Consider species recommended by the RHS Plants for Pollinators list to ensure maximum benefit for local wildlife.
Step 4: Create Log Piles and Rock Stacks
Place logs and branches in a semi-shaded, undisturbed area. Stack them loosely to create varied nooks and crannies. Do the same with stones, arranging them to form small crevices and basking spots.
- Practical Tip: Partially bury the base of some logs to provide stable foundation and connect them to the underground ecosystem, encouraging beneficial fungi and insects to colonize.
Step 5: Install a Water Feature
Choose a shallow bird bath or a similar container. Place it on a stable surface at varying levels, ideally near some cover for birds to feel safe. Ensure you add some stones or gravel to provide landing spots for insects and prevent anything from drowning.
- Practical Tip: Integrate a small, solar-powered bubbler or dripper if possible. The movement and sound of water are highly attractive to birds and help keep mosquitoes from breeding.
Step 6: Build Your Insect Hotel
Gather your selected materials – bamboo, hollow stems, drilled wood, pinecones – and arrange them tightly into a pre-made frame or a DIY structure from a wooden palette. Different sized holes and materials will attract different insect species.
- Practical Tip: Place your insect hotel in a sheltered spot, preferably facing south or southeast, to receive morning sun and protection from harsh winds and rain. This optimizes it for warmth and reduces moisture buildup.
Step 7: Lay Down Leaf Litter
Distribute a thick layer of autumn leaves (at least 2-4 inches) under shrubs, around perennial beds, and in designated quiet corners. Avoid raking them up entirely; this natural mulch is a critical overwintering habitat and soil enhancer.
- Practical Tip: Shredding larger leaves before spreading can help them break down faster and prevent them from smothering smaller plants, while still providing excellent insulation and habitat.
Maintenance & Care Tips
Maintaining your autumn wildlife habitat differs from traditional gardening, requiring a lighter touch to maximize its ecological benefits.
- Watering: During dry spells, particularly for newly established plants, ensure consistent watering. Aim for deep, infrequent watering in the morning, which promotes strong root growth and minimizes evaporation. For established native plants, they generally require less intervention, with most needing supplemental water only if rainfall is less than 1 inch per week during their first year.
- Pruning: Resist the urge to "tidy up" aggressively in autumn. Leave spent seed heads on plants like coneflowers and sunflowers; these provide vital food for birds throughout winter. Prune only dead or diseased branches to maintain plant health. Wait until late winter or early spring to cut back most perennials, as their hollow stems and foliage offer shelter for overwintering insects.
- Soil Health: Continuous soil health is paramount for a sustainable garden. Allow leaf litter and plant debris to decompose naturally on site, providing continuous organic matter. Avoid chemical fertilizers, which can harm beneficial soil organisms and groundwater. Instead, top-dress with a layer of homemade compost annually to enrich soil structure and nutrient content. Healthy soil supports robust plant growth and a thriving microbial community, which forms the base of your wildlife habitat's food web.
- Schedule: Minimal interference is key. Perform major "tidying" only once a year, typically in early spring before new growth emerges, to allow wildlife the longest possible access to shelter and food resources. Replenish water in bird baths daily and clean them weekly to prevent algae buildup and disease transmission. Regularly check insect hotels for stability and any necessary repairs.
Eco-Friendly Alternatives
Embracing sustainable practices is at the heart of creating effective wildlife habitats. Here's how to make your project greener:
- Recycled Materials: Instead of buying new, consider repurposing items. Old wooden pallets can be dismantled to create frames for insect hotels or raised beds. Broken terracotta pots can be inverted to provide shelter for toads and beneficial insects. Use salvaged bricks or stones for borders around your plant beds, reducing reliance on new manufactured goods.
- Organic Inputs: Ditch synthetic pesticides, herbicides, and fertilizers. These chemicals can harm wildlife, pollute water sources, and disrupt natural ecological balances. Opt for organic compost, natural mulches (like your own leaf litter), and biological pest control methods. Companion planting and introducing beneficial insects are excellent ways to manage pests naturally. For example, planting marigolds can deter nematodes, while dill attracts predatory wasps.
- Low-Water Options: Choose drought-tolerant native plants appropriate for your region. Once established, these plants require minimal supplementary watering, reducing your water consumption. Group plants with similar water needs together to optimize irrigation. Consider installing a rain barrel to collect rainwater for your watering needs, further reducing your reliance on municipal water. You can learn more about water-wise gardening techniques from resources like the University of Minnesota Extension.
Design & Styling Ideas
Designing for wildlife doesn't mean sacrificing aesthetics; it means integrating natural beauty with ecological function.
- Layered Planting: Mimic natural ecosystems by creating layers: ground covers, herbaceous perennials, shrubs, and small trees. This provides diverse habitats and food sources. For instance, a low layer of native sedges, a mid-layer of coneflowers and asters, and a towering serviceberry shrub create a multi-story home for wildlife.
- Wild Corners: Designate a less manicured area of your garden. Allow native grasses to grow taller, pile up logs and leaves, and let fallen branches remain. This "messy" look, often overlooked in traditional gardens, is an absolute sanctuary for insects, small mammals, and ground-nesting birds.
- Focal Points with Purpose: Integrate functional elements as design features. A beautifully crafted insect hotel can become an art piece. A rustic bird bath made from natural stone can be the centerpiece of a planting bed. Even a log pile can be arranged artfully, providing visual interest while serving as critical habitat.
- Pathways and Overlooks: Create winding paths through your wildlife-friendly zones, allowing you to observe your thriving ecosystem without disturbing it. Incorporate a small bench or viewing area to sit and appreciate the buzzing bees, fluttering butterflies, and chirping birds your garden attracts.
- Connect Your Garden: Think of your garden as part of a larger ecological corridor. If neighbors are also gardening for wildlife, discuss ways to connect your efforts, creating larger, more effective habitats. This could involve planting similar native species or leaving gaps in fences for small wildlife passage.
Common Mistakes to Avoid
Creating a thriving wildlife haven often involves unlearning some traditional gardening habits. Steering clear of these common pitfalls will boost your success:
- Over-Tidying: A perfectly manicured garden often equates to a wildlife desert. Raking away all leaves, cutting back all spent stalks, and removing all deadwood destroys vital overwintering sites for insects and nesting materials for birds.
- Prevention: Embrace a slightly "messy" aesthetic. Leave leaf litter under shrubs and trees. Delay cutting back perennial stems until early spring. Allow a small pile of branches or logs to decompose in an out-of-the-way corner.
- Using Pesticides and Herbicides: These chemicals don't discriminate. They kill beneficial insects alongside pests and can poison birds and other animals that consume treated plants or insects.
- Prevention: Adopt integrated pest management (IPM) strategies. Focus on prevention through healthy soil, diverse plantings, and attracting natural predators. Hand-pick pests, use horticultural oils or insecticidal soaps as a last resort, and always prioritize organic methods. The UC IPM website offers excellent evidence-based guidance.
- Planting Non-Native or Invasive Species: While some non-natives can be beautiful, many offer little ecological value to local wildlife and some aggressive ones can outcompete native plants, disrupting ecosystems.
- Prevention: Prioritize native plants that are adapted to your local climate and soil conditions, and which provide the specific food and shelter needed by local wildlife. Research species recommended for your specific ecoregion. The USDA Forest Service offers robust resources on native plant selection.
- Lack of Water Source: Water is fundamental for all life. Many gardeners focus on food and shelter but overlook this crucial element.
- Prevention: Install a reliable, shallow water source like a bird bath or a small pond. Ensure it's kept clean and refilled regularly, especially during dry periods.
- Insufficient Shelter: Wildlife needs safe places to hide from predators and to rest and raise young. Dense cover is just as important as food sources.
- Prevention: Incorporate dense shrubs, thorny bushes, brush piles, and evergreen plants into your design. These provide crucial cover and nesting sites, increasing the feeling of security for visiting animals.
Storage & Seasonal Tips
Maximizing the longevity and effectiveness of your autumn wildlife habitat requires smart storage and thoughtful seasonal preparation.
- Tool Storage: After each use, clean your gardening tools thoroughly. Remove any soil, sharpen blades if necessary, and apply a light coat of oil to metal parts to prevent rust. Store them in a dry, accessible location like a shed or garage. Keeping tools in good condition means they're always ready for your next sustainable gardening task.
- Plant Protection: For any slightly tender native plants, or if you anticipate unusually harsh winter conditions, a light layer of straw or chopped leaves around the base can provide extra insulation. Avoid heavy plastic covers which can trap moisture and promote disease. Focus on maintaining a healthy layer of leaf litter, which acts as nature's blanket.
- Season Prep: As winter approaches, resist the urge to clear away every last bit of autumn growth. Many insect larvae and eggs overwinter in hollow plant stems and dried seed heads. Leave these standing until early spring. Ensure bird feeders are stocked consistently, and ice is cleared from bird baths. This consistent provision becomes even more critical when natural food sources are scarce. Your proactive efforts now lay the groundwork for a bustling spring garden.
Conclusion
Creating autumn wildlife habitats through sustainable gardening is a profoundly rewarding endeavor that extends far beyond immediate aesthetic pleasure. By implementing practices that respect and enhance natural ecosystems, we’re not just tending gardens; we’re cultivating resilience, fostering biodiversity, and providing essential lifelines for local fauna during the colder months. From the buzzing of late-season pollinators to the rustle of foraging birds, every thoughtfully placed log, native plant, and water source contributes to a more vibrant and interconnected natural world right outside our doors. Embrace these strategies, and watch as your outdoor space blossoms into a vital sanctuary. Start small, observe often, and let nature be your guide in crafting a truly sustainable and wildlife-friendly haven this autumn.
FAQ
Q1: What are the best native plants for autumn wildlife?
A1: Asters, goldenrod, coneflowers, and native grasses are excellent choices, providing late-season nectar, seeds, and shelter.
Q2: How often should I clean my bird bath?
A2: Clean bird baths weekly to prevent algae and disease, and refill them daily to ensure a fresh water source.
Q3: Can I use treated wood for my insect hotel?
A3: No, avoid treated wood as the chemicals can be harmful to insects. Opt for natural, untreated wood or bamboo.
Q4: Is it okay to leave fallen leaves in my garden?
A4: Absolutely! Leaf litter is crucial for overwintering insects and enriches the soil. Leave it under shrubs or in designated "wild" areas.
Q5: What's the biggest mistake beginners make in wildlife gardening?
A5: Over-tidying the garden, which removes critical shelter and food sources that wildlife depends on, especially in autumn and winter.
Q6: How can I attract more butterflies in autumn?
A6: Plant late-blooming native flowers like native asters and goldenrod, which provide essential nectar sources for migrating butterflies.
Q7: Should I fertilize my native plants?
A7: Generally, no. Native plants are adapted to local soil conditions and rarely need synthetic fertilizers. Organic compost is usually sufficient if soil enrichment is necessary.
Further Reading
Looking to delve deeper into creating an ecological haven?
Consider building a DIY Cold Frame to extend growing seasons for some of your preferred pollinator plants.
For more autumn inspiration, explore how to create a captivating Autumn Living Wall Garden Decor to maximize vertical growing space.
You might also find tips on selecting plants for diverse ecosystems in our piece on Sustainable Gardening Fall Plants.
To enhance your overall outdoor ambiance, check out ideas for an Outdoor Living Backyard Seating Glow Up.
And for maintaining a thriving natural space, these Biodiversity-Friendly Fall Garden Tips offer practical advice.


