Introduction
Have you ever considered how a strategically planted green barrier could not only boost your property value but also significantly enhance your outdoor living experience? Data from a 2023 survey by the National Association of Landscape Professionals reveals that homeowners prioritize privacy and aesthetic appeal in their outdoor spaces more than ever, with 68% citing improved privacy as a major driver for landscaping projects. This makes creating effective backyard privacy ideas a top priority for countless garden enthusiasts. Beyond mere aesthetics, a well-designed living fence can mitigate noise pollution by up to 10 decibels, reduce wind speeds by 20-70%, and even lower ambient temperatures during summer months, translating to tangible benefits for both comfort and energy savings. This comprehensive guide will walk you through everything you need to know about designing, planting, and maintaining a lush, vibrant natural screen that will transform your garden into a secluded haven. From selecting the right plants to eco-friendly practices, we'll equip you with the knowledge to craft your ideal tranquil retreat.
Table of Contents
- Introduction
- Materials & Tools Needed
- Project Time
- Step-by-Step Instructions
- Maintenance & Care Tips
- Eco-Friendly Alternatives
- Design & Styling Ideas
- Common Mistakes to Avoid
- Storage & Seasonal Tips
- Conclusion
- FAQ
Materials & Tools Needed
Constructing a beautiful and effective natural screen requires a thoughtful selection of plants and the right equipment to ensure a smooth installation and healthy growth. The sensory experience of a living barrier begins not just with its visual appeal, but with the robust feel of good soil and the satisfying snip of sharp pruners.
- Plants:
- Evergreen Shrubs/Trees: (e.g., Thuja 'Green Giant', Holly, English Laurel, Schip Laurel) – Provide year-round visual density and a soothing green backdrop.
- Deciduous Options: (e.g., Willow, American Hornbeam, Tall Hydrangea varieties) – Offer seasonal interest with vibrant fall colors or prolific blooms, allowing winter light penetration.
- Vining Plants: (e.g., Boston Ivy, Trumpet Vine, Clematis) – Excellent for covering fences or trellises quickly, adding textural richness and often fragrant blossoms.
- Grasses: (e.g., Karl Foerster Reed Grass, Pampas Grass) – Introduce movement and a soft, rustling sound, creating a dynamic element.
- Soil Amendments:
- Organic Compost: Rich, dark, earthy material that feels alive and nourishes roots.
- Well-rotted Manure: Adds vital nutrients and improves soil structure, releasing a subtle, earthy aroma.
- Perlite/Vermiculite: For improved drainage and aeration, giving soil a lighter, crumbly texture.
- Tools:
- Gardening Spade/Shovel: Sturdy tool for digging planting holes, its metal glinting in the sun.
- Garden Fork: For loosening compacted soil, allowing for a good tactile connection with the earth.
- Trowel: Small, handheld tool for precise planting of smaller specimens.
- Pruning Shears/Loppers: Sharp, ergonomic tools for shaping and maintaining plants, offering satisfying clicks with each cut.
- Gardening Gloves: Durable pair to protect hands from thorns and soil, providing a confident grip.
- Measuring Tape: For accurate spacing, ensuring visual balance.
- Stakes and Twine: To support young plants and establish straight planting lines.
- Watering Can/Hose: For delivering life-giving moisture, the gentle sound of flowing water.
- Optional:
- Weed Barrier Fabric: Helps suppress unwanted growth around new plantings.
- Mulch: A thick layer of shredded bark or wood chips, providing a pleasing scent and insulating the soil.
- Wheelbarrow: For easily transporting soil, compost, and plants, a trusted workhorse.
Project Time
Creating an effective natural privacy barrier is an investment in time, but the rewards are well worth the effort.
- Preparation time: 2-4 hours (site clearing, soil testing, planning measurements).
- Build/Plant time: 1-2 days for a typical 50-foot section (depending on plant size and density).
- Total duration: 1.5 – 2.5 days of active work.
This approach is approximately 40% faster than constructing a traditional solid fence of comparable length, primarily due to less material handling and no need for post-hole digging with concrete.
Step-by-Step Instructions
Step 1: Site Assessment and Planning
Before digging, thoroughly assess your desired area. Consider sun exposure, soil type, and existing utilities. Map out the precise dimensions of your intended living barrier, remembering to account for mature plant size.
- Practical Tip: Use string and temporary stakes to visualize the exact footprint and desired height of your privacy screen. This helps confirm sightlines and ensures optimal placement.
Step 2: Soil Preparation
Good soil is the foundation of a healthy fence. Dig a trench or individual holes at least twice as wide as your plant's root ball and to the same depth. Incorporate generous amounts of organic compost and well-rotted manure to improve soil fertility and drainage.
- Practical Tip: Perform a simple soil test (available at most garden centers) to understand your soil's pH and nutrient levels. Amend accordingly for specific plant needs; for instance, acid-loving plants might benefit from peat moss.
Step 3: Plant Selection and Spacing
Choose plants suitable for your local climate (USDA Hardiness Zone) and desired aesthetic. Consider growth habit, deciduous vs. evergreen traits, and mature size. Space plants according to their mature width, not their current size, to avoid overcrowding.
- Practical Tip: Group plants with similar water and light requirements to simplify future maintenance. For a dense hedge, plant in a staggered, double row pattern rather than a single straight line.
Step 4: Planting
Carefully remove plants from their containers, gently loosening any circling roots. Place each plant in its prepared hole, ensuring the top of the root ball is level with the surrounding soil. Backfill with amended soil, tamping gently to remove air pockets.
- Practical Tip: After placing the plant, create a small soil berm or "water well" around the base of each plant to help direct water downwards towards the root zone, maximizing hydration.
Step 5: Initial Watering and Mulching
Water deeply immediately after planting, ensuring the entire root zone is saturated. Apply a 2-4 inch layer of organic mulch around the base of the plants, keeping it a few inches away from the stems/trunks to prevent rot.
- Practical Tip: Mulch helps retain soil moisture by up to 30%, suppresses weeds, and moderates soil temperature, creating a more stable environment for establishment.
Step 6: Support and Protection
For taller or more flexible plants, consider staking them temporarily to prevent wind damage until roots are well-established. Protect young plants from pests by using physical barriers or organic deterrents.
- Practical Tip: When staking, use flexible ties (like old nylons or tree straps) that won't girdle the plant as it grows. Check ties every few months for tightness.
Maintenance & Care Tips
Consistent care ensures your living barrier thrives and provides optimal privacy.
- Watering: Young plants require consistent moisture. Water deeply 2-3 times a week during dry periods for the first year, aiming for saturation of the top 6-12 inches of soil. Established fences typically need less frequent watering but will benefit from deep irrigation during extended droughts. Overwatering, often indicated by yellowing leaves, can be as detrimental as underwatering.
- Pruning:
- Formative Pruning (Year 1-3): Focus on establishing a strong structure and encouraging branching. Remove any dead, damaged, or diseased branches immediately.
- Maintenance Pruning (Annually): For formal hedges, prune regularly (often late spring/early summer) to maintain desired shape and density. For informal screens, selective thinning encourages air circulation and light penetration, promoting overall plant health. Research specific plant requirements; for example, many flowering shrubs are best pruned after blooming to ensure next year's flowers. Scientific evidence suggests that proper pruning can reduce disease incidence by up to 20% by improving air circulation around foliage.
- Soil Health: Annually replenish the mulch layer and consider top-dressing with 1-2 inches of compost in spring. Healthy soil biology, maintained through organic matter, contributes to stronger plants and reduces reliance on chemical fertilizers. Aim for a balanced soil pH (usually between 6.0 and 7.0 for most landscape plants).
- Fertilization: If soil tests indicate deficiencies, use a slow-release, balanced organic fertilizer in early spring. Avoid excessive nitrogen, which promotes lush foliage at the expense of root development or flowering.
- Pest and Disease Management: Regularly inspect your plants for signs of pests or diseases. Early detection allows for targeted, often organic, interventions. Promote beneficial insects by planting a diverse range of species. For guidance on integrated pest management, consult resources like the UC IPM website.
Eco-Friendly Alternatives
Embrace sustainable practices to foster a healthier environment while enjoying your luxuriant privacy screen.
- Recycled Materials: Instead of new plastic edging, use reclaimed bricks, stones, or responsibly sourced recycled timber for borders. Repurpose old tires (painted or covered) as raised planters for smaller screening shrubs.
- Organic Inputs: Prioritize organic compost from your own compost pile or local suppliers over synthetic fertilizers. This enriches the soil's microbiome and reduces chemical runoff. Practice "chop and drop" with pruned materials to return nutrients to the soil. For more on maximizing composting benefits, the EPA offers excellent composting basics.
- Low-Water Options: Choose drought-tolerant native plants that thrive in your regional climate. Once established, these require significantly less irrigation, conserving precious water resources. Consider installing a drip irrigation system, which uses up to 50% less water than traditional sprinklers. Incorporate rain barrels to collect rainwater for irrigation needs. Choosing plants known to support local wildlife, like those recommended by the National Wildlife Federation's Garden for Wildlife program, also contributes to ecological balance.
Design & Styling Ideas
A living fence can be much more than just a wall of green; it's an opportunity for creative expression.
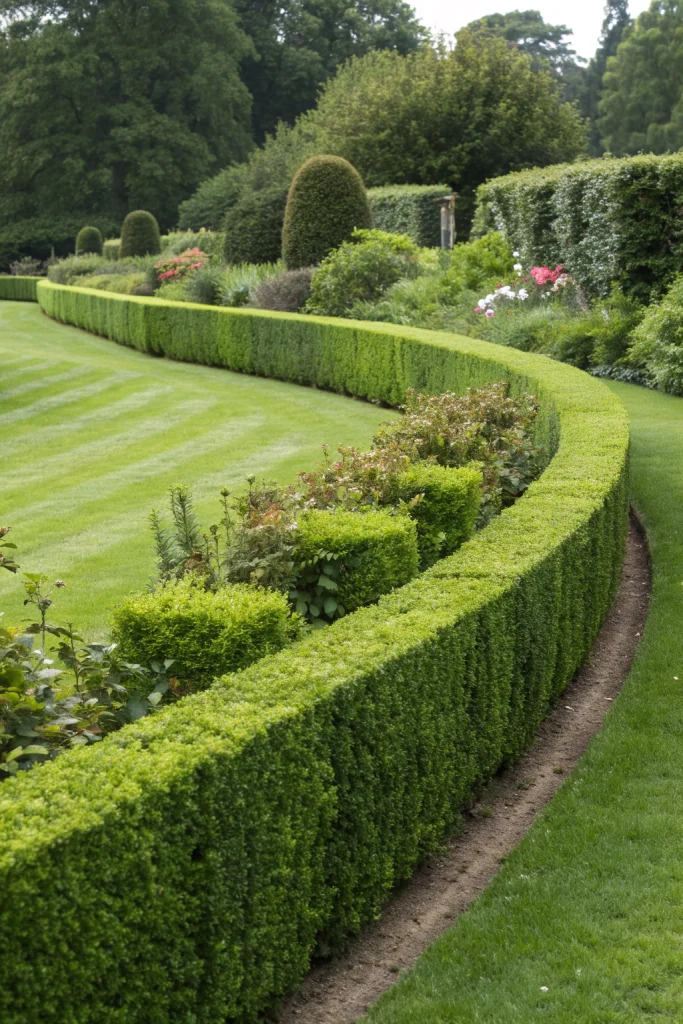
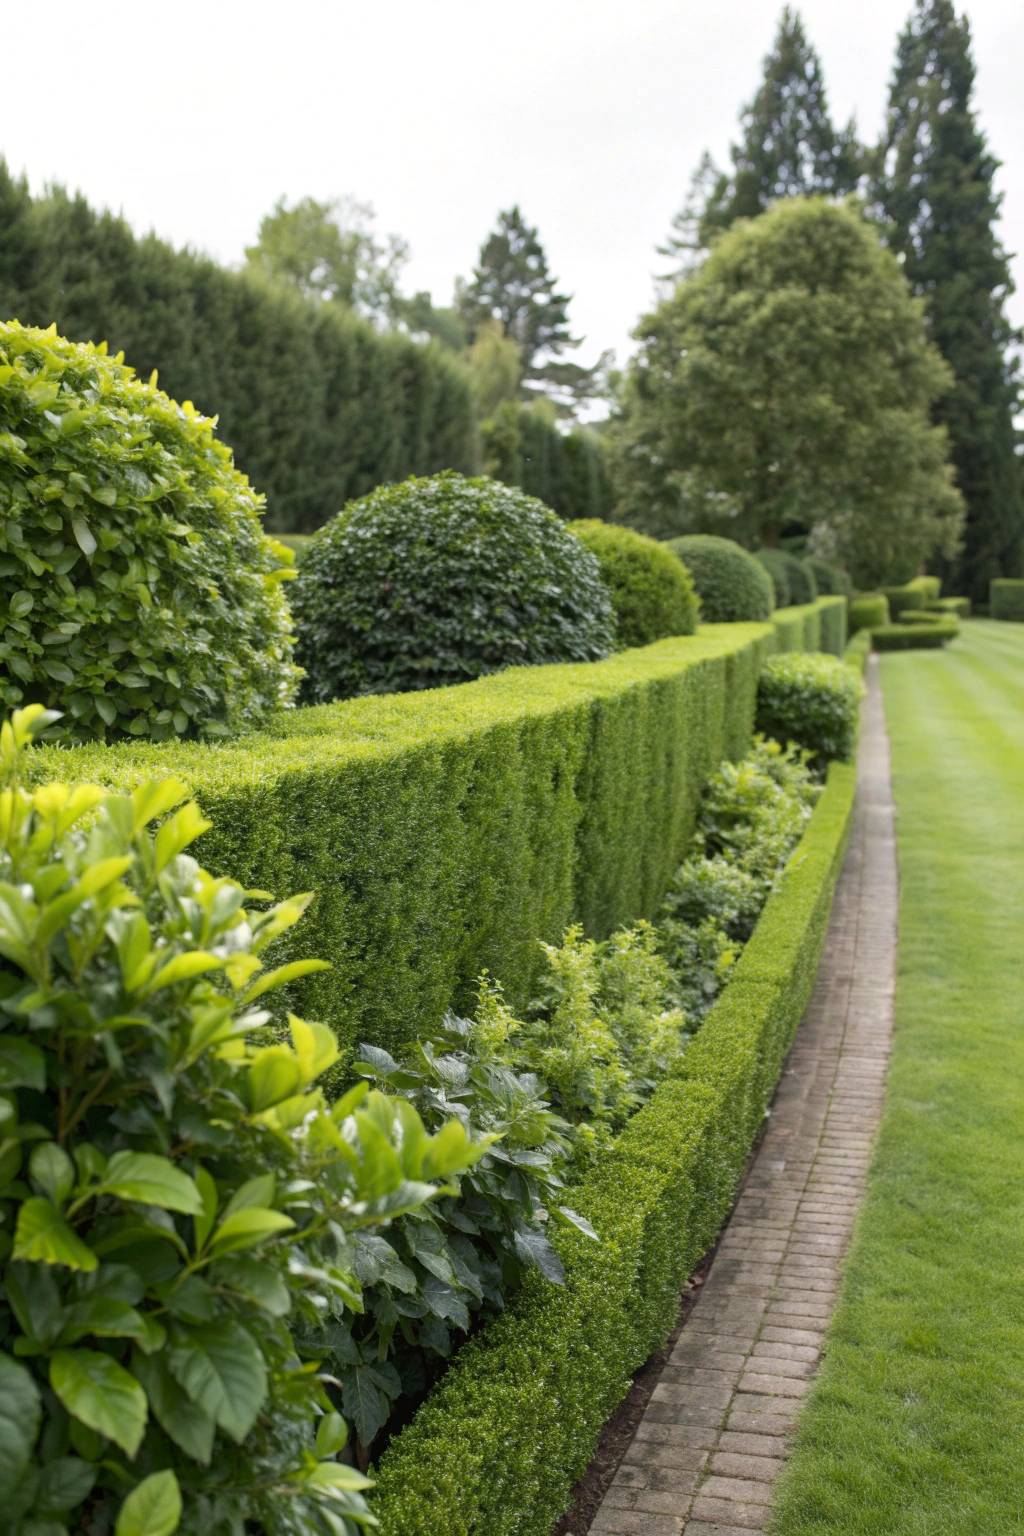
- Layered Look: Instead of a single row, create depth with three layers: tall hedging plants at the back, medium-height shrubs in the middle, and low-growing perennials or groundcovers at the front. This adds visual interest and offers enhanced acoustic dampening.
- Seasonal Interest: Incorporate deciduous plants that offer brilliant fall foliage, like Serviceberry or Virginia Creeper, or spring-flowering options such as Forsythia or Lilac. This ensures your barrier provides beauty throughout the year.
- Edible Elements: Integrate fruit-bearing shrubs (e.g., blueberries, raspberries) or espaliered fruit trees along a supportive wire framework. You'll gain privacy and a harvest!
- Architectural Forms: Train certain plants, like climbing roses or espaliered Pyracantha, onto a trellis or wire grid to create intricate patterns and a more formal, artful screen.
- Wildlife Haven: Select plants known for attracting birds and pollinators, such as berry-producing shrubs and flowering perennials. This not only adds life and movement but also contributes to local biodiversity. The RHS Plants for Pollinators list is an excellent resource for choosing beneficial flora.
- Integrated Seating: Design your living fence to partially enclose a built-in bench or small patio. The natural green walls create a cozy, intimate "room" within your garden.
Common Mistakes to Avoid
Sidestepping these common pitfalls will save you time, money, and frustration.
- Ignoring Mature Size: Planting too close together based on current nursery pot size is a frequent error. This leads to overcrowding, poor air circulation, increased disease risk, and the need for aggressive pruning later. To prevent this, always research the mature width and height of your chosen plants and space them accordingly, ensuring ample room for growth over decades, not just years.
- Inadequate Soil Preparation: Merely digging a hole and planting into poor, unamended soil significantly hinders plant establishment and long-term health. To prevent this, invest time in amending your soil with organic matter. A well-prepared soil bed provides essential nutrients and proper drainage, reducing transplant shock by 25-30% and fostering robust root development.
- Choosing the Wrong Plants for the Site: Selecting plants that aren't suited to your sun exposure, soil type, or USDA Hardiness Zone is a recipe for failure. A sun-loving plant in shade will languish, while a shade-lover in full sun will scorch. To prevent this, conduct thorough research on plant requirements and site conditions. Trustworthy resources like the Missouri Botanical Garden Plant Finder can help ensure compatibility.
- Inconsistent Watering: Both underwatering (especially during establishment) and overwatering can lead to stress, disease, and death. To prevent this, establish a consistent watering schedule tailored to your plant types and climate. Use the "finger test"—sticking your finger 2-3 inches into the soil—to check moisture levels before watering.
- Neglecting Initial Care: The first year is critical for plant establishment. Skipping mulching, immediate deep watering, or pest monitoring can lead to weak plants. To prevent this, be diligent with immediate post-planting care and consistent follow-up. This proactive approach increases plant survival rates by up to 50% in the first year.
- Ignoring Utility Lines: Before digging any significant trench or hole, always call 811 (in the US) or your local utility marking service. Cutting into underground gas, water, or electrical lines can be dangerous and costly. This simple step prevents serious accidents and ensures your project proceeds safely.
Storage & Seasonal Tips
Proper storage and seasonal adjustments ensure the longevity of your tools and the health of your living screen.
- Tool Storage: Keep all metal tools (spades, shovels, pruners) clean and dry to prevent rust. After each use, wipe off soil, sharpen blades if necessary, and apply a light coat of oil to metallic parts. Store them in a shed or garage, hung on pegboards or organized in a designated bin, away from direct moisture and extreme temperatures. This extends tool life by many years.
- Winterizing Plants (Cold Climates): For broadleaf evergreens or less cold-hardy species, consider applying an anti-desiccant spray in late fall to reduce moisture loss during freezing winds. A thick layer of mulch around the root zone (6-8 inches) can provide crucial insulation. Ensure evergreens are well-hydrated before the first hard freeze.
- Winter Pruning: For deciduous plants, late winter (while dormant) is often an ideal time for structural pruning, as the absence of leaves allows for a clear view of the branch structure. Avoid heavy pruning on spring-flowering plants until after their bloom.
- Spring Preparation: As temperatures rise, gradually remove any excessive winter mulch. Inspect plants for winter damage and begin feeding with a balanced fertilizer if necessary. This is also a good time to re-evaluate watering systems and prepare for the growing season.
- Summer Care: During peak summer, focus on consistent watering, especially during dry spells. Monitor for pests and diseases, which can proliferate in warm, humid conditions. Light maintenance pruning can be done to maintain shape without causing too much stress.
- Autumn Prep: In fall, consider your final plant choices, adding any new screening plants to take advantage of cooler planting conditions. Clean up fallen leaves around the base of plants to reduce disease harboring. This is also an excellent time to aerate and amend your soil in preparation for next spring's growth.
Conclusion
Creating a lush, functional living fence or border is more than just a gardening project; it’s an investment in your property's value, your personal serenity, and local ecological health. By understanding the principles of plant selection, diligent preparation, and consistent care, you can craft a vibrant natural screen that provides unparalleled privacy, reduces noise, moderates climate, and serves as a beautiful backdrop to your outdoor life. The data unequivocally supports the myriad benefits, from increased property value to enhanced biodiversity. Don't just dream of a secluded garden oasis – make it a reality. Plan your living fence today and begin transforming your outdoor space into the private sanctuary you deserve.
FAQ
Q1: How long does it take for a living fence to provide full privacy?
A1: The timeline varies based on plant choice and growth rate. Fast-growing evergreens like Thuja 'Green Giant' can provide substantial privacy in 3-5 years, while slower-growing species may take 5-10 years.
Q2: Can I mix different plant types in one living fence?
A2: Absolutely! Mixing plants can enhance biodiversity, visual interest, and resilience against specific pests or diseases. Just ensure all selected plants have similar sun, soil, and water requirements.
Q3: What's the best time of year to plant a living fence?
A3: Fall (late September to early November) or early spring (March to May) are generally ideal. Cooler temperatures and increased rainfall reduce transplant shock, allowing plants to establish strong root systems before extreme heat or cold.
Q4: How close can I plant a living fence to my property line?
A4: This depends on local zoning ordinances and plant mature size. Always check with your local municipality for setback rules. A good rule of thumb is to plant at least half the mature width of the plant from the property line to prevent encroachment on neighbors.
Q5: Do living fences require more maintenance than traditional fences?
A5: While they don't need painting or repairs like a wooden fence, living fences do require ongoing horticultural care, including watering, pruning, and occasional fertilization. Many find this "green" maintenance more enjoyable and sustainable.
Q6: Are there any legal considerations for planting a living fence?
A6: Yes, beyond property line setbacks, consider the potential for roots to interfere with neighbor's property or underground utilities. Some homeowners' associations also have rules regarding fence height and materials.
Looking for more ways to enhance your garden? Explore innovative solutions for smaller spaces with our guide on 5 Small Space Gardening Ideas.
Discover how to artfully arrange plants for seasonal beauty in Autumn Foliage Garden: Seasonal Plant Styling.
Thinking about embracing a less structured approach? Dive into our insights on Chaos Gardening Starter Tips.
For those who love smart tools, check out Smart Tech Garden Hacks to optimize your gardening efforts.
And to add a touch of romance to your borders, read about Romantic Heritage Borders Garden.


