12 Best Herbs to Grow Indoors Year Round for a Bountiful Kitchen
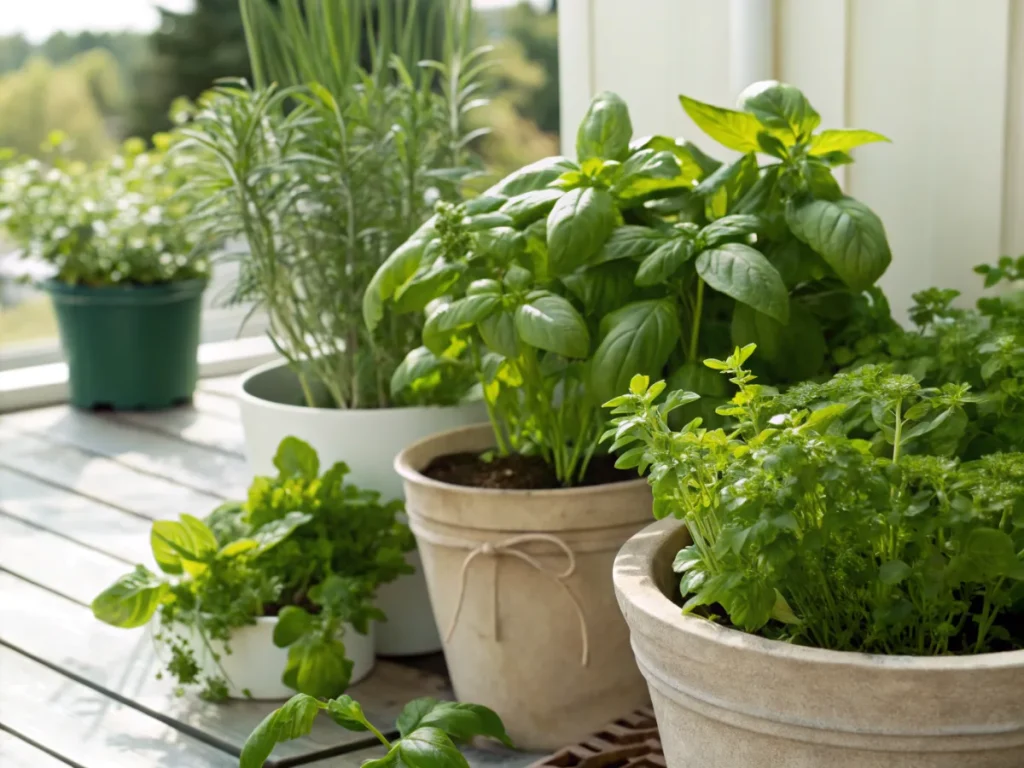
Imagine fresh basil for your pasta, vibrant chives for your scrambled eggs, or aromatic mint for your evening tea, all picked from your own indoor garden, regardless of the season outside. Growing herbs indoors year-round is not just a dream; it’s an achievable reality for anyone with a sunny windowsill and a little dedication. This comprehensive guide will walk you through everything you need to know to cultivate a thriving indoor herb garden, bringing continuous flavor and fragrance to your home.
[lwptoc]
Why This Matters: Fresh Herbs at Your Fingertips
Having a continuous supply of fresh herbs transcends mere convenience; it’s a game-changer for your culinary adventures and overall well-being. No more frantic dashes to the grocery store when a recipe calls for a sprig of rosemary or a handful of cilantro, only to find wilted, overpriced options. With herbs growing just steps away, you can elevate everyday meals into gourmet experiences, adding depth, aroma, and vibrant flavor that dried herbs simply can’t match.
Beyond the kitchen, an indoor herb garden contributes positively to your home environment. Plants naturally purify the air, releasing oxygen and absorbing common indoor pollutants, creating a healthier living space. The act of tending to your herbs can also be a mindful, calming activity, offering a small escape from daily stresses. It connects you to nature, even when confined indoors, fostering a sense of accomplishment and contributing to a more eco-conscious lifestyle by reducing packaging waste associated with store-bought herbs.
Furthermore, growing your own herbs provides complete control over their cultivation. You decide what goes into their soil and how they are treated, ensuring they are organic and free from harmful pesticides. This is especially important for herbs that you consume regularly, offering peace of mind about the purity of what you’re adding to your food. It’s a small but significant step towards greater self-sufficiency and a deeper connection to the food you eat.
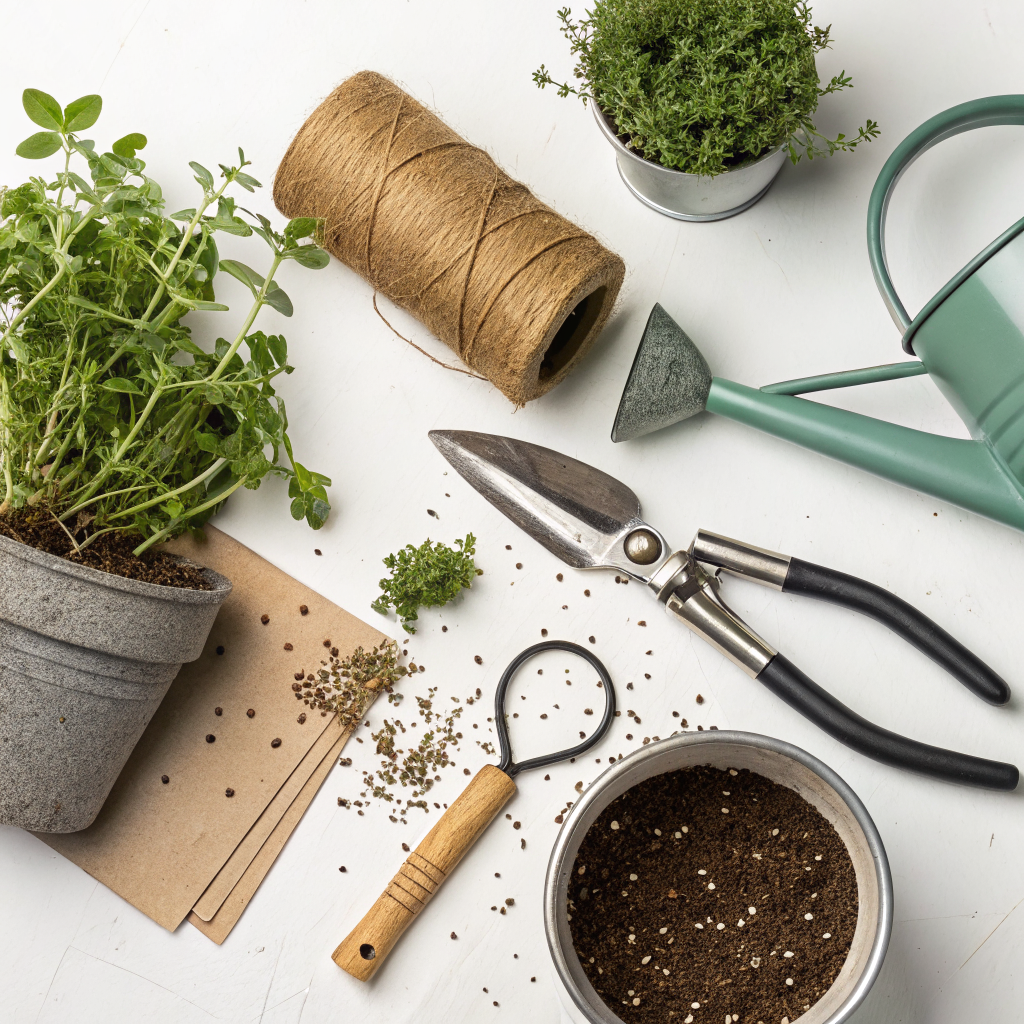
What You Need: Essential Tools and Materials for Your Indoor Herb Garden
Starting an indoor herb garden doesn’t require a massive investment, but having the right tools and materials will set you up for success. Understanding what each component does will help you make informed decisions and ensure your herbs thrive. Here’s a breakdown of the essentials:
1. Containers with Drainage
Importance: Proper drainage is the single most critical factor for healthy herb growth. Without it, roots will sit in stagnant water, leading to root rot and eventual plant death.
Options:
- Terracotta pots: Porous material allows for good airflow and helps prevent overwatering. They tend to dry out faster, so monitor moisture levels.
- Plastic pots: Lighter and retain moisture longer than terracotta, requiring less frequent watering. Ensure they have ample drainage holes.
- Self-watering planters: Excellent for busy gardeners, these systems have a reservoir that supplies water to the soil as needed, reducing the frequency of manual watering.
- Window boxes: Ideal for growing several herbs together, provided they have adequate drainage and are placed in a sunny window.
Size: Most herbs grow well in 6-8 inch pots. Deeper roots like rosemary or bay may prefer slightly larger containers. Avoid pots that are too large, as they can retain too much moisture.
2. High-Quality Potting Mix
Importance: Garden soil is too dense and can introduce pests and diseases indoors. A good potting mix provides aeration, drainage, and essential nutrients.
Qualities to look for:
- Lightweight and well-draining: Often contains perlite, vermiculite, or coco coir to prevent compaction and improve drainage.
- Sterile and disease-free: Specially formulated for container gardening to prevent soil-borne issues.
- Nutrient-rich: Some mixes include a slow-release fertilizer, which can be beneficial for initial growth.
Avoid: Heavy garden soil, topsoil, or compost that hasn’t been sterilized.
3. Light Source
Importance: Light is crucial for photosynthesis, and most herbs require at least 4-6 hours of direct sunlight daily. Indoor spaces often lack sufficient natural light, especially during winter months.
Options:
- Sunny South-Facing Window: If you’re lucky enough to have one, this is often sufficient for many light-loving herbs. Rotate plants regularly to ensure even growth.
- Grow Lights: An essential investment for year-round success, especially in darker homes or during shorter winter days.
- Fluorescent lights (T5 or T8): Cost-effective and energy-efficient, providing broad-spectrum light suitable for herbs. Position them 6-12 inches above plants.
- LED grow lights: More energy-efficient and long-lasting than fluorescents, often offering full-spectrum light tailored for plant growth. Can be placed closer to plants without causing heat damage.
Timer: Consider using a timer with your grow lights to provide a consistent 12-16 hours of light per day, mimicking natural conditions.
4. Watering Can or Spray Bottle
Importance: Precise watering is key to preventing both overwatering and underwatering.
Options:
- Small watering can with a long spout: Allows for direct and controlled watering at the soil level, minimizing splashing.
- Spray bottle: Useful for misting humidity-loving herbs like basil, especially in dry indoor environments.
Consider: A moisture meter can be a helpful tool for beginners to gauge when to water, preventing guesswork.
5. Pruning Shears or Scissors
Importance: Regular harvesting and pruning encourage bushier growth, prevent leggy plants, and extend the life of your herbs.
Options:
- Small, sharp pruning shears: Ideal for cleanly cutting stems without crushing them.
- Sharp kitchen scissors: Can also work well for smaller harvests.
Hygiene: Always clean your pruning tools before and after use to prevent the spread of diseases.
6. Fertilizers (Optional but Recommended)
Importance: As herbs deplete nutrients in their potting mix, occasional feeding will keep them vigorous and productive.
Options:
- Balanced liquid fertilizer: Dilute to half or quarter strength and apply every 2-4 weeks during active growth.
- Organic options: Fish emulsion or seaweed extract are excellent natural choices.
Caution: Avoid over-fertilizing, which can burn plant roots. Less is often more with herbs.
7. Seeds or Starter Plants
Importance: The source of your herbs.
Options:
- Seeds: More economical and offers a wider variety. Requires patience and a warm, bright spot for germination. Learn more about understanding different seed types.
- Starter Plants/Cuttings: Provides an instant garden. Look for healthy, compact plants without signs of pests or disease. Can be a great way to kickstart your collection and understand plant propagation techniques.
8. Humidity Tray (Optional)
Importance: Many herbs thrive in higher humidity than typical indoor environments offer, especially during dry winter months.
How to use: Fill a shallow tray with pebbles and add water just below the top of the pebbles. Place pots on top. As the water evaporates, it creates a humid microclimate around the plants. This is particularly beneficial for herbs like basil and mint.
Step-by-Step Guide: Cultivating Your Indoor Herb Garden
Embarking on your indoor herb gardening journey is an exciting and rewarding process. By following these steps, you’ll create a thriving environment for your herbs to flourish year-round. Patience and observation are key, as each herb and indoor environment is unique.
Step 1: Choose Your Herbs Wisely
The foundation of a successful indoor herb garden lies in selecting herbs known to tolerate indoor conditions and lower light levels compared to their outdoor counterparts. For a year-round harvest, opt for varieties that are naturally resilient and adapt well to container living.
- Basil: Loves warmth and light. Varieties like ‘Dwarf Greek’ or ‘Bush’ are excellent for containers. Needs consistent moisture and protection from drafts.
- Mint: Incredibly hardy and sometimes too vigorous outdoors, making it ideal for indoor containment. Many varieties exist; peppermint and spearmint are popular. Can tolerate slightly less light.
- Chives: Easy to grow from seed or bulb. Provides a mild oniony flavor. Prefers bright light and steady moisture.
- Oregano: A Mediterranean herb that tolerates drier soil between waterings. Needs plenty of light.
- Thyme: Similar to oregano, thrives in bright light and well-draining soil. Many creeping varieties are well-suited for pots.
- Rosemary: Can be a bit more challenging, but ‘Arp’ or ‘Prostratus’ varieties do well indoors. Requires abundant light and good airflow. Avoid overwatering.
- Parsley: Flat-leaf (Italian) or curly—both are rewarding. Prefers consistent moisture and bright, indirect light.
- Cilantro: Tends to bolt quickly, but successive plantings and regular harvesting can provide a steady supply. Prefers cooler temperatures and bright light.
- Lemon Balm: Member of the mint family, offers a lovely lemon scent and flavor. Easy to grow and tolerates some shade.
- Sage: Also a Mediterranean herb, requiring good light and allowing soil to dry out slightly between waterings.
- Bay Laurel: A slow-growing tree that makes an excellent, long-lived indoor plant. Needs bright light and consistent moisture.
- Dill: Can be grown from seed but has a short lifespan. Best to replant every few months for continuous supply. Enjoys bright light.
Step 2: Prepare Your Containers and Soil
Once you’ve chosen your herbs, it’s time to set up their new homes. Proper preparation ensures a healthy start and minimizes future problems.
- Clean Containers: If reusing pots, wash them thoroughly with soap and water, then rinse well. For terracotta, you can soak them for 30 minutes to an hour before use to prevent them from wicking moisture away from the soil too quickly.
- Add Drainage Layer (Optional): While not strictly necessary with good potting mix, some gardeners like to add a layer of pebbles or broken pottery shards at the bottom of the pot. This is mainly to prevent soil from washing out of the drainage holes, rather than improving drainage itself.
- Fill with Potting Mix: Fill your chosen pots with a high-quality, well-draining potting mix. Leave about an inch of space from the rim of the pot. Lightly moisten the soil before planting; it should be damp but not soggy.
Step 3: Planting Your Herbs
Whether you’re starting from seed or transplanting seedlings, handle your herbs with care to minimize stress.
- From Seed: Follow packet instructions for depth and spacing. Generally, plant seeds a few times their width deep. Gently cover with soil and mist the surface to keep it moist. Use a clear plastic dome or cling film to create a mini-greenhouse effect until germination.
- From Starter Plants: Gently remove the herb from its nursery pot, taking care not to disturb the roots too much. Place it in a hole in your prepared pot, ensuring the top of the root ball is level with the surrounding soil. Backfill with potting mix and gently pat down.
- Watering After Planting: Water thoroughly until water drains from the bottom. This helps settle the soil around the roots.
Step 4: Provide Optimal Light and Temperature
Light is the most critical factor for indoor herbs, dictating their growth and flavor intensity. Temperature also plays a significant role.
- Natural Light: Place your herb pots in the sunniest south-facing window you have available (or east/west for less intense sun). Rotate your pots every few days to ensure all sides of the plant receive adequate light and prevent lopsided growth.
- Supplemental Lighting: If natural light is insufficient (common during winter or in north-facing rooms), set up grow lights. Position fluorescent or LED lights 6-12 inches above the plant canopy for 12-16 hours a day. Use a timer for consistency.
- Temperature: Most herbs thrive in temperatures between 60-70°F (15-21°C), which is typical for most homes. Avoid placing them near cold drafts from windows or hot gusts from heating vents, as extreme temperature fluctuations can stress plants.
Step 5: Watering and Feeding Regime
Consistent, proper watering and occasional feeding are vital for sustained growth.
- Watering: The golden rule is to water when the top inch of soil feels dry to the touch. Stick your finger into the soil to check. Water thoroughly until it drains from the bottom of the pot, then discard any excess water in the saucer to prevent root rot. Different herbs have different needs; rosemary and thyme prefer slightly drier conditions, while basil and parsley like more consistent moisture.
- Feeding: After about 4-6 weeks, the initial nutrients in the potting mix will be depleted. Begin feeding with a balanced liquid fertilizer (e.g., 5-5-5) diluted to half or quarter strength, every 2-4 weeks during active growth. Reduce feeding in winter when growth slows.
Step 6: Pruning and Harvesting for Longevity
Regular harvesting is not just about getting fresh herbs; it’s essential for encouraging bushier growth and preventing your plants from becoming leggy or going to seed too quickly.
- Pinch Back Regularly: For herbs like basil, mint, and oregano, pinch off the top set of leaves and the tender stem right above a leaf node. This encourages the plant to branch outwards, creating a denser, more productive plant. This is a critical factor for keeping your herbs from getting leggy and going to seed.
- Harvesting Technique: When harvesting, use sharp scissors or pruning shears to make clean cuts. Avoid stripping too many leaves from one area; distribute your harvest around the plant. Never remove more than one-third of the plant at a time.
- Flower Buds: For herbs grown for their leaves (e.g., basil, cilantro, mint), snip off any flower buds that appear. Flowering signals the plant to focus its energy on seed production, often leading to a change in flavor (bolting) and reduced leaf production.
Pro Tips and Common Mistakes to Avoid
Even with the best intentions, indoor gardening can present challenges. Here are some seasoned tips to enhance your success and common pitfalls to steer clear of.
Pro Tips for Thriving Herbs:
- Aerate Soil: Every few months, gently aerate the top inch or two of soil with a chopstick or thin stick. This improves oxygen flow to the roots and helps water penetrate evenly.
- Pest Patrol: Regularly inspect your plants for signs of pests like aphids, spider mites, or whiteflies. Early detection makes treatment much easier. A simple solution of insecticidal soap or neem oil can often resolve issues.
- Increase Humidity: If your home is dry (especially in winter), misting plants or using a humidity tray (pebbles and water under the pot) can significantly benefit humidity-loving herbs like basil and mint.
- Rotate Plants: Even in the brightest windows, light comes from one direction. Rotate your pots 90 degrees every few days to ensure all sides of the plant get light, promoting even, bushy growth.
- Succession Planting: For herbs like cilantro and dill that tend to bolt quickly, plant a new batch of seeds every 3-4 weeks. This ensures a continuous supply as older plants fade.
- Hardening Off (if moving outdoors): If you plan to move your indoor herbs outdoors for summer, gradually acclimate them to outdoor conditions over a week or two. Start with a few hours in a sheltered, shady spot and slowly increase exposure to sun and wind.
Common Mistakes to Avoid:
- Overwatering: This is arguably the biggest killer of indoor plants. Signs include yellowing leaves, drooping, and a musty smell from the soil. Always check the soil moisture before watering.
- Insufficient Light: Herbs will become leggy (tall and spindly with sparse leaves) and pale if they don’t get enough light. They might also lack the strong flavor associated with well-grown herbs. Invest in grow lights if natural light is inadequate.
- Lack of Drainage: Pots without drainage holes or blocked drainage holes lead to waterlogged soil and root rot. Always ensure your pots have proper drainage.
- Ignoring Pests: Minor pest infestations can quickly become major problems if not addressed. Be vigilant and act promptly at the first sign of trouble.
- Using Garden Soil: Outdoor garden soil is too dense for containers, compacts easily, and can harbor pests, diseases, and weed seeds. Always use a high-quality potting mix designed for containers.
- Not Pruning/Harvesting: Skipping this step leads to leggy, unproductive plants that may go to seed prematurely. Regular pinching and harvesting encourage vigorous, bushy growth.
- Temperature Extremes: Placing plants near drafty windows, air conditioning vents, or heating radiators can stress them. Aim for stable, moderate temperatures.
- Planting Too Many Herbs in One Pot: While some companion planting can work, overcrowding can lead to competition for nutrients, water, and light. Give each plant adequate space to thrive, or select appropriately sized pots for multiple herbs. Learn more about common gardening mistakes and how to fix them.
Eco-Friendly Variations for Your Indoor Herb Garden
Embracing eco-friendly practices in your indoor herb garden is a wonderful way to reduce your environmental footprint and create a healthier micro-environment in your home. These variations focus on sustainable choices and resource conservation.
1. Upcycled and Recycled Containers
- Glass Jars and Bottles: Clean glass jars (pickle jars, wine bottles cut safely) can make attractive, albeit drainage-challenged, planters. For drainage, a layer of pebbles at the bottom can be used, but careful watering is crucial. Better yet, use them as decorative outer pots for plastic nursery pots with drainage holes.
- Tin Cans: Washed and de-labeled tin cans can be easily transformed into herb pots. Punch drainage holes in the bottom using a hammer and nail. Paint them for a more aesthetic look.
- Plastic Containers: Large yogurt containers, milk jugs, or even laundry detergent bottles can be cleaned, cut, and given drainage holes to serve as temporary or permanent herb homes.
- Cardboard Egg Cartons: Excellent for starting seeds and can be planted directly into larger pots, as the cardboard will biodegrade.
2. Sustainable Potting Mix Alternatives
- Coir (Coconut Fiber): A popular peat moss alternative, coir is a renewable resource, provides excellent water retention and aeration, and has a neutral pH.
- Compost-Rich Mixes: Create your own potting mix by blending homemade compost with sand or perlite for drainage. This reduces reliance on store-bought mixes and recycles household organic waste.
- Vermicompost: Worm castings are a fantastic, nutrient-rich amendment for your potting mix, boosting plant health naturally.
3. Water Conservation Techniques
- Self-Watering Planters: These systems significantly reduce water waste by providing water as needed, preventing evaporation, and eliminating runoff.
- Rainwater Collection: If feasible, collect rainwater for watering your indoor herbs. Rainwater is free of chlorine and other chemicals found in tap water, which can be beneficial for sensitive plants.
- Watering Globes: While not for every plant, these decorative globes release water slowly into the soil, reducing frequency of watering.
4. Natural Pest Control
- Companion Planting: While space is limited indoors, certain plants can deter pests. For instance, growing a small chamomile plant nearby can attract beneficial insects if outdoors, or its scent may deter some pests. Indoors, simply providing a diverse plant environment can sometimes confuse pests.
- Neem Oil: An organic, biodegradable insecticide derived from the neem tree. It disrupts the life cycle of many common pests. Mix according to instructions and spray plants, especially the undersides of leaves.
- Insecticidal Soap: A non-toxic solution that smothers soft-bodied insects. Homemade versions can be made with a mild liquid soap and water, but commercial insecticidal soaps are safer as they lack detergents that can harm plants.
- Manual Removal: For small infestations, simply picking off pests or wiping them away with a damp cloth is effective.
5. Seed Saving and Propagation
- Seed Saving: Allow some of your herbs (like dill, cilantro, or parsley) to go to seed. Collect the seeds when dry and store them for next season’s planting. This reduces reliance on purchasing new seeds.
- Propagate from Cuttings: Many herbs (mint, basil, rosemary, oregano, sage) can be easily propagated from cuttings. Simply snip a 4-6 inch non-flowering stem, remove the lower leaves, and place it in water or moist potting mix. This endlessly renews your supply without needing to buy new plants, a great way for propagating new herb plants.
Seasonal Considerations for Indoor Herbs
While the goal is year-round growth, indoor conditions fluctuate with the seasons, impacting your herbs. Understanding these changes and adapting your care will ensure continuous vitality.
Spring (Revitalization and Growth)
- Increased Light: As days lengthen, natural light becomes more abundant. Your herbs will respond with vigorous new growth.
- Watering: You’ll likely need to increase watering frequency as plants grow more actively and dry out faster.
- Fertilizing: This is the prime time to start or increase your feeding regime after a winter slowdown.
- Repotting: If any herbs have outgrown their pots, spring is the ideal time to repot them into slightly larger containers.
- Pruning: A good time for a more substantial haircut to encourage bushiness.
Summer (Peak Production)
- Abundant Light: If placed in a sunny window, your herbs will thrive. Be mindful of intense direct sun which can sometimes scorch tender leaves.
- Watering: Daily watering might be necessary for some herbs, especially in warmer conditions or if you live in a dry climate.
- Pest Watch: Warmer temperatures can sometimes lead to increased pest activity. Regular inspection is key.
- Harvesting: This is your most productive season! Harvest frequently to encourage continuous growth.
- Vacation Prep: If you’re going away, consider self-watering solutions or ask a friend to water.
Autumn (Transition and Preparation)
- Decreasing Light: As days shorten, natural light diminishes. Start considering supplemental grow lights if you haven’t already.
- Watering: Gradually reduce watering frequency as plant growth slows down.
- Fertilizing: Begin to taper off fertilizing or reduce it to a very dilute solution monthly.
- Bringing Indoors: If you’ve moved herbs outdoors for summer, bring them back inside before nighttime temperatures consistently drop below 50°F (10°C). Inspect them thoroughly for pests before bringing them in.
Winter (Survival and Maintenance)
- Low Light: This is the most challenging season for indoor herbs. Grow lights become crucial for most herbs to maintain any significant growth. Aim for 12-16 hours of light daily.
- Humidity: Indoor heating can make the air very dry. Implement humidity trays or regular misting to counteract this.
- Watering: Significantly reduce watering frequency. Allow the soil to dry out more between waterings to prevent root rot.
- Fertilizing: Stop fertilizing or reduce it to a very occasional, highly diluted dose for actively growing plants under strong grow lights.
- Dormancy: Some herbs, even indoors, may naturally slow down or enter a semi-dormant state. Don’t be alarmed; provide consistent basic care, and they’ll bounce back in spring.
Expert Resources for Advanced Indoor Herb Growing
To further deepen your knowledge and troubleshoot specific challenges, these external resources offer in-depth information from horticultural experts:
- The Royal Horticultural Society (RHS): A world-renowned gardening charity with extensive guides on various plants, including herbs. Their website offers detailed cultivation advice, pest and disease identification, and general gardening principles. Visit rhs.org.uk for their dedicated herb-growing section.
- Gardening Know How: An excellent online resource providing a vast library of articles on gardening topics for all skill levels. They cover everything from basic plant care to advanced propagation techniques and pest management. Explore their extensive content on herbs at gardeningknowhow.com.
- University Extension Programs: Many universities across the globe offer free, research-based information through their extension services. These guides often provide regionally specific advice but also cover universal gardening principles. For example, the University of Minnesota Extension offers valuable insights into indoor gardening and herb cultivation at extension.umn.edu. Search for your local university extension for more tailored advice.
Conclusion: Your Year-Round Herb Haven Awaits
Growing herbs indoors year-round is a truly rewarding endeavor that transforms your kitchen into a wellspring of fresh flavors and your home into a verdant sanctuary. From the vibrant green of basil on your windowsill to the soothing aroma of mint steeping in your tea, the benefits extend far beyond convenience. You’re not just cultivating plants; you’re nurturing a sustainable, eco-conscious lifestyle, enhancing your culinary skills, and fostering a deeper connection to nature, even in the heart of urban living.
Remember, gardening is an art as much as it is a science. While this guide provides a robust framework, the true magic lies in observation, patience, and a willingness to learn from your plants. Each herb has a personality, and each indoor environment presents unique challenges and opportunities. Embrace the journey, celebrate the small victories, and don’t be afraid to experiment. With the right foundations—good light, proper watering, consistent care, and a sprinkle of love—your indoor herb garden will flourish, providing you with an endless supply of fresh, homegrown goodness, no matter the season. So, go ahead, pick out your favorite herbs, find that sunny spot, and start growing your own year-round herb haven today!
FAQ: Growing Herbs Indoors Year-Round
1. Which herbs are truly the easiest to grow indoors year-round for beginners?
For beginners looking for year-round success, mint, chives, oregano, and lemon balm are consistently the easiest. Mint is incredibly robust, often invasive outdoors, making it perfect for indoor containment. Chives grow well from seed and are forgiving. Oregano and lemon balm are resilient and tolerate a range of indoor conditions, especially with good light. Basil is also easy but requires more consistent warmth and moisture than the others.
2. How much light do indoor herbs really need, especially in winter?
Most herbs require at least 4-6 hours of direct sunlight per day to thrive, and ideally 6-8 hours for robust growth and flavor. In winter, when natural light is significantly reduced and daylight hours are shorter, it’s highly recommended to use supplemental grow lights. Full-spectrum LED or T5/T8 fluorescent lights placed 6-12 inches above the plants for 12-16 hours a day can make a dramatic difference, ensuring your herbs continue to grow productively rather than just surviving.
3. Can I use regular garden soil for potted indoor herbs?
No, it’s strongly advised not to use regular garden soil for indoor potted herbs. Garden soil is too dense, compacts easily in pots, and lacks the proper drainage and aeration required for container gardening. It can also introduce pests, diseases, and weed seeds into your home environment. Always use a high-quality, well-draining potting mix specifically formulated for containers, which typically contains ingredients like perlite, vermiculite, or coco coir.
4. My indoor herbs are looking leggy and pale. What am I doing wrong?
Leggy and pale growth is a classic sign of insufficient light. Plants stretch and thin out as they try to reach a light source, and lack of light also reduces chlorophyll production, leading to paleness. To remedy this, move your herbs to a brighter, sunnier window (preferably south-facing) or invest in a full-spectrum grow light. Ensure they receive adequate light (4-6 hours direct, 12-16 hours supplemental) and consider rotating them regularly to ensure all sides get exposure. Pinching back leggy stems can also encourage bushier growth once light conditions improve.


