The Ultimate Weekend Project: Build a Cold Frame from Old Windows in 7 Easy Steps
Are you looking to extend your gardening season, protect delicate seedlings, or simply get a head start on spring planting without breaking the bank? Look no further! This comprehensive guide will walk you through the rewarding process of how to build a cold frame old windows. Reclaiming salvaged windows not only gives new life to discarded materials but also provides an incredibly effective, low-cost solution for gardeners of all levels. Imagine fresh greens in winter or robust starts ready for an early spring transplant – all thanks to your DIY ingenuity and a bit of elbow grease. Let’s dig in and transform those old windows into a gardening powerhouse!
[lwptoc]

Why This Matters for Your Garden: The Power of a Cold Frame
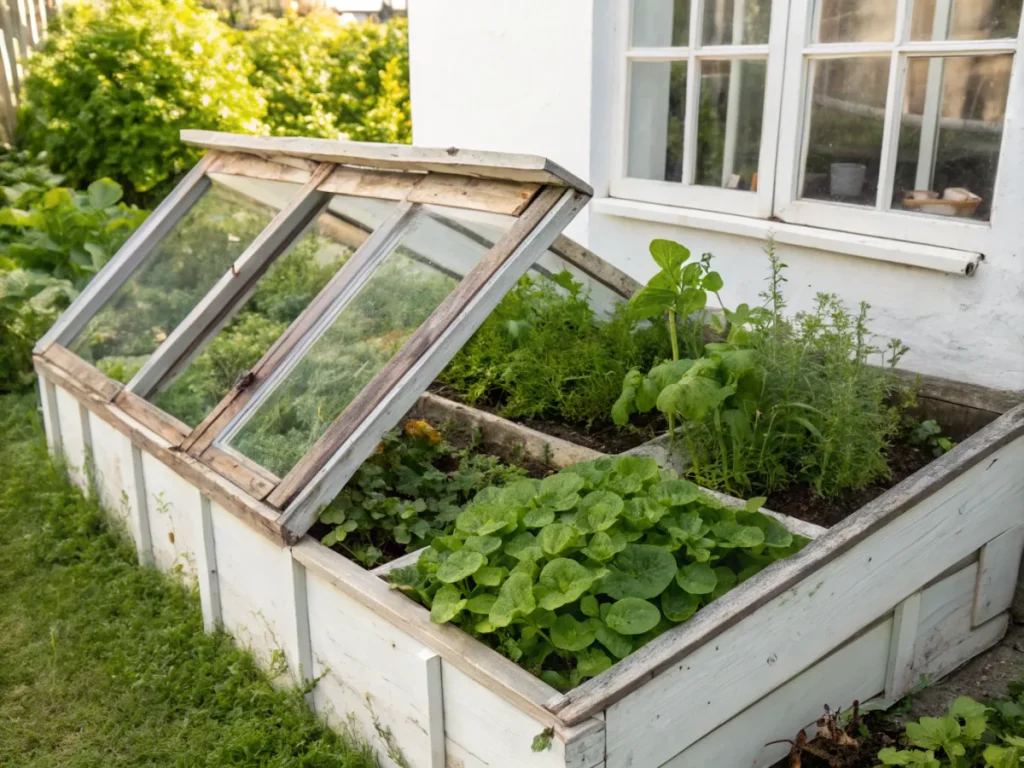
A cold frame is essentially a bottomless box with a translucent lid, typically glass or plastic, designed to protect plants from cold weather. It’s a miniature greenhouse, but without any artificial heating, relying instead on passive solar gain. This simple structure offers a multitude of benefits that can revolutionize your gardening efforts, especially if you live in a climate with unpredictable springs or early frosts.
Firstly, it allows for season extension. In many regions, the growing season is painfully short. A cold frame enables you to sow seeds weeks, even months, earlier than you otherwise could. Imagine harvesting fresh lettuce or spinach in late winter when the ground is still frozen, or keeping hardy herbs alive well into late autumn. This extension can significantly increase your harvest yield and provide fresh produce over a longer period.
Secondly, a cold frame is an excellent tool for hardening off seedlings. “Hardening off” is the crucial process of gradually acclimating young plants, started indoors, to outdoor conditions before transplanting them into the garden. Without this step, tender seedlings can suffer from “transplant shock” due to sudden exposure to wind, direct sunlight, and fluctuating temperatures. A cold frame provides a sheltered transition zone, slowly introducing plants to the elements while offering protection from harsh extremes, ensuring stronger, more resilient plants.
Thirdly, it acts as a protective nursery for tender plants. Newly transplanted perennials, vulnerable annuals, or even small shrubs can benefit from the microclimate a cold frame creates. It shields them from biting winds, heavy rains, and unexpected cold snaps, allowing them to establish their root systems more effectively without stress. This reduces plant loss and helps them thrive, particularly in their crucial early stages.
Finally, building a cold frame from old windows is an incredibly eco-conscious choice. Instead of buying new materials, you’re repurposing resources that might otherwise end up in a landfill. This reduces waste, conserves energy, and often saves you a considerable amount of money. It’s a perfect example of sustainable gardening, turning salvaged items into a functional and beneficial garden asset. For more ideas on sustainable gardening, check out our guide on sustainable gardening practices.
What You Need: Tools, Materials, and the Right Plants
Embarking on your cold frame project requires a bit of planning and gathering of materials. The beauty of this DIY is its flexibility; you can adapt it to the windows you find. Here’s a comprehensive list of what you’ll typically need:
Essential Tools:
- Measuring Tape: For accurate cuts and layout.
- Circular Saw or Hand Saw: For cutting lumber. A miter saw can also be helpful for cleaner cuts.
- Drill: For pre-drilling pilot holes and driving screws.
- Screwdriver bits: To match your chosen screws.
- Wood Clamps: To hold pieces securely while assembling.
- Safety Glasses and Gloves: Always prioritize safety when working with tools and salvaged materials.
- Staple Gun (optional): For attaching plastic sheeting if reinforcing.
- Caulking Gun: For sealing any gaps.
- Paintbrush (optional): For applying wood preservative or paint.
Materials – The Upcycled and the New:
- Old Windows: This is the star of your project! Look for sturdy, single-pane or double-pane windows. The size and number will dictate the dimensions of your cold frame. Ensure the glass is intact or can be easily replaced. Salvage yards, old homes being demolished, or even online marketplaces are great sources. Consider how the windows will open – hinges are key!
- Lumber for the Frame:
- 2x6s or 2x8s (pressure-treated or naturally rot-resistant wood like cedar/redwood): For the base frame. The thicker the wood, the better insulation it provides.
- 2x4s: For reinforcing corners, creating slopes, and potentially for the lid frame if you’re not using the window frames directly.
- Wood Screws (exterior grade): Various lengths, typically 2.5-inch and 3-inch, to secure the frame components.
- Hinges: Sturdy exterior hinges to attach your window lid to the base.
- Handle or Prop Stick: To lift and hold the lid open for ventilation.
- Caulking (exterior grade): To seal any gaps for better insulation.
- Wood Preservative or Exterior Paint/Stain (optional but recommended): To protect the wood from moisture and rot.
- Heavy-duty Plastic Sheeting (optional): If your windows are damaged or you want to add an extra layer of insulation.
- Gravel or Sand (optional): For a well-draining base.
Planting Considerations: What to Grow in Your Cold Frame
Once your cold frame is built, consider what plants will thrive within its sheltered environment:
- Leafy Greens: Lettuce, spinach, arugula, kale, Swiss chard are excellent choices. They tolerate cooler temperatures and provide continuous harvests.
- Root Vegetables: Radishes, carrots (short varieties), and even overwintering onions can do well.
- Herbs: Cilantro, parsley, chives, mint, and some varieties of thyme can be protected and harvested for longer.
- Hardy Seedlings: Cabbage, broccoli, cauliflower, Brussels sprouts can be started early.
- Hardening Off: ALL your indoor-started seedlings will benefit from a week or two in the cold frame before going into the garden.
Step-by-Step Guide: Bringing Your Cold Frame to Life
This is where your vision truly takes shape! Follow these steps to transform those old windows into a functional garden asset. Remember to always double-check measurements and prioritize safety.
Step 1: Design and Measure – The Blueprint of Your Cold Frame
Before cutting a single piece of wood, lay out your old windows. Determine the most effective way to combine them to form your cold frame lid. Will it be a single window, or two or three hinged together? Measure the total length and width of your chosen window(s) to get the exact dimensions for your base. This is the foundation of your design. Decide on the height of your cold frame – typically taller at the back to allow for a slope for water runoff and better sun capture. A slope of 6-12 inches from back to front is ideal.
Step 2: Cut the Lumber for the Base Frame
Using your measurements from Step 1, cut your 2×6 or 2×8 lumber for the long sides (back and front) and the short sides (ends) of your cold frame base. You’ll need two pieces for the back and front, and two for the sides. Remember, the back piece should be taller than the front piece to create the necessary slope. For example, if your front is 12 inches high, your back might be 18-24 inches high, and the side pieces will be cut at an angle to connect these two heights. Accurately measuring and cutting these angles is crucial for a snug fit. If using multiple planks for height, ensure they are securely joined.
Step 3: Assemble the Base Frame
Position your cut lumber pieces to form a rectangle. Using exterior-grade wood screws (typically 2.5-3 inches), secure the pieces at each corner. You may want to pre-drill pilot holes to prevent the wood from splitting. Ensure the frame is square and sturdy. If you’re building a very long cold frame, consider adding a support brace across the middle for added stability. For extra rigidity, you can cut and attach 2x4s vertically at each corner on the inside, reinforcing the screw connections. Don’t forget to treat any cut ends with wood preservative if you’re using pressure-treated lumber, to maintain its integrity against rot.
Step 4: Prepare and Attach the Window Lid
Clean your old windows thoroughly, removing any loose paint or debris. Check for any cracked panes; if necessary, replace them with new glass or clear polycarbonate sheets. If you have multiple windows that will form the lid, connect them with hinges along their long edges to create a single, foldable unit. Then, position the assembled window lid onto the top of your wooden base frame. Ensure it sits flush and covers the opening completely. Attach the hinges from the back edge of the window lid to the top of the taller back piece of your wooden frame. This allows the lid to open upwards, providing easy access for ventilation and plant care.
Step 5: Seal and Insulate for Optimal Performance
Once the lid is hinged, inspect your cold frame for any gaps or cracks between the wooden frame and where the window sits. Use exterior-grade caulk to seal these areas. This is vital for trapping heat and keeping out cold drafts and moisture. You can also add weatherstripping around the edges of the window frame for an even tighter seal. If desired, treat all exposed wood surfaces with an exterior paint or stain to protect them from the elements and prolong the life of your cold frame. This step significantly improves the cold frame’s efficiency and durability. For more on protecting outdoor wood, see this guide on protecting outdoor wood.
Step 6: Add Ventilation and Access Mechanisms
Effective ventilation is critical to prevent overheating on sunny days and to manage humidity, which can lead to fungal diseases. Attach a prop stick or a simple chain to the front edge of the window lid and the front of the cold frame. This allows you to prop the lid open at various heights to regulate the internal temperature. Alternatively, you can use automatic venting openers that raise and lower the lid based on temperature fluctuations – a fantastic upgrade if your budget allows. A handle on the front of the lid can make opening it even easier. This thoughtful addition ensures your plants always have the ideal environment.
Step 7: Site Selection and Planting
The final crucial step is choosing the right location for your new cold frame. Select a spot that receives full sun, especially during the winter months, preferably facing south. Good drainage is also important; you might want to elevate the frame slightly or add a layer of gravel inside the base for better drainage. Fill the interior with good quality potting soil or a mix of compost and garden soil, ensuring adequate depth for your chosen plants. Now, you’re ready to plant your seeds or transplant your seedlings! Remember to monitor the temperature inside the cold frame daily, using your ventilation system as needed. Congratulations, you’ve successfully learned how to build a cold frame old windows!
Pro Tips and Common Mistakes to Avoid
Building a cold frame from old windows is a straightforward project, but a few expert tips can elevate your results, and knowing common pitfalls can save you time and frustration.
Pro Tips:
- Sourcing Windows: Be creative! Check architectural salvage yards, Facebook Marketplace, Craigslist (look under “free” section), or even ask around at local demolition sites. Safety first when handling old windows – glass can be fragile! Don’t be afraid to mix and match sizes if you’re clever with your framing.
- The Ideal Slope: Aim for a slope of about 6-12 inches (e.g., the back is 6-12 inches taller than the front). This not only helps with water runoff but also maximizes sun exposure, especially during low winter sun angles. The steeper the angle, the better the solar gain in winter.
- Insulation is Key: Beyond sealing gaps, consider insulating the sides. You can line the interior walls with rigid foam insulation (cut to fit) or even pile straw bales around the exterior in extremely cold weather. This provides an extra layer of protection against frost.
- Automatic Vent Openers: While a prop stick works, an automatic vent opener is a game-changer. These devices use a wax cylinder that expands and contracts with temperature, automatically opening and closing the lid. This prevents your plants from cooking on unexpectedly warm days and eliminates the need for daily manual adjustments.
- Consider a Base: Instead of placing it directly on soil, create a raised bed base with hardware cloth underneath to deter burrowing pests like voles and moles. This also provides better drainage.
- Winter Care: In heavy snow, brush snow off the cold frame lid to allow light penetration. Snow can also be piled around the sides for additional insulation, but ensure it doesn’t block the lid from opening for ventilation.
Common Mistakes to Avoid:
- No Ventilation: This is arguably the biggest mistake. On a sunny day, even in winter, temperatures inside a closed cold frame can quickly soar, “cooking” your plants. Always provide a way to vent, even if it’s just propping the lid a few inches.
- Insufficient Slope: A flat top will accumulate rainwater and snow, potentially stressing the frame and blocking light. It also reduces the efficiency of solar heat gain.
- Poor Drainage: If your cold frame sits in a waterlogged area, your plants will suffer from root rot. Ensure the site is well-drained, or amend the soil within the frame for good drainage.
- Using Untreated Wood Outdoors: Regular untreated lumber will rot quickly when in contact with soil and moisture. Always use pressure-treated, cedar, or redwood for the base, or apply a generous amount of exterior-grade wood preservative/paint.
- Ignoring Pest Control: Cold frames can also become attractive shelters for slugs, snails, and other pests. Regularly inspect your plants and the interior of the frame for any unwelcome visitors. Copper tape around the base can deter slugs.
- Overcrowding Plants: Just like a regular garden bed, overcrowding in a cold frame restricts airflow and light, making plants more susceptible to disease. Give your plants enough space to grow.
Eco-Friendly Variations for Your Cold Frame
Building a cold frame from old windows is already a step towards sustainable gardening, but there are even more ways to enhance its eco-friendliness and resourcefulness.
- Found Object Base: Instead of cutting new lumber, consider alternative salvaged materials for the base. Old brick or concrete blocks from a demolition site can create a sturdy, long-lasting base. Even thick planks from old wooden pallets, carefully deconstructed and treated, can work for the sides, though their longevity might be less than purpose-built lumber.
- Straw Bale Construction: For a truly temporary or very low-cost cold frame, use straw bales directly as the sides. Stack them to create the desired height and slope, then simply place your old window on top. This is a fantastic option for a single season or for immediate use, and the straw can be composted afterward.
- Recycled Plastic “Glass”: If your old windows have broken panes, instead of buying new glass, consider cutting clear polycarbonate or plexiglass from old shower doors, discarded advertisement displays, or large picture frames. Ensure the material is UV stable for longevity.
- Composting Cold Frame: For an extra boost of warmth, especially in very cold climates, build your cold frame over a “hotbed” of actively composting organic material (like fresh manure and straw). The decomposition process generates heat, effectively turning your cold frame into a naturally heated mini-greenhouse. This requires more maintenance but can significantly extend your season.
- Rainwater Harvesting Integration: If your cold frame is large enough and positioned appropriately, consider directing rainwater runoff from the lid into a small collection system. A simple gutter attached to the back of the cold frame leading to a bucket can provide water for your cold frame plants, reducing reliance on tap water.
- Natural Finishes: Instead of synthetic paints, opt for natural linseed oil or other eco-friendly wood preservatives to treat your wooden frame. These options are typically less toxic and more biodegradable, aligning with a complete organic gardening approach. This keeps harmful chemicals out of your garden. Finding non-toxic alternatives for any garden material is an important part of ecological gardening.
Seasonal Considerations for Your Cold Frame
Your cold frame isn’t just for spring; it’s a versatile tool that can be utilized throughout the year to maximize your garden’s potential.
Winter:
- Overwintering Hardy Crops: Keep hardy greens like spinach, kale, and mache alive and producing fresh leaves throughout the winter.
- Protecting Perennials: Provide a sheltered spot for tender perennials that might not survive harsh winter conditions outside.
- Garlic and Onion Starts: Get an early start on these crops by planting cloves or sets in late fall for overwintering.
- Thermal Mass: Place dark-colored containers filled with water inside the cold frame. These will absorb heat during the day and slowly release it at night, moderating temperature fluctuations.
Spring:
- Early Seed Starting: Sow seeds for cool-season crops (lettuce, radishes, peas, cabbage family) weeks before the last frost date.
- Hardening Off: This is the prime time to harden off all your indoor-started seedlings before transplanting them into the garden. Gradually increase ventilation over 1-2 weeks.
- Protecting Early Transplants: Use it to shelter newly transplanted cool-season crops from unexpected late frosts or cold winds.
Summer:
- Summer Storage/Protection: On hot days, the cold frame can become too hot. Fully open the lid or even remove it entirely. It can be used to protect heat-sensitive plants from scorching sun if partially shaded.
- Solarizing Soil (if applicable): If you have an empty cold frame and want to sterilize the soil to kill weeds and pathogens, keep the lid closed on scorching summer days to allow temperatures to soar.
- Seed Saving: Provide a dry, protected environment for seed heads to fully dry before harvesting.
Autumn:
- Extending Warm-Season Harvests: Protect tender herbs or last fruits of peppers and tomatoes from early frosts.
- Planting Fall/Winter Crops: Sow seeds for late-season lettuce, spinach, or other greens for a fall and early winter harvest.
- Preparing for Winter: Clean out the cold frame, add fresh compost, and prepare it for winter planting or overwintering. Ensure all seals are sound and hinges are working well.
Regular monitoring of internal temperatures and adjusting ventilation accordingly is the most important skill to master for year-round cold frame success. A simple thermometer inside the cold frame is an invaluable tool for this purpose.
Expert Resources for Your Gardening Journey
While this guide provides a comprehensive overview, continuous learning is key to becoming a successful gardener. Here are some trusted external resources that offer further insights into cold frames, season extension, and general gardening best practices:
- Gardening Know How: An extensive online resource for all things gardening, offering detailed articles on cold frames, specific plant care, pest control, and much more. Their practical advice can help troubleshoot any gardening challenge. Visit Gardening Know How’s section on cold frames for additional tips and ideas.
- The Royal Horticultural Society (RHS): A leading UK gardening charity, the RHS provides authoritative advice and inspiration for gardeners worldwide. Their guides are meticulously researched and cover a wide array of topics, from plant selection to advanced growing techniques, including excellent information on protective structures like cold frames. Explore their resources at RHS Cold Frame and Cloche Advice.
- University Extension Programs: Many universities across the US (and similar institutions globally) offer invaluable, research-based gardening information tailored to local climates and conditions. These extension services are excellent for region-specific advice on cold frames, planting schedules, and soil health. For instance, the University of Minnesota Extension offers robust guides; search for your local university extension office online for highly relevant information. A good starting point can be found on sites like University of Minnesota Extension: Cold Frames and Hoop Houses. These resources often provide free fact sheets and workshops.
These resources, combined with your hands-on experience of how to build a cold frame old windows, will empower you to grow a thriving garden year-round.
Conclusion: Your DIY Cold Frame – A Season-Extending Triumph
Congratulations! You’ve just embarked on or completed a truly rewarding DIY project. Learning how to build a cold frame old windows is more than just constructing a box; it’s about extending your gardening capabilities, embracing sustainable practices, and enjoying fresh produce for a larger portion of the year. Not only have you given new life to old materials, but you’ve also created a valuable tool for hardening off seedlings, protecting delicate plants, and getting those prized early harvests.
From the initial design to the final planting, each step contributes to a more resilient and productive garden. The satisfaction of seeing your plants thrive in the shelter of your homemade cold frame is immense. So, embrace the seasons, keep experimenting, and enjoy the fruits (and vegetables!) of your labor. Happy gardening!
Pro Tip for Longevity:
Even with treated wood, consider elevating your cold frame slightly off the ground using pavers or bricks. This further prevents moisture wicking up into the wood and extends the life of your structure significantly.
Frequently Asked Questions About Building a Cold Frame
<p><strong>Q1: What kind of old windows are best for a cold frame?</strong></p>
<p>A1: Single-pane or double-pane wood-framed windows are ideal because they are easy to hinge and work with. Ensure the glass is intact or can be easily replaced. Avoid vinyl windows if possible, as they can be trickier to modify and less rigid. Look for windows in good structural condition, even if the paint is peeling.</p>

<p><strong>Q2: How do I prevent my cold frame from overheating?</strong></p>
<p>A2: Ventilation is critical! On sunny days, even in winter, temperatures inside can quickly rise. Prop the lid open using a stick, chain, or install an automatic vent opener. Monitor the internal temperature with a thermometer and adjust ventilation as needed. Generally, aim to keep the temperature below 70°F (21°C) for most cool-season crops. For more on temperature control, read our guide on <a href="https://nouvelles-technologie.com/garden-temperature-control/">garden temperature control</a>.</p>

<p><strong>Q3: Can I use plastic sheeting instead of glass windows?</strong></p>
<p>A3: Yes, heavy-duty clear plastic sheeting (e.g., 6-mil greenhouse film or polycarbonate twinwall sheets) can be used as an alternative, especially if you can't find suitable windows or are worried about glass breaking. It's lighter and often more affordable. However, plastic generally doesn't insulate as well as glass and may degrade faster due to UV exposure, requiring more frequent replacement.</p>

<p><strong>Q4: How deep should the soil be inside my cold frame?</strong></p>
<p>A4: A soil depth of at least 8-12 inches (20-30 cm) is generally recommended. This allows adequate space for root development for most cold-hardy vegetables and seedlings. If you plan to grow deeper-rooted crops like carrots, aim for the higher end of this range. Ensure the soil is rich in organic matter and well-draining.</p>


