Introduction
Many gardeners find the prospect of collecting, and, saving, seeds, for future planting daunting, but did you know that carefully saved seeds can boast a germination rate of up to 90% in optimal conditions, often outperforming commercial packets that might only guarantee 60-70%? This simple, satisfying practice not only slashes seed costs but also ensures genetic continuity of your favorite, well-adapted plants.
[lwptoc]
Embracing seed saving allows you to cultivate a more resilient and self-sufficient garden. You’ll gain a deeper connection to your plants’ life cycles and contribute to biodiversity right in your backyard. This guide will walk you through the entire process, empowering you to become your own seed bank.
Join us on this rewarding journey to preserve exceptional varieties, adapt plants to your unique microclimate, and save a significant amount of money each gardening season. The knowledge you gain will be invaluable for future harvests and a flourishing ecosystem.
Quick Summary
- Cost Savings: Consistently save 75-100% on annual seed purchases.
- Genetic Purity: Preserve specific heirloom traits and adapt varieties to your local climate over time.
- Eco-Friendly: Reduce demand for industrially produced seeds and packaging waste.
Context & Ideal Conditions
Successful seed collection is predominantly a late summer to early fall activity, often between August and October, depending on your USDA Hardiness Zone (e.g., Zone 6b vs. Zone 9a) and specific plant maturation cycles. Most seed-bearing plants thrive in full sun conditions (at least 6 hours of direct sunlight daily) during their growing phase to produce viable seeds.
The ideal temperatures for drying and storing seeds vary but generally fall between 60-70°F (15-21°C) with low humidity, typically under 50%. A neutral soil pH of 6.0-7.0 during the growing season promotes healthy plants and robust seed development. Ensure plants are allowed to fully mature and dry on the stem for best results.
collecting, and, saving, seeds, for: Tools & Materials
To begin collecting, and, saving, seeds, for your next planting season, you’ll need a few essential items. For dry seeds like beans or poppies, sharp bypass pruners (e.g., Felco F-2) are crucial for clean cuts, minimizing plant damage. For wet seeds, such as tomatoes or cucumbers, a fine-mesh sieve with openings of approximately 0.05 in (1.3 mm) is ideal for separating seeds from pulp, and glass jars (e.g., pint-sized, 16 fl oz / 473 ml) or shallow dishes will be needed for fermentation.
Small paper envelopes (2.5 x 4 in / 6.4 x 10.2 cm) or coin envelopes are perfect for individual seed packets, ensuring proper air circulation. A permanent marker, preferably archival quality, is vital for labeling. For some larger seeds, a simple brown paper bag (e.g., standard lunch bag size) serves well for initial drying of entire seed heads. Always wear gardening gloves, such as nitrile-coated cotton gloves (ANSI Level 2 cut resistance), to protect your hands from potential irritants or thorns.
collecting, and, saving, seeds, for: Time, Difficulty & Budget
| Prep | 15–30 min |
| Build/Plant | 10–60 min (per species) |
| Total | 25–90 min (per species) |
| Skill Level | Beginner |
| Budget | ≈ $10–$50 (materials/tools) |
Collecting and saving seeds is remarkably accessible, especially when compared to buying new packets every year. This activity is approximately 90% cheaper than relying solely on commercial seed purchases annually. Your primary investments are a few basic tools and containers, most of which you might already own or can easily procure at minimal cost.
Step-by-Step Tutorial
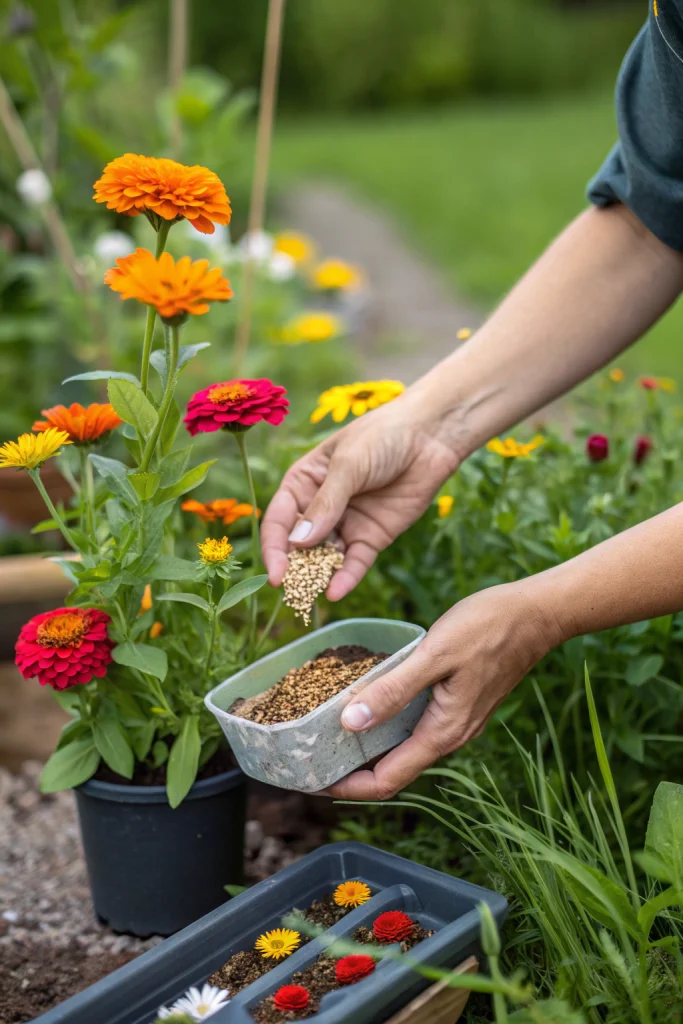
Step 1 — Identify Ripe Seeds & Collect
Carefully observe your chosen plants for signs of mature seeds. For dry-seeded plants like beans, peas, or dill, pods should be dry, brown, and brittle, rattling when shaken. Tomatoes and cucumbers, which are wet-seeded, should be overripe, often showing soft spots or deep coloration. Collect during dry weather to prevent moisture issues, ideally mid-morning after dew has evaporated.
Use your sharp bypass pruners to cut seed heads or pods directly from the plant. For legumes, collect entire pods. For plants with delicate seeds like lettuce or cosmos, you might gently shake the dried flower heads over a container to catch falling seeds. Always ensure you are collecting from healthy, vigorous plants free of disease or pests to propagate robust offspring.
Step 2 — Extracting and Cleaning Seeds
For dry seeds, gently crush the dried pods or seed heads over a tray. You might need to rub them between your hands or use a rolling pin for tougher cases like corn or sunflowers. To separate chaff from seed, use a simple winnowing technique: pour the mixture from one container to another in front of a gentle fan or breeze. The lighter chaff will blow away, leaving heavier seeds behind. Repeat until reasonably clean.
Wet seeds (e.g., tomatoes, cucumbers) require fermentation. Scoop the seeds and pulp into a glass jar and add a small amount of water, about 1/4 (6.4 mm) over the mixture. Cover loosely and let it sit at room temperature for 2-4 days. A layer of mold may form on top; this is normal and helps break down germination inhibitors. Once fermentation is complete, the viable seeds will sink, and the pulp will float. Skim off the floating debris, pour the water and sunken seeds into a fine-mesh sieve, and rinse thoroughly under cool running water.
Step 3 — Drying Seeds Thoroughly
Proper drying is paramount to preventing mold and preserving viability. Spread the cleaned seeds in a single layer on a non-stick surface, such as a ceramic plate, parchment paper, or a fine mesh screen. Avoid direct sunlight as extreme heat can damage embryos. Optimal drying occurs in a well-ventilated area, away from high humidity, at room temperature (60-75°F / 15-24°C).
Allow seeds to air dry for at least 1-3 weeks. Larger seeds, like beans or corn, may take longer, up to 4 weeks. To test dryness, try bending a seed; if it snaps rather than bends, it's generally dry enough. For smaller seeds, a "smash test" where you press a seed with a blunt object can indicate internal moisture. Ensure complete dryness before storage to avoid mildew and loss of viability.
Step 4 — Packaging and Labeling
Once thoroughly dry, transfer seeds into airtight containers for storage. Small paper envelopes or coin envelopes are excellent for breathability and are easy to label. For long-term storage, seal paper envelopes inside a larger airtight container, such as a glass mason jar with a rubber seal or a plastic food storage container. For high humidity environments or very long-term storage, add a desiccant packet to the sealed container to absorb any lingering moisture.
Label each packet clearly with the plant name (include botanical name if known, e.g., Phaseolus vulgaris for common beans), variety, and the date of harvest. This information is critical for tracking viability and planning future plantings. Store seeds in a cool, dark, and dry location. A cupboard, a dark closet, or even a dedicated seed storage box that maintains a stable temperature and humidity is ideal.
Care & Schedule
Stored seeds require minimal care but consistent conditions. Maintain storage temperatures between 35-50°F (1.7-10°C) and relative humidity between 30-40% for optimal longevity. Regularly check your storage area for signs of rodent activity or insect pests.
| Month | Activity | Details |
|---|---|---|
| Fall (Sept-Nov) | Collect, Clean & Dry | Harvest mature seeds from plants after they dry on the stem or after fermentation for wet seeds. Thoroughly dry for 1-4 weeks depending on size. Package and label, then store. |
| Winter (Dec-Feb) | Monitor & Plan | Check seeds quarterly for moisture, mold, or pests. Organize seed packets and plan next season’s garden layout. Research germination requirements for stored varieties. |
| Spring (Mar-May) | Germination Test | Perform a germination test on a small sample of older seeds (e.g., 10 seeds on a damp paper towel). Plant seeds for spring starts indoors 6-8 weeks before last frost. |
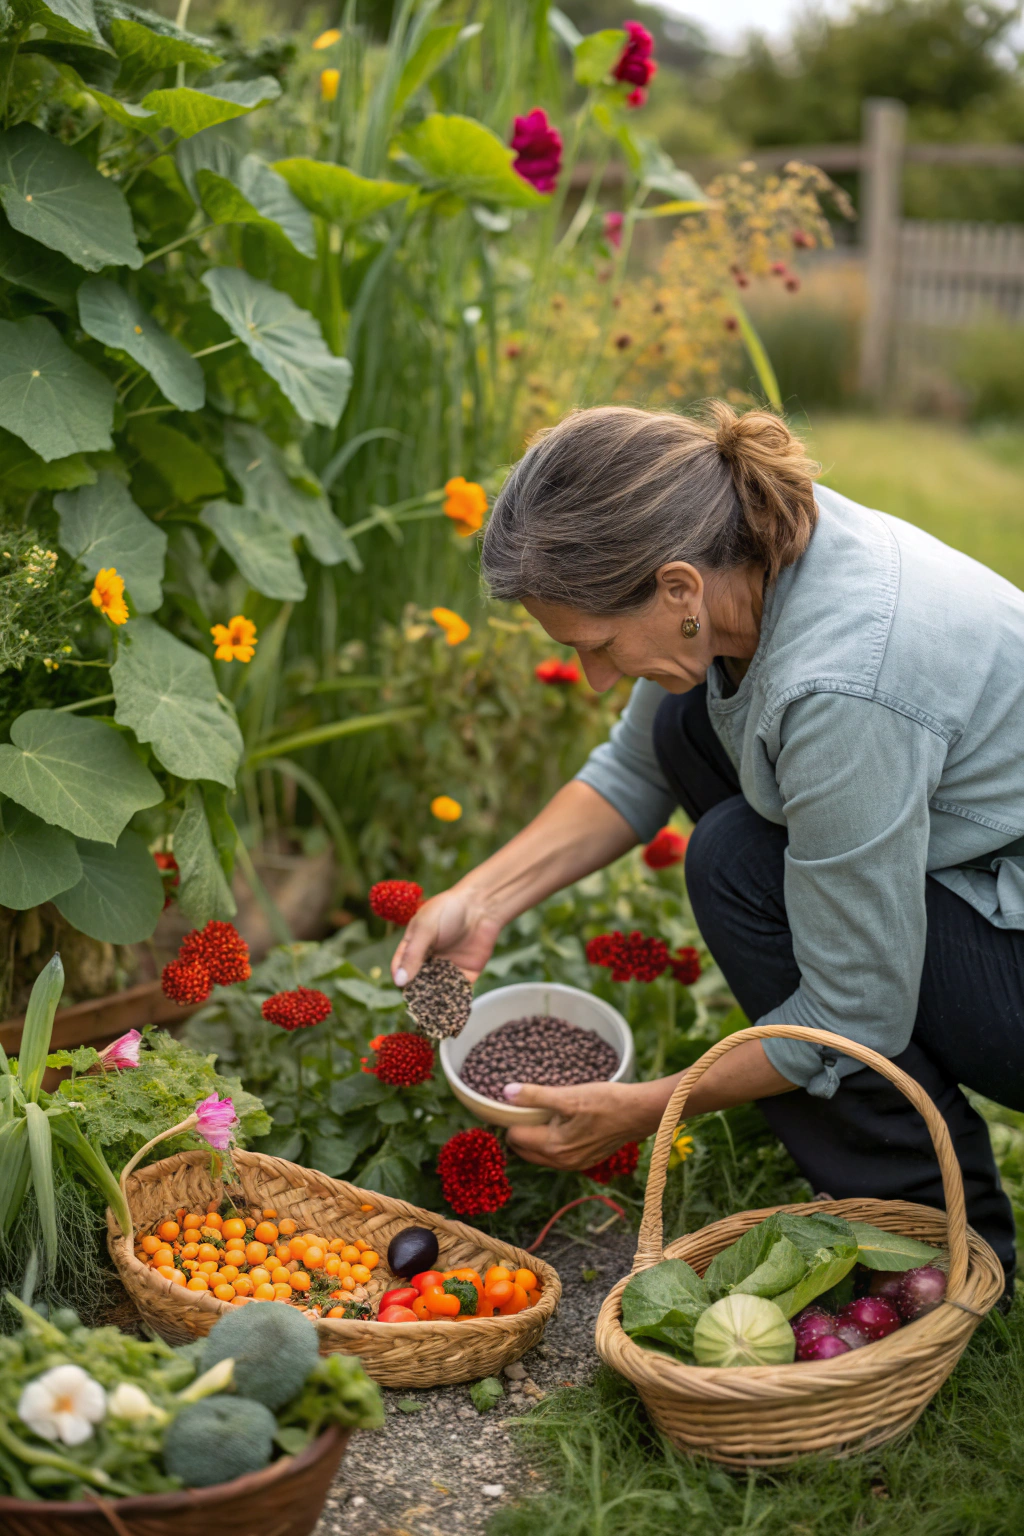
| Summer (Jun-Aug) | Observe & Select | Monitor plant health, growth habits, and yield. Identify the strongest, most disease-resistant plants from which to collect seeds later in the season. |
No significant fertilization or watering is needed for stored seeds themselves. However, maintain a dry environment for your storage container. A yearly inventory check helps ensure you have enough seeds and allows you to discard any that show signs of degradation.
Variations & Adaptations
For gardeners in small spaces or on balconies, seed saving is still very viable. Focus on compact, determinant varieties of vegetables like bush beans (*Phaseolus vulgaris*) or cherry tomatoes (*Solanum lycopersicum* ‘Tiny Tim’). Herbs such as basil (*Ocimum basilicum*) and cilantro (*Coriandrum sativum*) also produce abundant seeds in pots. Instead of large drying screens, use paper towels or coffee filters for drying small batches of seeds.
In hot, humid climates (e.g., USDA Zone 9-10), drying seeds can be challenging. Consider using a food dehydrator on its lowest setting (below 95°F / 35°C) for a few hours, or place seeds in a paper bag in an air-conditioned room. Conversely, in cold, dry climates (e.g., Zone 4-5), seeds dry quickly but might become too brittle; ensure they are fully cured on the plant before harvest. Aesthetic options include storing attractive, labeled seed packets in vintage wooden boxes or clear glass jars on a shelf.
Common Mistakes to Avoid
One major pitfall is collecting immature seeds. Seeds ripen at the end of the plant’s life cycle. Harvesting too early means underdeveloped embryos, leading to poor or no germination. Wait until pods are brittle, fruits are overripe, or flower heads are fully dried, such as with calendula (*Calendula officinalis*) seeds.
Another mistake is inadequate drying. Damp seeds will germinate prematurely or, more commonly, succumb to mold and rot in storage. This negates all your collection efforts. Ensure seeds are "snap dry" before sealing them for storage, typically after 1-4 weeks of air drying.
Overcrowding seeds during drying can also lead to issues. If seeds are piled too thickly, moisture becomes trapped, promoting fungal growth. Always spread seeds in a single layer on a well-ventilated surface.
Forgetting to label is a frustrating but common error. Differentiating between varieties, especially similar-looking ones like different types of beans or lettuce, becomes impossible three months later. Label immediately and clearly with plant name, variety, and date.
Storing seeds in unsuitable conditions, such as warm, brightly lit spots or places with fluctuating humidity, drastically reduces their viability. Aim for a cool, dark, and dry location to prolong their life.
Lastly, cross-pollination can be an issue, especially with open-pollinated varieties of squash (Cucurbita pepo) or corn (Zea mays). If you grow multiple varieties of the same species and want true-to-type seeds, you'll need to isolate them by significant distances (e.g., 1/2 mile / 0.8 km) or hand-pollinate. Failure to do so might result in hybrid offspring that don't resemble the parent plants.
Sustainability, Safety & Regulations
Seed saving is inherently sustainable, reducing reliance on commercial monoculture and synthetic treatments often used in mainstream seed production. Maximize your eco-efforts by collecting seeds from open-pollinated or heirloom varieties, which promote genetic diversity. Utilize rainwater harvesting for irrigating your seed-producing plants, and dispose of any plant waste in a compost bin (like these for October garden compost) rather than sending it to a landfill.
For safety, always wear appropriate PPE, including gardening gloves and eye protection, when handling thorny plants or using sharp tools like pruners. Ensure children and pets cannot access small, stored seeds, as some varieties can be toxic if ingested. When handling dust from dried seed heads, consider wearing a basic dust mask (N95 or equivalent) to prevent inhalation of fine particles. Be aware of local regulations regarding planting specific species, especially invasive ones; always stick to native or well-behaved garden varieties.
Measure the Outcome
Tracking your seed-saving success can be incredibly satisfying and informative. A simple way to measure efficiency is the germination rate. Conduct a small test by placing 10-20 seeds between moist paper towels, sealing them in a plastic bag, and keeping them warm (70-80°F / 21-27°C). Note the percentage that sprout after the typical germination period – aim for at least 70%.
For financial impact, calculate your annual seed savings. If a packet of your favorite tomato seeds costs $3-$5 and you're now saving seeds from 10 plants, that's $30-$50 saved right there. Quantify growth by tracking the height or yield of your seed-saved plants compared to store-bought ones. Lastly, a simple "satisfaction score" based on flavor, vigor, and aesthetic appeal reminds you of the personal benefits.
Conclusion
Collecting and saving seeds is a powerful, rewarding practice that enriches your garden and empowers you as a gardener. It’s a journey towards self-sufficiency, biodiversity, and significant savings. By following these simple steps, you can ensure a vibrant garden for years to come.
So, go ahead and explore the potential in your own garden – you might be surprised by the bounty you can cultivate from a few carefully chosen seeds. Let us know what seeds you're excited to save in the comments below! Share this guide with fellow gardening enthusiasts to spread the joy of sustainable planting.
FAQ
A: Generally late summer to early fall when the plant pods or fruits are fully mature and dry on the vine or stem. Consistency is key for viability.
A: Not necessarily. Basic gardening hand tools, a fine-mesh sieve, glass jars, paper envelopes, and a marker are often sufficient. You can adapt many household items.
A: Most seeds should be brittle and snap when bent, not bend. For small seeds, they should feel completely dry to the touch and sound like tiny pebbles when shaken.
A: Viability varies greatly by species. Some, like beans, can last 3-5 years, while others, like onions, might only be good for one season. Proper storage extends their life.
A: You can, but hybrid (F1) seeds usually won’t produce plants true to the parent. Their offspring will revert to parental traits, often with reduced vigor or different characteristics. Stick to open-pollinated or heirloom varieties for predictable results.
A: Repurpose old film canisters, medicine bottles, or spice jars. Small, unused envelopes or even folded wax paper can be used as individual packets. The main goal is a cool, dark, and dry environment.
A: Molding almost always indicates inadequate drying or too much moisture in the storage environment. Ensure seeds are bone-dry before sealing and store them in a very low-humidity area.
Internal & External Links
Preserve the magic of autumn in your garden by learning more about creating garden compost from fallen leaves. For those looking to add a touch of seasonal beauty, discover how to make DIY Dried Flower Arrangements for your home. You can also get inspired for the upcoming seasons by exploring colour palettes for autumn gardens. Continue your gardening journey with us, and don’t forget to check out our Pinterest Boards — Garden & DIY inspiration for endless ideas!


