Introduction
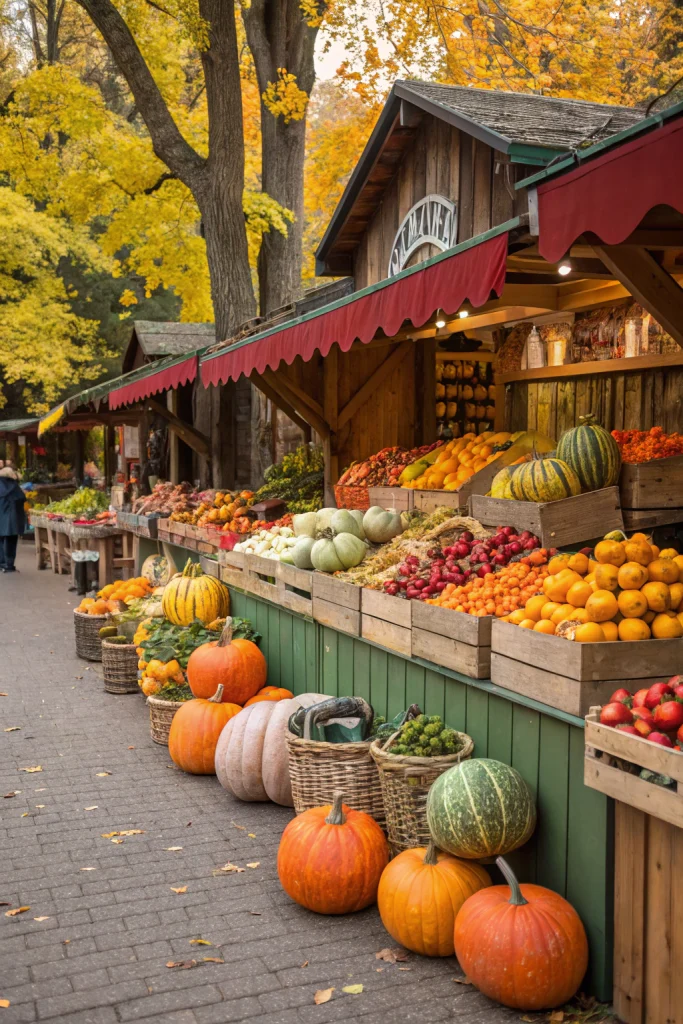
Creating colorful, october, market, stalls, with vibrant garden harvests might seem like a daunting task, especially when considering the typical urban gardening yield of just 20 lbs (9 kg) per 100 square feet (9.3 m²) of space. Many believe that bountiful harvests are reserved for large rural plots, but with careful planning and smart techniques, you can significantly outperform these averages, even with limited space.
[lwptoc]
This guide will walk you through the practical steps to transform your garden yield into stunning market-ready displays, whether for actual sales or simply to celebrate autumn's abundance. We’ll focus on techniques that maximize visual appeal and extend the freshness of your produce, ensuring measurable results in both beauty and longevity.
Our goal is to help you create eye-catching displays that are not only beautiful but also sustainable and efficient. You'll learn how to select the best produce, arrange it for maximum impact, and incorporate DIY elements that reflect your personal style and ecological values. Get ready to showcase the fruits of your labor with pride.
Quick Summary
- Achieve stunning, vibrant market displays using simple DIY techniques and garden harvests.
- Expect to spend approximately 3–5 hours for initial setup, with ongoing maintenance requiring about 30 minutes weekly.
- Save money by utilizing repurposed materials, with estimated costs ranging from $25–$75, significantly less than pre-made decor.
Context & Ideal Conditions
The ideal time to set up your market stalls is in early to mid-October, when autumn harvests are at their peak. For visual impact, choose an outdoor location with partial shade to full sun (4-6 hours of direct sunlight) to highlight the vibrant colors while preventing rapid wilting of delicate items. Ambient temperatures between 50-65°F (10-18°C) are perfect for keeping produce fresh.
Ensure your display area has stable, level ground capable of supporting the weight of crates and produce, approximately 50-100 lbs (23-45 kg) per square yard (0.84 m²). If setting up indoors, maintain good air circulation to prevent condensation build-up. Consider soil pH neutrality (6.0-7.0) and well-draining soil for any potted plants or cut flowers displayed in containers.
colorful, october, market, stalls, with: Tools & Materials
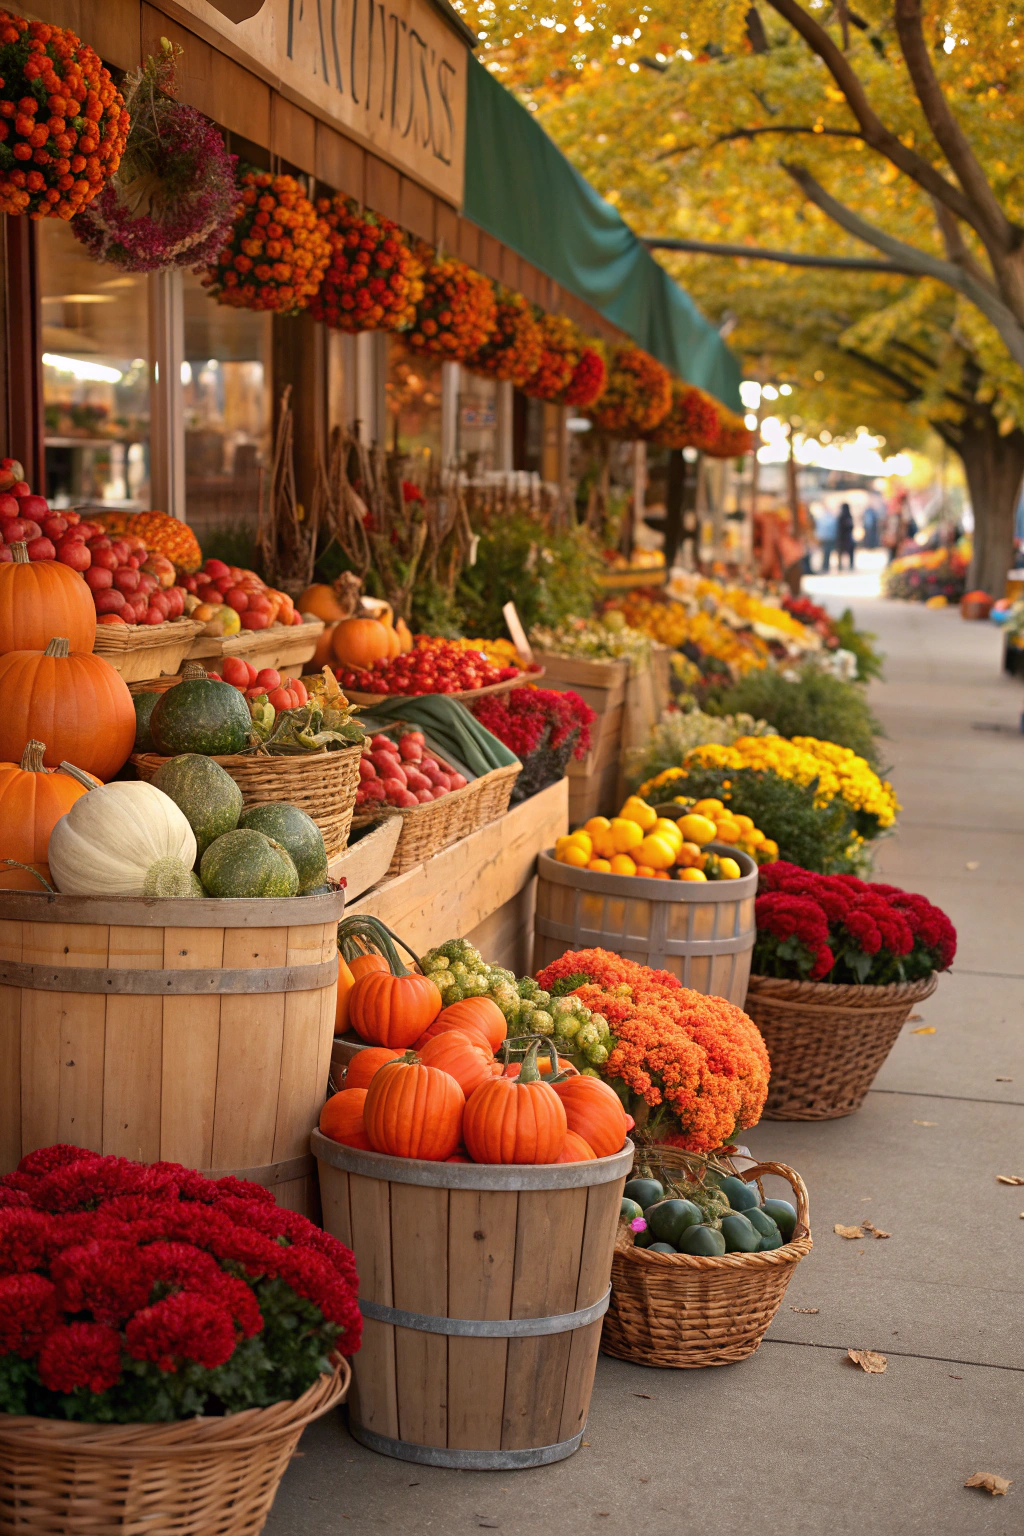
To build your vibrant market stalls, gather six untreated pine crates, each 18 in (46 cm) long, 12 in (30 cm) wide, and 10 in (25 cm) deep. You’ll need twenty-four 1.5 in (3.8 cm) galvanized wood screws, a power drill with a 1/8 in (3 mm) pilot bit, and a level. For display, collect 10-12 medium-sized pumpkins and gourds (various colors, 6-10 in / 15-25 cm diameter), 5 lbs (2.3 kg) of ‘Honeycrisp’ apples, and a bundle of ‘Bright Lights’ Swiss chard.
Include three rustic burlap runners, each 6 ft (1.8 m) long and 1 ft (30 cm) wide, and five glass mason jars (1 qt / 0.95 L capacity) for cut flowers. For safety, wear ANSI Z87.1-compliant safety glasses and EN 388 rated work gloves. A measuring tape, a utility knife, and a soft-bristle brush for cleaning produce complete the toolkit.
colorful, october, market, stalls, with: Time, Difficulty & Budget
| Prep | 30–60 min |
| Build/Plant | 120–180 min |
| Total | 150–240 min |
| Skill Level | Beginner |
| Budget | ≈ $40–$100 (materials/tools) |
Constructing these colorful market stalls is a highly rewarding project that is approximately 40% cheaper than purchasing pre-made display units from a garden center or craft store.
Step-by-Step Tutorial
Step 1 — Layout & Prep
Begin by clearing your chosen display area, ensuring it’s free of debris and level. Use your measuring tape to mark out a rectangle approximately 6 ft (1.8 m) long by 3 ft (0.9 m) wide for your primary display zone. Use chalk or string to outline this space, helping to visualize the arrangement of your crates.
Place your first layer of three crates, side by side, along one of the 6 ft (1.8 m) edges, ensuring even spacing. Use a 2 ft (60 cm) level to check that each crate is balanced and stable. Make any necessary adjustments by adding small wood shims (1/8 in / 3 mm thick) underneath to prevent wobbling, which is crucial for safety and preventing produce from rolling off.
Step 2 — Cutting & Assembly
Stack the remaining three crates on top of the base layer, creating a tiered effect. You can place them centrally or offset for a dynamic look. Using the power drill with the 1/8 in (3 mm) pilot bit, pre-drill two holes through the bottom of each top crate into the top edge of the corresponding base crate, approximately 2 in (5 cm) from the sides.
Secure the upper crates to the lower ones using the 1.5 in (3.8 cm) galvanized wood screws. Drive the screws at a moderate speed to prevent splitting the wood. This assembly enhances stability, supporting the weight of your abundant harvests. Ensure all screws are fully countersunk for a smooth finish.
Step 3 — Installation/Planting
Begin arranging your rustic burlap runners across the tops of the crates, ensuring they drape aesthetically and cover any gaps. Start by laying them flat, then gently pleat or gather them for visual texture. Place your largest decorative items, such as the pumpkins and gourds (Cucurbita spp.), evenly across the top and middle tiers.
Next, artfully arrange the ‘Honeycrisp’ apples (Malus domestica 'Honeycrisp') in smaller baskets or directly in the crates, creating clusters of uniform color. For any container plants, like 'Bright Lights' Swiss chard (Beta vulgaris subsp. cicla 'Bright Lights'), place them in the mason jars filled with 3 in (7.6 cm) of water, ensuring stems are submerged and refreshed with 0.5 qt (0.47 L) of water daily.
Step 4 — Finishing & QA
With all elements in place, step back and assess the overall balance and visual appeal of your market stalls. Adjust any items as needed to fill empty spaces and create a sense of abundance. Ensure that all crates are stable and that heavy items are securely placed to prevent tipping.
Perform a final safety check: run your hand along all exposed wood edges to identify any splinters. If present, use 120-grit sandpaper to smooth them down. Check that all produce is clean and free of visible soil or blemishes. Ensure any cut flowers or chard have fresh water and are not wilting.
Care & Schedule
Maintaining the freshness and appeal of your colorful October market stalls is simple yet crucial. For cut items like Swiss chard or decorative flowers, change the water in the mason jars daily, adding 0.5 qt (0.47 L) of fresh, cool water. If the weather is particularly warm or sunny (above 70°F / 21°C), increase watering frequency or temporarily move delicate produce to partial shade.
For hardier produce like pumpkins and apples, wipe them down gently with a damp cloth every 2-3 days to remove dust and maintain shine. Inspect all items for signs of rot or spoilage daily, removing any compromised pieces immediately to prevent spread. Fertilization is not necessary for harvested produce, but if you include potted plants, ensure their soil remains moist, checking every other day.
Variations & Adaptations
For small spaces or apartment balconies, consider using a single stack of two crates, or even an old wooden ladder adorned with potted herbs and smaller pumpkins. In hot, arid climates (USDA Zone 8b+), prioritize shade and misting stations for fresh produce, or focus on displaying drought-tolerant plants and dried arrangements. For cold climates (USDA Zone 5a-), opt for heartier root vegetables and items that withstand frost.
You can easily adapt the aesthetic by painting the crates with autumn-themed colors or distressing them for a vintage look. For a "knock-down" version, instead of screwing crates together, just stack them and use non-slip mats between layers for stability, making storage easier post-season. Consider using galvanized steel bins for a more industrial feel or woven baskets for a rustic, farmhouse aesthetic.
Common Mistakes to Avoid
One common mistake is *over-stuffing* the colorful market stalls, which makes them appear cluttered rather than abundant. This can also lead to produce damage. Instead, allow for visual breathing room between items, using different heights and textures to create interest.
Another pitfall is neglecting drainage for cut flowers or potted plants. Always ensure mason jars have fresh water, and if utilizing pots, confirm they have drainage holes to prevent root rot.
Choosing undersized fasteners for crate assembly is a safety risk; using inadequate screws can lead to instability. Always use screws that penetrate at least 1 inch (2.5 cm) into the connecting piece.
Using untreated wood outdoors in damp conditions without proper sealing is another error, as it can lead to premature rot. Apply a weather-resistant sealant or paint to prolong the life of your wooden elements.
Poor orientation can quickly diminish the appeal of your display. Avoid placing delicate produce in direct, harsh afternoon sun, which can cause rapid wilting and sunburn. Optimize placement for indirect light or morning sun.
Finally, overloading the top tiers with heavy produce can pose a tipping hazard. Distribute weight evenly, placing heavier items on lower, more stable sections of the market stalls.
Sustainability, Safety & Regulations
Embrace sustainability by sourcing salvaged wooden crates or repurposing old fruit crates, reducing waste and often lowering costs. Consider using rainwater collected in a smart harvesting setup for watering any potted plants or cut flowers displayed, minimizing tap water consumption. For cleaning produce, use only natural, biodegradable solutions.
Safety first: Always wear EN 388 rated work gloves and ANSI Z87.1-compliant safety glasses when handling tools, especially during the cutting and assembly phases. Ensure all assembled structures are stable and cannot be easily knocked over, especially if children or pets will be near your colorful October market stalls. Check local ordinances for any height or setback restrictions if your stalls are outdoors and near property lines. Dispose of organic waste (spoiled produce) in a compost bin, and recycle any plastic or glass components.
Measure the Outcome
To quantify the success of your colorful October market stalls, implement a few simple metrics. Track the freshness retention: how many days did your displayed apples or chard remain visually appealing? For instance, did your apples last 10 days instead of the typical 7 in open air? Calculate this as a percentage: (Actual Fresh Days / Expected Fresh Days) * 100%.
If you incorporate potted plants, measure their growth in inches (cm) per month. For example, did your marigolds grow 2 in (5 cm) versus 1 in (2.5 cm) in a less optimal display? You can also estimate water savings; if you used 5 gal (19 L) of captured rainwater instead of tap water over the month, that's a tangible saving. Finally, and perhaps most importantly, gauge satisfaction by observing visitor reactions and compliments on your vibrant, colorful market stalls.
Conclusion
Creating eye-catching, colorful October market stalls with your garden harvests is an achievable and rewarding endeavor. By focusing on smart design, sustainable practices, and careful maintenance, you can craft displays that are both beautiful and functional. Remember to prioritize stability, check for freshness, and embrace the vibrant palette of autumn.
We encourage you to experiment with different arrangements and materials to find what best suits your style and harvest. Transform your garden's bounty into a stunning visual feast. Try it for yourself, share your creations in the comments below, or inspire others by sharing your photos on social media!
FAQ
Internal & External Links
Discover more creative ways to display your harvest with rustic apple crate planters or explore ideas for colorful ornamental cabbages in October borders. For more advanced DIY projects, check out our guide on DIY wooden ladders with potted autumn flowers to add vertical interest to your market stalls. Find further inspiration on wooden crates fall decor.
Pinterest Boards — Garden & DIY inspiration


