Introduction
Many gardeners wonder if cover crops planted in October for soil protection truly deliver on their promises, but surprisingly, studies show they can reduce soil erosion by 80-90% and boost next year’s crop yields by 10-20% compared to unplanted fallow ground. Incorporating cover crops into your autumn routine is not just a sustainable practice; it’s a strategic investment in the long-term health and productivity of your garden.
[lwptoc]
This guide will walk you through everything you need to know about selecting, planting, and managing cover crops specifically during the pivotal month of October. We’ll offer practical, actionable advice, ensuring your soil benefits from improved structure, increased organic matter, and enhanced nutrient retention, all while requiring minimal effort. Get ready to transform your garden into a more resilient and bountiful ecosystem.
By dedicating a small amount of time this fall, you’ll prevent nutrient leaching, suppress winter weeds, and lay the groundwork for a more vibrant spring garden. Our step-by-step instructions and readily available materials will help you achieve these measurable results, saving you time and money in the seasons to come.
Quick Summary
- Cover crops significantly improve soil health, structure, and fertility, leading to boosted yields and reduced need for synthetic fertilizers.
- Planting takes approximately 1-2 hours for a 500 sq ft (46.5 m²) garden, with minimal ongoing maintenance required until spring.
- Initial seed costs are typically $10-$30 per 500 sq ft (46.5 m²), offering substantial long-term savings on soil amendments.
Context & Ideal Conditions
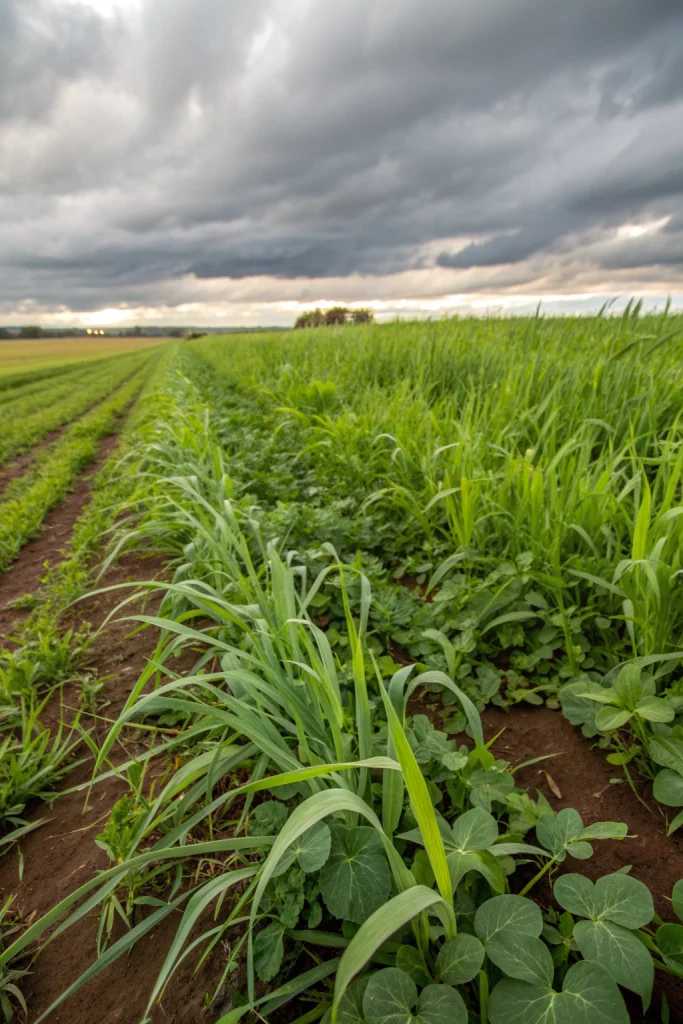
October presents a crucial window for planting cover crops in most temperate regions, specifically USDA hardiness zones 4-8. The cooler temperatures, typically ranging from 40-60°F (4-16°C), encourage root establishment before a hard freeze, while sufficient moisture from autumn rains aids germination. Full sun (6-8 hours daily) is ideal for most cover crops, though some can tolerate partial shade, such as crimson clover and hairy vetch.
Soil pH should ideally be between 6.0 and 7.0 for optimal growth of most common cover crops. Well-draining soil with good organic matter is preferred, but cover crops are renowned for their ability to improve even poor soil conditions, including heavy clay or sandy loam. The goal is to establish a dense cover that can withstand winter weather, minimizing erosion and compaction.
cover, crops, planted, october, for: Tools & Materials
For effectively planting cover crops in October for your garden, you’ll need a few essential tools and materials.
- Cover Crop Seeds: Select suitable varieties like hairy vetch (Vicia villosa), crimson clover (Trifolium incarnatum), winter rye (Secale cereale), or oats (Avena sativa). Typical seeding rates range from 1-3 lbs per 100 sq ft (0.45-1.36 kg per 9.3 m²), depending on the specific crop and desired density.
- Rake: A sturdy garden rake, preferably with a 12-16 inch (30-40 cm) head, for preparing the seedbed and lightly covering seeds.
- Hand Trowel or Cultivator: For breaking up any compacted soil and creating shallow furrows in smaller areas.
- Broadcast Spreader (optional): For larger areas, a handheld or walk-behind spreader can ensure even distribution of seeds. Look for models with adjustable settings for various seed sizes.
- Garden Hose with Spray Nozzle or Watering Can: To provide initial moisture for germination. A watering can with a 2-3 gal (7.6-11.4 L) capacity is excellent for smaller beds.
- Gloves: Standard gardening gloves to protect your hands, rated to EN 388 for abrasion resistance.
- Measuring Tape: A 25 ft (7.6 m) tape measure for accurately calculating your planting area.
- Wheelbarrow or Garden Cart (optional): For transporting seeds or any soil amendments like compost over larger distances.
- Soil Test Kit: A basic home pH test kit can be useful, especially if you suspect extreme soil conditions.
cover, crops, planted, october, for: Time, Difficulty & Budget
Planting cover crops in October for soil protection is a highly approachable task for most gardeners, requiring minimal specialized skills.
| Prep | 15–30 min |
| Build/Plant | 30–90 min (per 500 sq ft / 46.5 m²) |
| Total | 45–120 min |
| Skill Level | Beginner |
| Budget | ≈ $10–$40 (materials/tools for 500 sq ft) |
This budget is approximately 50-70% cheaper than purchasing pre-mixed soil amendments or relying solely on bagged compost for similar soil-building benefits, providing a significant return on investment.
Step-by-Step Tutorial
Planting cover crops in October is an efficient way to enhance soil health and prepare your garden for a successful spring.
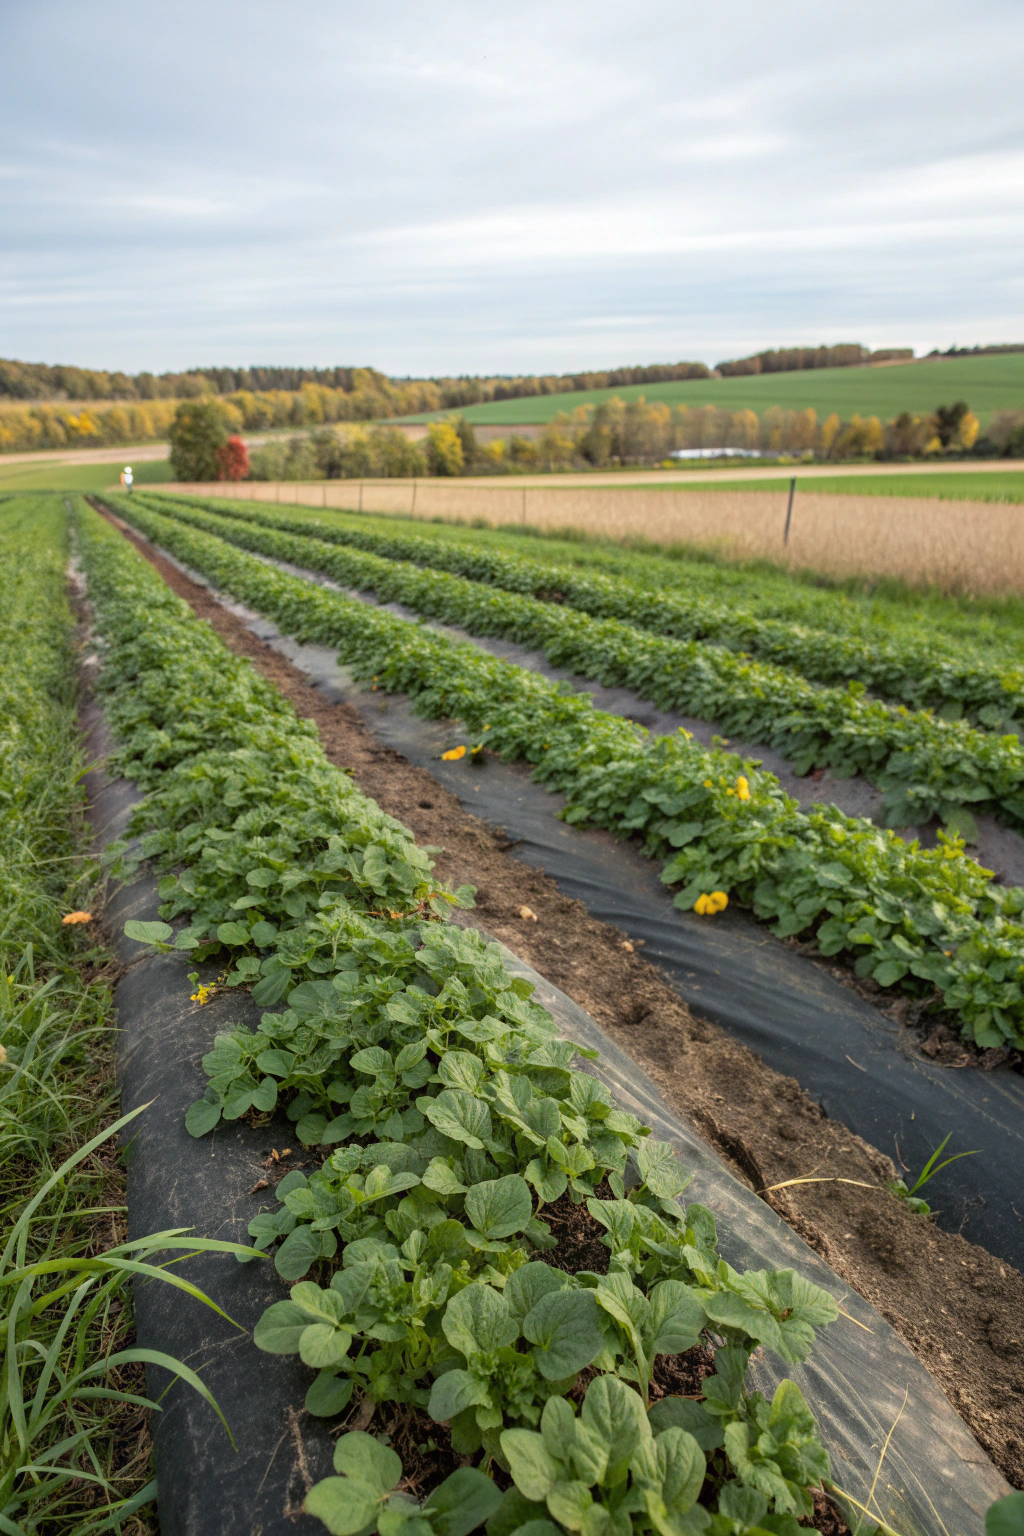
Step 1 — Layout & Prep
Begin by clearing your garden beds of any remaining crop debris, weeds, and large rocks. Use a garden rake to gently level the soil surface, aiming for a relatively flat bed, but avoid over-tilling, as it can disrupt soil structure. For areas larger than 100 sq ft (9.3 m²), mark out your planting area using string and stakes to ensure even seed distribution.
Step 2 — Seed Selection & Calibration
Choose your cover crop seeds based on your specific goals and hardiness zone. Winter rye, oats, and hairy vetch are excellent choices for October planting in many regions due to their cold hardiness and quick establishment. If using a broadcast spreader, consult its manual for calibration settings specific to your chosen seed size to ensure an even application. Different seeds have different weights and sizes, affecting spreader settings.
Step 3 — Installation/Planting
Evenly broadcast your chosen cover crop seeds over the prepared soil surface. For small beds, you can hand-broadcast by holding handfuls of seed and casting them in an arc over the area. For larger spaces, a walk-behind or handheld broadcast spreader ensures consistent coverage. Aim for overlapping passes to prevent bare spots.
After broadcasting, lightly rake the seeds into the top 0.25-0.5 inch (0.6-1.3 cm) of soil. This provides sufficient soil-to-seed contact for germination while offering protection from birds and wind. Immediately after raking, water the newly planted area thoroughly. Aim for about 0.5 inches (1.3 cm) of water, which is approximately 0.3 gal per 10 sq ft (1.1 L per 0.9 m²), ensuring the top inch (2.5 cm) of soil is moist but not waterlogged.
Step 4 — Finishing & QA
Monitor your newly planted cover crop for the first few weeks, ensuring consistent moisture until germination occurs, usually within 7-14 days depending on the crop and weather. Inspect for any areas with sparse growth and reseed if necessary, especially if heavy rains have washed away seeds or birds have been particularly active.
Once established, ensure the plants are growing robustly before the first hard freeze. A healthy stand of cover crops should appear dense and uniformly green, typically reaching a height of 2-4 inches (5-10 cm) before winter dormancy. This robust growth ensures maximum soil protection throughout the colder months.
Care & Schedule
Once your cover crops are established, care is generally minimal through the winter. For most regions where cover crops are planted in October, the goal is to allow them to grow and protect the soil until spring.
- Watering: After establishment, rainfall usually suffices. If October and early November are unusually dry, provide supplemental watering to ensure the top 2-3 inches (5-8 cm) of soil remain moist, especially if daytime temperatures exceed 60°F (16°C). Aim for 0.5-1 gal (1.9-3.8 L) per 10 sq ft (0.9 m²) per week if no rain occurs.
- Fertilization: Generally not required. Cover crops are planted to *add* nutrients to the soil. If your soil is exceptionally poor, a light top-dressing of compost (0.5 inch / 1.3 cm layer) after germination can provide a boost without risking nitrogen runoff.
- Pest and Disease Management: Cover crops are typically resilient. Monitor for common garden pests, but severe infestations are rare, especially in colder months. Healthy soil will deter most issues.
- Spring Termination: This is a critical step. For non-winter-killing varieties (like winter rye, hairy vetch), terminate them 2-4 weeks before planting your spring crops. This allows time for the organic matter to begin decomposing and releasing nutrients into the soil. Methods vary from mowing and tilling to crimping or simply cutting at the soil line (for smaller areas).
- Mulch Top-ups: If your cover crop stand is sparse in areas, consider adding a 1-2 inch (2.5-5 cm) layer of chopped leaves or straw as additional winter mulch for extra soil protection.
Variations & Adaptations
Cover cropping can be tailored to various garden sizes and climate conditions. For small spaces or urban balconies, planting cover crops in large containers or raised beds is entirely feasible. Use smaller-statured varieties like oats or crimson clover in 5-gallon (19-L) fabric pots or planters at least 12 inches (30 cm) deep.
In hot climates (Zone 9+), October may still be too warm for typical winter-hardy cover crops. Opt for heat-tolerant varieties like Sudan grass (Sorghum × drummondii) or buckwheat (Fagopyrum esculentum) that can be planted in late fall and terminated before they flower. For extreme cold (Zone 3-), prioritize extremely hardy options such as winter rye or annual ryegrass for their robust winter survival.
Consider alternative termination methods for managing cover crops without heavy tools. For instance, in small beds, you can simply cut the cover crops at the soil line with pruning shears in the spring, leaving the roots to decompose naturally and minimizing soil disturbance. This "chop and drop" method is excellent for no-till gardening.
Aesthetic options exist too; some cover crops, like crimson clover, produce beautiful red blossoms in late spring, attracting pollinators before being incorporated into the soil. This provides an interim visual appeal before your main planting season, turning a functional practice into a visual treat.
Common Mistakes to Avoid
Mistakes can hinder the effectiveness of your cover crops and negate their benefits. Avoid these common pitfalls to ensure a successful outcome.
- Planting Too Late: Waiting past mid-October, especially in colder regions (Zones 4-6), can prevent adequate establishment before the ground freezes. Insufficient root development leads to poor soil protection and potential winter-kill. Plant early enough for 4-6 weeks of growth before consistent hard freezes.
- Incorrect Seeding Rate: Too little seed results in sparse growth, leaving soil exposed to erosion and weed invasion. Too much seed leads to overcrowding, competition, and wasted resources. Always follow recommended seeding rates for your specific cover crop, typically 1-3 lbs per 100 sq ft (0.45-1.36 kg per 9.3 m²).
- Poor Seed-to-Soil Contact: Simply scattering seeds on top of compacted soil without light raking or covering leads to minimal germination, as seeds dry out or are eaten by birds. Ensure seeds are lightly covered by 0.25-0.5 inch (0.6-1.3 cm) of soil.
- Inadequate Watering Post-Planting: The initial days after planting are crucial. Without sufficient moisture, seeds won’t germinate. Immediately water the area thoroughly and keep it moist until seedlings emerge.
- Not Terminating on Time: Allowing winter-hardy cover crops (like winter rye) to go to seed in spring can result in them becoming a weed in your main crop. Terminate them 2-4 weeks before you intend to plant your cash crops.
- Over-tilling: While some light incorporation is fine, excessive tilling destroys the beneficial soil structure built by cover crop roots and releases stored carbon. Favor cutting, crimping, or shallow cultivation over deep tilling.
- Ignoring Soil Conditions: While cover crops improve soil, choosing crops that are unsuitable for your existing soil pH or drainage issues will reduce their effectiveness. Perform a basic soil test to tailor your cover crop selection.
Sustainability, Safety & Regulations
Incorporating cover crops into your gardening practice is a cornerstone of sustainable agriculture, boosting soil health without chemical inputs. Maximize environmental benefits by sourcing organic, non-GMO seeds. Consider using rainwater collected in barrels for initial watering, further reducing your garden’s water footprint. Any cut cover crop material can be left on the soil surface as a natural mulch, contributing to biomass and reducing the need for imported mulches.
For safety, always wear sturdy gardening gloves (e.g., ANSI Cut Level A1) when working with tools and seeds. If using a broadcast spreader, ensure it’s clean and properly maintained. Use eye protection if there's any risk of dust or debris. When terminating cover crops in spring, exercise caution with any sharp tools like mowers or hoes.
Check local regulations regarding cover crops; while generally encouraged, some municipalities might have specific guidelines for planting in shared spaces or near property lines, ensuring no obstruction to public pathways. Dispose of any excess seed packaging responsibly. Teach children and pets to avoid contact with freshly sown areas to prevent accidental ingestion of seeds or disruption of germination.
Measure the Outcome
Tracking the impact of your cover crops can provide tangible evidence of their benefits and help you refine your practices for future seasons.
- Survival Rate (%): After a hard winter, estimate the percentage of your cover crop stand that survived. A healthy survival rate of 70-90% indicates successful establishment.
- Organic Matter Increase (%): Conduct a soil test before planting and again the following autumn. A 0.2-0.5% increase in soil organic matter annually is a significant improvement attributed to cover crops.
- Next Season’s Growth (in/cm per month): Observe the growth rate of your subsequent cash crops in areas where cover crops were planted versus any control plots. Expect a 1-2 inch (2.5-5 cm) per month growth advantage for crops grown in improved soil.
- Weed Suppression (%): Visually estimate the reduction in weed germination and growth in cover-cropped areas compared to bare soil. A 50-70% reduction is common.
- Soil Erosion Reduction (visual): After heavy rains or strong winds, observe if soil particles are visibly moved less in cover-cropped areas.
- Water Savings (gallons/L per month): While harder to quantify precisely without instruments, a healthy cover crop canopy and improved soil structure can reduce evaporation, potentially lowering irrigation needs by 10-20% in the following growing season.
- Cost Per Square Foot/Meter: Calculate your seed cost per sq ft (or m²). This low investment for significant long-term benefits typically ranges from $0.02-$0.08 per sq ft ($0.22-$0.86 per m²).
Conclusion
Planting cover crops in October for soil protection is a highly impactful and surprisingly simple practice that pays dividends in garden health and productivity. You’ve learned how selecting the right seeds, ensuring proper establishment, and timely termination can transform your garden’s ecosystem. By preventing erosion, adding有機質, and suppressing weeds, you empower your soil to thrive, leading to more resilient and abundant future harvests.
Don’t let your garden beds sit bare this winter. Embrace the power of cover crops; your soil, and your future plants, will thank you. Ready to give it a try? Share your experiences and questions in the comments below, and inspire others to protect their garden's most vital resource!
FAQ
A: For USDA Zone 6, excellent choices for October planting include winter rye (Secale cereale), hairy vetch (Vicia villosa), and crimson clover (Trifolium incarnatum). These varieties are cold-hardy and establish well before winter.
A: Yes, some cover crops, like crimson clover and hairy vetch, tolerate partial shade better than others. Winter rye prefers full sun but can still provide significant benefits in areas receiving at least 4-5 hours of direct sunlight daily.
A: No, you can plant cover crops with minimal tools. A garden rake for preparing the seedbed and covering seeds, plus a watering can or hose, are often all you need for smaller areas. A broadcast spreader is helpful for larger plots but not essential.
A: Germination typically occurs within 7-14 days for most common cover crops planted in October, assuming adequate moisture and soil temperatures above 40°F (4°C).
A: Even a short, 2-3 inch (5-8 cm) stand of cover crops provides significant benefits by protecting the soil from erosion and improving its structure. Visible leaf growth is less critical than root establishment.
A: For small gardens, you can “chop and drop” by cutting the cover crops at the soil line with a sharp hoe or pruning shears. Leave the cut material on the surface to decompose, acting as an in-situ mulch.
A: Generally, no. Healthy cover crops can even host beneficial insects. However, ensure termination happens before they go to seed to prevent potential volunteers in your main crop.
A: Oats (Avena sativa) are often one of the most economical cover crop options, providing quick growth and good soil protection, though they are usually winter-killed in colder zones. Winter rye is also relatively inexpensive and extremely hardy.
Internal & External Links
- Explore different garden design ideas and planting strategies on our Autumn Garden Colour Palettes.
- Learn more about sustainable gardening practices, including no-till methods, on our guide to No-Till Soil Practices.
- Enhance your garden’s aesthetic with Autumn Bulb Planting Guide to complement your healthy soil.
- Discover creative ways to store your garden harvest, similar to how cover crops retain soil nutrients, through our article on Wooden Crates Fall Decor.
- For even more garden inspiration, visit our Pinterest Boards — Garden & DIY inspiration.


