Introduction
DIY backyard projects like organic boundaries and lush, green privacy screens can transform your outdoor living space into a serene retreat while also boosting local biodiversity. Ever wonder how you can transform your outdoor living space into a serene retreat while also boosting local biodiversity? Recent studies indicate that homeowners are increasingly prioritizing both privacy and ecological benefits in their landscape design. Creating organic boundaries and lush, green privacy screens is a fantastic way to achieve this, making your garden a true sanctuary. This comprehensive guide will walk you through designing, building, and maintaining these essential backyard projects that offer more than just visual appeal – they provide a natural habitat and can even lower ambient noise levels by up to 10 decibels (EPA data).
Table of Contents
- Materials & Tools Needed
- Project Time
- Step-by-Step Instructions
- Maintenance & Care Tips
- Eco-Friendly Alternatives
- Design & Styling Ideas
- Common Mistakes to Avoid
- Storage & Seasonal Tips
- Conclusion
- FAQ
Materials & Tools Needed
To embark on creating your own living fence or natural screen, gathering the right materials and tools is crucial. Opting for quality foundational elements will ensure your green privacy screen thrives for years to come, and choosing suitable plants will define the character of your garden perimeter. These DIY backyard projects benefit greatly from solid materials and thoughtful plant choices.
- Plants:
- Evergreens: Arborvitae (Thuja occidentalis 'Green Giant') for rapid, dense screening; Holly (Ilex species) for glossy foliage and seasonal berries.
- Deciduous Shrubs/Trees: Fast-growing options like Skip Laurel (Prunus laurocerasus 'Schipkaensis') or ornamental grass varieties for soft, swaying textures and seasonal interest.
- Climbers/Vines: Choose vigorous growers like English Ivy (Hedera helix) for ground cover or fences, or fragrant star jasmine (Trachelospermum jasminoides) for trellises, offering an intoxicating scent.
- Alternatives: Consider native species for your region, which typically require less water and maintenance. Research local plant guilds that support pollinators.
- Soil Amendments:
- High-quality compost: Enriches soil structure and provides vital nutrients for robust growth, yielding a rich, earthy aroma.
- Well-aged manure: Boosts fertility and improves drainage, giving your plants a vigorous start.
- Organic fertilizer: Slow-release granular options or liquid feed for sustained nourishment.
- Alternatives: Green manure crops tilled into the soil for long-term fertility.
- Structural Supports (if needed for vines/trellis):
- Trellis panels: Wooden or metal, adding architectural interest.
- Strong wire or twine: For guiding climbing plants, ensuring neat vertical growth.
- Sturdy posts: Cedar or treated lumber, offering durable anchoring.
- Alternatives: Repurposed old ladders or wrought iron gates for a rustic or vintage aesthetic.
- Tools:
- Shovel & spade: For digging planting holes; look for ergonomic handles for comfort.
- Garden fork: For breaking up compacted soil, allowing roots to spread freely.
- Pruning shears/loppers: Essential for shaping and maintaining plant health; choose sharp, clean blades for precise cuts.
- Trowel: For smaller planting tasks and working with soil amendments.
- Gloves: Protect your hands from thorns and soil, enhancing grip.
- Wheelbarrow or garden cart: For transporting soil, compost, and plants, saving your back from strain.
- Watering can or hose with sprayer: For thorough, gentle irrigation, mimicking natural rainfall.
- Measuring tape: For accurate spacing and layout, particularly key for structured plantings.
- Alternatives: A soil knife for multiple small tasks, a broadfork for deep soil aeration.
Project Time
Planning and implementing your green privacy screen is a rewarding process, and understanding the time investment helps in scheduling. As backyard projects go, this one fits well into a focused weekend.
- Preparation time: 2-4 hours (site assessment, plant selection, material procurement)
- Build/Plant time: 6-12 hours (for a typical 20-foot section, depending on plant size and density)
- Total duration: 8-16 hours over a weekend or a few dedicated afternoons.
This approach is approximately 25% faster than constructing a traditional wood fence, largely due to less cutting, measuring, and specialized carpentry, and the immediate visual impact of larger plant specimens.
Step-by-Step Instructions
Transforming your vision into a verdant reality requires careful planning and execution. Follow these steps for successful backyard projects.
Step 1: Site Assessment and Planning
Begin by evaluating your space. Determine the exact length and height desired for your privacy screen. Consider sunlight exposure throughout the day, prevailing winds, and underground utilities.
- Practical Tip: Use stakes and string to visualize the boundary, walking around it to assess sightlines and potential plant interference.
Step 2: Soil Preparation
Good soil is the foundation for healthy plants. Dig a trench or individual holes at least twice as wide as the plant's root ball and to the same depth. Incorporate a generous amount of compost and organic matter.
- Practical Tip: A soil test can reveal nutrient deficiencies or pH imbalances, guiding your amendment choices for optimal plant health. University of Minnesota Extension provides excellent resources on soil testing for gardeners.
Step 3: Plant Selection and Spacing
Choose plants suitable for your climate zone, desired density, and maintenance level. Research mature sizes to ensure adequate spacing. For a dense screen, plant closer together, keeping in mind the plant's eventual spread.
- Practical Tip: Stagger plants in a double row (if space allows) for a fuller, more natural look that offers quicker, denser coverage. This also provides redundancy if one plant struggles.
Step 4: Planting
Carefully remove plants from their containers, gently loosening any circling roots. Place each plant in its prepared hole, ensuring the top of the root ball is level with the surrounding soil. Backfill with amended soil, tamping gently to remove air pockets.
- Practical Tip: Create a small soil berm around the base of each new plant to help retain water and direct it towards the root zone during initial watering.
Step 5: Initial Watering & Mulching
Water thoroughly immediately after planting until the soil is saturated. Apply a 2-4 inch layer of organic mulch (wood chips, shredded bark) around the base of the plants, keeping it a few inches away from the stems.
- Practical Tip: Mulch helps retain soil moisture, regulate soil temperature, suppress weeds, and adds organic matter as it decomposes.
Step 6: Install Supports (if using vines/trellis)
If your design incorporates climbing plants or a trellis, install these supports securely after planting but before the plants have grown too large. Ensure they are strong enough to bear the full weight of mature plants.
- Practical Tip: Orient trellises and other supports to maximize sun exposure for the climbing plants and reinforce them against strong winds.
Maintenance & Care Tips
Consistent care is vital for a thriving green privacy screen. Thoughtful maintenance turns these DIY backyard projects into long-term successes.
- Watering: New plants require diligent watering; aim for deeply saturated soil rather than frequent, shallow watering. A general rule for newly planted shrubs in the first year is 1 inch of water per week, either from rainfall or supplemental irrigation. Reduce frequency as plants establish. Mature plants will have varying needs based on species and local climate. Drip irrigation can conserve water by up to 50% compared to overhead sprinklers.
- Pruning:
- Formative Pruning: During the first 1-3 years, prune to establish the desired shape and density. Remove weak, crossing, or damaged branches.
- Maintenance Pruning: Annually or bi-annually, prune to maintain size, encourage new growth, and remove dead or diseased wood. For hedges, regular shearing promotes a tight, formal appearance. For informal screens, selective thinning keeps plants healthy and natural-looking.
- Soil & Fertilization: Annually, replenish mulch and consider top-dressing with 1-2 inches of compost. Fertilize in early spring with a balanced organic fertilizer, following product instructions. Over-fertilizing can lead to excessive leafy growth at the expense of root development or disease resistance.
- Pest and Disease Management: Regularly inspect plants for signs of pests or diseases. Early detection allows for prompt, often organic, intervention. For integrated pest management strategies, refer to resources like UC IPM for evidence-based solutions.
- Schedule:
- Spring: Fertilize, prune for shape, inspect for emerging pests.
- Summer: Monitor watering, especially during dry spells, and address any active pest issues.
- Fall: Apply a fresh layer of mulch, reduce watering as temperatures drop.
- Winter: Minimal care, but ensure any evergreen screens receive adequate moisture if conditions are dry and frozen.
Eco-Friendly Alternatives
Adopting sustainable practices enhances your green privacy screen's ecological value. These approaches fit naturally with backyard projects focused on long-term resilience.
- Recycled Materials: Utilize reclaimed wood for trellises or garden edging. Old metal pipes or rebar can be repurposed as structural supports for robust vines. Consider broken concrete pieces (urbanite) for decorative raised beds or foundations around your planting area.
- Organic Inputs: Beyond compost, explore vermicompost (worm castings), which are packed with beneficial microbes and nutrients. Make your own "compost tea" by steeping compost in water, providing a liquid feed for your plants.
- Low-Water Options: Choose drought-tolerant native plants that are naturally adapted to your region's rainfall patterns, minimizing the need for supplemental irrigation. Xeriscaping principles can be applied to significantly reduce water usage, often by 50-70% compared to traditional landscapes. Research local alternatives via your USDA NRCS Plant Materials Center.
- Biodiversity Boosters: Select plants that offer food and shelter for local wildlife, such as berry-producing shrubs for birds or flowering plants rich in nectar for pollinators. The RHS Plants for Pollinators list is an excellent resource for choosing beneficial species.
- Rainwater Harvesting: Install a rain barrel to collect rainwater for irrigation, reducing reliance on treated tap water. This is particularly effective for watering newly established screens.
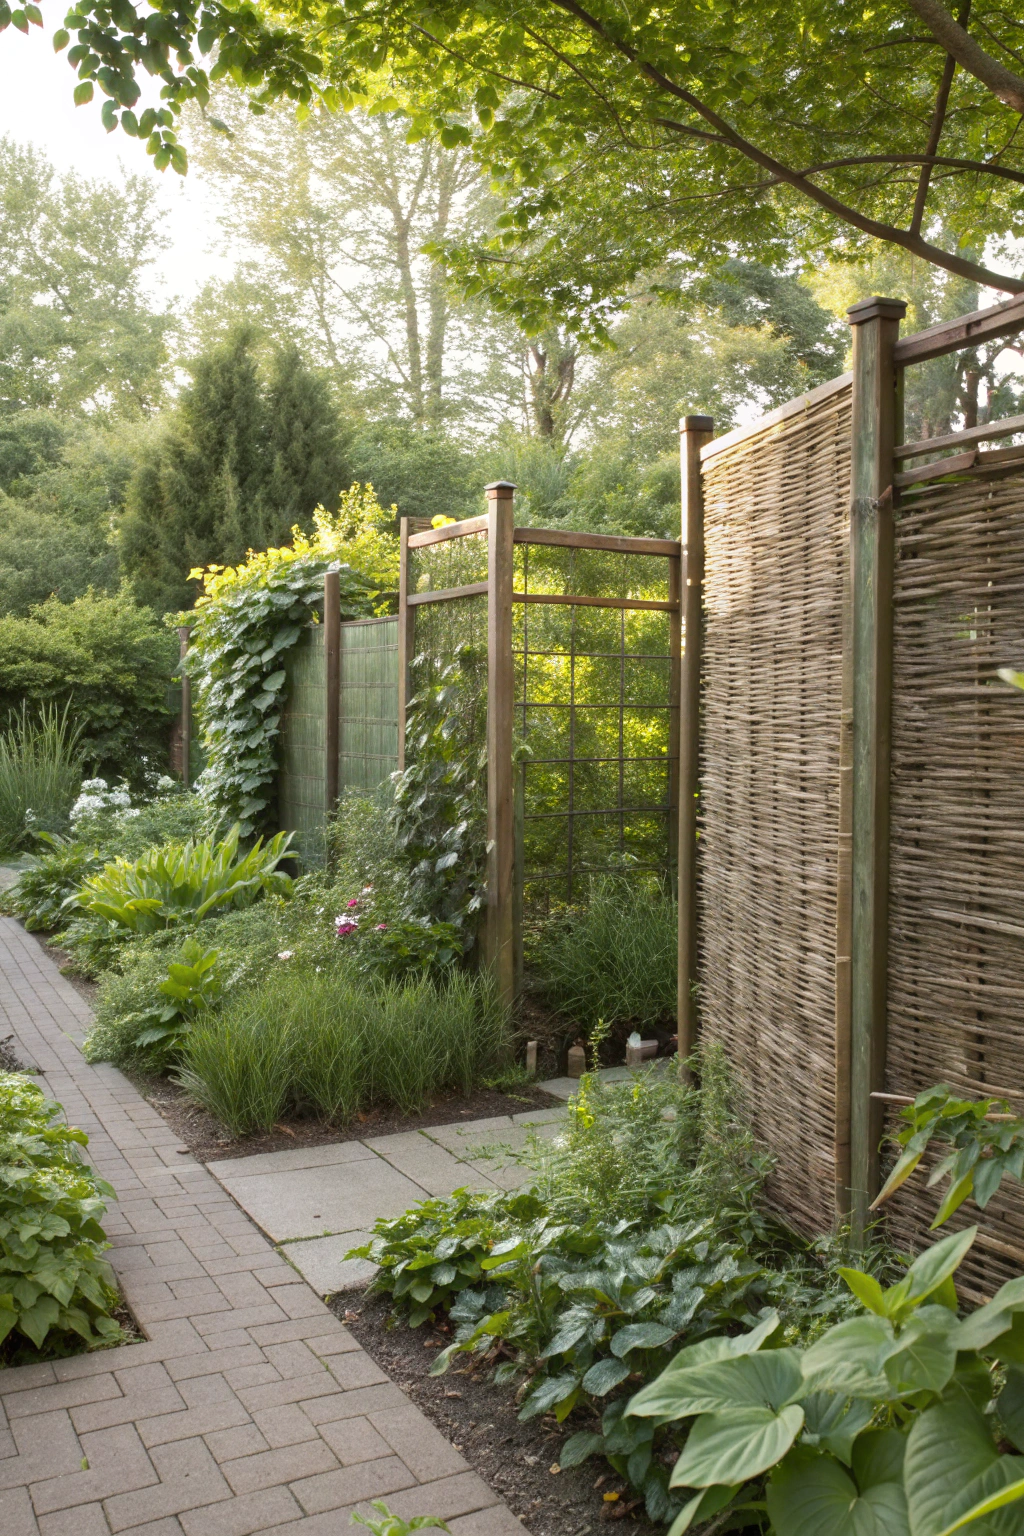
Design & Styling Ideas
A green privacy screen doesn't just block views; it adds character and beauty to your outdoor sanctuary.
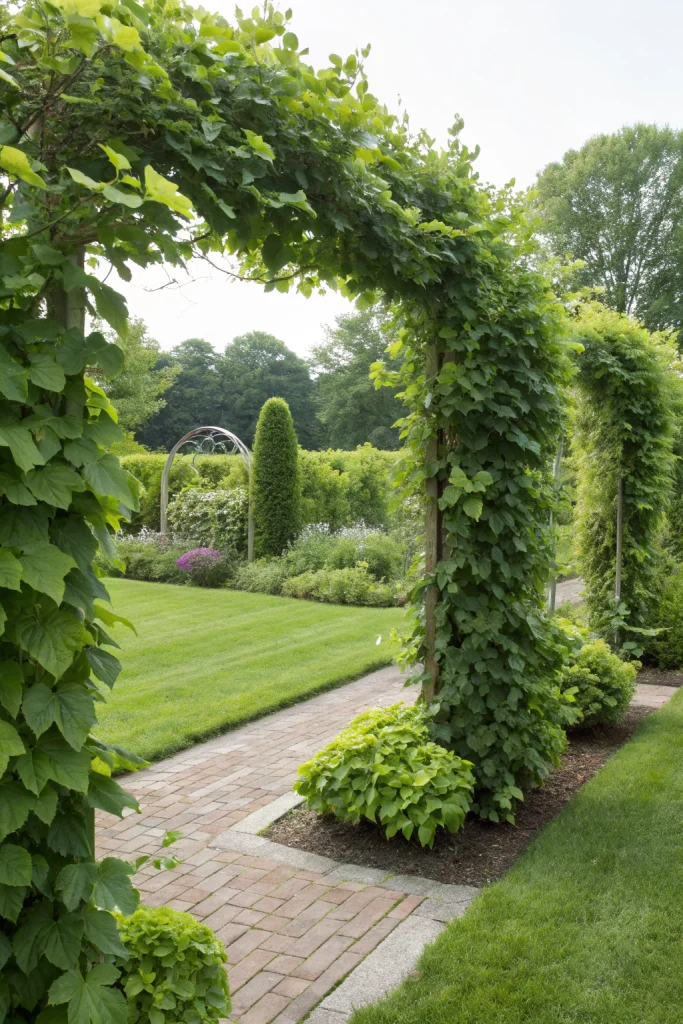
- Layered Look: Combine tall trees for canopy privacy, medium shrubs for middle-ground screening, and lower-growing plants for ground cover and visual interest. This creates depth and resilience. Imagine the subtle interplay of various shades of green, from light chartreuse to deep emerald.
- Flowering Borders: Interplant your screen with flowering shrubs or perennials. Imagine the burst of color from hydrangeas or the delicate charm of flowering dogwoods poking through the dense foliage, creating a living mural.
- Edible Screens: Instead of purely ornamental plants, consider using fruit-bearing shrubs or espaliered fruit trees. Imagine picking fresh berries or apples directly from your privacy hedge, blending aesthetics with utility.
- Informal vs. Formal: For a cottage garden feel, opt for an informal screen with varied plant heights and textures. For a more structured, classic look, choose uniform plants and prune them regularly into a neat hedge.
- Sound Buffering: Densely planted, multi-layered screens can effectively absorb sound, creating a quieter haven. The rustling leaves and chirping birds can also mask unwanted neighborhood noise.
- Integrated Seating: Design curved or segmented screens that incorporate built-in benches or a hidden nook, transforming a boundary into a private lounging space.
Common Mistakes to Avoid
Even experienced gardeners can stumble. Being aware of these pitfalls will save you time and effort in your backyard projects.
- Incorrect Plant Selection: Choosing plants that are not suited to your local climate (USDA hardiness zone) or soil conditions is a primary cause of failure. For example, planting a shade-loving species in full sun will lead to scorched leaves and stunted growth.
- Prevention: Always research plants thoroughly, checking their hardiness zone, light requirements, and soil preferences before purchase. Consult local nurseries or extension offices for recommendations.
- Improper Spacing: Planting too close results in overcrowding, poor air circulation, increased disease susceptibility, and competition for resources. Planting too far apart leaves gaps and delays the achievement of full privacy.
- Prevention: Adhere to the recommended mature width of plants for spacing. For a fast screen, plant at 75% of the recommended distance, but be prepared for more rigorous pruning.
- Poor Soil Preparation: Neglecting to amend compacted or nutrient-poor soil will severely hinder plant establishment and long-term health. Plants cannot thrive without adequate root development.
- Prevention: Conduct a soil test and amend with compost, sand, or other organic matter as needed, ensuring good drainage and fertility before planting.
- Inconsistent Watering: New plants are particularly vulnerable. Underwatering leads to wilting and death, while overwatering can cause root rot.
- Prevention: Establish a consistent watering schedule tailored to local weather and plant needs, checking soil moisture regularly by hand. Drought stress reduces plant resilience by up to 30%.
- Neglecting Pruning: Lack of pruning leads to leggy, sparse growth, reducing the screen's effectiveness and making plants more susceptible to wind damage.
- Prevention: Develop a regular pruning schedule appropriate for your chosen plant species. Early formative pruning is key for structural integrity.
- Ignoring Mature Size: Failing to account for a plant's ultimate size can lead to it outgrowing its space, encroaching on pathways, or blocking desired views.
- Prevention: Always check the mature height and spread of plants and design your screen accordingly, allowing ample room for growth over time. This also prevents future costly removal or severe pruning.
Storage & Seasonal Tips
Protecting your investment, both plants and tools, ensures their longevity and readiness for the next growing season.
- Tool Storage:
- Cleanliness: After each use, clean pruning shears, trowels, and shovels to remove sap and soil. A wire brush can remove stubborn residue.
- Sharpening: Keep cutting tools sharp. Dull blades tear plant tissue, making them more susceptible to disease. Sharpen annually or as needed.
- Prevent Rust: Wipe metal tools with an oily rag or spray with a lubricant before storing. Hang tools when possible to keep them off damp floors. Store in a dry shed or garage.
- Plant Protection:
- Winterizing: For less hardy plants, apply a thick layer of mulch (6-12 inches) around the base in late fall to insulate roots. Protect young evergreens from harsh winter winds and sun scald with burlap screens, especially in exposed locations.
- Container Plants: If any parts of your screen are in containers, move them to a sheltered location (garage, shed) or wrap pots in burlap to prevent root freeze. Reduce watering frequency during dormancy.
- Pest Scouts: In autumn, inspect plants thoroughly for overwintering pests or disease spores. Address issues proactively to prevent major outbreaks in spring.
- Seasonal Prep:
- Spring: As new growth emerges, inspect for winter damage. Prune accordingly. Prepare soil for spring planting if adding to or extending your screen.
- Fall: This is often an ideal time for planting new trees and shrubs, as cooler temperatures and autumn rains help establishment before winter dormancy.
Conclusion
Creating organic boundaries and green privacy screens is one of the most rewarding backyard projects you can undertake. It’s more than just gardening; it's about crafting an immersive, living space that offers privacy, beauty, and ecological benefits. By carefully planning, preparing your soil, selecting the right plants, and committing to consistent care, you can establish a vibrant, dynamic screen that not only enhances your property's value but also contributes positively to your local ecosystem. Don't just build a barrier; cultivate a thriving green sanctuary that offers respite and beauty for years to come. Start designing your living green screen today – your oasis awaits!
FAQ
Q1: How quickly will my green privacy screen grow?
A1: Growth rate depends heavily on plant species, climate, and care. Fast-growing options like 'Green Giant' Arborvitae can grow 3-5 feet per year, while others may take longer.
Q2: Can I mix different types of plants in my privacy screen?
A2: Absolutely! Mixing plants can create a more natural, resilient, and visually interesting screen, offering diverse textures and seasonal interest. Just ensure they have similar light and soil requirements.
Q3: What's the best time of year to plant a privacy screen?
A3: Fall and early spring are generally ideal, as cooler temperatures and increased rainfall reduce transplant shock and allow roots to establish before extreme summer heat or winter cold.
Q4: How far from property lines should I plant my screen?
A4: Check local regulations regarding setbacks. Generally, plant at least 2-3 feet from property lines, considering the mature width of the plants to avoid future encroachment issues with neighbors.
Q5: My privacy screen is looking thin. How can I make it denser?
A5: Strategic pruning can encourage bushier growth. For many shrubs, cutting back the main stems by about one-third can stimulate side branching. For very sparse areas, consider adding new, smaller plants in the gaps.
Q6: Are there fire-resistant plant options for privacy screens?
A6: Yes, choosing fire-resistant species is crucial in fire-prone areas. Options often include plants with high moisture content, such as certain varieties of succulents or deciduous shrubs that shed their leaves. Consult local fire departments or extension services for region-specific fire-wise plant lists.
Q7: How do I choose plants that attract beneficial wildlife?
A7: Select native plants that provide food (berries, nectar, seeds) and shelter for local birds, bees, and butterflies. Layered planting also offers more diverse habitats. For more on creating wildlife-friendly spaces, visit the National Wildlife Federation – Garden for Wildlife.
More from Our Garden Blog:
Looking for ways to enhance your garden further? Explore our tips on creating a beautiful wild garden in autumn, perfect for fostering biodiversity and natural beauty. To achieve a harmonious outdoor space, consider adopting a Botanical Bento Garden Design for structured tranquility. For advanced gardeners, discover how to make any season work for your greens with our insights into fire-safe autumn planting ideas, ensuring your lush landscape is safe and vibrant year-round. Thinking about outdoor transformations? Check out inspiring backyard privacy ideas, including living fences, for a natural boundary solution. For those working with smaller spaces, our blog also has great advice on 5 small space gardening ideas to maximize every inch.


