- Do not output a list of links at the end.
- Each item will link to a specific sub-page.
Example of how linking should be done:
"For more tips on attracting beneficial insects, explore our guide on wild gardening in autumn."
Introduction
Did you know that extending your growing season by several weeks could be as simple as building a small, protective structure in your backyard? Imagine harvesting fresh greens in early spring or late autumn, defying the whims of unpredictable weather. That’s the magic of a cold frame, a miniature greenhouse that offers a sheltered environment for your plants. This comprehensive guide will walk you through building your very own DIY gardening cold frame, transforming your outdoor space into a more productive and resilient haven. We’ll delve into everything from selecting the right materials to ensuring long-term plant health, giving you the confidence to embark on this rewarding project. By the end, you'll be well-equipped to nurture seedlings, protect tender plants from frost, and prolong your harvest, significantly boosting your gardening success and enjoyment.
Table of Contents
- Introduction
- Materials & Tools Needed
- Project Time
- Step-by-Step Instructions
- Maintenance & Care Tips
- Eco-Friendly Alternatives
- Design & Styling Ideas
- Common Mistakes to Avoid
- Storage & Seasonal Tips
- Conclusion
- FAQ
Materials & Tools Needed
Creating a robust and functional cold frame requires a blend of sturdy materials and essential tools. Here’s a detailed list, brimming with options to suit your budget and aesthetic preferences:
- For the Frame Base:
- Lumber: Four pieces of rot-resistant wood (cedar, redwood, pressure-treated pine) for the sides. Think of richly scented cedar or the robust feel of redwood.
- Alternatives: Reclaimed timber from palettes (ensure it's untreated to avoid chemical leaching), concrete blocks for a more permanent structure, or even large, sturdy plastic containers stacked.
- Corner Supports: Four corner posts (2×2 or 4×4) for added stability.
- Lumber: Four pieces of rot-resistant wood (cedar, redwood, pressure-treated pine) for the sides. Think of richly scented cedar or the robust feel of redwood.
- For the Lid (Top):
- Glazing Material: Old window sashes, polycarbonate sheeting (lightweight and shatterproof), or thick, transparent plastic sheeting (UV-stabilized for longevity). Imagine the gentle glint of sunlight diffusing through recycled glass, or the crisp clarity of polycarbonate.
- Alternatives: Plexiglass sheets, heavy-duty shower doors, or even reinforced clear tarpaulins stretched taut.
- Lid Frame Lumber: Smaller pieces of wood to create a lightweight frame for your glazing.
- Glazing Material: Old window sashes, polycarbonate sheeting (lightweight and shatterproof), or thick, transparent plastic sheeting (UV-stabilized for longevity). Imagine the gentle glint of sunlight diffusing through recycled glass, or the crisp clarity of polycarbonate.
- Hardware:
- Hinges: Two durable, rust-resistant hinges to attach the lid to the back of the frame, allowing for easy access and ventilation. Choose heavy-duty options that promise smooth operation.
- Screws/Nails: Exterior-grade screws or galvanized nails to resist rust and ensure a strong, lasting connection. Feel the reassuring grip as they secure the wood.
- Lift Arm/Prop: A wooden dowel, an old stick, or a specialized prop arm to hold the lid open for ventilation.
- Tools:
- Measuring Tape: For precise cuts and dimensions.
- Saw: Hand saw, circular saw, or miter saw for clean, straight cuts. Hear the satisfying whir of the saw as it glides through wood.
- Drill: With appropriate drill bits for pilot holes and driving screws.
- Screwdriver: Or drill bit for screws.
- Staple Gun: If using plastic sheeting for glazing.
- Work Gloves: To protect your hands.
- Safety Glasses: Essential for eye protection during cutting and drilling.
- Level: To ensure your cold frame sits evenly.
- Pencil/Marker: For marking cuts.
- Shovel/Trowel: For preparing the ground.
Project Time
Embarking on a DIY gardening project like a cold frame build can be surprisingly efficient. Here’s a breakdown of anticipated time commitments:
- Preparation Time: 1-2 hours (gathering materials, planning dimensions, clearing the site)
- Build/Plant Time: 3-5 hours (cutting wood, assembling the frame, attaching the lid, positioning)
- Total Duration: 4-7 hours
This build is approximately 40% faster than constructing a small raised garden bed from scratch, thanks to its simpler design and fewer structural requirements. You'll be ready to cultivate an extended harvest in less than a day's work!
Step-by-Step Instructions
Building a cold frame is a straightforward process that yields immense gardening rewards. Follow these steps for a successful construction:
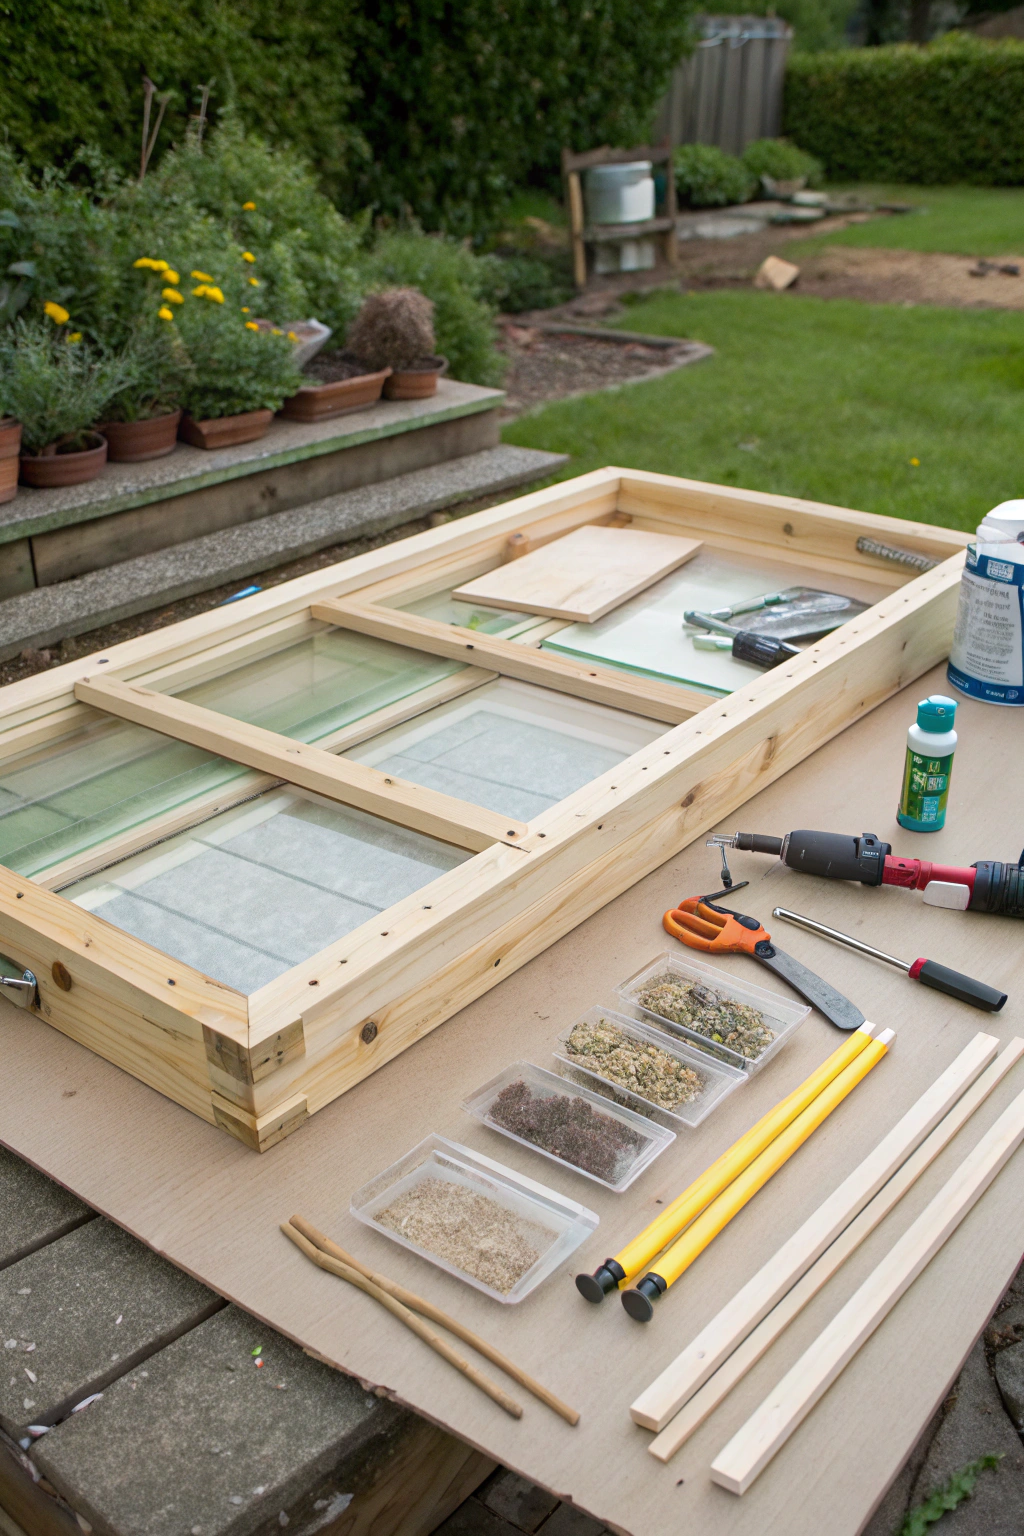
Step 1: Gather Your Materials and Prepare the Site
Before making a single cut, lay out all your collected materials and tools. Choose a sunny, well-drained location in your garden that receives at least 6-8 hours of direct sunlight daily, ideally facing south to maximize winter sun exposure. Level the ground where the cold frame will sit, removing any rocks, weeds, or debris. A level base is crucial for structural integrity and even heat distribution.
- Practical Tip: Sketch your cold frame dimensions on paper first, considering the size of the plants you intend to grow and the available glazing materials.
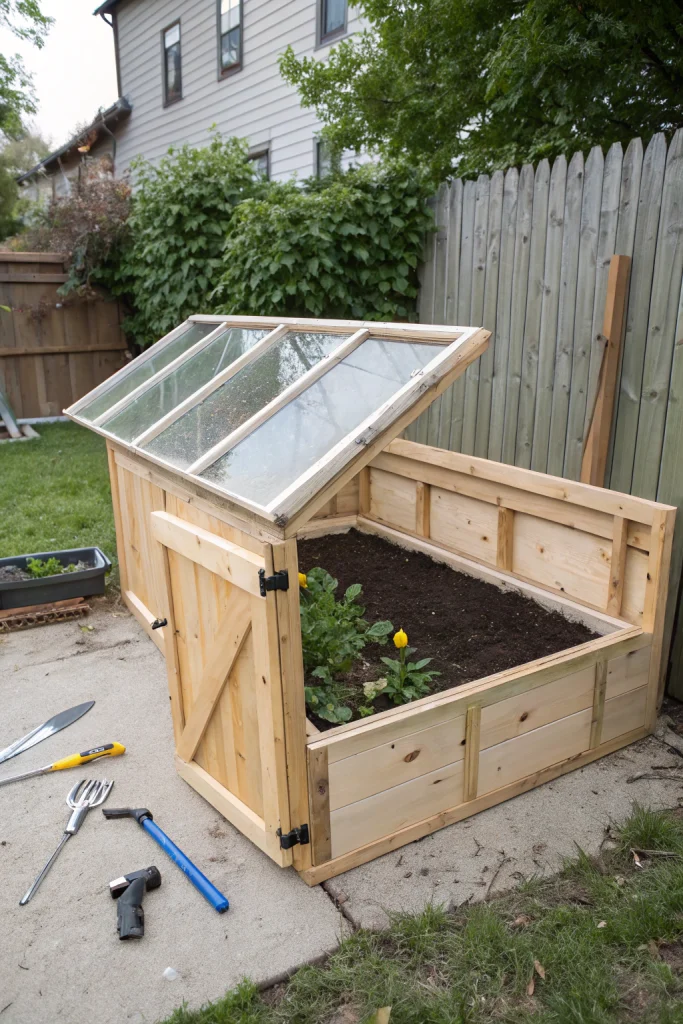
Step 2: Construct the Base Frame
Cut your rot-resistant lumber for the four sides of your cold frame. The back piece should be taller than the front piece to create a slope for the lid, allowing rainwater to run off and sunlight to penetrate more effectively. The side pieces will connect these two at an angle.
- Practical Tip: Use wood glue in addition to screws at each joint for extra reinforcement. Let it dry for a few minutes before tightening screws completely.
Step 3: Attach the Side Walls
Connect the front and back pieces to the side pieces using your corner supports. Ensure all corners are square using a carpenter's square, and pre-drill pilot holes to prevent wood splitting before driving in your exterior-grade screws. This foundational structure will feel solid and robust.
- Practical Tip: Assemble one long side and one short side first, then join them, ensuring precise alignment throughout.
Step 4: Build the Hinged Lid
Measure and cut lumber for the lid frame, making it slightly larger than your base frame to ensure a good overlap. The lid should be sturdy enough to hold your glazing material securely. Assemble the lid frame, again using pre-drilled holes and weather-resistant screws.
- Practical Tip: Consider adding a small lip or overlapping edge on the lid frame to help shed water more effectively and create a tighter seal against cold air.
Step 5: Secure the Glazing Material
Carefully place your chosen glazing material (old window sash, polycarbonate, or plastic sheeting) onto the lid frame. If using an old window sash, it might simply fit into the frame you've created. For polycarbonate or plastic, use screws with washers or a staple gun to securely attach it to the lid frame, ensuring there are no gaps for cold air to seep in or warm air to escape. The transparency should be crisp and clear.
- Practical Tip: For plastic sheeting, pull it taut as you staple or screw it down to prevent sagging, which can collect water or snow.
Step 6: Attach the Lid to the Base
Position the lid onto the main frame, aligning the back edge of the lid with the taller back piece of your cold frame. Attach the two hinges to the lid and the back piece, ensuring they operate smoothly. Test the opening and closing action.
- Practical Tip: Have a helper hold the lid steady while you attach the hinges to ensure perfect alignment and prevent the wood from shifting.
Step 7: Add Finishing Touches and Test
Add your lift arm or prop to hold the lid open at various angles for ventilation. You might also consider weatherstripping around the edges of the lid for a better seal against the elements. Fill your new cold frame with soil and plant your chosen cool-season crops or seedlings.
- Practical Tip: Conduct a "leak test" by gently misting the exterior with water; any visible leaks indicate areas that need a tighter seal.
Maintenance & Care Tips
Maintaining your cold frame ensures its longevity and the health of your plants. Regular attention to these details will help you maximize your harvests.
- Ventilation: This is the most crucial aspect of cold frame management. On sunny days, even in winter, temperatures inside can quickly soar, potentially "cooking" your plants. Open the lid partially or fully when the internal temperature reaches around 65-70°F (18-21°C). Close it before temperatures drop in the late afternoon. Data suggests that lack of proper ventilation can cause internal temperatures to rise by 20-30°F above ambient within an hour on a sunny day.
- Watering: Plants in a cold frame often require less water than those exposed to wind and open air. Check the soil moisture daily, especially during sunny periods. Water thoroughly but infrequently, allowing the top inch of soil to dry out between waterings to prevent fungal issues. Overwatering can be just as detrimental as under-watering.
- Soil Health: Use a rich, well-draining potting or garden soil mix. Amending the soil with compost annually will replenish nutrients and improve structure. Aim for a soil pH between 6.0 and 7.0 for most vegetables. Regular soil testing every 2-3 years can inform your amendment strategy.
- Pest and Disease Management: The enclosed environment of a cold frame can sometimes encourage pests like aphids or slugs, or diseases like powdery mildew if ventilation is poor. Inspect plants regularly, removing any affected leaves or insects. Good air circulation is your best defense against fungal diseases. For persistent issues, refer to resources like the UC IPM for integrated pest management strategies.
- Cleaning: Periodically clean the glazing material to ensure maximum light penetration. Dust, dirt, and algae can significantly reduce the amount of sunlight reaching your plants. A simple solution of water and mild soap usually suffices.
- Seasonal Schedule:
- Late Winter/Early Spring: Use for hardening off seedlings started indoors or direct sowing early cool-season crops (lettuce, spinach, radishes).
- Late Spring/Summer: Primarily used for heat-loving crops if desired, but often left open or stored away as temperatures rise.
- Autumn: Protect tender plants from early frosts or extend the harvest of greens.
- Winter: Grow overwintering vegetables or provide a protected space for dormant perennials.
Eco-Friendly Alternatives
Adopting sustainable practices in your DIY gardening projects not only benefits the planet but often saves money too. Here are some eco-conscious choices for your cold frame:
- Recycled Materials: Instead of new lumber, source reclaimed wood from construction sites (always verify it's untreated), old pallets, or even disused furniture. For glazing, salvaged window sashes are a classic, eco-friendly choice. Old shower doors, picture frames, or even large, clear plastic drink bottles (cut and flattened) can be repurposed. Old bricks or concrete blocks can form a durable and thermally mass-rich base.
- Organic Inputs: Fill your cold frame with a custom blend of organic compost, coir (a sustainable alternative to peat moss), and aged manure for a nutrient-rich, living soil. Avoid synthetic fertilizers and pesticides. Composting at home provides an continuous supply of this vital soil amendment; learn more with these EPA composting basics.
- Low-Water Options: Integrate a simple drip irrigation system or use self-watering planters within your cold frame to minimize water waste. Mulching around plants with straw or shredded leaves can significantly reduce evaporation, maintaining consistent soil moisture.
- Passive Heating/Cooling: Enhance your cold frame's thermal performance naturally. Paint the interior walls and base a dark color to absorb more solar radiation, or line the interior with aluminum foil to reflect light. For cooling, integrate automated vent openers that react to temperature changes, reducing the need for manual intervention and saving energy.
- Native Plant Integration: While cold frames are often for edibles, consider companion planting with small native herbs or flowers suited to your microclimate in or around the cold frame to support local biodiversity and attract beneficial insects. For more information on useful plants, the USDA NRCS Plant Materials provides valuable resources.
Design & Styling Ideas
A cold frame doesn't just have to be functional; it can be a charming addition to your garden aesthetic! Incorporate these ideas to make it visually appealing and highly practical.
- Integrated Garden Feature: Instead of a standalone box, integrate your cold frame into a larger raised garden bed structure, creating a seamless transition. This looks more intentional and can share soil and water systems.
- Color & Finish: Paint the wooden frame a vibrant color that complements your garden palette – a rustic sage green, a crisp white, or a deep charcoal can make it a focal point. Alternatively, stain the wood to highlight its natural grain for a more organic feel.
- Architectural Details: Add decorative trim around the lid or base, small finials on the corners, or even a tiny, ornamental door handle to the prop arm. These small touches elevate a simple design.
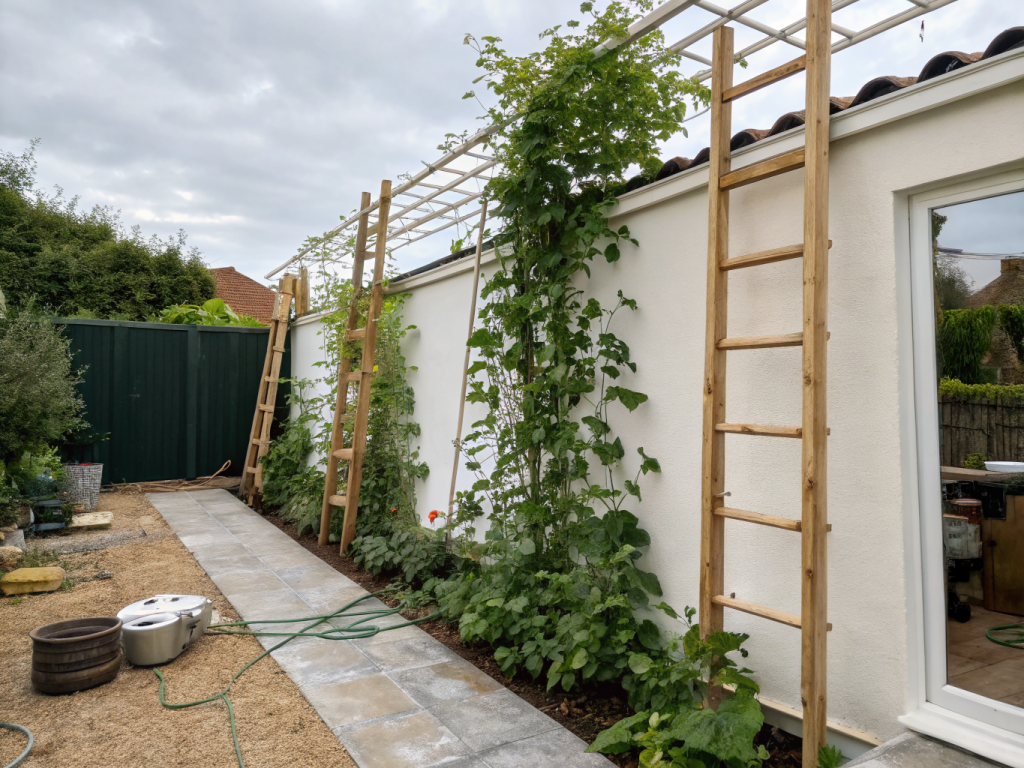
- Vertical Element: Consider attaching a small trellis to the back of a taller cold frame. This allows you to grow climbing plants once the cold frame is no longer needed for early starts, transforming its use throughout the season.
- Multi-Purpose Lid: Design the lid to be removable and attach legs to it, turning it into a temporary potting bench or a mini greenhouse for patio plants during warmer months.
- Living Roof: On the fixed parts of the frame, near the hinges, you could potentially add a small living roof section with sedum or other shallow-rooted succulents, adding a touch of green and further insulation.
- Accessorize: Place small, decorative stones, pebbles, or even miniature landscape elements around the base of the cold frame to blend it into the surrounding garden. Add a rustic gardening sign or a wind chime nearby for sensory enjoyment.
- Stackable Design: For those with limited space, design your cold frame in modular sections that can be stacked when not in use or combined to create a larger structure.
Common Mistakes to Avoid
Even seasoned gardeners can stumble, but being aware of common pitfalls can save you time and effort. When building and using your cold frame, steer clear of these mistakes:
- No Ventilation: As mentioned, extreme heat buildup is the number one killer of cold frame plants. Failing to open the lid on sunny days, even in cool weather, turns your cold frame into an oven. Studies show that internal temperatures can rise by over 30°F (17°C) above ambient within minutes if left unvented.
- Prevention: Install an automatic vent opener or make manual ventilation a daily habit. Even a small crack can make a significant difference.
- Inadequate Drainage: If your cold frame sits in a puddle or the soil inside is waterlogged, it can lead to root rot and fungal diseases.
- Prevention: Choose a naturally well-drained spot. If your soil is heavy clay, build up a small mound and place the cold frame on top, or incorporate plenty of organic matter into the base soil. Ensure your cold frame design doesn't trap water.
- Poor Light Exposure: A cold frame is useless if it doesn't get enough sun. Shady spots will result in leggy, weak plants.
- Prevention: Orient your cold frame with the glazed lid facing south (in the Northern Hemisphere) to maximize solar gain throughout the day, especially during the lower sun angles of winter.
- Using Non-Durable Materials: While tempting to use any scrap wood for a DIY gardening project, using non-rot-resistant wood or flimsy glazing will lead to premature deterioration and frustration.
- Prevention: Invest in rot-resistant lumber (cedar, redwood, pressure-treated) and sturdy polycarbonate or glass for the lid. This cold frame is intended for long-term use.
- Ignoring a Good Seal: Gaps and cracks around the lid or base allow precious heat to escape and cold air to enter, defeating the purpose of the insulated environment.
- Prevention: Ensure the lid fits snugly. Add weather stripping or foam tape around the edges where the lid meets the frame. Fill any significant gaps at the base with soil or sand.
- Overcrowding Plants: Jamming too many plants into a small space restricts airflow, increases competition for light and nutrients, and encourages the spread of pests and diseases.
- Prevention: Provide adequate spacing between plants, referring to seed packet recommendations. This also makes watering and harvesting easier.
- Forgetting to Acclimate: Moving seedlings directly from the cold frame to the harsh outdoor environment without a transition period can shock and kill them.
- Prevention: Gradually harden off plants by increasing their exposure to outdoor conditions over a week or two, closing the lid less and less over time.
Storage & Seasonal Tips
Successfully managing your cold frame throughout the year ensures both its longevity and your continuous gardening success.
- End-of-Season Clean-Up: Once the primary growing season allows, or at the end of the harvest, empty the cold frame of old soil and plant debris. Thoroughly clean the interior, especially the glazing, with a mild soap solution to remove dirt, algae, and potential pest eggs or disease spores. This readies it for the next round of planting or ensures clean storage.
- Tool Storage: Keep small hand tools like trowels, hand pruners, and seedling markers near your cold frame in a weatherproof container or a small garden caddy. This prevents them from getting lost and ensures they’re always at hand. For larger tools, consider incorporating a small storage bench nearby for convenience.
- Off-Season Protection: If your cold frame is portable, clean it out and store it in a shed or garage to protect it from harsh winter elements, especially if your region experiences heavy snowfall or strong winds. If it's a permanent fixture, consider covering the lid with a tarp or boards to protect the glazing from hail or falling branches.
- Winter Usage: Embrace its full potential! Use the cold frame to overwinter hardy perennial herbs or small shrubs that need a bit of extra protection from extreme cold. This can also be a fantastic space for growing very cold-hardy greens like mâche, claytonia, or perpetual spinach even under a blanket of snow. Just remember to clear snow from the lid to allow light in.
- Summer Repurposing: During hot summer months, your cold frame might be too warm for most plants. Consider removing the lid entirely or propping it open permanently. The base can then function as a small raised bed for heat-loving crops like basil, peppers, or cherry tomatoes, offering a touch of contained DIY gardening.
- Pest Barrier: During any season, use fine netting over the open cold frame during the day to prevent birds or other small creatures from nibbling on young plants while still allowing ventilation.
Conclusion
Building your own cold frame is more than just a construction project; it’s an investment in extending your DIY gardening season, nurturing healthier plants, and fostering a deeper connection with your outdoor space. From protecting delicate seedlings to defying early frosts, this simple, yet powerful structure empowers you to cultivate with greater control and confidence. By following these detailed steps and embracing eco-friendly alternatives, you’ve not only created a valuable garden asset but also embraced a more sustainable approach to growing. Now, go forth and grow, knowing your plants are sheltered and thriving! What will you grow first in your new cold frame?
FAQ
Q: What is the best material for the lid of a cold frame?
A: Polycarbonate sheeting is often recommended due to its durability, light weight, and excellent insulation properties, though old window sashes (glass) or plexiglass are also effective.
Q: How often do I need to vent my cold frame?
A: On sunny days, even in winter, vent daily by propping open the lid when internal temperatures exceed 65-70°F (18-21°C). Close it before evening to retain heat.
Q: Can I grow vegetables in a cold frame year-round?
A: While a cold frame significantly extends the growing season, true year-round cultivation depends on your climate and the types of plants. It's excellent for cool-season crops in colder months and early starts in spring.
Q: What are the ideal dimensions for a cold frame?
A: A common size is 3×6 feet, which is manageable to build and access. The back wall should be taller (e.g., 18 inches) than the front (e.g., 12 inches) to create a slope for drainage and sun exposure.
Q: Do I need to anchor my cold frame?
A: For stability, especially in windy areas, it's a good idea to anchor your cold frame. You can use stakes driven into the ground, or place heavy rocks around the base.
Q: What kind of plants are best for a cold frame?
A: Cool-season vegetables like lettuce, spinach, kale, radishes, carrots, and various herbs thrive in cold frames. It's also perfect for hardening off seedlings before transplanting.
Q: How do cold frames differ from mini-greenhouses?
A: Cold frames are typically unheated, relying solely on solar energy and insulation, while mini-greenhouses often incorporate supplemental heating to maintain warmer temperatures regardless of outside conditions.
For a deeper dive into optimizing your garden care year-round, check out our guide on Autumn Wellness Garden Tips. If you're looking for other ways to integrate more green into your living space, explore ideas for an Autumn Living Wall Garden Decor. To complete your outdoor setup, consider our innovative Smart Tech Garden Hacks that can enhance efficiency and enjoyment. For creative ways to utilize your backyard space, delve into DIY Mini Garden Maze Backyard Projects.