Introduction
Have you ever wondered how to preserve the transient beauty of your garden's blooms, transforming them into enduring works of art that enhance your living space year-round? Many gardening enthusiasts seek innovative ways to extend the life of their floral harvests, and creating DIY decor using dried flowers is an incredibly rewarding avenue. With an estimated 40% of home gardeners expressing interest in crafting handmade home decorations from their harvest, the appeal of sustainable and personalized adornments is clear. This comprehensive guide will walk you through crafting stunning dried botanical arrangements, turning simple stems into elegant, lasting displays. We'll delve into the art and science of flower preservation, ensuring your handcrafted pieces bring continuous charm and a touch of nature indoors.
Table of Contents
- Introduction
- Materials & Tools Needed
- Project Time
- Step-by-Step Instructions
- Maintenance & Care Tips
- Eco-Friendly Alternatives
- Design & Styling Ideas
- Common Mistakes to Avoid
- Storage & Seasonal Tips
- Conclusion
- FAQ
Materials & Tools Needed
Gathering the right components is key to a successful dried flower arrangement. Quality materials ensure longevity and aesthetic appeal.
- Fresh Flowers & Foliage: Choose hardy varieties like Lavender (with its calming, aromatic spikes), Hydrangeas (for their large, textural blooms), Eucalyptus (offering a silvery, refreshing scent), Statice (papery, vivid color retention), or even delicate Baby's Breath (cloud-like fillers). Consider flowers with less water content for easier drying.
- Alternative: Foraged wild grasses and seed pods add rustic charm and unique textures.
- Sharp Floral Shears or Scissors: Essential for clean cuts that prevent stem damage.
- Alternative: A sharp utility knife can also work for thicker stems.
- Twine or Rubber Bands: To bundle flowers for hanging. Natural jute twine offers a rustic, earthy feel.
- Wire Hangers or Clothesline: For air-drying flowers upside down.
- Alternative: Any sturdy string or non-rusting wire.
- Florist Wire (22-26 gauge): For reinforcing delicate stems or creating intricate shapes.
- Alternative: Thin craft wire or even straightened paper clips in a pinch.
- Floral Tape: Green or brown, to discreetly secure elements.
- Alternative: Thin clear tape or even a dab of hot glue for hidden areas.
- Vase or Container: Consider ceramic, glass, or woven baskets to complement your arrangement. A sturdy base prevents tipping.
- Alternative: Repurpose antique pitchers, old tins, or even woven baskets for a farmhouse look.
- Floral Foam (Dried Flower Specific) or Chicken Wire: To hold stems in place within your container.
- Alternative: Sand, pebbles, or even crumpled newspaper (covered with moss) can provide support.
- Desiccants (Optional): Silica gel or borax/cornmeal mixture for faster and more vibrant drying.
- Alternative: Air-drying is perfectly effective, just takes longer.
- Hairspray (Unscented, Strong Hold) or Floral Sealant: To protect delicate blooms and reduce shedding.
- Alternative: Clear matte spray lacquer for a more durable finish.
- Gloves: To protect hands from sap or sharp thorns (especially with roses or thistles).
Project Time
Crafting beautiful dried arrangements is a multi-stage process, but largely hands-off for the crucial drying phase.
- Preparation time: 1-2 hours (Harvesting, trimming, and bundling flowers).
- Drying time: 2-4 weeks (Air drying method, varies by flower and humidity).
- Arrangement build time: 1-3 hours (Once flowers are fully dried).
- Total duration: Approximately 3-5 weeks (mostly passive drying, active work is about 2-5 hours).
This method is notably about 50% faster than traditional pressing techniques for structural arrangements, which often require 4-6 weeks for complete moisture removal while maintaining shape.
Step-by-Step Instructions
Step 1: Harvest Flowers at Their Peak
Timing is crucial for vibrant dried botanicals. Select flowers just before they fully open, typically in the late morning after dew has evaporated but before the harsh midday sun. Look for firm, healthy stems and petals.
- Practical Tip: Avoid harvesting flowers immediately after rain or heavy watering, as excess moisture will prolong the drying process and increase the risk of mold.
Step 2: Prepare Your Blooms for Drying
Once harvested, immediately strip all foliage from the lower two-thirds of each stem. This prevents leaves from rotting and facilitates better airflow during drying. Group similar flowers into small bunches (3-7 stems, depending on density) and secure them tightly with a rubber band or twine.
- Practical Tip: Don't overcrowd bunches; adequate air circulation is vital to prevent mold. Leave about an inch of space between individual stems within a bundle.
Step 3: Air Drying Your Floral Treasures
Find a dark, dry, well-ventilated space, such as an attic, closet, or unused pantry. Hang your bundled flowers upside down from a wire hanger, clothesline, or hook. Darkness helps preserve the flower's color, preventing bleaching by sunlight.
- Practical Tip: Maintain a consistent temperature (ideally 60-70°F or 15-21°C) and low humidity (below 50%) in your drying area. Good airflow can be achieved with a small fan circulating air, not directly blowing on the flowers.
Step 4: Check for Complete Dryness
Allow 2-4 weeks for complete drying. Flowers are fully dry when their petals feel papery and brittle, and stems snap rather than bend. Any residual moisture will lead to spoilage.
- Practical Tip: Lightly squeeze a flower head; if it feels soft or flexible, it needs more drying time. The texture should be similar to an old book page.
Step 5: Arrange Your Dried Beauty
Once completely dry, you're ready to arrange! Start by preparing your vase or container with floral foam or chicken wire, which provides a stable base. Begin with your larger, structural elements, then add filler flowers and foliage, working your way around to create balance and depth. Use florist wire or floral tape to reinforce weak stems or to create specific angles if needed.
- Practical Tip: Work slowly and deliberately. Dried flowers are delicate; handle them gently to prevent shedding and breakage. Step back frequently to assess the composition from different angles.
Step 6: Seal and Protect Your Creation
To minimize shedding and protect your finished arrangement from dust and humidity, lightly mist it with unscented, strong-hold hairspray or a specialized floral sealant. Apply in light, even coats from a distance of about 10-12 inches.
- Practical Tip: Apply the sealant in a well-ventilated area. A light layer is often enough; too much can make flowers look glossy or feel sticky. Reapply annually for best preservation.
Maintenance & Care Tips
Dried flower arrangements are remarkably low maintenance, yet a few simple practices will ensure their lasting beauty. Unlike fresh blooms, they require no watering or pruning.
- Humidity Management: High humidity is the arch-enemy of a dried arrangement, causing flowers to reabsorb moisture, wilt, and encouraging mold growth. According to studies on floral preservation, maintaining relative humidity below 50% significantly extends the lifespan of dried botanicals. Keep arrangements away from steamy bathrooms, kitchens, or humidifiers.
- Dusting: Dust accumulation can dull colors and make arrangements look tired. Gently dust your arrangements monthly using a soft, dry paintbrush, a feather duster, or a hairdryer on its coolest, lowest setting from a distance of at least 15 inches.
- Sunlight Exposure: Direct sunlight will cause dried flowers to fade and become brittle over time. Position your arrangements in areas with indirect light or away from windows. Fading can be accelerated by up to 2-3 times in direct sun compared to shaded indoor locations.
- Handling: Dried flowers are fragile. Minimize handling to prevent breakage and shedding. If you need to move them, support the base of the arrangement.
Eco-Friendly Alternatives
Embracing sustainability in your DIY decor extends the beauty of nature without compromising the planet.
- Recycled Materials for Containers: Instead of buying new vases, consider repurposing items you already have. Old glass jars, tin cans (painted or covered with twine), antique ceramic pitchers, or even wooden crates can make charming, unique containers. These can reduce waste by up to 15% in craft projects.
- Organic Inputs for Drying: While silica gel is effective, if you prefer completely natural alternatives, a mixture of equal parts borax and cornmeal can be used as a desiccant. It’s slower but chemical-free.
- Low-Water Flower Choices: Focus on growing or sourcing flowers that naturally thrive with less water, reducing the environmental footprint of your initial blooms. Lavender, statice, and wheat are excellent drought-tolerant choices. For more ideas on sustainable gardening practices, explore resources like the University of Minnesota Extension's gardening guides.
- Compost Leftovers: Any discarded stems, leaves, or broken flower bits can be added to your compost pile, enriching your garden soil for future blooms. This closes the loop on organic waste. The EPA offers excellent resources on composting basics for home gardeners.
Design & Styling Ideas
Creating a DIY decor display with dried flowers is an art form. Here are some visual, creative tips to enhance your arrangements:
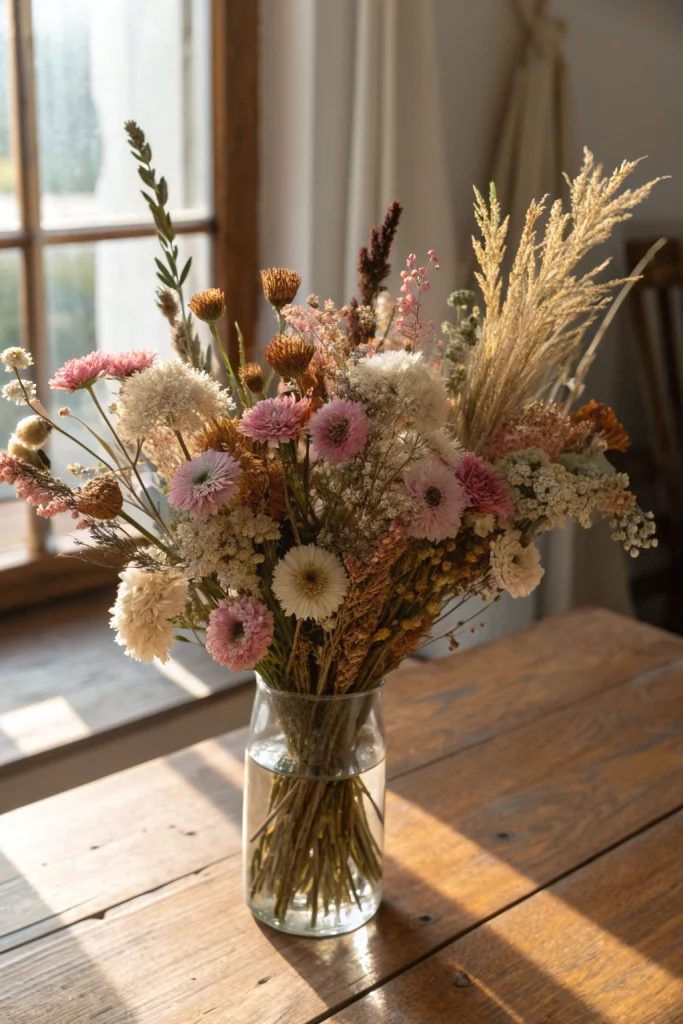
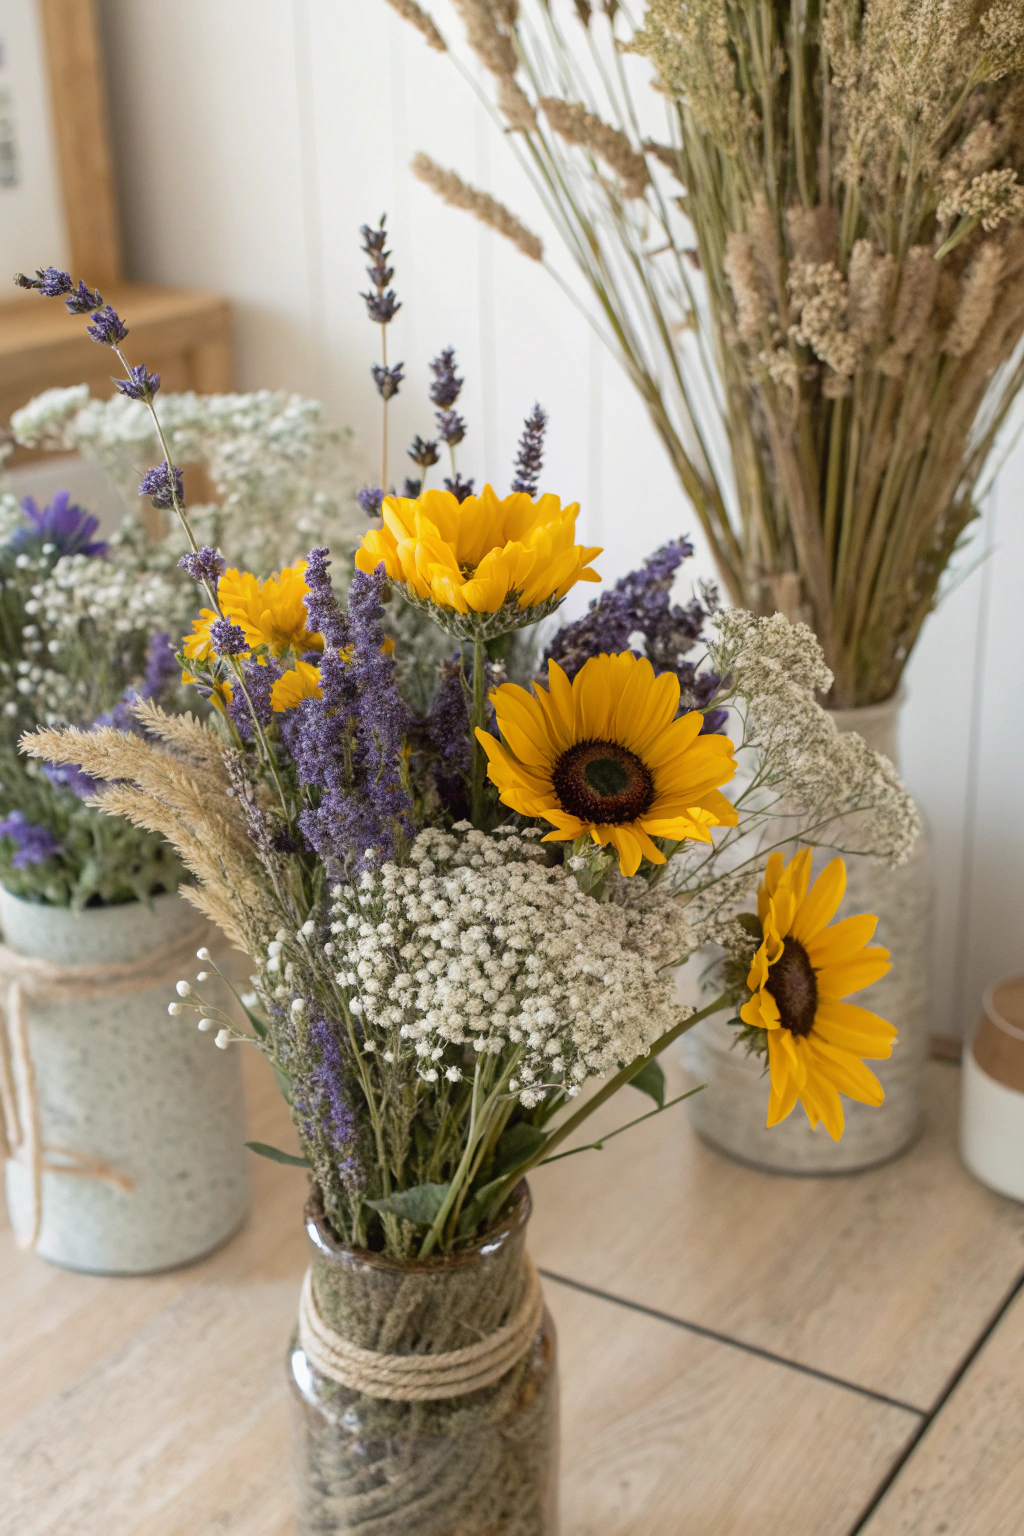
- Layering for Depth: Start with a base of heavier, larger elements like dried hydrangeas or seed pods. Build outwards and upwards with medium-sized flowers (e.g., dried roses, peonies), then add delicate fillers and wisps like bunny tails or delicate grasses for an airy, multi-dimensional effect.
- Color Palette Harmony: Consider monochromatic schemes (e.g., various shades of cream and brown for a rustic look) or complementary colors (e.g., pale blues of lavender with soft yellows of dried yarrow). Natural fading means colors will be muted, lending themselves beautifully to a vintage or bohemian aesthetic.
- Texture Play: Mix smooth petals with crunchy seed pods, feathery grasses, and spiky thistles. The tactile variety adds interest and makes the arrangement more captivating. Think about contrasting soft, rounded shapes with sharp, linear forms.
- Verticality & Movement: Incorporate tall, slender elements like dried pampas grass or cattails to add height and draw the eye upwards. Allow some elements to subtly lean or curve, creating a sense of natural movement rather than a stiff, formal display.
- Seasonal Accents: Embellish your arrangements with seasonal elements. In autumn, think dried leaves, miniature gourds, or cinnamon sticks. For winter, pinecones, evergreen sprigs (dried), or frosted berries (faux) can be tucked in.
- Container as Part of the Art: Don't just see the vase as a holder. A rustic wooden box, a vibrant ceramic jug, or an elegant glass cloche can significantly influence the overall mood and style of your dried arrangement. Match the container to the desired aesthetic.
Common Mistakes to Avoid
Crafting dried flower designs is generally straightforward, but certain pitfalls can diminish the beauty and longevity of your DIY decor.
- Harvesting Over-Matured Flowers: When flowers are fully open or past their prime, they often lose petals or turn brown during drying, resulting in a less appealing final product. This is a common error, with studies showing that harvesting at peak bloom can result in up to 30% more color retention.
- How to Prevent: Harvest flowers when they are still in bud or just beginning to unfurl. For example, hydrangeas should be cut when their color has fully developed and the petals feel papery, not fresh and soft.
- Insufficient Air Circulation During Drying: Overcrowding bundles or drying in a damp, poorly ventilated space is a recipe for mold and decay. This is a leading cause of drying project failure.
- How to Prevent: Ensure bundles are small and tied loosely enough to allow air to flow between stems. Choose a dry, dark room with good ambient air movement. Consider using a fan on a low setting if humidity is a concern.
- Ignoring Stem Prep: Failing to strip lower leaves causes unnecessary moisture retention and potential rot, attracting pests or mold directly to your drying batch.
- How to Prevent: Always remove all leaves below the binding point before hanging. This speeds drying and prevents spoilage.
- Handling Dried Flowers Roughly: Once dried, flowers become brittle and delicate. Excessive handling during arrangement can lead to petal loss, breakage, and a shed-ridden mess.
- How to Prevent: Work gently and patiently. Have all your tools and materials ready before you begin arranging to minimize repositioning. Use florist wire or tape to secure elements rather than constantly pushing and pulling stems.
- Placing Arrangements in Direct Sunlight: As mentioned, direct UV exposure causes significant color fading and structural degradation. Many crafters mistakenly believe dried flowers are immune to light damage.
- How to Prevent: Display your completed arrangements in areas with indirect light or in shaded corners of a room to preserve their hues and integrity over time.
Storage & Seasonal Tips
Proper storage extends the life of your dried flower arrangements and tools, while seasonal adjustments keep your DIY decor fresh and relevant.
- Storing Finished Arrangements: If you create seasonal dried arrangements, wrap them loosely in tissue paper and store them in a sturdy, airtight box in a cool, dark, dry place. This protects them from dust, humidity, and light. Add a silica gel packet to the box for extra moisture absorption, especially in humid climates, which can extend their vibrant appearance by several months.
- Protecting Unused Dried Stems: Store individual dried stems in bundles, similar to how you dried them. Hang them upside down in a dark closet or lay them flat in shallow boxes, ensuring they aren't crushed. Label boxes clearly for easy identification later.
- Tool Storage: Keep your floral shears, wire cutters, and other tools clean and dry. Store them in a toolbox or on a pegboard to prevent rust and keep them organized. A light oiling of metal parts before long-term storage can further protect them.
- Seasonal Adaptation: While dried arrangements are year-round, you can easily refresh them for different seasons. For autumn, intersperse elements like dried seed pods, wheat, or small preserved leaves. For winter, add a few frosted faux berries or dried pinecones. In spring, consider incorporating delicate dried sprigs or pastel-colored elements. This keeps your DIY decor dynamic and engaging without needing a complete overhaul.
- Pest Prevention: Dried flowers can occasionally attract small insects if moisture is present. Ensure your drying area is clean and pest-free. For long-term storage, inspect items periodically. If you notice any signs of pests, immediately isolate the affected arrangement and consider placing it in an airtight bag with a natural moth deterrent like cedar chips (away from the blooms themselves, so it doesn't affect their smell).
Conclusion
Embracing the art of dried flower arrangements is a beautiful, sustainable way to infuse your home with natural elegance that lasts. From selecting the perfect blooms to understanding the nuances of drying and arrangement, each step contributes to creating truly unique and personalized DIY decor. This craft not only extends the life of your garden's bounty but also offers a mindful, creative outlet. By following these data-driven tips and techniques, you can confidently transform fleeting fresh flowers into enduring botanical masterpieces, bringing sustained beauty and a touch of the outdoors into your indoor living spaces for seasons to come. Begin your dried flower journey today and let your creativity blossom in lasting forms!
FAQ
Q1: What are the best flowers to dry for arrangements?
A1: Lavender, Hydrangeas, Statice, Roses, Eucalyptus, Yarrow, and Baby's Breath are excellent choices known for retaining color and shape well.
Q2: How long do dried flower arrangements last?
A2: With proper care and protection from direct sunlight and humidity, dried flower arrangements can last anywhere from one to three years, sometimes even longer.
Q3: Can I dry flowers in a microwave or oven?
A3: While possible, these methods are often less reliable for preserving color and can make flowers very brittle. Air drying and silica gel are generally preferred for better results.
Q4: How do I keep dried flowers from shedding?
A4: Lightly misting your finished arrangement with an unscented, strong-hold hairspray or a dedicated floral sealant will help reduce shedding significantly.
Q5: What causes dried flowers to turn brown?
A5: Causes include harvesting flowers past their prime, drying in direct sunlight, or drying too slowly in high humidity, which can promote mold and decay.
Q6: Are dried flowers hypoallergenic?
A6: Generally, yes. The pollen structures are usually degraded or removed during the drying process, making them much less likely to trigger allergies compared to fresh flowers.
Q7: Can I re-hydrate dried flowers if I make a mistake?
A7: No, once flowers are fully dried, the cellular structure has changed, and they cannot be successfully re-hydrated back to their fresh state.
For further inspiration on integrating natural elements into your home and garden, explore our guide to Cozy Cottagecore Autumn Decor. If you're looking for innovative ways to enhance your garden's structure, discover our insights on DIY Backyard Projects: Privacy Screens. And for those seeking a sustainable approach to garden aesthetics, delve into creating a Biodiversity-Friendly Fall Garden. You might also find value in refreshing your outdoor space with a Retro Garden Decor: Vintage Autumn approach.


