The Ultimate Guide to Building a DIY Raised Bed from Galvanized Steel Panels
Tired of traditional wooden raised beds that rot and warp within a few seasons? Looking for a sleek, modern, and incredibly durable solution for your gardening dreams? Then you’ve come to the right place! Building a DIY raised bed galvanized steel not only offers superior longevity and aesthetic appeal but also provides an optimal growing environment for your plants. This comprehensive guide will walk you through every step, from planning to planting, ensuring your new galvanized steel raised bed stands the test of time and becomes the centerpiece of your garden.
[lwptoc]
Why a DIY Raised Bed from Galvanized Steel Panels Matters for Your Garden
Choosing galvanized steel for your raised beds is a smart, forward-thinking decision for several compelling reasons. Traditional lumber, even treated wood, inevitably succumbs to moisture, pests, and rot, requiring frequent replacement and adding to landfill waste. Galvanized steel, on the other hand, offers unparalleled durability and a lifespan that can easily span decades, making it a truly sustainable choice.
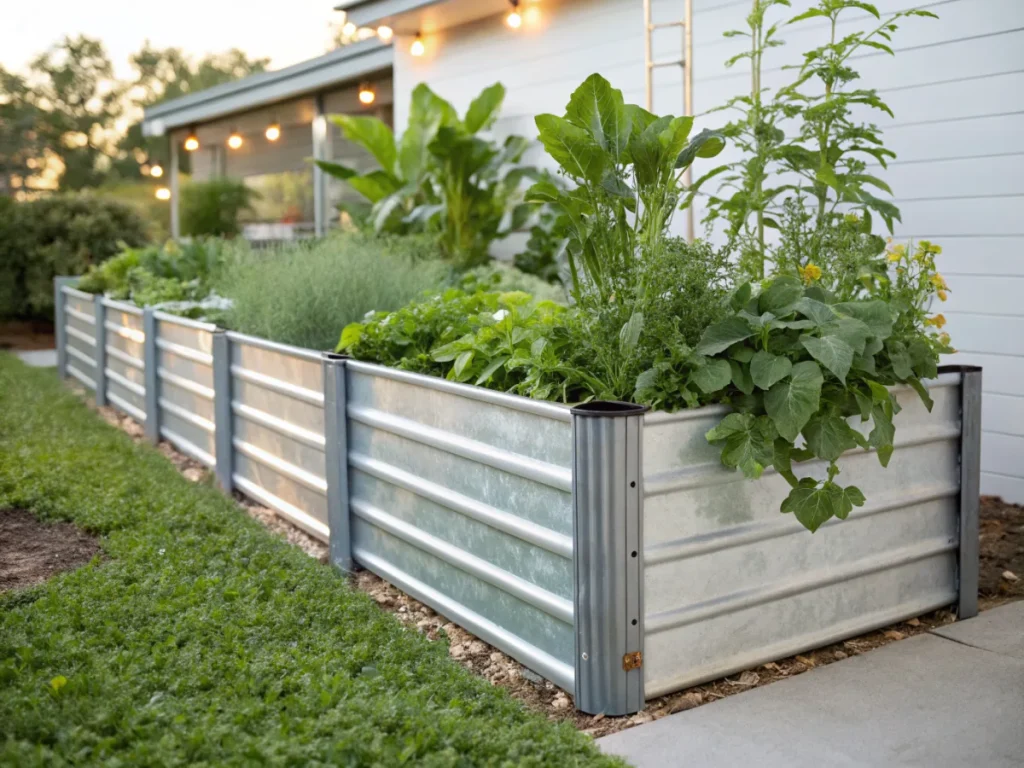
Beyond its impressive longevity, galvanized steel brings a modern, industrial aesthetic to any garden space. Its clean lines and metallic sheen can elevate the look of your yard, complementing contemporary home designs and providing a striking contrast to lush greenery. This material is also incredibly strong, meaning your raised bed will maintain its structural integrity against soil pressure, heavy watering, and even accidental bumps from garden tools.
Furthermore, galvanized steel is an excellent choice for organic gardening. Unlike some treated lumbers that can leach chemicals into the soil, galvanized steel is considered inert once its zinc coating has stabilized, posing no risk to your plants or the soil ecosystem. This allows you to grow healthy, chemical-free produce with complete peace of mind. Its reflective surface can even help regulate soil temperature, reflecting harsh summer sun and preventing overheating of the root zone, which is particularly beneficial in warmer climates.
Finally, a DIY approach to building your DIY raised bed galvanized steel saves you money compared to pre-fabricated options while allowing for complete customization. You can tailor the dimensions, height, and even the shape precisely to your garden’s layout and your specific gardening needs. This level of control ensures your raised bed is not just functional, but perfectly integrated into your personal landscape.
What You Need: Tools, Materials, and the Right Plants
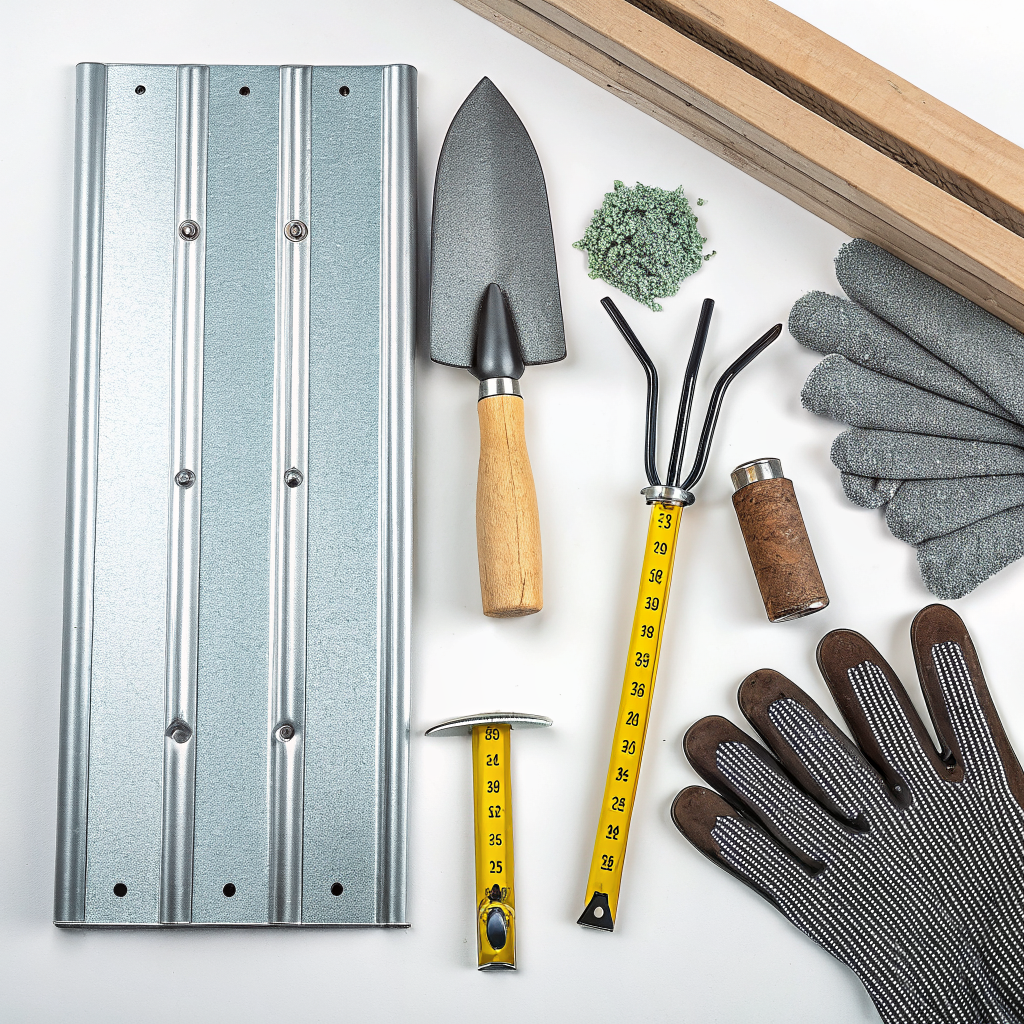
Before diving into construction, gathering all your necessary tools and materials is crucial for a smooth and efficient build. Don’t underestimate the importance of having everything on hand; it will save you multiple trips to the hardware store and keep your project on track.
Essential Tools:
- Tin Snips or Metal Shears: For cutting the galvanized steel panels if custom sizes are needed. Heavy-duty ones are recommended.
- Drill with Metal Bits: To create pilot holes for fasteners. Cobalt or titanium bits work best with metal.
- Measuring Tape: For accurate measurements of panels and layout.
- Marker or Pencil: For marking cut lines or drill points.
- Gloves: Heavy-duty work gloves to protect your hands from sharp edges.
- Safety Glasses: Crucial eye protection when cutting or drilling metal.
- Level: To ensure your raised bed is perfectly level on uneven ground.
- Clamps: To hold panels securely together while drilling and fastening.
- Impact Driver or Wrench: For quickly and securely attaching hardware.
- Shovel and Rake: For site preparation and filling the bed.
- Spirit Level (long): For checking the levelness of longer sections.
Key Materials:
- Galvanized Steel Panels: Corrugated or flat panels, typically roofing or siding sheets. Look for 26-gauge or thicker for good rigidity. The number of panels and their dimensions will depend on your desired bed size.
- Galvanized Screws with Washers & Nuts: Self-tapping metal screws (e.g., #10 or #12) with neoprene washers are ideal for joining panels and providing a watertight seal. Consider carriage bolts for corners if you want extra strength.
- L-Brackets or Corner Brackets (Galvanized): For reinforcing corners and providing a clean finish.
- Plexiglass or Exterior Grade Plywood Strips (optional): For creating a protective top edge or ‘cap’ to cover sharp edges. Some prefer wood for this, which can be stained or painted.
- Angle Iron or Galvanized Tubing (optional): For internal bracing of very long beds to prevent bowing.
- Hardware Cloth (optional): If gophers or moles are an issue, lay this at the bottom of the bed before filling.
- Landscaping Fabric (optional): To line the bottom if you want to prevent weeds from growing up while still allowing drainage.
- Topsoil/Potting Mix: High-quality organic soil mix is crucial for healthy plant growth. Consider a ‘lasagna’ method for filling.
- Compost: Essential for enriching your soil.
Don’t forget to visit reputable hardware stores or agricultural supply centers for your materials. Sometimes, local metal fabrication shops can cut panels to precise specifications, saving you time and effort.
Choosing the Right Plants:
Once your DIY raised bed galvanized steel is built, the possibilities for planting are endless. Raised beds are excellent for a wide variety of vegetables, herbs, and flowers due to better drainage and warmer soil temperatures. Consider:
- Deep-rooted vegetables: Carrots, potatoes, radishes, parsnips thrive in the loose soil.
- Leafy greens: Lettuce, spinach, kale, Swiss chard appreciate the consistent moisture.
- Fruiting vegetables: Tomatoes, peppers, eggplants, cucumbers (with trellising) do well.
- Herbs: Basil, rosemary, thyme, mint (in containers to prevent spreading) are perfect.
- Flowers: Marigolds (for pest control), nasturtiums (edible), zinnias (pollinators).
Plan your planting based on sunlight exposure, growing zones, and companion planting principles. The Royal Horticultural Society offers excellent resources on selecting plants for raised beds.
Step-by-Step Guide: Building Your DIY Raised Bed from Galvanized Steel Panels
Building your DIY raised bed galvanized steel is a rewarding project that can be completed over a weekend with careful planning and execution. Follow these steps for a sturdy and long-lasting garden bed.
Step 1: Site Selection and Preparation
The success of your raised bed begins with its location. Choose a spot in your garden that receives at least 6-8 hours of direct sunlight per day, ideally facing south or southeast. Ensure the ground is relatively level; if not, you’ll need to do some minor grading. Clear the area of any weeds, rocks, or debris. Consider accessibility for watering, weeding, and harvesting. If you plan to lay hardware cloth to deter pests, do this now, extending it slightly beyond the bed’s footprint and bending the edges upwards. This creates a barrier that pests can’t easily tunnel under.
Step 2: Marking Out and Cutting Panels
Determine the desired dimensions of your raised bed. Common sizes are 4×8 feet or 3×6 feet, but you can customize this to fit your space. Using your measuring tape and marker, lay out the dimensions on your galvanized steel panels. If you’re using pre-cut roofing sheets, this step might only involve marking for slight adjustments. For cutting, don your safety glasses and gloves. Use tin snips or metal shears to carefully cut along your marked lines. For long, straight cuts, a metal shear attachment for a drill can be incredibly efficient. Always be mindful of sharp edges.
Step 3: Assembling the Sides and Corners
This is where your clamps become invaluable. Stand two panels upright to form a corner (at a 90-degree angle). Clamp them firmly together, ensuring they are flush at the top and bottom. Using your drill and metal bit, pre-drill holes through both panels where you intend to place your fasteners. Space these holes about 6-12 inches apart, closer at the ends. Insert your galvanized screws with washers and nuts, tightening them securely but not over-tightening, which can distort the metal. Repeat this process for all corners, gradually building the perimeter of your bed. For added stability and a cleaner look, you can place galvanized L-brackets on the inside of each corner, attaching them with additional screws.
Step 4: Adding Bracing and Top Edge (Optional but Recommended)
For longer beds (e.g., 8 feet or more), horizontal bracing is highly recommended to prevent the sides from bowing outward when filled with soil. You can use galvanized angle iron, tubing, or even treated wood studs secured horizontally across the width of the bed, roughly halfway up. Attach these braces to the side panels using screws and L-brackets. To cover the potentially sharp top edge of the galvanized steel, consider adding a cap. This can be made from narrow strips of plexiglass, galvanized sheet metal bent over the edge, or even wood planks. If using wood, ensure it’s exterior-grade, cedar, or redwood for longevity. Secure the cap to the top edge of the steel panels with appropriate fasteners, pre-drilling pilot holes for wood to prevent splitting.
Step 5: Positioning and Leveling
Once the frame is assembled and braced, carefully move it to its final desired location. Use your long spirit level to check the levelness of the entire structure. If the ground is uneven, you may need to shim underneath certain sections with pavers, rocks, or compacted soil to ensure the top edge of your bed is perfectly level. This is crucial for even watering and prevents soil erosion from one side. Once level, you can consider anchoring the bed with rebar stakes driven through the bottom corners or into the ground inside the bed, especially if you live in high-wind areas.
Step 6: Filling Your Raised Bed
This is arguably the most exciting part! Begin by laying down a layer of cardboard or newspaper at the very bottom to suppress weeds and slowly decompose, adding organic matter. Then, you can employ the “lasagna gardening” method for filling, which is both cost-effective and creates nutrient-rich soil.
- Bottom Layer (12-18 inches): Branches, twigs, leaves, grass clippings, wood chips. These decompose slowly, creating air pockets and long-term nutrients.
- Middle Layer (6-12 inches): Partially decomposed compost, straw, aged manure. This layer adds rich organic matter.
- Top Layer (6-12 inches): High-quality raised bed mix. This should be a blend of good topsoil, compost, and perlite or vermiculite for drainage and aeration.
Fill the bed to about 2-3 inches from the top to allow for future mulching and prevent soil from washing out. Water thoroughly as you fill to help the layers settle. Congratulations, your DIY raised bed galvanized steel is ready for planting!
Pro Tips and Common Mistakes
Even with a detailed guide, a few extra insights can make your project smoother and avoid common pitfalls. Learning from experienced DIYers can save you time, money, and frustration.
Pro Tips:
- Pre-Assemble Sections: If your bed is very large, consider assembling two long sides and two short sides separately, then connecting them at the corners. This can be easier to manage than building one continuous perimeter.
- Overlap Corrugations for Strength: When joining corrugated panels along a seam, slightly overlap the corrugations. This creates a stronger connection and helps prevent soil leakage.
- Seal Edges (Optional): For maximum longevity and a super clean look, consider running a bead of exterior-grade silicone sealant along internal seams and screw heads. This is particularly useful if you live in a very wet climate.
- Consider a Subterranean Barrier: If gophers or moles are a significant issue in your area, burying hardware cloth 12-18 inches deep around the perimeter of the bed before filling can be more effective than just placing it at the bottom. This prevents them from tunneling in from the sides.
- Round Sharp Edges: Use a metal file or sandpaper to gently smooth down any particularly sharp edges on the panels, especially if you won’t be adding a top cap. Safety first!
- Ergonomic Height: When planning, consider a height that is comfortable for you to work at. Taller beds (18-24 inches) reduce bending and are great for those with back issues.
- Drainage Holes (Rarely Needed): Raised beds naturally drain very well, so additional drainage holes in the galvanized steel sides are usually unnecessary unless your soil is extremely heavy clay and you’re not using a proper raised bed mix.
- Document Your Build: Take photos! Not only is it fun to look back on, but it can also help you remember specific techniques or material choices for future projects. Check out this composting guide for another backyard DIY that complements a raised bed.
Common Mistakes to Avoid:
- Not Wearing Safety Gear: Galvanized steel can have very sharp edges. Always wear heavy-duty gloves and safety glasses when handling, cutting, and drilling.
- Improper Site Preparation: Skimping on leveling the ground will lead to a lopsided bed, uneven settling of soil, and potential structural stress over time.
- Under-Securing Panels: Don’t use too few screws or fasteners. The weight of wet soil is considerable. Ensure adequate fastening, especially at corners and along long runs.
- Ignoring Soil Quality: Simply filling your galvanized bed with native garden soil is a missed opportunity. Invest in or create a high-quality raised bed mix for optimal plant health and fewer problems down the line. Gardening Know How has great advice on soil.
- Building Too Wide: While exciting, a very wide bed can be difficult to reach across for weeding, planting, and harvesting. Aim for a maximum width of 4 feet if you can access it from both sides, or 2 feet if it’s against a fence or wall.
- Forgetting About Thermal Expansion: While steel is durable, it does expand and contract with temperature changes. Ensure your connections aren’t so rigid that they cannot accommodate slight movement over time. Standard methods of fastening usually allow for this.
- Not Mulling Over Materials: Do your research on the gauge of steel, type of fasteners, and any protective coatings before purchasing. Cheaping out on materials can lead to early failure. This applies to other DIY projects too, like this DIY vertical garden tower requiring specific materials.
Eco-Friendly Variations for Your Galvanized Steel Raised Bed
Embracing eco-conscious practices doesn’t stop at choosing durable galvanized steel. There are several ways to make your DIY raised bed galvanized steel even more environmentally friendly and align with sustainable gardening principles.
- Recycled or Reclaimed Steel Panels: Look for opportunities to source salvaged corrugated steel roofing or siding sheets from demolition sites, farm clear-outs, or architectural salvage yards. Always inspect reused materials for excessive rust or damage, but perfectly good panels often go to waste. This significantly reduces the embodied energy of your project.
- ‘Lasagna’ Layering with Local Resources: Maximize the use of readily available organic materials from your own yard or neighborhood for filling. Instead of buying expensive bagged soil, consider tree trimmings from arborists, leaf litter from neighbors, or spent brewing grains from local breweries. This minimizes transport emissions and supports local recycling efforts.
- Rainwater Harvesting Integration: Design your raised bed’s location in conjunction with a rainwater harvesting system. Position it where it can be easily watered by a rain barrel or connected to an irrigation system fed by collected rainwater. This conserves municipal water and reduces your water bill. For more on rainwater use, see our guide on DIY rain barrels.
- Beneficial Insect & Pollinator Habitats: Dedicate a section or a companion raised bed to native flowering plants. These provide essential nectar and pollen for pollinators and act as attractants for beneficial predatory insects, reducing the need for chemical pest control in your vegetable beds.
- Composting Integration: Place your raised bed near a composting system. This visual and functional proximity encourages you to regularly add organic waste, enriching your soil annually and reducing household waste. It also makes harvesting finished compost for your beds a breeze.
- Permaculture Principles: Incorporate permaculture design principles like stacking functions (e.g., adding a living fence or trellis to one side of the bed), zone planning, and guild planting (planting a beneficial community of plants together) to maximize productivity and ecosystem health within and around your raised bed.
- Minimal Disturbance Soil: Once your bed is filled, practice no-dig or no-till gardening. This preserves the soil structure and beneficial microbial life, leading to healthier soil and better plant growth over time, reducing the need for frequent soil amendments.
- Solarization for Weed Control: Before adding your final layers of good soil, consider solarizing the bottom layers with clear plastic where invasive weeds are present. This natural heating method kills weeds and pathogens without chemicals, preparing a clean slate for your garden.
Seasonal Considerations for Your Galvanized Steel Raised Bed
While a DIY raised bed galvanized steel is remarkably low-maintenance, a few seasonal considerations will help you maximize its productivity and keep it in top condition year-round.
Spring:
- Soil Amendment: At the start of the growing season, replenish your raised bed with fresh compost and any necessary organic fertilizers. Raised beds, especially after a winter, benefit from a fresh boost of nutrients.
- Early Planting: The soil in raised beds tends to warm up faster than in-ground soil, allowing for earlier planting of cool-season crops like lettuce, radishes, and spinach. Consider using row covers for extra frost protection.
- Irrigation Setup: Install any drip irrigation or soaker hose systems now, before plants get too large, ensuring even and efficient watering throughout the warmer months.
Summer:
- Consistent Watering: Raised beds drain more efficiently, which means they can dry out faster. Monitor soil moisture closely and water regularly, especially during hot, dry spells. Mulching heavily around plants will help retain moisture.
- Pest and Disease Monitoring: With denser planting, keep a close eye on pests and diseases. The increased airflow around raised beds can sometimes help, but vigilance is key.
- Succession Planting: Take advantage of the long growing season by succession planting. As one crop finishes, replace it with another to maximize harvests from your limited space.
Autumn:
- Harvesting and Cleanup: As summer crops finish, harvest everything and clean out spent plant material. This is a good time to observe any pest or disease issues that occurred.
- Cover Cropping: For beds that won’t be planted over winter, consider planting a cover crop like clover, vetch, or winter rye. These crops protect the soil, prevent erosion, suppress weeds, and add organic matter when tilled in (or “chopped and dropped”) in spring.
- Soil Conditioning: Add a generous layer of compost or aged manure to the bed in fall. It will slowly break down over winter, enriching the soil for the next spring.
Winter:
- Protection for Perennials: If you have perennial herbs or small shrubs in your raised bed, ensure they are adequately mulched for winter protection, especially in colder climates.
- Structure Inspection: This is a good time to inspect the galvanized steel structure for any loose fasteners, sharp edges that have emerged, or signs of wear. Make any necessary repairs or tighten bolts.
- Planning for Next Season: Use the quiet winter months to plan your garden layout, research new plant varieties, and order seeds for the upcoming spring. Refer to resources like University of Minnesota Extension for regional planting guides.
Expert Resources for Advanced Raised Bed Gardening
To further enhance your gardening knowledge and ensure the success of your DIY raised bed galvanized steel, here are some invaluable resources from gardening experts:
- Gardening Know How: Growing In Raised Beds – This article provides a wealth of information on everything from soil composition to plant selection optimized for raised beds. It’s an excellent starting point for any raised bed enthusiast.
- The Royal Horticultural Society (RHS): Raised Beds – The RHS is a leading gardening charity, and their page on raised beds offers authoritative advice on construction, filling, and maintenance from a UK perspective, much of which is universally applicable.
- University of Minnesota Extension: Raised Bed Gardening – University Extension programs are fantastic sources of research-based gardening information tailored to specific regions. This guide from the UMN is comprehensive and covers practical aspects including benefits, design, and soil for raised beds.
These resources offer a deeper dive into the science and art of raised bed gardening, helping you make informed decisions for your specific environment and gardening goals. From advanced soil science to pest management strategies, these experts have you covered.
Conclusion: Your Long-Lasting Garden Sanctuary
Building a DIY raised bed galvanized steel is more than just a construction project; it’s an investment in a durable, attractive, and highly productive gardening future. You’ve now gained the knowledge and confidence to create a raised bed that will stand strong against the elements, resist pests, and provide an optimal environment for your plants for many seasons to come. The sleek, modern aesthetic of galvanized steel will elevate your garden’s design, making it a true centerpiece that combines form and function.
Beyond the immediate satisfaction of a successful DIY project, you are contributing to a more sustainable gardening practice by choosing a long-lasting material that minimizes waste and the need for frequent replacements. Embrace the journey, enjoy the process, and soon you’ll be harvesting fresh, healthy produce from your resilient, beautiful galvanized steel raised bed. Happy gardening!
Frequently Asked Questions About DIY Raised Bed Galvanized Steel
Q1: Is galvanized steel safe for growing vegetables?
Yes, galvanized steel is generally considered safe for growing vegetables. The zinc coating is inert and does not readily leach into the soil in harmful amounts. Some initial experts recommended a food-grade barrier for very specific projects, but current consensus, including from university extensions, is that the trace amounts of zinc released are negligible and, in fact, zinc is a essential micronutrient for plants. As a precaution, you can opt for galvanized steel that is specifically certified for potable water or food use, or apply an inert liner if you have concerns.
Q2: How long does a galvanized steel raised bed last compared to wood?
A properly constructed DIY raised bed galvanized steel can last 20-50 years, or even longer, depending on the gauge of steel and environmental conditions. This significantly outperforms most wooden raised beds. Even treated lumber typically only lasts 5-10 years before requiring significant repairs or replacement, while untreated wood can degrade in as little as 3-5 years due to rot and pests.
Q3: Does the metal get too hot and cook the plant roots?
While metal can heat up in direct sun, it typically does not “cook” plant roots in a raised bed. The large volume of soil acts as an insulator, dissipating heat effectively. Additionally, the reflective surface of galvanized steel can actually help reflect strong sunlight, preventing the soil from overheating compared to darker materials. Proper mulching on the soil surface further helps regulate soil temperature. If you live in an extremely hot climate, you might consider painting the exterior of the bed a lighter color or positioning it to receive some afternoon shade.
Q4: Can I use corrugated roofing sheets for this project?
Absolutely! Corrugated roofing sheets are an excellent and cost-effective material for a DIY raised bed galvanized steel. They are typically made from galvanized steel, come in various gauges (26-gauge is a good choice for rigidity), and their corrugated profile adds strength, helping to resist bowing under the pressure of soil. Just ensure they are free of any harmful coatings or treatments not intended for garden use before repurposing.


