The Ultimate Guide: 10 Steps to DIY Solar-Powered Garden Lights From Scratch
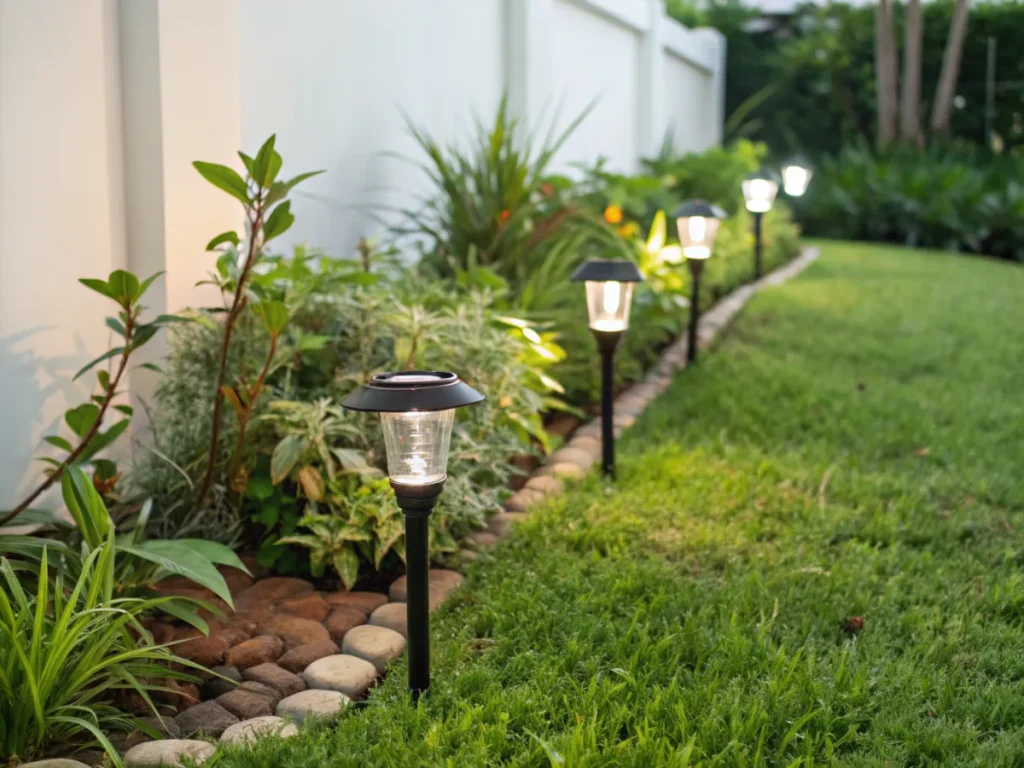
Tired of dim, unreliable store-bought solar garden lights? Or perhaps you’re looking for a rewarding DIY project that combines electronics, gardening, and sustainability? You’ve come to the right place! This comprehensive guide will walk you through building your very own robust and efficient DIY solar garden lights from scratch. Imagine illuminating your garden paths, highlighting your favorite shrubbery, or creating a magical nighttime ambiance, all powered by the sun and your own ingenuity. Not only will you save money in the long run, but you’ll also gain a deep understanding of basic solar power principles.
[lwptoc]
Creating your own solar lights is a fantastic way to customize your outdoor lighting precisely to your needs, whether it’s for security, aesthetics, or both. We’ll delve into the essential components, step-by-step assembly, and crucial tips to ensure your homemade lights shine brightly night after night. Get ready to embrace your inner electronics enthusiast and transform your garden into a beautifully lit oasis!
Why DIY Solar Garden Lights Matter for Your Garden (and Wallet!)
Building your own DIY solar garden lights offers a multitude of benefits beyond mere illumination. Firstly, it provides an unparalleled level of customization. Store-bought options often come in limited designs and light outputs. By building them yourself, you can choose the exact brightness (lumens), color temperature, housing material, and even the type of light distribution (spotlight, floodlight, path light) to perfectly complement your garden’s aesthetic and needs. This allows for a truly unique and personalized landscape lighting scheme.
Secondly, cost-effectiveness is a significant advantage. While there’s an initial investment in components, the longevity and repairability of DIY lights often surpass their mass-produced counterparts. You’re investing in quality components that you’ve selected, rather than cheap, often disposable units. Furthermore, once built, the operational cost is zero, as they harness the free energy of the sun. This translates to noticeable savings on your electricity bill and reduces your carbon footprint, making them an excellent eco-conscious choice.
Finally, the educational aspect is invaluable. This project is a fantastic introduction to basic electronics, solar power, and energy storage. You’ll learn about voltage, current, circuits, and the fascinating process of converting sunlight into stored energy. This hands-on experience can spark further interest in renewable energy and other DIY electronics projects, empowering you with new skills and knowledge. It’s a rewarding journey from concept to a glowing reality, enhancing both your garden and your understanding of sustainable technology.
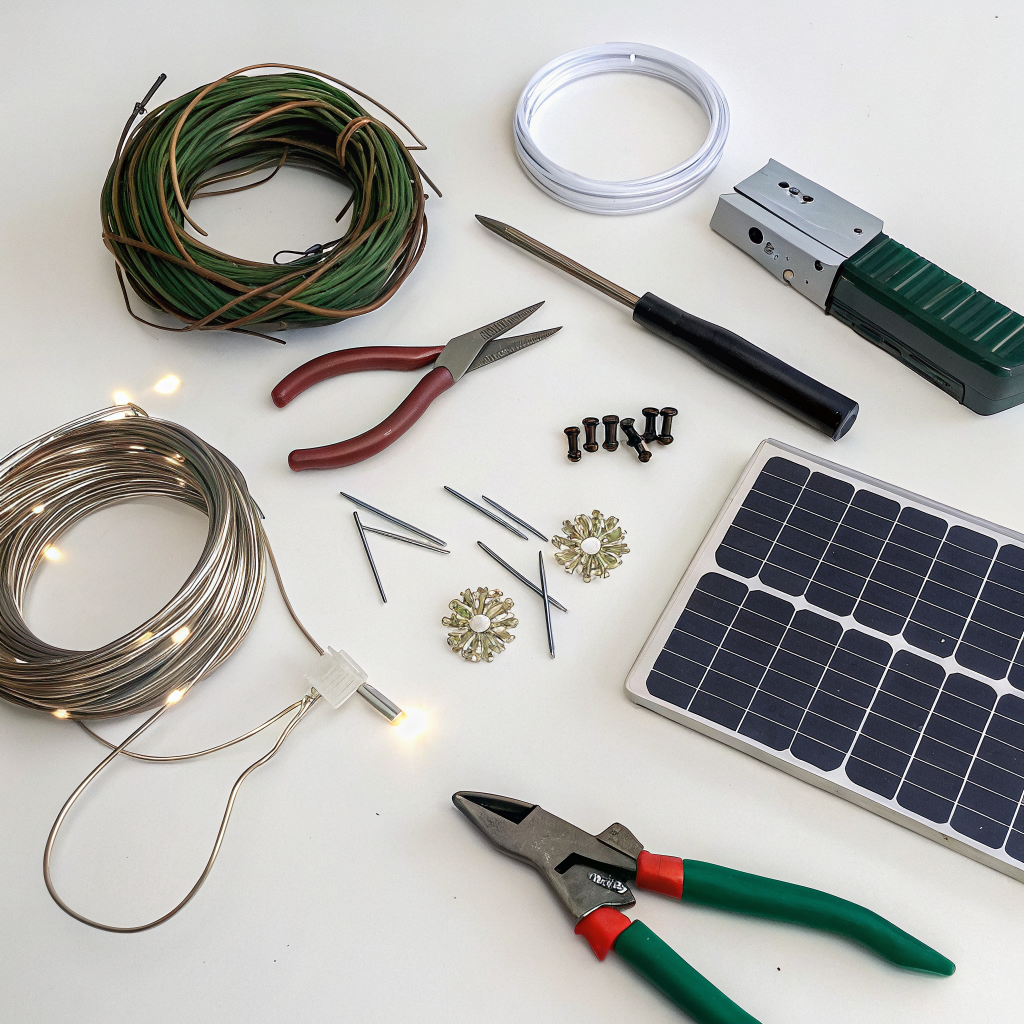
What You Need: Tools and Materials for Your DIY Solar Garden Lights
Before embarking on your DIY solar garden lights project, gather all the necessary tools and materials. Having everything at hand will make the process smoother and more enjoyable. We’ve broken down the list into essential components and helpful tools.
Essential Components:
- Mini Solar Panel: Aim for a small, high-efficiency panel (e.g., 5V, 150mA – 250mA). The wattage will determine how quickly your battery charges.
- Rechargeable Battery: A NiMH (Nickel-Metal Hydride) AA or AAA battery is ideal (around 1.2V, 600mAh to 1800mAh). Avoid standard alkaline batteries as they are not rechargeable. Alternatively, a small 3.7V Li-ion battery (like an 18650) with a suitable charging/protection circuit can be used for higher brightness.
- LED (Light-Emitting Diode): Choose a low-power, high-brightness LED. Warm white, cool white, or even color-changing LEDs are options. Ensure its forward voltage is compatible with your battery and circuit.
- Joule Thief Circuit Kit or Components: This tiny circuit boosts the low battery voltage to power the LED efficiently. You can buy a kit or assemble it from:
- Transistor (e.g., 2N3904 NPN)
- Toroid core (small ferrite ring)
- Enamelled copper wire (fine gauge, e.g., 28-30 AWG)
- Resistor (e.g., 1kΩ)
- Diode: A small Schottky diode (e.g., 1N5817) prevents the battery from discharging back into the solar panel at night.
- Photoresistor (LDR) or Light Sensor: This acts as a switch, turning the light on when it gets dark.
- Weatherproof Enclosure: A small, clear, waterproof plastic or glass enclosure (e.g., a small jam jar, a purpose-built plastic case). This is crucial for outdoor longevity.
- Wires: Small gauge, insulated electrical wire (e.g., 22-26 AWG).
- Heat Shrink Tubing: For insulating connections.
- Mounting Stake/Fixture: To hold your light in the ground or attach it to a surface.
Tools You’ll Need:
- Soldering Iron and Solder: Essential for strong electrical connections.
- Wire Strippers/Cutters: For preparing wires.
- Multimeter: Extremely useful for checking voltage, current, and continuity. Don’t skip this if you’re serious about electronics!
- Hot Glue Gun: For securing components and providing additional waterproofing.
- Small Screwdriver Set: If your enclosure requires screws.
- Drill with Small Bits: For making holes for wires and mounting.
- Safety Glasses: Always protect your eyes when soldering or drilling.
By having these items ready, you’ll be well-equipped to tackle the construction of your custom DIY solar garden lights. This preparation phase is key to a successful and frustration-free building experience.
Step-by-Step Guide: Building Your DIY Solar Garden Lights
Now, let’s get to the exciting part – assembling your DIY solar garden lights! Follow these steps carefully to ensure a functional and durable light.
Step 1: Preparing the Joule Thief Circuit
The Joule Thief is the heart of our light, allowing a low-voltage battery to power an LED. If you bought a kit, follow its instructions. If building from scratch:
- Wind the Coil: Take about 15-20 inches of enamelled copper wire. Fold it in half and twist the folded end a few times. Thread the folded end through the ferrite toroid core. Now, wind both strands of wire simultaneously around the toroid about 8-12 times, ensuring the winds are neat and cover the core.
- Identify Wires: You’ll have four loose ends. Use a multimeter to find the ends of each original wire. Let’s label them A1, A2, B1, B2. A1 and B2 will be the start and end of one continuous winding if you soldered them together.
- Connect the Circuit: Strip the enamel from the ends of the wires. Solder one end of the first winding (e.g., A1) to the base pin of the NPN transistor. Solder one end of the second winding (e.g., B1) to one end of the 1kΩ resistor. Connect the other end of the resistor to the collector pin of the transistor. The emitter pin of the transistor will be connected to the negative terminal of the battery.
You can find many detailed schematics for a basic Joule Thief circuit online. Ensure good, clean solder joints. This step requires precision.Step 2: Integrating the Solar Panel and Charging Circuit
This part ensures your battery charges during the day.
- Diode Connection: Solder the anode (non-banded side) of the Schottky diode to the positive (+) terminal of your mini solar panel. The cathode (banded side) of the diode will connect to the positive (+) terminal of your rechargeable battery. This prevents current from flowing back from the battery to the solar panel at night.
- Negative Connection: Connect the negative (-) terminal of the solar panel directly to the negative (-) terminal of your rechargeable battery.
- Testing: Use your multimeter to check that current flows from the solar panel to the battery when exposed to light, and does not flow in reverse when it’s dark. This is crucial for battery health.
For advanced users with 3.7V Li-ion batteries, you would integrate a dedicated Li-ion charging module (like TP4056) between the solar panel and battery for safe charging and discharge protection.
Step 3: Adding the Light Sensor (Photoresistor)
The photoresistor ensures your light only turns on when it’s dark, saving battery life.
- Positioning: The photoresistor should be exposed to ambient light but still protected from moisture. For path lights, usually, it’s placed near the solar panel.
- Circuit Integration: Connect one lead of the photoresistor to the positive (+) terminal of the battery. Connect the other lead of the photoresistor to one of the free ends of the inductor coil’s winding (e.g., A2, if A1 is connected to the transistor base). This setup will allow current to flow through the Joule Thief circuit as resistance of the LDR decreases in darkness, triggering the LED.
Double-check your connections against a full schematic for the Joule Thief with LDR. An example schematic for a Joule Thief can be found easily online, or you might refer to advanced sensor integration tutorials for similar concepts.
Step 4: Connecting the LED
This is where your light comes alive!
- Identify Polarity: LEDs have polarity. The longer lead is usually positive (+), and the shorter one is negative (-). If your LED has a flat edge on its ‘cup’ side, that indicates the negative terminal.
- Solder to Joule Thief Output: Solder the positive (+) lead of your LED to the output of the Joule Thief circuit (usually the collector pin of the transistor, or after an additional small resistor if specified for your LED). Solder the negative (-) lead of the LED to the negative terminal of the battery (which is also the emitter of the transistor).
- Test the Light: In a dark room or by covering the photoresistor, check if your LED lights up when the solar panel is covered (simulating night) and goes off when exposed to light (simulating day). If it doesn’t, recheck all your connections and soldering joints. Use your voltmeter to check voltages at different points in the circuit.
Step 5: Enclosure and Weatherproofing
This is critical for the longevity of your DIY solar garden lights.
- Prepare Enclosure: Drill small holes in your chosen weatherproof enclosure for wires (if necessary) and for mounting. Ensure the solar panel is on the top, unobstructed. The photoresistor should also be easily exposed to ambient light.
- Component Placement: Carefully place all the electronic components (battery, Joule Thief, wiring) inside the enclosure. Use hot glue to secure the battery and other fragile components, preventing them from rattling around.
- Seal Everything: Use silicone sealant or hot glue liberally around any holes where wires enter the enclosure, around the edges of the solar panel (if not pre-sealed), and any openings that could allow moisture in. The goal is to make it as watertight as possible.
- Mounting: Attach your finished light to a sturdy garden stake or create a base that can be placed on a flat surface. Ensure the solar panel has an unobstructed view of the sky throughout the day.
You might want to check out some weatherproofing techniques for outdoor electronics for more ideas.
Pro Tips and Common Mistakes for Your DIY Solar Garden Lights
Even with a detailed guide, building DIY solar garden lights can have its quirks. Here are some pro tips and common pitfalls to help you succeed.
Pro Tips:
- Test as You Go: Don’t wait until the very end to test. After each major connection (solar panel to battery, Joule Thief to LED), use your multimeter to check voltage and continuity. This makes troubleshooting much easier.
- Good Solder Joints: Cold solder joints are a common cause of failure. Ensure your iron is hot enough, the joint is clean, and the solder flows smoothly to create a shiny, cone-shaped connection. Watch a few soldering tutorial videos if you’re new to it.
- Component Sourcing: Invest in quality components. Cheap solar panels might not charge efficiently, and poor-quality batteries won’t hold a charge for long. A good LED will also make a significant difference in brightness and lifespan.
- Battery Management: For long-term battery health, ensure your solar panel provides sufficient current to fully charge the battery during the shortest winter days. An underrated solar panel can lead to undercharged batteries and reduced lifespan.
- Diffuse the Light: If your LED is too bright or harsh, consider adding a diffuser around it. A piece of frosted plastic or even a thin layer of translucent paint can soften the light output for a more pleasant ambiance.
- Mounting Angle: For maximum efficiency, mount your solar panel at an angle that allows it to capture direct sunlight for the longest duration, especially during winter. In the Northern Hemisphere, this usually means facing south.
Common Mistakes to Avoid:
- Incorrect Polarity: LEDs, diodes, and batteries are polarity-sensitive. Connecting them backward will prevent them from working and can sometimes damage components. Always double-check + and – connections.
- Poor Connections: Loose wires, cold solder joints, or uninsulated connections can lead to intermittent operation, short circuits, or complete failure. Ensure all connections are secure and properly insulated with heat shrink tubing or electrical tape.
- Inadequate Weatherproofing: This is probably the number one reason DIY outdoor electronics fail. Moisture ingress will quickly corrode circuits. Be meticulous with silicone, hot glue, and ensuring no gaps remain after assembly.
- Underpowered Solar Panel/Battery: If your solar panel is too small or your battery capacity is too low, your light won’t shine brightly for long, especially on cloudy days or after short winter days. Match your panel output to your battery capacity and LED power consumption.
- Ignoring the Diode: Forgetting the blocking diode between the solar panel and battery will allow the battery to discharge through the solar panel at night, rendering your light useless.
- Overheating Components: While less common with low-power circuits like these, ensure components aren’t crammed too tightly without airflow, especially if using higher-power LEDs.
Note: Patience is key! If your light doesn’t work immediately, systematically troubleshoot each section of the circuit. Don’t get discouraged – every successful DIY project involves a bit of problem-solving.
Eco-Friendly Variations for Your DIY Solar Garden Lights
Enhancing the eco-friendliness of your DIY solar garden lights involves more than just harnessing solar power. It extends to the materials you use and the lifespan of your components.
- Recycled/Upcycled Enclosures: Instead of buying new plastic enclosures, consider repurposing items like old glass jars (jam, pickle, mason jars), plastic bottles (thick, clear ones work best), or even old lantern frames. This reduces waste and adds a unique, rustic charm to your garden. Ensure they are thoroughly cleaned and can be made watertight.
- Sustainable Wood Housings: If you’re skilled in woodworking, you can craft beautiful housings from reclaimed wood or sustainably sourced timber. Just ensure the electronics compartment is well-sealed and waterproofed from the wood itself, as wood can absorb moisture.
- Long-Life Components: Though tempting to opt for the cheapest components, investing in high-quality, long-lasting LEDs (e.g., reputable CREE or Philips LEDs), durable solar panels, and high-cycle-count rechargeable batteries (like NiMH or LiFePO4 for more advanced users) reduces the frequency of replacement and waste.
- Biodegradable Mounting Materials: Explore alternatives to conventional plastic garden stakes. Treated bamboo, metal (which can be recycled), or even rebar can be more durable and environmentally friendlier options for mounting your lights.
- Repair, Don’t Replace: The very nature of DIY encourages repairability. When a component fails, identify and replace just that part, rather than discarding the entire unit. This drastically reduces electronic waste. Keep spare parts if possible.
- Smart Energy Management: Consider adding a microcontroller (like a very small ATtiny) for more advanced power management. This could allow for dimming modes after a few hours, motion sensing, or custom timer functions, further conserving battery life and extending light duration.
By incorporating these eco-friendly variations, your DIY solar garden lights become a true testament to sustainable living, reducing both your environmental footprint and your consumption of new resources.
Seasonal Considerations for Optimal Performance of Your DIY Solar Garden Lights
The performance of your DIY solar garden lights will naturally vary with the seasons. Understanding these fluctuations is key to managing expectations and optimizing their operation.
- Winter Performance: This is often the most challenging season. Shorter daylight hours mean less time for the solar panel to charge the battery. The sun’s angle is also lower, reducing direct light exposure, especially in northern latitudes. Expect reduced illumination times.
- Mitigation: Ensure solar panels are free of snow and ice daily. Consider manually moving lights to sunnier spots if possible. A larger solar panel or battery capacity can also help buffer these seasonal changes, providing more stored energy.
- Summer Performance: Long daylight hours and strong direct sunlight mean maximum charging efficiency. Your lights should shine brightly and for extended periods throughout the night.
- Consideration: Overheating components can sometimes be an issue in extreme heat. Ensure good ventilation within the enclosure if using high-power LEDs.
- Spring and Autumn: These transitional seasons offer moderate performance. While daylight hours are increasing or decreasing, cloud cover can be more prevalent in some regions, impacting charging.
- Maintenance: These are good times for routine maintenance like cleaning solar panels and checking connections.
- Cloudy Days: Regardless of season, heavy cloud cover significantly reduces the charging rate. Your lights might not charge to full capacity, resulting in shorter illumination times.
- Solution: A slightly oversized solar panel relative to your battery and LED’s needs can help improve performance on overcast days, as it can capture more diffuse light.
- Algae and Dust Build-up: Over time, solar panels can accumulate dirt, dust, and even algae, which greatly reduces their efficiency.
- Regular Cleaning: Periodically wipe down the solar panel with a soft, damp cloth to ensure maximum light absorption.
By taking these seasonal factors into account, you can better design and maintain your DIY solar garden lights, ensuring they provide reliable illumination year-round, despite nature’s cycles. Remember that perfect year-round performance might require compromises or adjustments in colder, darker months.
Expert Resources for Your DIY Solar Garden Lights Journey
To further deepen your knowledge and hone your skills for building DIY solar garden lights, consult these trusted external resources:
- Gardening Know How – Guide to Solar Lighting: gardeningknowhow.com/plant-problems/environmental/solar-garden-light-issues.htm – While this link discusses troubleshooting common solar light issues, understanding these problems can help you design more robust DIY solutions from the start.
- Royal Horticultural Society (RHS) – Sustainable Lighting: rhs.org.uk/garden-design/lighting-the-garden – The RHS provides excellent advice on garden lighting principles, including how to use lighting effectively and sustainably in your outdoor space. This context will help you design your DIY solar lights not just for function, but for aesthetic impact.
- University of Minnesota Extension – Understanding Solar Energy: extension.umn.edu/planting-community-gardens/solar-energy-garden – This resource offers educational insights into solar energy, which is fundamental to understanding how your DIY solar garden lights work and how to maximize their efficiency. It’s a great primer on the science behind your project.
These resources, combined with technical electronic forums and communities, will provide a wealth of information to support your DIY endeavors.
Conclusion: Illuminate Your Garden with Pride and Innovation
Congratulations! You’ve navigated the intricate yet rewarding journey of building your very own DIY solar garden lights from scratch. This project is more than just assembling components; it’s an investment in sustainable living, a testament to your DIY spirit, and a unique way to personalize your outdoor space. You’ve harnessed the power of the sun, learned fundamental electronics, and created a functional piece of art for your garden.
The satisfaction of seeing your homemade lights glow softly at dusk, knowing you crafted them with your own hands, is truly unparalleled. Not only have you saved money and reduced your environmental footprint, but you’ve also gained valuable skills and knowledge that can be applied to countless other DIY and eco-conscious projects. So step back, admire your illuminated garden, and bask in the glow of your innovation. Your garden will thank you, and you’ll have a fantastic conversation starter for visitors!
FAQ: DIY Solar-Powered Garden Lights
<h4>Q1: How long do DIY solar garden lights typically last compared to store-bought ones?</h4>
<p>DIY solar garden lights, when constructed with quality components and proper weatherproofing, often outlast store-bought versions. The key advantage is repairability; you can replace individual components like the battery or LED if they fail, whereas cheaper commercial units are typically disposable. With good care, your DIY lights can last many years.</p>

<h4>Q2: Can I use a larger solar panel and battery for brighter, longer-lasting lights?</h4>
<p>Absolutely! Sizing your components appropriately is crucial. A larger solar panel will provide more current to charge a higher capacity battery faster. A higher capacity battery (measured in mAh) will power your LED for a longer duration. Ensure your Joule Thief circuit (or LED driver) is designed to handle the LED's current requirements and that your battery's voltage is compatible.</p>

<h4>Q3: What type of battery is best for DIY solar garden lights?</h4>
<p>For simple projects, rechargeable NiMH (Nickel-Metal Hydride) AA or AAA batteries (1.2V) are common and easy to integrate. For higher light output and longer life cycles, a 3.7V Li-ion battery (like an 18650) is excellent, but it requires a dedicated Li-ion charging and protection module for safety and battery longevity.</p>

<h4>Q4: My DIY solar light isn't turning on. What should I check first?</h4>
<ol>
    <li><strong>Polarity:</strong> Double-check all positive (+) and negative (-) connections, especially for the LED, diode, and battery.</li>
    <li><strong>Solder Joints:</strong> Examine all solder connections for cold joints (dull, lumpy, or cracked). Re-solder as needed.</li>
    <li><strong>Battery Charge:</strong> Test the battery voltage with a multimeter. Ensure it's charged and providing adequate voltage.</li>
    <li><strong>Photoresistor:</strong> Make sure the light sensor is covered (in darkness) when testing to trigger the light.</li>
    <li><strong>Diode:</strong> Check if the blocking diode is connected correctly and not faulty, preventing charging or allowing discharge.</li>
    <li><strong>Joule Thief:</strong> Inspect the Joule Thief circuit components and connections carefully.</li>
</ol>


