Introduction
Creating your own diy wooden trays with pumpkins and chrysanthemums can yield up to a 40% cost-saving compared to purchasing pre-made arrangements, defying the common belief that DIY is always more expensive. This project marries rustic charm with vibrant autumnal color, offering a sustainable and personalized touch to your seasonal decor.
This comprehensive guide will walk you through each step, ensuring even novice DIYers can achieve stunning results. You'll learn how to select the right materials, assemble your trays, and arrange your fall harvest for maximum visual impact, transforming your home for the autumn season.
Beyond monetary savings, crafting these trays provides a rewarding hands-on experience, allowing you to tailor dimensions and aesthetics to perfectly suit your space. The satisfaction of displaying your own creation, filled with the warmth of pumpkins and the cheerful bloom of chrysanthemums, is truly unmatched.
[lwptoc]
Quick Summary
- Cost-Effective Decor: Save up to 40% compared to store-bought autumn arrangements.
- Weekend Project: Complete the entire project within 4-6 hours, making it perfect for a weekend.
- Customizable Charm: Personalize your autumn decor with unique wooden trays and arrangements.
Context & Ideal Conditions
This project is best undertaken in late summer to early autumn, typically from August to October, when pumpkins (Cucurbita pepo, C. maxima, C. moschata) and chrysanthemums (Chrysanthemum morifolium) are readily available. For chrysanthemums, choose varieties suited to your USDA Hardiness Zone (Zones 5-9 are common for garden mums) if you intend to plant them later.
The trays themselves are designed for display in areas with good airflow to prevent moisture buildup, which can lead to premature decay of organic materials. If displayed outdoors, ensure they are in a location that receives partial sun (3-6 hours of direct sunlight) to full sun (6+ hours) if the chrysanthemums are still potted and actively growing. For indoor displays, any well-lit area is suitable. Ensure the ambient temperature is between 45-70°F (7-21°C) for optimal preservation of pumpkins and flower longevity. The soil for chrysanthemums should ideally be well-draining with a pH between 6.0 and 7.0.
diy, wooden, trays, with, pumpkins: Tools & Materials
To embark on this satisfying project, gather your essential tools and materials. You’ll need lumber such as cedar or pine for natural resistance to decay and ease of working. Plywood offers a more economical option for the base.
Wood for Trays (for 2 trays, each approximately 24x12x4 in / 61x30x10 cm):
- (4) 1×4 in (2.5×10 cm) pine or cedar boards, 8 ft (2.4 m) long. This will be enough for the sides.
- (1) 1/2 in (1.27 cm) plywood sheet, 2×4 ft (61×122 cm) for bases.
- (20) 1-1/2 in (3.8 cm) exterior-grade wood screws, #8 coarse thread.
- Wood glue, Titebond III (weatherproof).
- Sandpaper, 120-grit and 220-grit.
- Wood sealer or stain (optional).
Pumpkins & Chrysanthemums:
- (8-12) Small to medium pumpkins (Cucurbita pepo ‘Jack-Be-Little’, ‘Miniature Mix’), 4-8 in (10-20 cm) diameter.
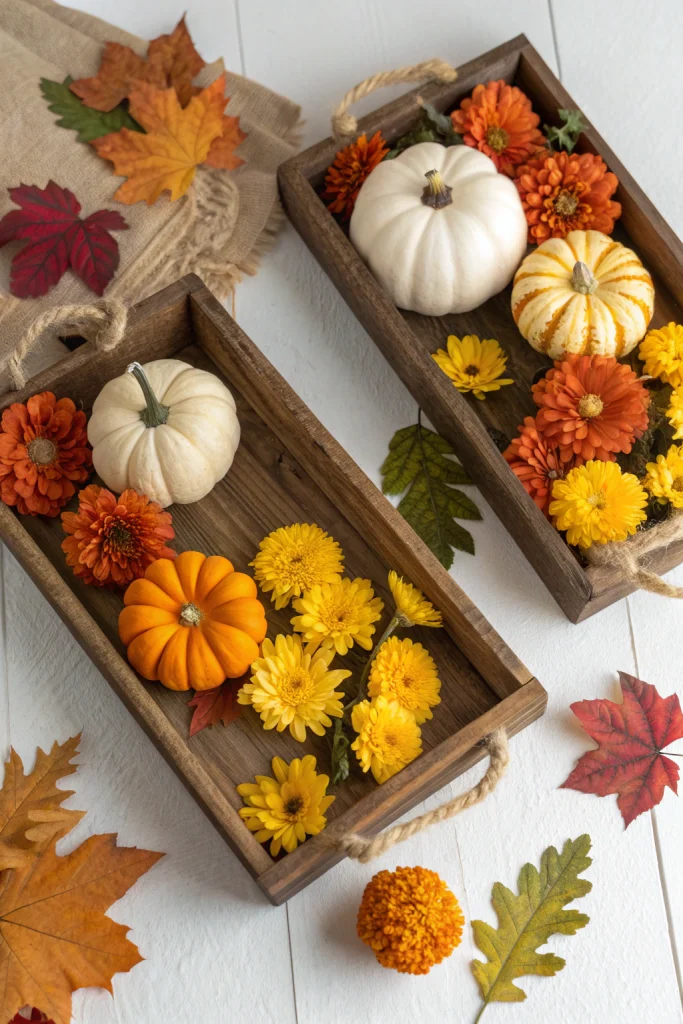
- (4-6) Potted chrysanthemums (Chrysanthemum morifolium), 6-8 in (15-20 cm) pots. Choose colors like deep reds, oranges, and yellows for classic autumn appeal.
- Spanish moss or excelsior for filler, 1 bag (16 oz / 450 g).
Tools:
- Measuring tape (25 ft / 7.6 m).
- Pencil.
- Miter saw or circular saw with a fine-tooth blade.
- Cordless drill/driver with Phillips head bit.
- Drill bits: 1/8 in (3 mm) for pilot holes, and a countersink bit.
- Safety glasses (ANSI Z87.1 certified).
- Work gloves.
- Clamps (2-4, 18 in / 45 cm capacity).
- Optional: Orbital sander.
diy, wooden, trays, with, pumpkins: Time, Difficulty & Budget
This project is an accessible and rewarding endeavor for most skill levels, requiring minimal specialized tools and offering a significant return on your investment of time and effort. It’s an excellent way to personalize your fall decor without breaking the bank.
| Prep | 30–45 min |
| Build/Plant | 3–5 hours |
| Total | 3.5–5.75 hours |
| Skill Level | Beginner to Intermediate |
| Budget | ≈ $40–$70 (materials/tools) |
Constructing these attractive trays yourself is approximately 50-70% cheaper than purchasing two similar, pre-assembled decorative trays with seasonal decor from a home goods store or nursery. This budget includes the wood, fasteners, and a basic wood finish, allowing extra room for your choice of pumpkins and chrysanthemums.
Step-by-Step Tutorial
Creating these charming wooden trays to display your autumn bounty is a straightforward process. Follow these steps for a sturdy and beautiful result.
Step 1 — Layout & Prep
Begin by preparing your workspace and measuring out your wood. A clear, flat surface ensures accuracy and safety. Measure twice, cut once!
First, lay out your 1×4 in (2.5×10 cm) boards on a flat surface. Using your measuring tape and pencil, mark cut lines for two tray bases (each 24 in / 61 cm long by 12 in / 30 cm wide) and four side pieces for each tray. For each tray, this means two pieces at 24 in (61 cm) for the long sides and two pieces at 10.5 in (26.7 cm) for the shorter end pieces (allowing for the thickness of the 1x4s for the long sides). Double-check all measurements before cutting. Cut your 1/2 in (1.27 cm) plywood sheets to 24×12 in (61×30 cm) for the bases.
Step 2 — Cutting & Assembly
Safety first! Ensure your safety glasses are on and work gloves are worn. Use a miter saw or circular saw to cut all wood pieces according to your marked layout.
Once cut, sand all surfaces and edges with 120-grit sandpaper, then finish with 220-grit for a smooth finish. This prevents splinters and prepares the wood for finishing. Apply a bead of wood glue to the edges of the plywood base where the side pieces will attach. Position the two 24 in (61 cm) long side pieces flush with the plywood base edges. Pre-drill pilot holes (1/8 in / 3 mm drill bit) through the side boards into the plywood at 6 in (15 cm) intervals to prevent splitting. Drive 1-1/2 in (3.8 cm) wood screws through the pilot holes, securing the long sides. Repeat for the 10.5 in (26.7 cm) end pieces, ensuring they fit snugly between the long sides.
Step 3 — Installation/Planting
Now that your trays are built, it’s time to bring them to life with your pumpkins and chrysanthemums. This step focuses on arranging and securing your natural elements.
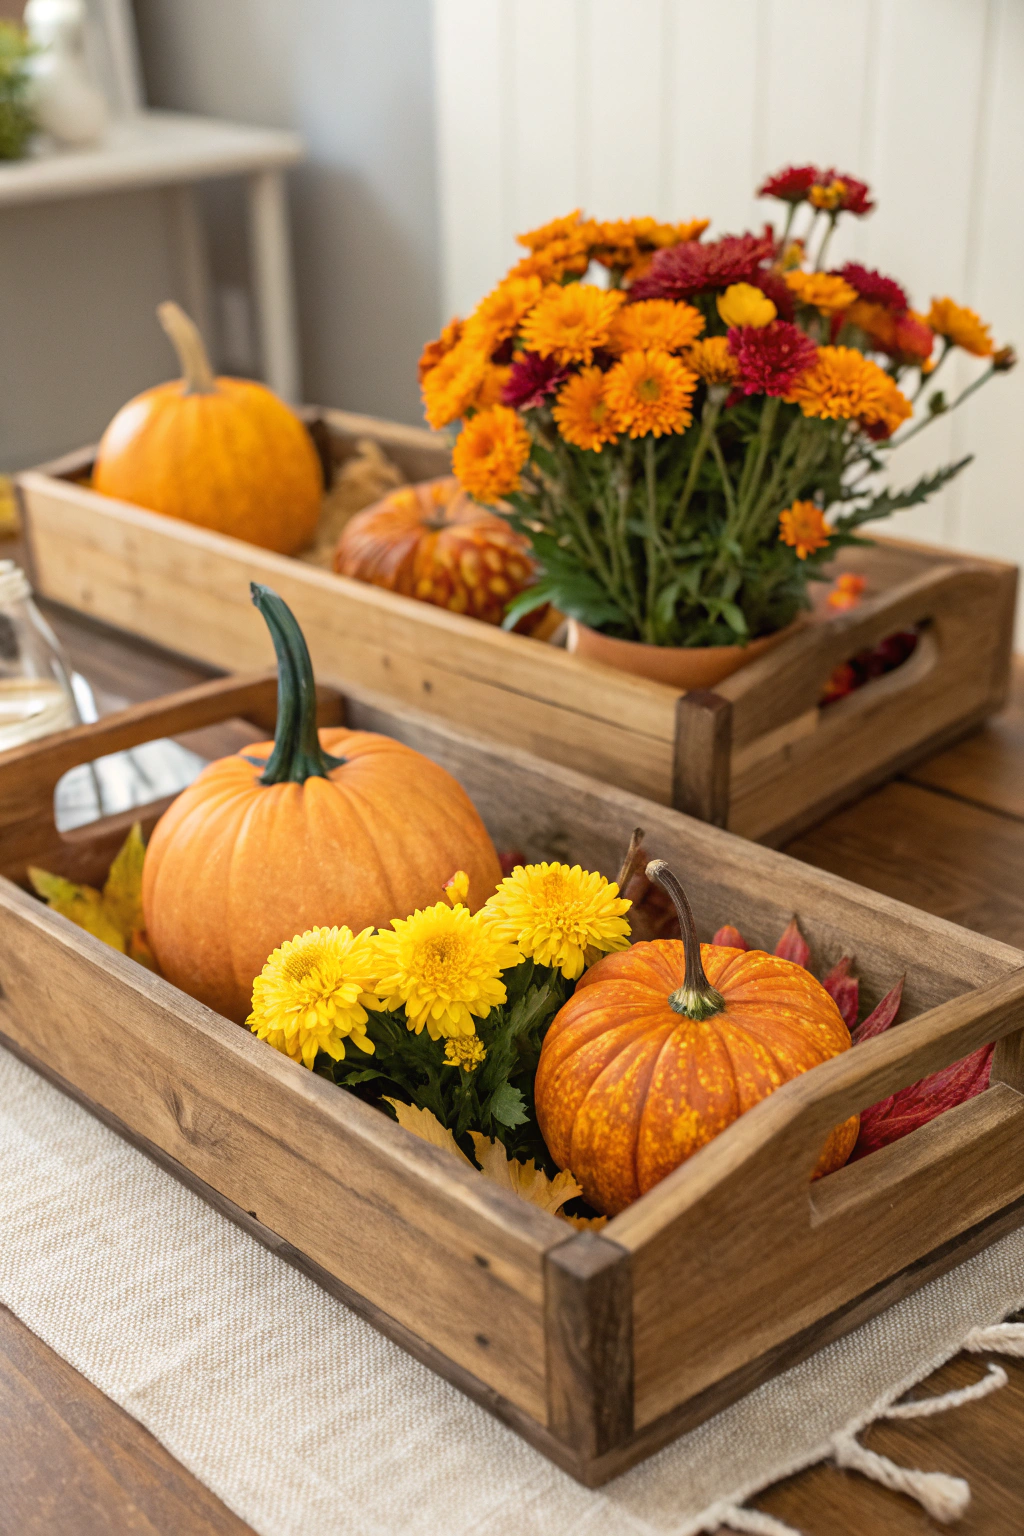
If your chrysanthemums are still in nursery pots, place them directly into the trays. This allows for easier watering and eventual replanting. Position the potted chrysanthemums first, distributing them evenly in the trays, typically two to three pots per tray depending on their size. Next, strategically place your pumpkins and gourds around the chrysanthemums. Arrange them to create varying heights and textures. Fill any gaps with Spanish moss or excelsior to give a lush, autumnal feel. Ensure the chrysanthemums receive sufficient light if they are to remain healthy for an extended period.
Step 4 — Finishing & QA
The final touches enhance both the durability and aesthetic of your DIY wooden trays.
After assembly, give the entire wooden tray a final sanding with 220-grit sandpaper to remove any rough spots or pencil marks. Wipe down the wood with a damp cloth to remove sawdust. Apply your chosen wood sealer or stain according to the product instructions. This protects the wood from moisture and UV damage, especially if the trays will be displayed outdoors. For outdoor use, select an exterior-grade sealant classified as 'Use Class 3' or higher for good weather resistance. Once dry, lightly sand with 220-grit again and apply a second coat for enhanced protection and finish. Before placing your decor, check for stability and any sharp edges. The trays should be level and capable of holding the weight of your pumpkins and potted plants without wobbling.
Care & Schedule
Proper care will ensure your diy wooden trays with pumpkins and the accompanying chrysanthemums maintain their beauty throughout the fall season, typically from September through November.
Watering: Chrysanthemums require consistent moisture. Water potted chrysanthemums every 2-3 days with approximately 1-2 quarts (1-2 L) of water per pot, or when the top inch of soil feels dry. During warmer or windier weather, they may need daily watering. Pumpkins generally require no watering for display purposes; excess moisture could encourage rot.
Fertilization: For chrysanthemums, if they are newly purchased and healthy, no additional fertilization is needed during their seasonal display. However, if you plan to keep them beyond the season, a balanced liquid fertilizer (e.g., 5-10-5 N-P-K) diluted to half strength can be applied every 2-4 weeks after blooming.
Pruning/Cleaning: Deadhead spent chrysanthemum blooms regularly by pinching or snipping just below the flower head to encourage new flower production and maintain a tidy appearance. Clean fallen leaves or soft spots from pumpkins promptly to prevent decay spread.
Mulch Top-ups: If chrysanthemums are directly planted in the trays with soil, a 0.5-1 inch (1.27-2.5 cm) layer of shredded bark mulch or pine needles can retain soil moisture and regulate temperature.
Fastener Checks: Periodically, especially if trays are moved or exposed to varying weather, inspect all wood screws to ensure they remain tight. Tighten any loose fasteners with a screwdriver to maintain structural integrity.
| Month | Activity |
|---|---|
| September | Assemble trays, arrange decor. Water chrysanthemums 2-3 times/week. Deadhead as needed. |
| October | Continue watering and deadheading. Inspect pumpkins for soft spots; remove if present. Check fastener tightness. |
| November | Reduce watering frequency as temperatures drop (approx. 1 time/week). Clear debris. Prepare chrysanthemums for winter if applicable (e.g., cut back, relocate). |
| December onwards | Store wooden trays in a dry place. Clean and compost organic materials. |
Variations & Adaptations
The versatility of these diy wooden trays with pumpkins allows for numerous adaptations, catering to different spaces, climates, and aesthetic preferences.
Small Spaces/Balconies: For compact areas, create smaller trays, perhaps 12x12x3 in (30x30x7.5 cm), using mini pumpkins (Cucurbita pepo 'Munchkin') and smaller potted Kalanchoes or pansies instead of mums. A vertical stacking design with multiple, narrower trays can save floor space while adding visual interest.
Hot/Cold Climates: In hotter climates (USDA Zones 9-11), consider heat-tolerant plants during early autumn, such as celosia or ornamental peppers, which thrive in warmth. For colder climates (USDA Zones 3-5), utilize hardy annuals like pansies or protect chrysanthemums with frost cloths on chilly nights. You could also use entirely artificial decor to avoid plant maintenance in extreme temperatures.
Alternative Materials: Instead of new wood, repurpose old fence pickets, barn wood, or pallet wood for a more rustic, weathered look. For a modern aesthetic, use painted MDF or composite decking material, which offers superior weather resistance especially in humid environments. Metal sheet bases or galvanized steel bands for sides can also provide a contemporary edge.
Knock-Down Version: To save storage space during the off-season, design the trays with corner brackets and wing nuts, allowing them to be easily disassembled and stored flat. Predrill larger holes for the wing nuts for quicker assembly.
Aesthetic Options: Experiment with wood stains (e.g., dark walnut for a rich, traditional look; light gray for a Scandinavian feel) or painted finishes (e.g., distressed white for farmhouse charm, vibrant orange or black for a spooky Halloween theme). Combine different pumpkin varieties — warty, striped, and smooth — with various chrysanthemum colors for a dynamic display. Add pinecones, dried corn, or fairy lights for extra flair.
Common Mistakes to Avoid
To ensure your diy wooden trays with pumpkins and chrysanthemums remain beautiful and last throughout the season, steer clear of these common pitfalls.
- Over-watering Chrysanthemums: Excessive watering can lead to root rot, especially in containers without adequate drainage. Prevention: Water only when the top inch of soil feels dry. Ensure pots have drainage holes.
- Wrong pH for Chrysanthemums: Mums prefer slightly acidic to neutral soil (pH 6.0-7.0). Planting them in highly alkaline or acidic garden soil can lead to nutrient deficiencies. Prevention: Confirm soil pH if planting directly in trays; amend with peat moss to lower pH or lime to raise it.
- Undersized Fasteners: Using screws that are too short or too thin will result in weak joints that can quickly come apart. Prevention: Always use 1-1/2 in (3.8 cm) #8 wood screws for this project, paired with pre-drilled pilot holes.
- Wrong Wood Type: Indoor-grade wood like untreated pine or MDF can quickly deteriorate if used outdoors without proper sealing. Prevention: Opt for cedar, redwood, or pressure-treated lumber for outdoor trays, or meticulously seal any indoor-grade wood.
- No Drainage in Trays: If you’re directly planting chrysanthemums into the wooden trays rather than keeping them in pots, insufficient drainage will cause waterlogging. Prevention: Drill several 1/2 in (1.27 cm) drainage holes in the bottom of the tray base, and consider adding a layer of gravel beneath the soil.
- Overloading the Tray: Packing too many heavy pumpkins or large pots into a small tray can stress the joints and lead to structural failure. Prevention: Be mindful of the tray’s dimensions and the combined weight. If using many heavy items, reinforce the base with additional supports or thicker plywood.
- Poor Orientation: Placing chrysanthemums in deep shade will reduce their bloom time and vibrancy. Prevention: Ensure chrysanthemums receive at least 3-6 hours of direct sunlight daily for optimal flowering, especially if they are actively growing.
Sustainability, Safety & Regulations
Embarking on DIY projects like these offers a fantastic opportunity to incorporate sustainable practices and ensure safety for everyone.
Sustainability: Prioritize salvaged or reclaimed wood where possible, such as old fence boards or pallet wood, to reduce waste and give materials a second life. Instead of harsh chemical stains, opt for nature-based wood sealers or paints with low VOC (Volatile Organic Compound) content. Collect rainwater for watering your chrysanthemums, especially if displaying the trays outdoors. At the end of the season, compost any organic materials (pumpkins, mums) and store the wooden trays for future use, minimizing landfill waste. Consider growing your own pumpkins and mums to reduce transportation emissions associated with store-bought items.
Safety: Always wear appropriate Personal Protective Equipment (PPE) when working with tools. This includes ANSI Z87.1 certified safety glasses to protect your eyes from sawdust and debris, and work gloves to prevent splinters and cuts. When using power tools like circular saws or drills, ensure their guards and safety mechanisms are in place and functioning correctly. If working with wood preservatives or paints, do so in a well-ventilated area or wear a respirator to avoid inhaling fumes. Keep children and pets away from the active work zone.
Regulations: For most small, non-permanent DIY projects like decorative trays, specific local regulations or permits are rarely required. However, if your project involves significant structural changes, or if you are attaching elements to a property line structure, always check with your local homeowner's association (HOA) or municipal building department regarding potential height restrictions or setback requirements. Ensure your display does not block public walkways or create trip hazards. If using electrical components for lighting, ensure they are UL-listed and rated for outdoor use if applicable.
Measure the Outcome
Evaluating the success of your DIY wooden trays goes beyond aesthetic appeal. By tracking a few simple metrics, you can gauge the project’s efficiency, cost-effectiveness, and overall impact.
The survival rate of your chrysanthemums is a key indicator: aim for 80-90% of your potted plants to remain vibrant throughout the display period (typically 4-6 weeks). Monitor the growth of any chrysanthemums you plan to pot later; a healthy plant might grow 1-2 in (2.5-5 cm) per month. For water conservation, note how many gallons (or liters) of rainwater you collect and use for your plants – even 1-2 gal (3.8-7.6 L) per week can add up. The cost per square foot (or square meter) for your DIY trays, compared to commercially available alternatives, will show significant savings, often as low as $1.50-$2.50 per square foot versus $4-$7 for retail. Finally, measure your own satisfaction and the positive comments from friends and family – these qualitative measures are invaluable.
Conclusion
Crafting your own diy wooden trays with pumpkins and chrysanthemums is a rewarding project that elevates your autumn decor with personalized charm. From the tangible cost savings to the creative satisfaction, this endeavor allows you to infuse your space with the warm, rich colors of the season. By carefully selecting materials and following the detailed steps, you ensure both durability and beauty.
Remember the key takeaways: build a sturdy frame, select healthy plants, and maintain them diligently. Don't be afraid to experiment with different wood finishes or plant arrangements to truly make these trays your own. Whether adorning your porch, patio, or indoor spaces, these homemade displays will undoubtedly draw admiration and bring joy. So grab your tools, embrace the spirit of autumn, and bring your vision to life! Go ahead, try this project, share your creations in the comments below, and inspire others to get their hands dirty.
FAQ
Q: What is the best season to display diy wooden trays with pumpkins and chrysanthemums?
A: Late summer through late autumn (August to November) is ideal, when pumpkins are harvested and chrysanthemums are in full bloom.
Q: Do chrysanthemums need full sun in these trays?
A: Potted chrysanthemums appreciate partial to full sun (3-6+ hours daily) to maintain their vibrancy and extend bloom time, especially if displayed outdoors.
Q: Can I use different types of wood for the trays?
A: Yes, pine is economical, cedar offers natural weather resistance, and reclaimed pallet wood provides a rustic look. Ensure outdoor woods are sealed for longevity.
Q: Are minimal tools required for this project?
A: While power tools like a miter saw make it quicker, hand saws and a drill are sufficient. Lumber yards can often make cuts for you if power tools aren't an option.
Q: My chrysanthemums are wilting. What should I do?
A: Check soil moisture. Wilting usually indicates under-watering, but can also be from over-watering or extreme heat. Feel the soil; if dry, water thoroughly.
Q: How can I prevent the pumpkins from rotting prematurely?
A: Ensure good airflow around the pumpkins and keep them dry. Avoid placing them directly on damp surfaces. If displaying outside, bring them in during heavy rain.
Q: What are some low-cost options for this project?
A: Using reclaimed wood, smaller pumpkins, and opting for fewer, larger chrysanthemum pots rather than many small ones can reduce costs. Look for plant sales at local nurseries.
Q: How long does it usually take for chrysanthemums to flower after purchase?
A: Chrysanthemums purchased in bloom are usually ready for immediate display. They typically flower for 4-8 weeks, depending on variety and care.
Internal & External Links
If you’re looking for more ways to enhance your garden and outdoor living spaces, consider exploring how to create rustic apple crate planters for autumn gardens. For general garden inspiration, be sure to check out Pinterest Boards — Garden & DIY inspiration, which offers a plethora of innovative ideas. You might also find unique ways to showcase seasonal decor with wooden shelves displaying seasonal gourds and apples to complement your trays.


