Introduction
Are you looking to transform your garden into a productive and beautiful space, even as the days shorten and temperatures drop? According to a recent survey, nearly 60% of home gardeners express an interest in extending their harvesting season beyond summer. This desire for year-round bounty can be fully realized through thoughtful food & garden design, specifically by embracing edible landscaping with fall crops. This approach not only provides fresh produce for your table but also adds aesthetic charm and ecological value to your outdoor areas. Forget the drab, dormant fall garden – imagine a vibrant tapestry of greens, purples, and rich textures, all while cultivating delicious, cold-hardy edibles. Let’s delve into making your autumn garden both a feast for the eyes and a reliable source of sustenance.
Table of Contents
- Introduction
- Materials & Tools Needed
- Project Time
- Step-by-Step Instructions
- Maintenance & Care Tips
- Eco-Friendly Alternatives
- Design & Styling Ideas
- Common Mistakes to Avoid
- Storage & Seasonal Tips
- Conclusion
- FAQ
Materials & Tools Needed
Creating a thriving fall edible landscape requires a thoughtful selection of tools and materials. Here’s what you’ll need to get started, along with some sensory alternatives:
- Premium Garden Soil/Compost: Rich, dark, crumbly soil that feels alive and smells earthy, essential for nutrient-hungry fall crops. Alternatively, your own home-made, fragrant compost, teeming with beneficial microbes.
- Cold-Hardy Vegetable Seeds/Starts: A vibrant selection of kale (deep purple ‘Redbor’, frilly ‘Lacinato’), Swiss chard (rainbow stalks hinting at sweetness), spinach (tender leaves), collards (robust and earthy), leeks (mildly pungent and tall), carrots (sweet, crisp roots), and radishes (peppery bite). For a sensory twist, visualize the crisp texture of fresh lettuce or the firm root of a parsnip.
- Hand Trowel: A sturdy, comfortable tool for digging precise holes. A small, ergonomic hand shovel can also work wonders in tighter spaces.
- Garden Fork/Spade: For aerating heavy soil and incorporating amendments, feeling the resistance as you break up compacted earth.
- Gardening Gloves: Durable, yet supple gloves to protect your hands from thorns and soil, letting you feel the texture of the earth without getting too dirty. Consider breathable, cotton-backed varieties for comfort.
- Watering Can or Hose with a Gentle Sprayer: For a soft, refreshing shower over delicate seedlings.
- Organic Mulch: A thick layer of straw (dry, rustic scent, whispering as you spread it), shredded leaves (a forest-floor aroma), or wood chips (earthy, damp woodland scent) to insulate and retain moisture.
- Optional: Row Covers/Cold Frames: Lightweight fabric or clear plastic to whisper protection against early frosts, extending your harvest.
- Optional: Soil Tester Kit: To measure pH and nutrient levels, giving you a clear understanding of your garden’s foundation.
- Optional: Garden Marker/Labels: Durable, weather-resistant labels to elegantly identify your burgeoning edibles.
Project Time
- Preparation time: 2-4 hours (site assessment, planning, soil testing)
- Build/Plant time: 3-6 hours (depending on garden size and chosen plants)
- Total duration: 5-10 hours, spread over a few days for optimal planning and execution.
This process is approximately 30% faster than establishing a full spring and summer garden from scratch, as many fall crops grow more quickly and require less initial coddling in cooler temperatures.
Step-by-Step Instructions
Step 1: Assess Your Site and Plan Your Layout
Begin by truly understanding your available space. Observe sunlight patterns (at least 6 hours of direct sun daily is ideal for most fall edibles), drainage, and existing microclimates. A well-designed food & garden design integrates edibles seamlessly.
- Practical Tip: Use graph paper or a digital design tool to sketch out your garden, marking existing features and placing plants strategically based on mature size and light requirements.
Step 2: Soil Preparation is Key
Healthy soil is the foundation for a productive fall garden. Perform a soil test to understand its composition and nutrient levels. Aim for a pH between 6.0 and 7.0 for most vegetables.
- Practical Tip: Amend your soil generously with 2-4 inches of well-rotted compost or aged manure. This enriches the soil, improves drainage in heavy clay, and adds moisture retention to sandy soils. Dig it in to a depth of at least 8-10 inches for robust root development.
Step 3: Select and Source Your Fall Crops
Choose cold-hardy varieties suitable for your climate zone and expected first frost date. Look for ‘days to maturity’ on seed packets to ensure your crops will be ready before deep freezes. Excellent choices include spinach, lettuce, kale, Swiss chard, collards, radishes, carrots, beets, and leeks.
- Practical Tip: Purchase seeds or starter plants from reputable local nurseries or online suppliers. Many varieties are specifically bred for fall resilience, offering better yields and flavor in cooler weather. Consider unique cultivars for visual appeal, like purple kohlrabi or red-veined kale.
Step 4: Planting for Fall Success
Follow spacing recommendations on seed packets. For direct sowing, ensure the soil is consistently moist until germination. For transplants, dig holes slightly larger than the root ball, place the plant, and gently backfill, watering thoroughly immediately afterward.
- Practical Tip: Plant crops in succession every 1-2 weeks for a continuous harvest. For example, sow a small patch of radishes, then two weeks later, sow another, ensuring you don’t have too many ready at once.
Step 5: Mulch and Protect Your New Garden
Apply a 2-4 inch layer of organic mulch around your newly planted crops. This helps retain soil moisture, suppress weeds, and insulate the soil from fluctuating fall temperatures. As temperatures drop further, consider using row covers or cold frames.
- Practical Tip: Clear plastic sheeting draped over hoops creates a simple mini-greenhouse effect, raising soil temperatures by 5-10°F during the day and offering crucial frost protection at night. Secure the edges to prevent wind from blowing them away.
Maintenance & Care Tips
Consistent care ensures a bountiful fall harvest. Watering is critical, especially during dry spells; “fall droughts” can be common. Aim for about 1 inch of water per week, either from rain or irrigation. Check soil moisture a few inches down – if it feels dry, it’s time to water. Pruning is generally less intensive for fall crops, but remove any yellowing or damaged leaves to direct the plant’s energy to healthy growth. For leafy greens, a “cut-and-come-again” method works best: harvest outer leaves, allowing the inner leaves to continue growing.
Soil health remains pivotal. After the initial amendment, fall crops generally don’t require heavy fertilization. However, a light side-dressing of composted manure or a balanced organic liquid feed every 3-4 weeks can boost growth, especially for hungry brassicas like kale. Consider getting your soil tested annually to monitor nutrient levels through your local extension office (e.g. University of Minnesota Extension: https://extension.umn.edu/). Pay close attention to pest management; while cooler weather often reduces pest pressure, slugs and aphids can still be an issue. Integrated Pest Management (IPM) strategies, like hand-picking pests or using insecticidal soap, are effective.
Eco-Friendly Alternatives
Embracing sustainable practices in your edible landscaping is not only good for the planet but often better for your plants and your wallet. Instead of buying new materials, think about what you can repurpose. Consider using old wooden pallets or salvaged bricks to create raised garden beds, providing excellent drainage and soil control. For fencing or trellises, bamboo stalks or pruned branches from your own trees offer a natural, renewable alternative to plastic or metal.
When it comes to inputs, prioritize organic options. Make your own compost from kitchen scraps and yard waste; this nutrient-rich “black gold” dramatically improves soil structure and fertility. For pest control, opt for homemade solutions like neem oil sprays or introducing beneficial insects over synthetic pesticides. To reduce water consumption, install a rain barrel to collect precious rainwater for irrigation. For low-water options, incorporate drought-tolerant edible herbs like rosemary and thyme, which thrive with minimal watering once established and add aromatic beauty to your garden. The USDA Forest Service (https://www.fs.usda.gov/) often provides excellent resources on native, water-wise plant choices that enhance local ecosystems.
Design & Styling Ideas
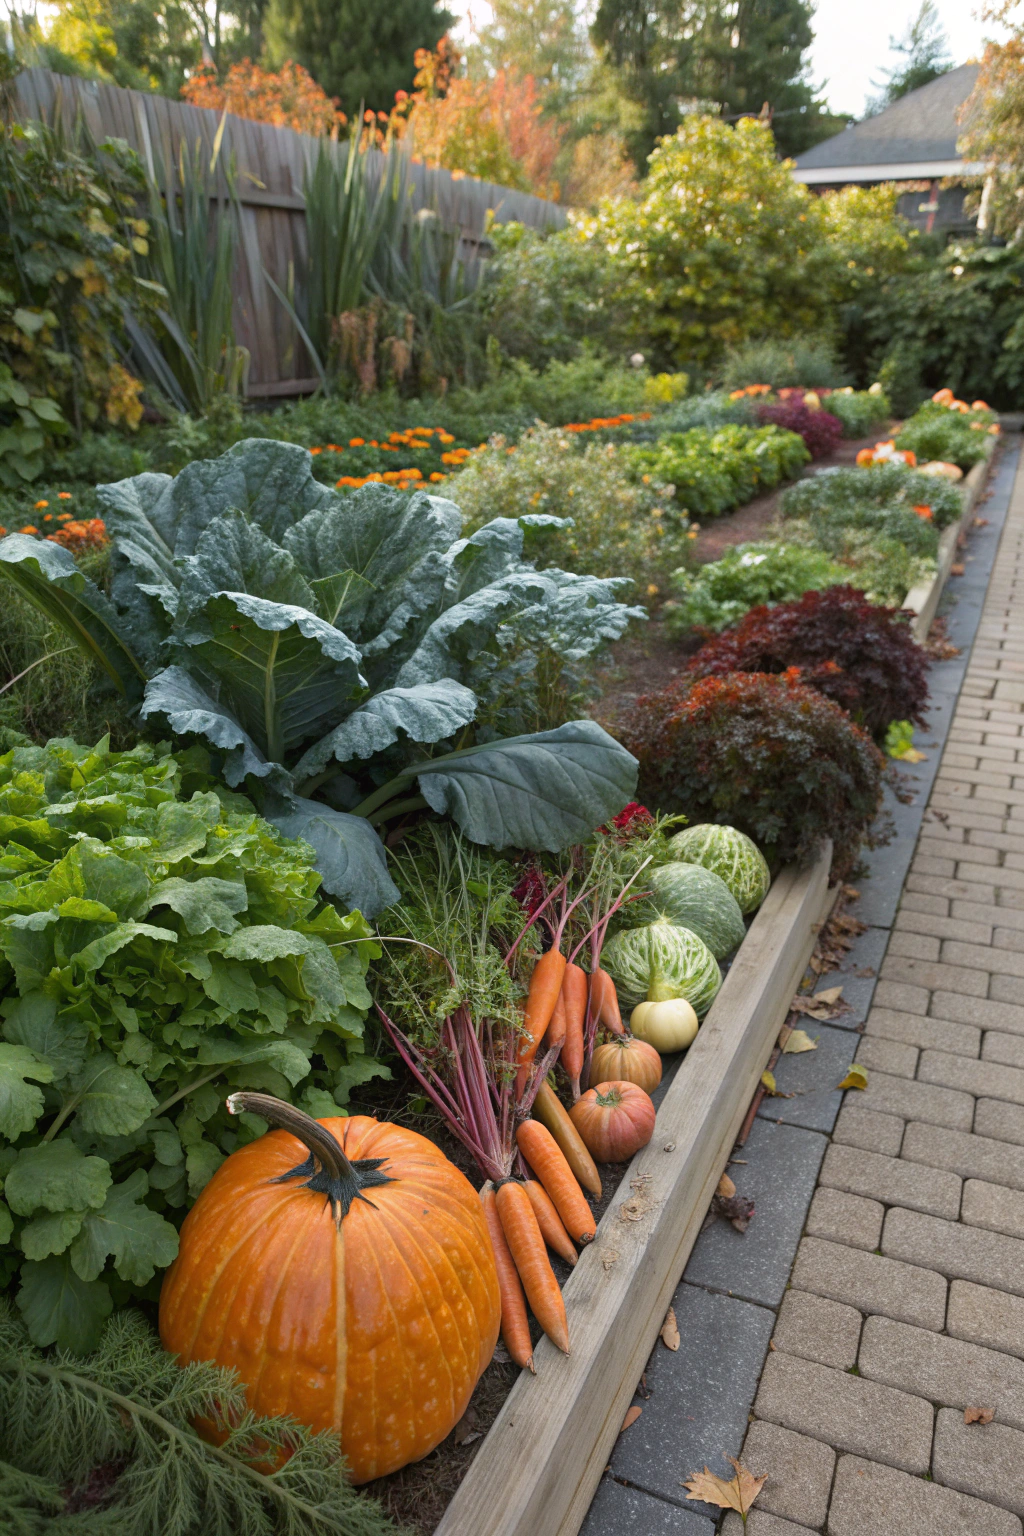
Transforming your edible landscape into a visual masterpiece requires creativity and a keen eye for aesthetics. Think beyond straight rows; incorporate curves, circles, and irregular shapes to create flow and visual interest. Use varying heights to add dimension: taller leeks and kale as backdrops, medium-height chard and bush beans in the middle, and shorter radishes and leafy greens at the front as edible border plants.
Color is your friend in fall. Many fall edibles boast stunning hues: the deep purples of ‘Redbor’ kale, the vibrant reds and yellows of Swiss chard, and the subtle greens of different lettuces. Combine these with ornamental elements like decorative stone pathways, rustic wooden planters, or even a small bird bath to attract beneficial wildlife. Consider grouping plants with similar care needs together for easier maintenance, but mix textures for a dynamic look – the crinkly leaves of Savoy cabbage next to the smooth, broad leaves of collards. An attractive archway with climbing beans could offer a welcoming entry point into your garden space, reminiscent of a cozy cottagecore autumn decor style.
Common Mistakes to Avoid
Avoiding common pitfalls can save you time, effort, and disappointment in your fall edible garden.
- Planting Too Late: A significant mistake is miscalculating planting dates. If you plant too close to your average first frost, crops won’t have enough time to mature. Preventing this means checking your local frost dates and counting backward using the “days to maturity” on seed packets, adding a buffer of 2-4 weeks for slower growth in cool weather.
- Inadequate Sun Exposure: Fall sun is weaker and lower in the sky. Placing cold-hardy vegetables in partial shade, relying on summer’s sun patterns, will lead to stunted growth. To prevent this, observe your garden’s sunlight exposure carefully in late summer/early fall and select the sunniest spots for your edibles (6+ hours recommended).
- Poor Soil Preparation: Simply putting seeds into unamended, compacted soil will yield poor results. Fall crops still need fertile, well-draining soil to thrive. Prevent this by conducting a soil test and incorporating ample organic matter (compost, aged manure) before planting, ensuring optimal nutrient availability and root development.
- Overwatering or Underwatering: Both extremes are detrimental. Overwatering leads to root rot, especially in cooler, humid conditions, while underwatering stresses plants. Prevent this by regularly checking soil moisture levels a few inches deep and adjusting watering frequency based on rainfall and plant needs. More frequent, shallow watering might be needed for germinating seeds, while established plants prefer deeper, less frequent watering.
- Neglecting Pest and Disease Control: Cold weather doesn’t eliminate all threats. Slugs, snails, and certain fungal diseases can still plague fall crops. Prevent widespread issues by inspecting plants regularly, implementing organic pest control methods, and ensuring good air circulation between plants. The UC IPM website (https://ipm.ucanr.edu/) offers comprehensive, science-based advice on integrated pest management specific to various crops and regions.
Storage & Seasonal Tips
Proper tool storage and seasonal preparation are essential for extending the life of your garden equipment and ensuring your edible landscape is protected through winter. Before storing, clean all your tools thoroughly, removing soil and debris. Sharpen digging tools and prune blades, then wipe them with an oily rag to prevent rust. Store them in a dry, covered area like a shed or garage.
For plant protection, as temperatures consistently drop below freezing, consider harvesting all remaining mature crops. Many root vegetables like carrots and parsnips can be left in the ground and mulched heavily (12-18 inches of straw) for “in-ground storage,” allowing you to harvest them fresh even after light freezes. For leafy greens you wish to extend, ensure row covers or cold frames are firmly secured. Before the first hard frost, drain all hoses and irrigation systems to prevent freezing and bursting. If you have containers, either bring them indoors or wrap them with burlap and mulch them to protect root systems. Finally, spend time adding more organic matter to empty beds, like leaves or cover crops, to enrich the soil for next spring.
Conclusion
Embracing edible landscaping with fall crops allows you to extend your harvest season, beautify your outdoor space, and enjoy fresh, homegrown produce long after summer fades. This approach, rooted in smart food & garden design, transforms your yard into a productive and resilient ecosystem. From selecting the perfect cold-hardy varieties to implementing eco-friendly practices and creative styling, every step contributes to a more sustainable and satisfying gardening experience. Don’t let the cooler weather signal the end of your gardening journey; instead, see it as an invitation to a new season of growth and bounty. Start planning your fall edible garden today and savor the unique flavors and visual delights it brings!
FAQ
Q1: What are the best fall crops for beginners?
A1: Spinach, lettuce, radishes, carrots, and kale are excellent choices for beginners due to their relatively easy care and quick growth in cooler temperatures.
Q2: How do I protect my fall garden from unexpected early frost?
A2: Use lightweight row covers, old sheets, or blankets draped over plants, secured before sunset, to trap ground heat. Small cold frames or cloches can also offer targeted protection.
Q3: Can I grow fall crops in containers?
A3: Absolutely! Many fall edibles like lettuce, spinach, kale, and radishes thrive in containers. Choose pots that are at least 8-12 inches deep and wide for adequate root space.
Q4: How often should I fertilize my fall vegetables?
A4: Generally, if your soil was well-amended before planting, light fertilization with a balanced organic liquid feed every 3-4 weeks is sufficient, especially for leafy greens.
Q5: What’s the difference between “cold-hardy” and “frost-tolerant” crops?
A5: Cold-hardy crops can withstand cooler temperatures and light freezes (down to about 28-32°F) without significant damage. Frost-tolerant crops can survive even colder temperatures and may improve in flavor after a light frost.
Q6: My fall crops are bolting (going to seed) quickly. Why?
A6: Bolting in fall crops is often triggered by sudden temperature fluctuations, particularly unexpected warm spells, or sometimes by inadequate watering. Ensure consistent moisture and consider heat-tolerant varieties if your fall weather is unpredictable.
Here are some more resources to help you nourish and protect your garden:
Looking for ways to make your garden even more efficient? Check out our article on Smart Tech Garden Hacks.
If you’re interested in alternative gardening methods, explore the benefits of a Vertical Autumn Garden.
For further inspiration on creating a beautiful and functional outdoor space, read about 5 Small Space Gardening Ideas.
To ensure your garden contributes positively to the environment, take a look at these Biodiversity-Friendly Fall Garden Tips.
And for a whimsical touch, consider designing a DIY Mini Garden Maze for Backyard Projects.