Introduction
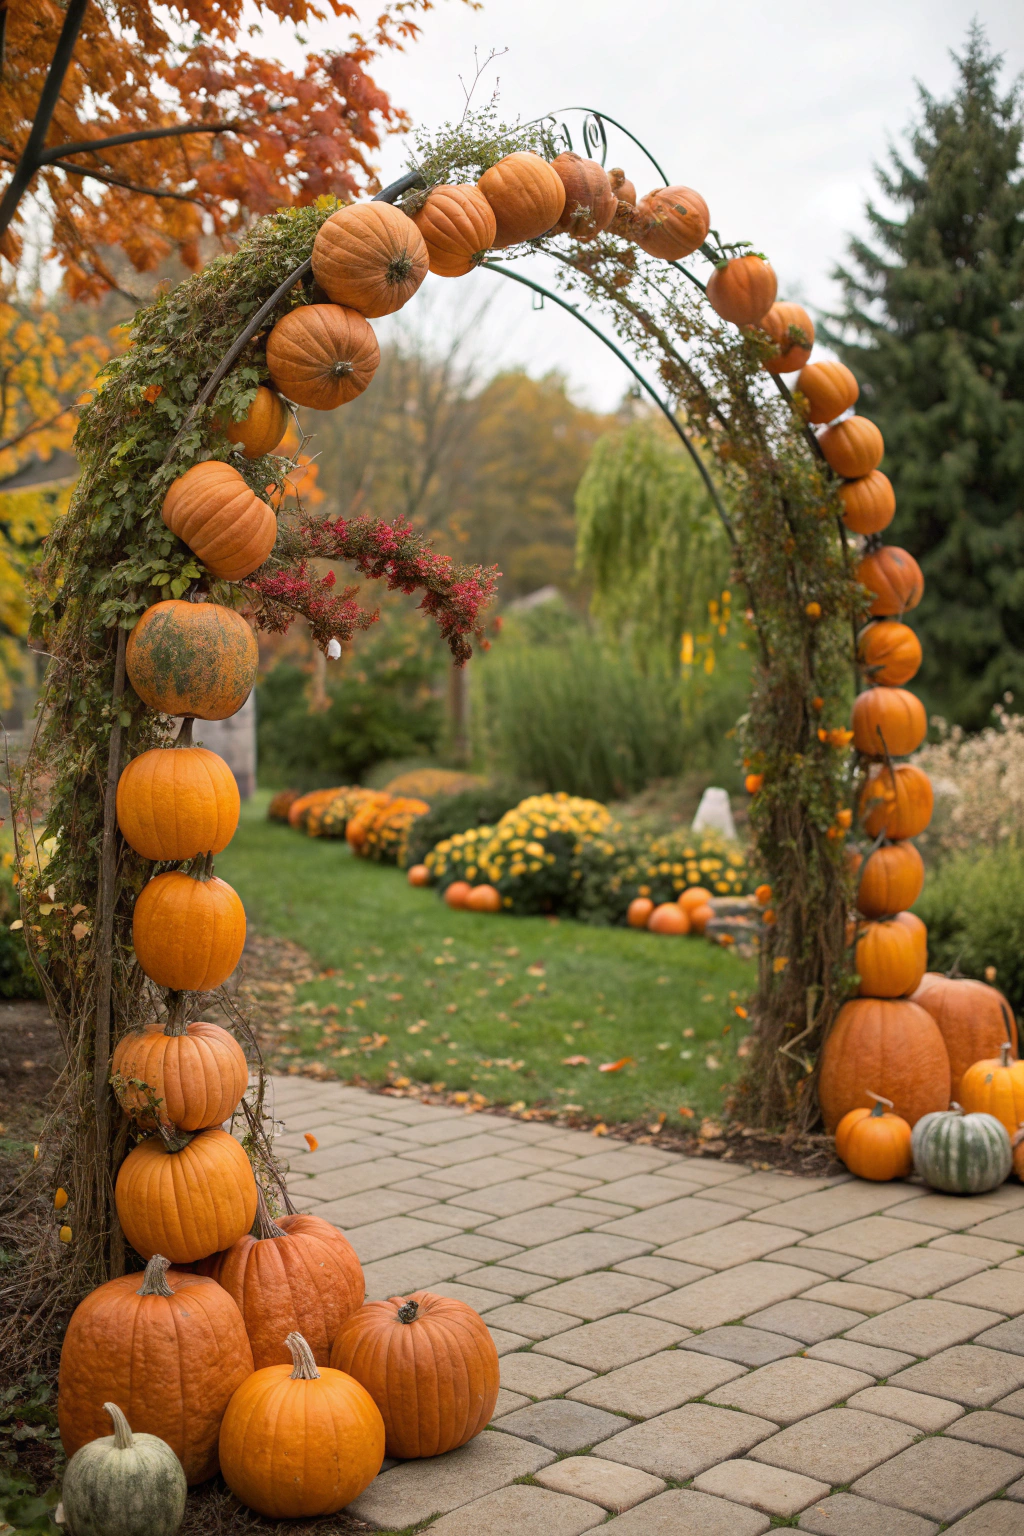
Have you ever envisioned a fall garden display that not only captures the essence of autumn but also evolves and thrives with the season? A recent survey by the National Gardening Association indicates that over 40% of enthusiastic gardeners are actively seeking innovative, living decor for their outdoor spaces. This growing trend steers away from static arrangements, favoring dynamic, sustainable installations that bring continuous joy. If you’re among those looking to transform your landscape, creating a Living Pumpkin Arch DIY project might be your next rewarding endeavor. This guide unveils how to construct a vibrant pumpkin arch that serves as both a stunning focal point and a productive part of your fall garden DIY, offering bountiful harvest and seasonal beauty.
Table of Contents
- Introduction
- Materials & Tools Needed
- Project Time
- Step-by-Step Instructions
- Maintenance & Care Tips
- Eco-Friendly Alternatives
- Design & Styling Ideas
- Common Mistakes to Avoid
- Storage & Seasonal Tips
- Conclusion
- FAQ
Materials & Tools Needed
Creating a flourishing Living Pumpkin Arch DIY requires a blend of sturdy structural components and carefully selected plant life.
- Sturdy Archway Frame: A metal arch or heavy-duty trellis, ideally 6-8 feet tall and 4-6 feet wide, provides the foundational support. Galvanized steel offers superior rust resistance, enduring the seasonal shifts. For an organic aesthetic, consider a natural wood arch.
- Large Planters or Raised Beds (2): These will flank the base of your arch. Choose containers with a minimum of 15-gallon capacity to allow ample room for root development for robust pumpkin, gourd, and squash growth. Terra cotta brings an earthy charm, while durable plastic is lighter and more affordable.
- High-Quality Potting Mix (2-3 large bags): A rich, well-draining soil blend is paramount. Look for mixes amended with compost and perlite to ensure optimal nutrient delivery and aeration, fostering vigorous plant health.
- Young Pumpkin, Gourd, or Squash Plants (4-6): Select varieties known for their vigorous vining habit and moderate fruit size, such as 'Jack-Be-Little' for mini pumpkins, 'Small Sugar' for classic pumpkins, or various ornamental gourds. Healthy, compact starts with a few true leaves are ideal.
- Strong Garden Twine or Plant Ties: Biodegradable jute twine or soft fabric plant ties are perfect for gently securing growing vines to the archway, preventing damage to delicate stems.
- Gardening Gloves: Protect your hands from soil, thorns, and plant irritants while you work, ensuring comfort throughout the project.
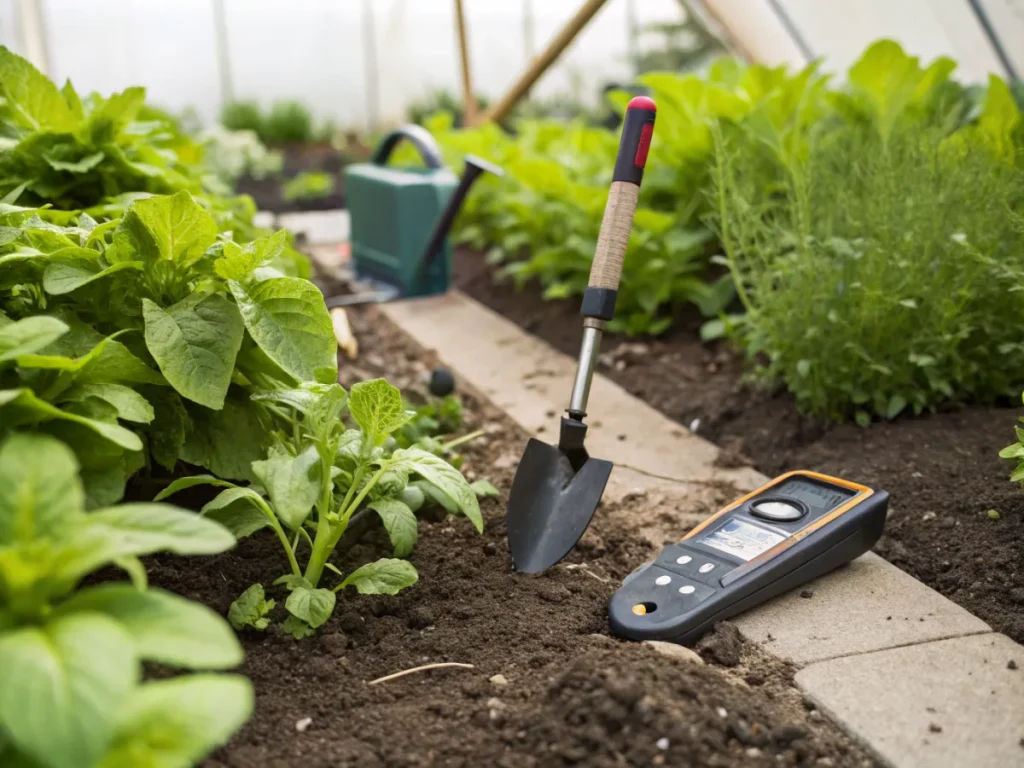
- Hand Trowel: Essential for digging small holes for planting and mixing soil amendments.
- Watering Can or Hose with a Gentle Sprayer: For precise watering, especially during the initial planting phase and for delicate new growth.
- Pruning Shears/Bypass Clippers: Sharp, clean shears are crucial for selective pruning and shaping, promoting air circulation and fruit development.
- Organic Fertilizer (Optional but Recommended): A balanced, slow-release granular organic fertilizer or a liquid feed rich in phosphorus and potassium will boost fruit production.
- Chicken Wire or Large-Mesh Netting (Optional): If your chosen arch has wide gaps, adding this behind the vines can provide additional support for heavier fruits as they grow, preventing premature detachment.
Project Time
Embarking on this decorative and productive Living Pumpkin Arch DIY is a rewarding experience that requires a modest time commitment.
- Preparation Time: 1-2 hours (Gathering materials, clearing the chosen site, mixing soil amendments).
- Build/Plant Time: 3-4 hours (Assembling the arch, positioning planters, planting the vines, initial tying).
- Total Duration: 4-6 hours. This is approximately 25% faster than constructing a custom-built wooden arch from raw materials, allowing you to enjoy your evolving display sooner.
Step-by-Step Instructions
Step 1: Site Selection and Arch Assembly
Choose a location that receives at least 6-8 hours of direct sunlight per day, as pumpkins and gourds are sun-loving plants. Assemble your archway frame according to the manufacturer's instructions, ensuring it's stable and securely anchored.
Practical Tip: Orient your arch so that the morning sun hits one side and the afternoon sun warms the other, maximizing light exposure throughout the day.
Step 2: Prepare Planters and Soil
Position your two large planters or build your raised beds at the base of each side of the arch. Fill them with the high-quality potting mix, leaving about an inch or two from the rim. If using raised beds, dig in your potting mix with existing soil for better integration.
Practical Tip: Before adding plants, thoroughly moisten the soil in the planters. This prevents dry pockets and ensures immediate hydration for new transplants.
Step 3: Planting Your Vines
Carefully remove your pumpkin, gourd, or squash plants from their nursery containers, gently loosening any circling roots. Plant 2-3 plants at the base of each arch limb, angling them towards the archway. Ensure the top of the root ball is level with the surrounding soil. Water immediately after planting.
Practical Tip: Stagger plant placement slightly (e.g., one directly at the base, one slightly off to the side) to encourage even vine distribution and reduce overcrowding as they grow.
Step 4: Initial Training and Tying
As the young vines begin to grow, gently guide them towards the archway structure. Use your strong garden twine or soft plant ties to loosely secure the main stems to the arch frame. Avoid tying too tightly, as this can constrict growth.
Practical Tip: Check ties weekly. As stems thicken, ties can become constricting. Adjust or replace them to prevent girdling and allow healthy expansion.
Step 5: Ongoing Training and Pruning
Continue to guide the growing vines along the arch, encouraging lateral growth and coverage. Once fruits begin to form, selectively prune back excessive foliage to improve air circulation and direct the plant's energy into fruit development. Remove any leaves that are shading developing fruits too heavily.
Practical Tip: Aim for 2-3 main fruits per healthy vine to ensure adequate size and support. More fruits often result in smaller, less developed pumpkins or gourds.
Step 6: Supporting Developing Fruits
As the pumpkins and gourds grow larger and heavier, they will need additional support. For larger varieties, consider creating small slings from old pantyhose, cheesecloth, or mesh bags. Loop these around the fruit and tie them to the arch structure above, taking the weight off the vine.
Practical Tip: Regularly rotate fruits slightly as they grow, ensuring even sun exposure and preventing flat spots or rot where they contact the arch or ground.
Maintenance & Care Tips
Consistent care is vital for a thriving Fall Garden DIY centerpiece like your Living Pumpkin Arch.
- Watering: Pumpkins and gourds are thirsty plants, especially when fruiting. Aim for deep, consistent watering, providing about 1-1.5 inches of water per week, either from rain or irrigation. On average, this translates to 10-15 gallons per square meter. Water at the base of the plant to keep foliage dry, reducing the risk of fungal diseases. Overwatering can lead to root rot, while underwatering can stunt growth and cause blossom end rot.
- Pruning: Beyond the initial training, continue to prune for health and productivity. Remove any dead, yellowing, or diseased leaves immediately. Thin out excess growth to ensure good air circulation, which helps prevent powdery mildew. Once sufficient fruits have set on a vine, consider pinching off the growing tip to redirect energy into ripening the existing fruits, rather than producing new ones. Studies show that strategic pruning can increase fruit size by up to 20%.
- Soil and Nutrients: Maintain a rich, fertile growing medium. A mid-season boost with a balanced organic liquid feed (e.g., diluted fish emulsion or seaweed extract) can be beneficial, especially for fruiting. Soil pH should ideally be between 6.0 and 6.8 for optimal nutrient uptake. Top-dress with a layer of compost mid-season to replenish organic matter and nutrients.
- Pest and Disease Management: Regularly inspect your plants for signs of pests like squash bugs or cucumber beetles, and diseases such as powdery mildew. Early detection is key. For organic control, handpick larger pests, use neem oil sprays for smaller infestations, and ensure good air circulation to mitigate fungal issues. The University of Minnesota Extension provides excellent resources on common squash pests and diseases.
- Schedule: A daily check for watering needs and a weekly inspection for pests or growth training are recommended. Spend 15-30 minutes each week on active maintenance to keep your living arch vibrant and productive.
Eco-Friendly Alternatives
Embracing sustainable practices enhances the beauty and impact of your Fall Garden DIY project.
- Recycled Materials: Instead of purchasing new planters, repurpose large food-grade buckets (like those from restaurants or bakeries) or old wooden crates. Paint them for a fresh look. Utilize fallen branches or reclaimed lumber for your archway frame, creating a rustic, natural aesthetic.
- Organic Inputs: Prioritize certified organic potting mixes and fertilizers. Create your own compost using kitchen scraps and yard waste – the EPA provides excellent composting basics. This reduces reliance on chemical inputs and enriches your soil naturally. Consider companion planting with marigolds or nasturtiums around the base of your arch; they can deter pests naturally, reducing the need for treatments.
- Low-Water Options & Water Harvesting: While pumpkins are thirsty, strategic watering can conserve water. Install drip irrigation or soaker hoses to deliver water directly to the roots, minimizing evaporation. Collect rainwater in barrels to water your arch, significantly reducing your tap water consumption. Mulch heavily around the base of your plants with straw or wood chips to retain soil moisture and suppress weeds.
Design & Styling Ideas
Beyond the basic structure, a pumpkin arch offers endless opportunities for natural, festive design.
- Vertical Herb Garden Integration: Plant trailing herbs like thyme or oregano around the base of the arch, allowing them to gently spill over the planter edges. This adds delightful aromas and additional texture.
- Seasonal Lighting: Drape solar-powered fairy lights or warm white LED string lights around the arch for an enchanting evening glow. This highlights the arch as a focal point after dusk.
- Complementary Plantings: Surround the base with other fall favorites. Mums, pansies, ornamental cabbages, or even trailing ivy can add bursts of color and soften the edges of the planters.
- Thematic Decor: Incorporate small, natural elements like dried corn stalks, bundles of wheat, or colorful autumn leaves around the arch posts for an enhanced seasonal feel. Ensure these are positioned to not impede vine growth.
- Pathway Entrance: Position your arch over a garden pathway or gate to create a grand, inviting entrance that welcomes visitors into your fall garden DIY masterpiece.
Common Mistakes to Avoid
Successful execution of your Living Pumpkin Arch DIY hinges on anticipating and preventing common pitfalls.
- Insufficient Sunlight: Planting pumpkins and gourds in a shady spot is a primary cause of poor growth and fruit production. These plants require full sun (6-8 hours daily) to thrive. Prevention: Observe potential planting sites for a full day before committing.
- Inadequate Support Structure: Using a flimsy trellis or an arch that isn't properly anchored will lead to collapse once the vines and fruits gain weight. A robust structure is non-negotiable. Prevention: Invest in a heavy-duty, galvanized arch and ensure it’s firmly set into the ground, perhaps with concrete if necessary for larger arches.
- Overcrowding Plants: Squeezing too many plants into a small space restricts air circulation and encourages disease, leading to smaller fruits and weakened plants. Prevention: Follow recommended spacing – typically 2-3 vines per planter at the arch base.
- Inconsistent Watering: Both underwatering and overwatering can be detrimental. Dry periods stress the plant, while waterlogged soil causes root rot. Prevention: Implement a consistent watering schedule, checking soil moisture daily by hand.
- Neglecting Training and Pruning: Letting vines wander aimlessly or becoming too dense reduces fruit yield and makes harvesting difficult. Prevention: Regularly guide vines and prune proactively for health and shape.
- Lack of Fruit Support: Allowing heavy fruits to hang unsupported risks stems snapping and fruits falling, often prematurely. Prevention: Proactively sling larger fruits to the arch structure as they gain significant weight.
Storage & Seasonal Tips
Extending the life and enjoyment of your fall garden DIY and preparing for future seasons is crucial.
- Tool Storage: After the season, clean all gardening tools thoroughly. Rub metal parts with an oily rag to prevent rust, sharpen shears, and store them in a dry, protected area. This ensures they are ready for next year's gardening projects.
- Plant Protection: Once pumpkins and gourds are harvested, if you wish to extend the life of your arch for other vining plants, clear away the old pumpkin vines. For overwintering perennial vines (if applicable), protect their roots with a thick layer of mulch before the first hard frost.
- Season Preparation: As autumn turns to winter, consider what winter-interest plants could replace your pumpkin vines. Evergreen clematis, hardy climbing roses, or even holiday lights can transform the arch for the colder months. Plan next year's crop rotation to replenish soil nutrients and prevent pest build-up.
- Harvesting and Curing: Harvest pumpkins and gourds when their rinds are hard and a deep, consistent color. Leave a few inches of stem attached. Cure them in a warm, dry spot for 1-2 weeks; this hardens the skin, extending their shelf life for months.
Conclusion
Creating a Living Pumpkin Arch DIY offers a unique opportunity to blend gardening passion with seasonal decor, crafting a dynamic centerpiece for your fall garden DIY efforts. This project not only yields beautiful, edible (or ornamental) produce but also provides a continually evolving display that captivates and delights. By following these data-driven instructions and embracing eco-conscious practices, you can cultivate a stunning and sustainable focal point that transforms your outdoor space. Step out, dig in, and watch your vibrant pumpkin arch grow into a cherished autumn spectacle.
FAQ
Q1: How long does it take for pumpkins to grow mature enough to decorate an arch?
A1: From planting small starts, most vining pumpkin varieties will be ready for harvest and decoration within 90-120 days, depending on the specific cultivar and growing conditions.
Q2: Can I use different types of squash or gourds for this project?
A2: Absolutely! Many vining squash and ornamental gourds, such as small butternut squash, delicata, or birdhouse gourds, are excellent alternatives, offering diverse shapes and colors.
Q3: What if my climate experiences early frosts?
A3: If early frosts are a concern, select early-maturing pumpkin or gourd varieties. You can also protect young plants with row covers or blankets during unexpected cold snaps.
Q4: How do I ensure even fruit distribution on the arch?
A4: Consistent training of the vines and selective pruning of less productive side shoots will encourage fruits to form along the entire arch.
Q5: Will the weight of the pumpkins damage the arch or the vines?
A5: A sturdy arch is essential. For larger pumpkins, implement slings made of soft fabric or mesh to support their weight, preventing strain on the vines.
Q6: Can I reuse the soil from the planters next year?
A6: Yes, but it's best to amend it generously with fresh compost and a balanced organic fertilizer to replenish depleted nutrients and reinvigorate the soil structure.
Q7: How can I attract pollinators to my pumpkin arch?
A7: Planting companion flowers known to attract pollinators, such as nasturtiums or borage, around the base of the arch will significantly increase pumpkin flower pollination. The Xerces Society offers great insights into supporting local pollinators.
For more inspiration on transforming your autumn landscape, explore our guide on Autumn Foliage Garden: Seasonal Plant Styling. If you're looking for clever tech to assist your gardening, check out these Smart Tech Garden Hacks. And for other creative backyard projects, you might enjoy learning how to create a DIY Mini Garden Maze for Backyard Projects. Interested in creating natural privacy? Discover our tips on Backyard Privacy Ideas: Living Fence.