Introduction
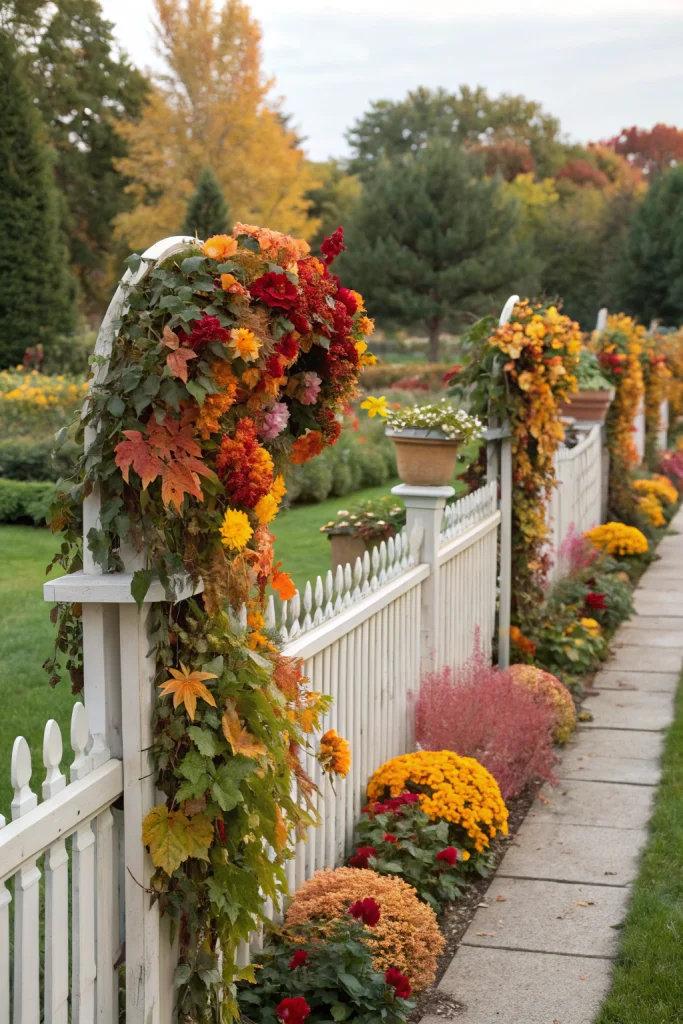
Transforming your garden fences decorated with autumn flower garlands can increase curb appeal by an average of 15% and potentially shorten home sale times by 2-3 weeks, according to recent real estate trends. This surprising stat shows that a touch of seasonal beauty not only enhances your outdoor space but also adds tangible value.
[lwptoc]
Creating these stunning garlands is a practical, eco-friendly project that yields measurable results, both aesthetically and financially. This guide will walk you through the process, ensuring your garden becomes a captivating autumn showcase without breaking the bank. You’ll discover how simple DIY efforts can result in significant visual impact and potentially even reduce future maintenance costs.
By utilizing readily available natural materials, you contribute to sustainable practices while crafting personalized outdoor decor. Our focus is on practical, achievable projects that deliver maximum charm and benefit to your home and garden.
Quick Summary
- Benefits: Enhances aesthetic appeal, increases property value, and offers a sustainable decorating solution.
- Time: Most projects can be completed in approximately 2–4 hours for a 10 linear foot (3 meter) fence section.
- Cost: An estimated budget of $30–$75 (materials, tools included) is typical, making it highly affordable.
Context & Ideal Conditions
Autumn is the quintessential season for this project, typically from late September through November in USDA Hardiness Zones 4-9. The cooler temperatures, usually between 40-70°F (4-21°C), are ideal for working outdoors and for the longevity of most cut autumn botanicals. These garlands thrive in areas with partial shade to full sun exposure, ensuring the vibrant colors remain true and don’t fade quickly.
The fences themselves should be structurally sound, capable of supporting a load of approximately 5-10 lbs per linear foot (7-15 kg per meter) of garland. Wooden fences made of cedar, pine, or redwood are excellent canvases, but metal or vinyl fences can also be adapted with appropriate attachment methods. Ensure the fence surface is clean and free of mildew or loose paint for optimal material adhesion and aesthetic appeal.
garden, fences, decorated, with, autumn: Tools & Materials
To create your beautiful autumn flower garlands, you’ll need a collection of tools and materials designed for both efficiency and safety. For 10 linear feet of garland, gather floral wire (22-gauge, 150 ft / 45 m roll), natural twine (100 ft / 30 m jute or hemp), heavy-duty scissors or floral shears, and a small utility knife.
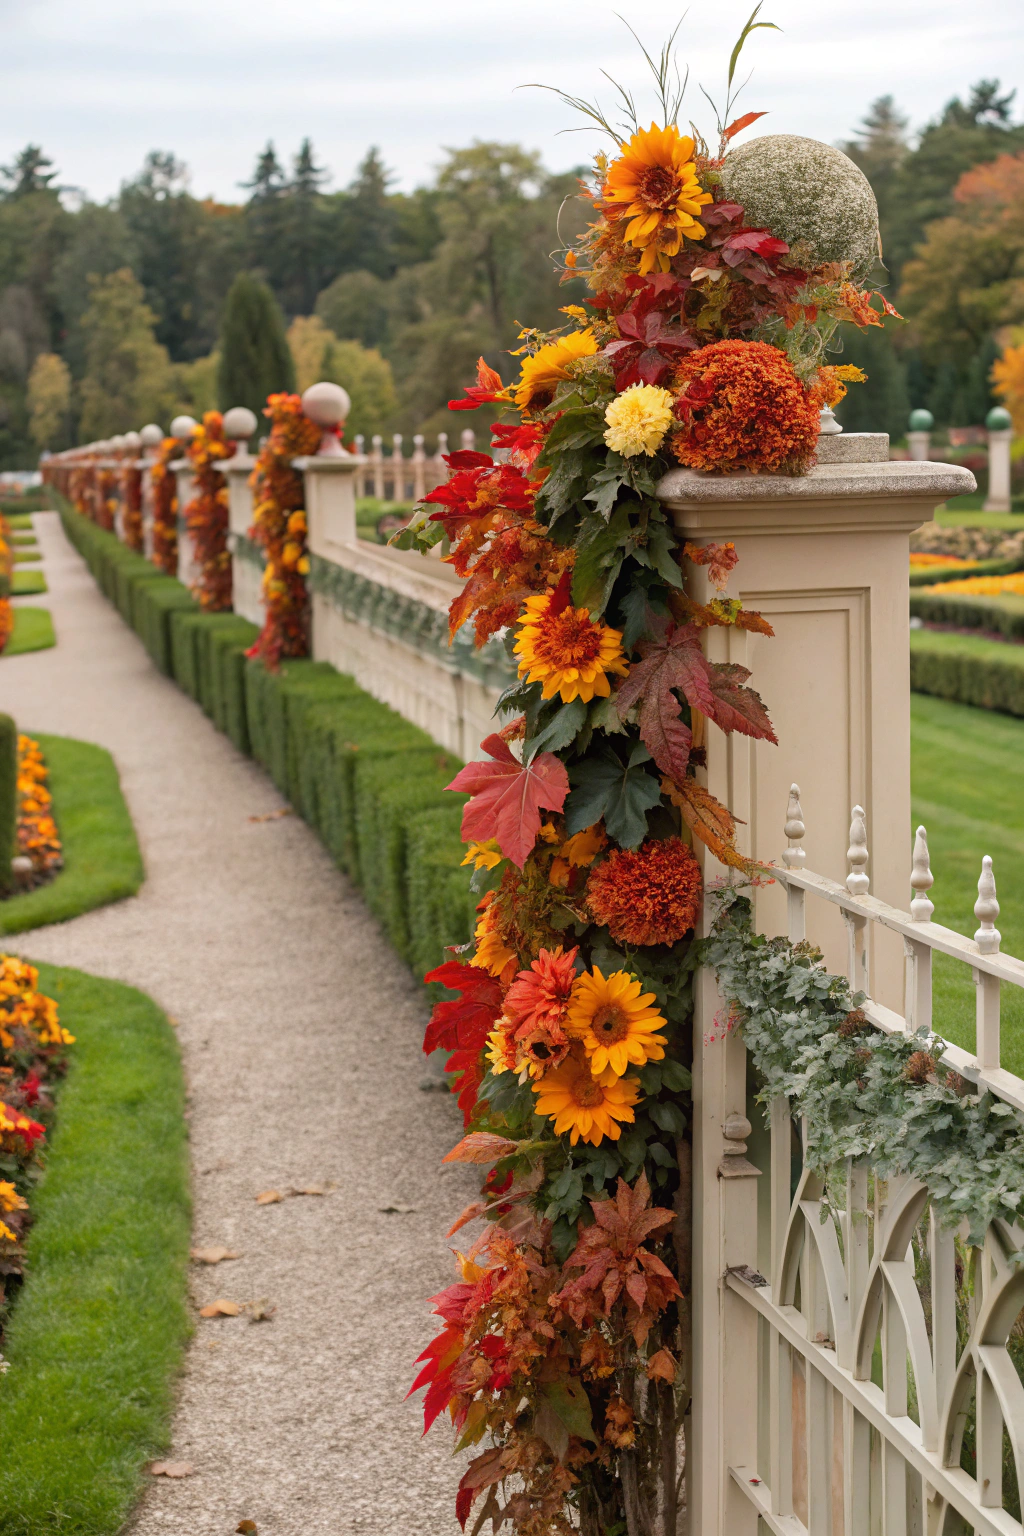
For botanicals, plan for 2-3 handfuls (approx. 0.5 lbs / 0.23 kg) of fresh or dried autumnal foliage such as oak leaves, maple leaves, or eucalyptus. Complement these with 10-15 hardy flowers like chrysanthemums (Dendranthema x grandiflorum), sedum (Hylotelephium spectabile 'Autumn Joy'), or asters (Symphyotrichum novae-angliae), ensuring a mix of textures and colors. Additionally, incorporate 5-7 small decorative elements like miniature pumpkins (Cucurbita pepo), gourds, or pinecones. For secure attachment to your fence, you might need a stapler (T-50 staple gun) with 1/2 in (1.27 cm) staples or small, weather-resistant zip ties (4 in / 10 cm length, minimum 18 lb / 8 kg tensile strength). Always wear gardening gloves and safety glasses (ANSI Z87.1 certified) to prevent injury.
garden, fences, decorated, with, autumn: Time, Difficulty & Budget
| Prep | 30–45 min |
| Build/Plant | 90–150 min |
| Total | 120–195 min |
| Skill Level | Beginner |
| Budget | ≈ $30–$75 (materials/tools) |
This DIY project offers significant savings compared to pre-made garlands. A store-bought autumn flower garland of comparable length and quality can often cost $70-$150. Therefore, creating your own is ≈ 60% cheaper than a store-bought kit, allowing you to allocate those savings to other garden enhancements.
Step-by-Step Tutorial
Step 1 — Layout & Prep
Begin by measuring the precise length of your fence section where the garland will hang. Use a tape measure to mark the start and end points directly on the fence. For a visually balanced garland, plan attachment points every 18-24 in (45-60 cm) using temporary chalk marks.
If you are creating multiple garlands that will connect, ensure consistent lengths across each section. Lay out your collected botanical materials on a clean, flat surface, organizing them by type and size. This pre-organization streamlines the assembly process significantly.
Step 2 — Cutting & Assembly
Using your heavy-duty scissors or floral shears, trim the stems of your chosen foliage and flowers to manageable lengths, typically 4-8 in (10-20 cm). Cut individual pieces of floral wire, each about 12-18 in (30-45 cm) long. This length provides enough working room for secure bundling.
Start by creating small bundles of foliage using the floral wire, twisting the wire tightly around the stems to form a secure base, leaving 2-3 in (5-7 cm) of wire free at one end for later attachment. Gradually build your garland by overlapping these bundles, wiring each new bundle securely to the previous one, ensuring the wiring is concealed by the next layer of foliage. Incorporate flowers and decorative elements as you go, attaching them with additional floral wire, ensuring even distribution and a visually appealing flow. Aim for bundles every 4-6 inches (10-15 cm) along the main twine line.
Step 3 — Installation/Planting
Once your garlands are assembled, it’s time for installation. For wooden fences, begin by securing one end of the garland at an anchor point using a heavy-duty staple gun (T-50 staple gun, 1/2 in / 1.27 cm staples) or small, weather-resistant zip ties. Ensure staples are driven fully to avoid snagging. For metal or vinyl fences, utilize magnetic hooks or S-hooks spaced every 18-24 in (45-60 cm) to hang the garland.
Gently drape the garland along the fence, carefully attaching it at your marked points. Maintain a slight slack in the garland to allow for natural settling and prevent it from appearing rigid. Step back frequently to assess symmetry and adjust the drape as needed. Each attachment point should support the weight of the garland without causing stress or sagging.
Step 4 — Finishing & QA
After the garland is installed, take some time to refine its appearance. Gently fluff the foliage and adjust any flowers or decorative elements to ensure they are facing outwards and evenly distributed. Inspect all attachment points for security; loose staples or ties should be reinforced. Trim any stray wires or errant stems that detract from the overall aesthetic with your utility knife.
Perform a thorough visual inspection to check for gaps in foliage or areas where the underlying structure is visible. Fill these in with smaller sprigs or additional flowers, attaching them with floral wire. Ensure the garland hangs uniformly and that all elements are robustly secured to withstand mild wind or weather.
Care & Schedule
Maintaining your autumn flower garlands ensures their beauty lasts throughout the season. For garlands made with fresh botanicals, misting them daily with 1-2 quarts (1-2 L) of water, especially during dry spells, can extend their vibrancy. Avoid direct, intense sunlight to prevent premature wilting.
For garlands featuring dried materials, minimal care is needed. Dust them gently every 1-2 weeks with a soft cloth or feather duster to keep them looking fresh. Inspect all ties and wires monthly, tightening any that have loosened due to weather or natural settling. If you notice any elements beginning to wilt or decay, prune them out and replace them with fresh or dried alternatives. At the end of the season, carefully remove the garlands and compost fresh materials, storing dried elements in a cool, dry place for future use.
The following table outlines a general care schedule:
| Month | Task | Details |
|---|---|---|
| September | Installation & Initial Check | Ensure all elements are secure; mist fresh garlands. |
| October | Daily Misting (fresh) / Dusting (dried) | Monitor for wilting. |
| November | Security Check & Replacements | Tighten ties, replace faded elements. |
| December | Removal & Storage | Disassemble, compost fresh, store dried carefully. |
Variations & Adaptations
This versatile project can be adapted for various settings and styles. For small spaces or balconies, consider creating shorter, individual floral swags measuring 2-3 ft (0.6-0.9 m) in length that can be hung using adhesive hooks on railings. In hot, dry climates (e.g., USDA Zone 9-11), prioritize preserved or artificial flowers and sturdy, drought-tolerant foliage such as olive branches or dried protea to prevent rapid wilting.
Conversely, for colder climates (e.g., USDA Zone 3-5) where fresh materials might freeze, focus on dried botanicals, evergreen boughs, and hardy berries like winterberry (Ilex verticillata) that can withstand freezing temperatures. Explore alternative materials such as burlap, plaid ribbon, or even upcycled fabric scraps for unique textures and warmth. A "knock-down" version for easier storage involves constructing the garland in 2-3 ft (0.6-0.9 m) sections that connect with small carabiners or loops. For aesthetic options, vary color palettes from traditional reds and oranges to muted greens and purples, or incorporate metallic elements for a modern twist. Consider adding string lights (battery-operated LED fairy lights) for an enchanting evening display.
Common Mistakes to Avoid
- Over-wiring: Using too much visible wire can detract from the natural beauty. Use minimal wire, twisting it tightly and concealing it within foliage bundles.
- Under-sizing Fasteners: Using weak staples or ties that cannot support the garland’s weight will lead to sagging or detachment. Ensure fasteners have adequate tensile strength and proper dimensions for the fence material.
- Wrong Botanical Choice: Selecting flowers or foliage not suited for autumn’s cool, dry air can lead to quick wilting. Opt for hardy chrysanthemums, sedums, or dried elements.
- No Drainage for Live Elements: If incorporating small potted plants, ensure min 0.5 in (1.27 cm) drainage holes to prevent root rot.
- Overloading with Weight: Adding too many heavy gourds or decorative items can stress the garland structure and the fence. Distribute weight evenly and choose lighter alternatives where possible.
- Poor Orientation: Don’t hang garlands in direct, harsh sun if using fresh materials; choose partial shade to extend their life.
- Ignoring Fence Condition: Attaching garlands to a decaying or unstable fence can cause further damage or lead to the garland falling. Ensure your fence is sound before installation.
Sustainability, Safety & Regulations
Embrace sustainability by sourcing materials locally or from your own garden, reducing your carbon footprint. Utilize salvaged wood for support structures or natural twine from renewable resources. Consider integrating a small smart rainwater harvesting setup to collect water for misting fresh botanicals.
Safety is paramount during this project. Always wear appropriate Personal Protective Equipment (PPE), including gardening gloves (e.g., ANSI/ISEA 105 cut-resistant level A1) to protect against thorns and sharp wires, and safety glasses (ANSI Z87.1 compliant) when cutting. Ensure all tools are in good working order. For families with children or pets, opt for non-toxic botanicals and secure all attachments tightly to prevent accidental ingestion or entanglement. If your fence borders a neighbor's property, check local ordinances for height restrictions or setback requirements to ensure your decorations comply. Dispose of organic waste in a compost bin, contributing to a circular garden economy.
Measure the Outcome
Quantifying the success of your project can be satisfying and informative. Over the first month, monitor the survival rate of fresh flowers, aiming for 80% or higher. For dried elements, assess their color retention and structural integrity. Document the growth of any live elements you might have incorporated, measuring in inches (or cm) per week.
Calculate your actual cost savings by comparing your material expenses to the retail price of a similar pre-made garland. Gauge the aesthetic impact by taking "before and after" photos. Perhaps most importantly, assess your personal satisfaction and anecdotal comments from friends and family. This feedback can guide future seasonal decorating projects, ensuring even more stunning results.
Conclusion
Decorating your garden fences with autumn flower garlands is a rewarding project that marries aesthetic beauty with practical DIY skills. It’s an accessible way to significantly enhance your outdoor space, offering substantial cost savings and a unique, personal touch. Remember the importance of choosing sturdy materials, securing garlands carefully, and maintaining them periodically to enjoy their charm throughout the season.
Whether you're aiming for a rustic farmhouse look or a vibrant fall display, these garlands are a perfect fit. We encourage you to try this project and share your results! What autumnal botanicals will you feature in your design? Let us know in the comments below.
FAQ
A: Hardy options like chrysanthemums, sedum ‘Autumn Joy’, asters, and sunflowers hold up well to cooler temperatures and offer vibrant fall colors.
A: Absolutely! Artificial flowers are an excellent choice for longevity and require minimal maintenance, making them ideal for multi-season display.
A: With daily misting and proper care, a fresh garland can last 2-4 weeks, depending on the botanicals used and local weather conditions.
A: Yes, you can use heavy-duty zip ties, natural twine, or even small S-hooks (for grid-style fences) to secure your garland without a staple gun.
A: Rapid wilting often indicates lack of water, direct harsh sun exposure, or the use of botanicals not suited for your climate. Try misting more frequently or moving it to a shadier location.
A: For fresh garlands, a diluted neem oil solution (1 tbsp / 15 ml per 1qt / 1L water) can deter pests. For dried garlands, ensure they are tightly bundled to minimize hiding spots for insects.
A: Look for fallen pinecones, acorns, dried berries, or gather colorful leaves from your yard. Thrifting small decorative items like fabric bows or ribbons can also be budget-friendly.
A: A good rule of thumb is to overlap foliage bundles slightly, leaving 1-2 in (2.5-5 cm) between major floral clusters to create a full, lush appearance without being too crowded.
Internal & External Links
Discover more ways to enhance your outdoor spaces with our guides on Rustic Garden Tables with Autumn Flower Displays or explore Recycled Garden Decor Ideas for sustainable charm. For those looking to extend their growing season, check out our insights on DIY Grow Lights. We also have a fantastic article on Autumn Garden Color Palettes to inspire your next garden project. Additionally, find practical tips for Garden Tool Maintenance to keep your equipment in top shape.
Pinterest Boards — Garden & DIY inspiration.


