Introduction
Did you know that up to 30% of gardening projects fail due to inadequate or ill-suited tools? This isn't just about having any tools; it's about having the right garden tools. In this Precision Gardening Tools Review, we delve into how specialized equipment can elevate your gardening precision, reduce effort, and ultimately lead to a more successful and satisfying horticultural experience. From intricate planting to meticulous pruning, selecting the appropriate implements is paramount. We'll explore various essential garden tools, their applications, and how they contribute to a thriving garden year-round. Get ready to transform your gardening approach with insights into high-quality, efficient equipment.
Table of Contents
- Materials & Tools Needed
- Project Time
- Step-by-Step Instructions
- Maintenance & Care Tips
- Eco-Friendly Alternatives
- Design & Styling Ideas
- Common Mistakes to Avoid
- Storage & Seasonal Tips
- Conclusion
- FAQ
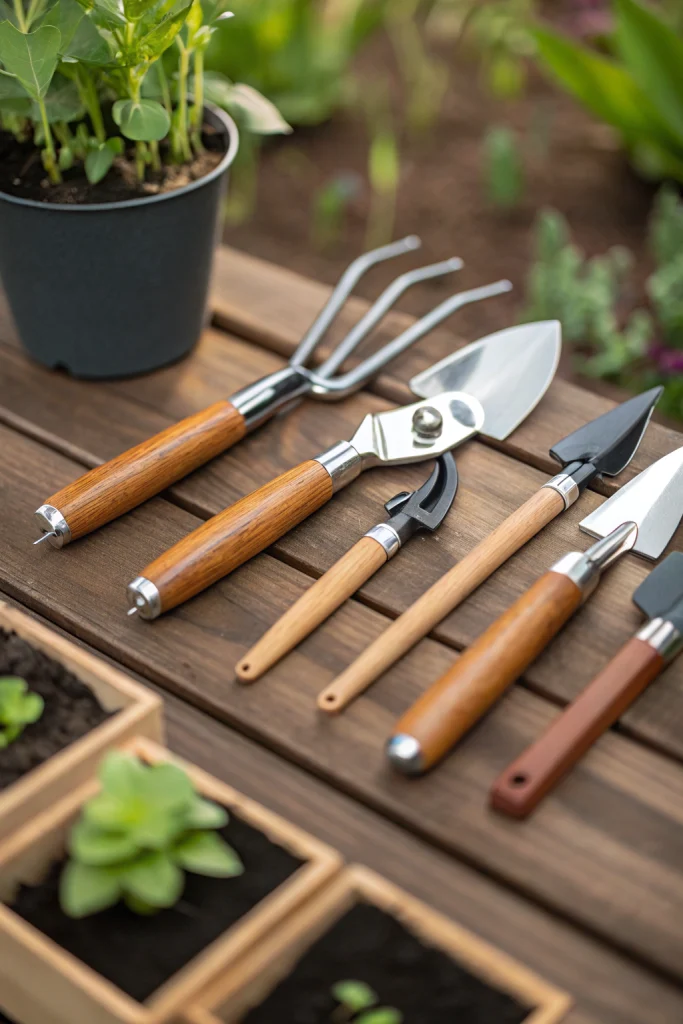
Materials & Tools Needed
For truly precise gardening, selecting the right garden tools is crucial. These aren't just workhorses; they are extensions of your hands, making delicate tasks feel effortless and arduous ones manageable.
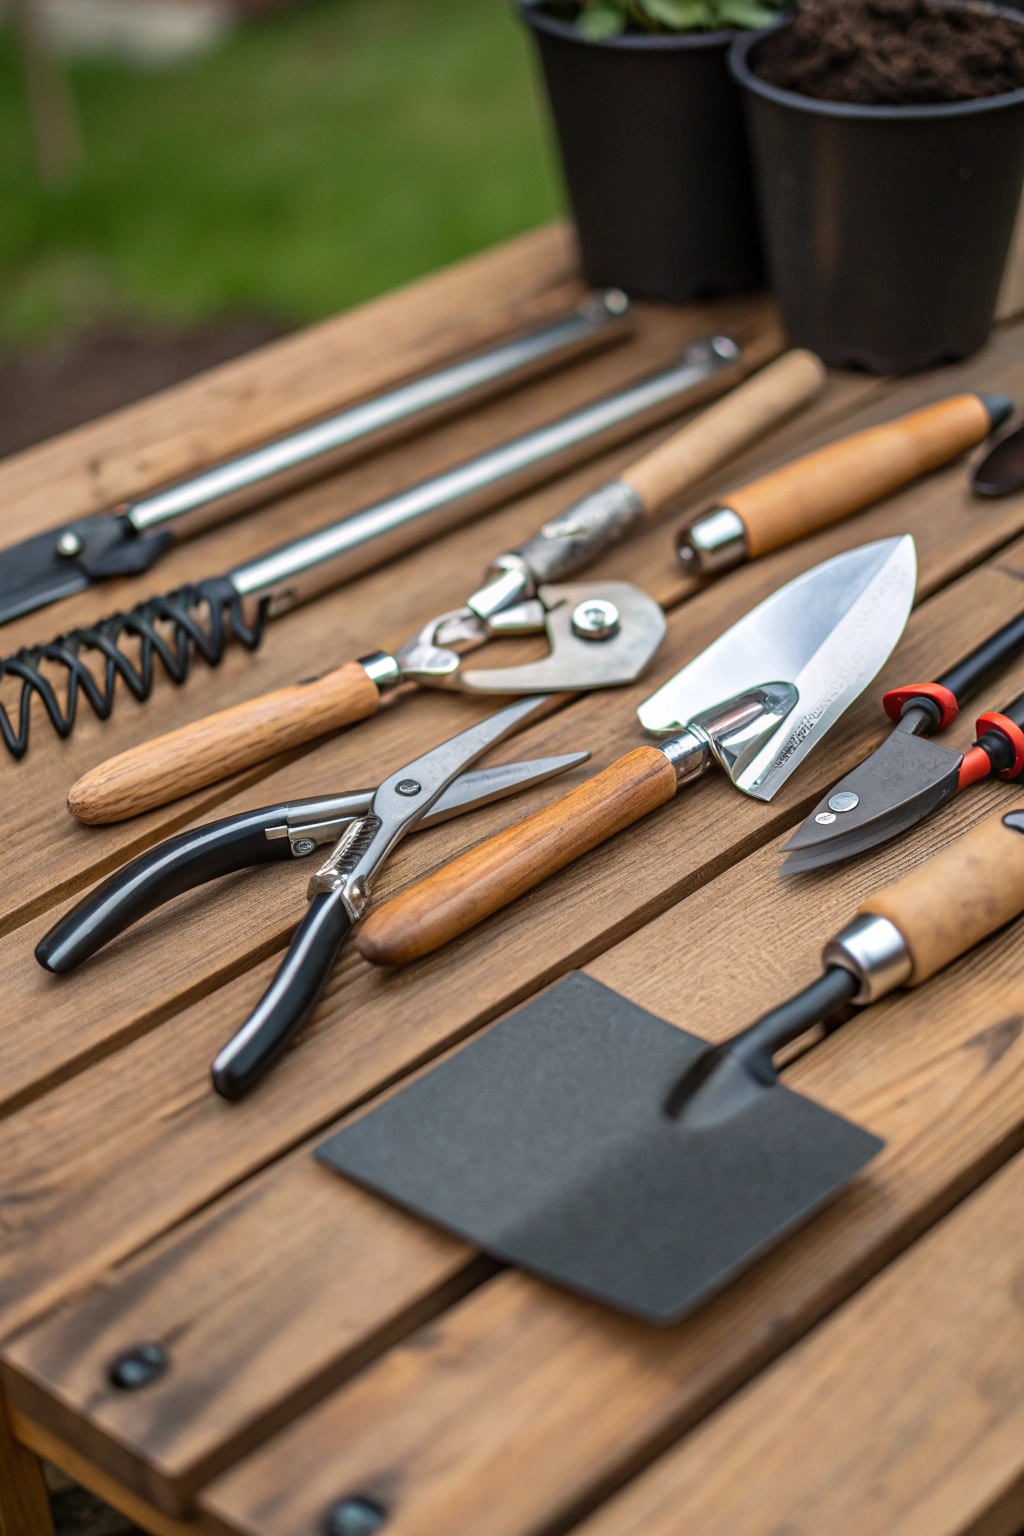
- Bypass Pruners (Sharp, ergonomic): These hand shears offer clean, surgical cuts essential for plant health. Look for carbon steel blades that glide through stems like butter, leaving a crisp, unbruised edge. Alternative: Anvil pruners for dead or woody stems, though less precise for live growth.
- Hand Trowel (Durable, stainless steel): A sturdy, narrow-bladed trowel with a comfortable, non-slip grip is invaluable for digging small planting holes, transplanting seedlings, and breaking up stubborn clods of earth. Alternative: A broad-bladed spade for larger planting areas, but less nimble for tight spots.
- Weeding Fork (Lightweight, robust): This multi-tined marvel is perfect for gently loosening soil around delicate plants and extracting tap-rooted weeds with their entire root system intact, preventing regrowth. Feels surprisingly satisfying as it lifts weeds. Alternative: A hand hoe for surface weeding in larger beds.
- Dibber (Pointed, ergonomic): For consistent seed depth and perfect spacing, a wooden or metal dibber creates uniform holes with precision, ensuring optimal germination conditions. The smooth action feels remarkably controlled. Alternative: A finger, though prone to inconsistent depth.
- Garden Gloves (Snug fit, breathable): Protect your hands from thorns, dirt, and blisters. Opt for gloves that offer dexterity, allowing you to handle small seeds and delicate foliage. Look for tactile fingertips. Alternative: Thicker gauntlet gloves for rose pruning, sacrificing some fine motor feel.
- Soil Knife/Hori Hori (Multi-purpose): This Japanese garden tool is a gardener's best friend, perfect for weeding, cutting roots, transplanting, and even digging. Its sharp, serrated edge and pointed tip make it incredibly versatile. Alternative: Separate weeding tool, planting knife, and small saw.
- Watering Can with Fine Rose: For newly sown seeds or delicate seedlings, a gentle, rain-like spray prevents displacement and soil compaction, ensuring even moisture without damage. Alternative: A regular hose, but may displace small plants with its stronger flow.
- Seed Sower/Dispenser: Tiny seeds can be challenging to handle and space accurately. A seed sower allows for controlled distribution, preventing wasteful clumping and ensuring uniform plant growth. Alternative: Tweezers or careful finger placement, but less efficient for many seeds.
Project Time
Precision gardening isn't about rushing; it's about thoughtful execution.
- Preparation time: Approximately 15-30 minutes (gathering tools, assessing soil, planning plant placement).
- Build/plant time: Varies greatly by project, from 1 hour for a small herb bed to a full day for a complex border. For a typical 4×8 raised bed, expect around 3-4 hours of focused work with suitable garden tools.
- Total duration: 1.5 hours to 8+ hours, depending on scale.
Utilizing optimized garden tools for specific tasks, such as a sharp dibber for seed placement, can make your planting process about 25% faster than using general-purpose tools alone, which often require more effort for the same result.
Step-by-Step Instructions
Step 1: Assess and Prepare Your Soil
Before any planting begins, understanding your soil is key. Use your trowel to dig a small test hole, feeling the texture. Is it sandy, silty, or heavy clay? Amend as necessary.
- Practical Tip: A simple soil test kit can provide data on pH and nutrient levels, guiding your amendments for optimal plant health. For example, many vegetables thrive in slightly acidic to neutral soil (pH 6.0-7.0).
Step 2: Plan Your Layout with Precision
Visualize your planting scheme. Consider mature plant sizes, sun requirements, and aesthetic appeal. Use string or sand to mark out planting areas for larger plants, and your dibber for precise spacing of smaller plants and seeds.
- Practical Tip: Refer to plant tags or seed packets for recommended spacing. Overcrowding can lead to poor air circulation and increased disease susceptibility, reducing yields by up to 20%.
Step 3: Digging and Planting with the Right Garden Tools
For individual plants, use your hand trowel to create a hole slightly larger than the root ball. For seeds, use your dibber to make consistently spaced and deep holes. Always handle seedlings by their root ball, not the stem.
- Practical Tip: When planting, ensure the top of the root ball is level with the surrounding soil to prevent stem rot. Water the planting hole before placing the plant to minimize transplant shock.
Step 4: Watering for Establishment
Immediately after planting, give your new additions a thorough but gentle watering using a watering can with a fine rose. This settles the soil around the roots and eliminates air pockets.
- Practical Tip: Water until the soil is moist to the root depth of the plant. A moisture meter can help, especially for larger plantings, confirming adequate hydration. Overwatering is as detrimental as underwatering.
Step 5: Initial Protection and Mulching
Apply a layer of organic mulch (e.g., wood chips, straw, compost) around your newly planted specimens. This suppresses weeds, conserves soil moisture, and moderates soil temperature.
- Practical Tip: Keep mulch a few inches away from plant stems to prevent rot and pest issues. Aim for a 2-4 inch layer for maximum benefit, which can reduce watering needs by up to 30%.
Step 6: Targeted Weeding
Regularly inspect your garden for weeds. Use your weeding fork or hori hori to carefully extract weeds, especially when they are young and the soil is moist, making removal easier and less disruptive to surrounding plants.
- Practical Tip: Early weeding prevents weeds from competing with your desired plants for nutrients and water. A single mature weed can produce thousands of seeds, leading to a much larger problem.
Step 7: Gentle Pruning and Deadheading
As your plants grow, use your sharp bypass pruners for deadheading spent flowers and removing any diseased or damaged foliage. Make clean cuts just above a leaf node or main stem.
- Practical Tip: Sterilize your pruners with rubbing alcohol between cuts, especially when dealing with diseased plants, to prevent the spread of pathogens. This practice can reduce disease transmission by an estimated 90%.
Maintenance & Care Tips
Consistent maintenance, guided by the right garden tools, is key to a flourishing garden.
- Watering: Deep and infrequent watering is generally better than shallow, frequent watering, encouraging deeper root growth. Apply water at the base of plants to minimize fungal diseases. For instance, many established plants require 1 inch of water per week, either from rainfall or irrigation. Consider drip irrigation systems for efficiency, reducing water usage by 50% compared to overhead sprinklers. During hot summer months, plants may need daily checks, while in cooler periods, once or twice a week might suffice.
- Pruning: Regular pruning with clean, sharp bypass pruners encourages bushier growth, better air circulation, and more flowers/fruit. Prune deciduous shrubs when dormant in late winter/early spring, and evergreens in early spring. Deadhead regularly to divert energy from seed production back into flowering.
- Soil Health: Healthy soil is the foundation of a healthy garden. Annually amend your garden beds with 2-3 inches of organic compost. This improves soil structure, enhances drainage, and provides a slow-release of nutrients. Studies show that a 1% increase in soil organic matter can lead to an additional 20,000 gallons of water held per acre of soil. Regularly check soil for compaction and loosen gently with your weeding fork or hori hori as needed. For more in-depth soil information, the USDA Forest Service offers comprehensive resources on soil health.
- Fertilization Schedule: Determine your plants' nutritional needs. Leafy greens benefit from nitrogen-rich fertilizers, while fruiting plants need more phosphorus and potassium. A good rule of thumb is to fertilize during active growth periods (spring and early summer). Always follow package instructions to avoid over-fertilization, which can burn roots and lead to nutrient runoff. A balanced slow-release fertilizer every 2-3 months is often sufficient for most established garden beds.
Eco-Friendly Alternatives
Adopting eco-friendly practices in your gardening not only benefits the environment but often leads to healthier, more resilient plants.
- Recycled Materials: Instead of buying new, consider upcycling for your garden. Old tires can become raised beds, plastic bottles can be repurposed as self-watering devices for seedlings, and broken concrete can form attractive, permeable pathways. Even old wooden pallets can be dismantled to create vertical planters.
- Organic Inputs: Ditch synthetic chemical fertilizers and pesticides. Embrace composting your kitchen and yard waste to create nutrient-rich soil amendments. Choose organic pest control methods like introducing beneficial insects (ladybugs, lacewings) or using neem oil. For sustainable agriculture practices, the SARE (Sustainable Agriculture Research & Education) program provides valuable research and resources.
- Low-Water Options: Select drought-tolerant native plants suitable for your region. Implement rainwater harvesting systems, such as rain barrels, to collect water for irrigation, significantly reducing municipal water usage. Strategic mulching (as mentioned above) also plays a vital role in water conservation, reducing evaporation from the soil surface by up to 50%.
- Tool Longevity: Invest in high-quality, durable garden tools that will last for years, reducing waste from frequent replacements. Maintain them properly (cleaning, sharpening) to extend their lifespan.
Design & Styling Ideas
A well-designed garden is a joy to behold. Here are some creative, visual tips to enhance your outdoor space:
- Create Zones: Divide your garden into functional zones – a seating area, a dedicated vegetable patch, a vibrant flower bed. Use low hedges, stepping stones, or even a change in plant height to delineate these areas subtly.
- Vertical Gardening: Maximize space and add visual interest with vertical planters. Think trellises for climbing roses or cucumbers, wall-mounted herb gardens, or tiered planters for succulents. This technique works wonders for small gardens, providing both beauty and bounty. Consider exploring ideas for a vertical garden.
- Color Palettes: Choose a cohesive color scheme for your flowering plants. A monochromatic scheme (e.g., all shades of blue and purple) can create a serene, sophisticated look, while a complementary scheme (e.g., oranges and blues) adds dynamic energy.
- Focal Points: Introduce a striking element to draw the eye, such as a garden sculpture, a unique specimen plant, a beautifully crafted bird bath, or even a well-placed bench.
- Texture Play: Mix different plant textures for visual depth. Pair fine-leaved grasses with broad-leaved hostas, or the delicate fronds of ferns with the sturdy architecture of sedum. This adds richness even in monochrome plantings.
- Lighting: Don't forget your garden after dark. Strategically placed solar lights can highlight pathways, illuminate focal points, and create a magical ambiance for evening enjoyment. For creative landscape lighting, see our guide on moonlit autumn garden lighting.
Common Mistakes to Avoid
Even experienced gardeners can fall prey to common pitfalls. Being aware of these can save you time, effort, and plant health.
- Overwatering/Underwatering: The classic mistake! Symptoms of both can look similar (wilting). The best way to prevent this is by checking soil moisture before watering. Stick your finger 2-3 inches into the soil; if it feels dry, water. Evidence suggests that overwatering is responsible for up to 80% of houseplant deaths (and a significant portion of garden plant issues) due to root rot.
- Incorrect Plant Placement: Putting sun-loving plants in shade or vice-versa, or planting something that grows into a massive tree directly under a power line. Always research a plant's mature size and light/soil requirements before planting. Misplaced plants lead to suboptimal growth, stress, and eventually, plant failure.
- Ignoring Soil Health: Treating soil as just a medium to hold plants, rather than a living ecosystem. Poor soil leads to weak plants susceptible to pests and diseases. Regular soil amendments with compost, and avoiding excessive tilling, are critical. Soil organic matter is the foundation of healthy soil structure and nutrient availability.
- Using Dull Garden Tools: Attempting to cut with dull pruners or rusty shovels. Dull tools tear plant tissue, creating entry points for disease, and make gardening much harder. A regularly sharpened blade makes clean cuts and prevents damage. A study by UC IPM confirms that clean, sharp cuts promote faster healing and reduce disease incidence in pruned plants.
- Over-fertilizing: More isn't always better. Excess fertilizer can burn roots, cause lush foliage but no flowers/fruit, and contribute to nutrient runoff into waterways. Perform soil tests and follow recommended dosages.
- Planting Invasive Species: Introducing non-native plants that aggressively outcompete native flora, disrupt local ecosystems, and can be nearly impossible to remove. Always confirm a plant's invasiveness for your specific locale before purchasing.
Storage & Seasonal Tips
Proper care for your garden tools and plants throughout the year ensures their longevity and your success.
- Tool Storage: After each use, clean your garden tools thoroughly. Remove all soil and debris with a stiff brush or cloth. Dry them completely, then apply a thin layer of oil (linseed oil or mineral oil works well) to metal parts to prevent rust. Store them in a dry, organized space like a tool shed, garage, or even a labeled bucket. Hang larger tools to save space and protect blades. Good storage can extend the life of your tools by several years, making your investment worthwhile.
- Winterizing Your Garden: Before the first hard frost, prepare your garden for winter.
- Perennials: Cut back dead foliage (but leave some for wildlife shelter and winter interest). Apply a layer of mulch for insulation if your region experiences harsh winters.
- Annuals: Remove spent annuals to prevent disease buildup.
- Watering Systems: Drain irrigation lines and outdoor hoses to prevent freezing and bursting.
- Pots: Bring frost-sensitive potted plants indoors or move them to a sheltered location. Empty and clean terra cotta pots to prevent cracking in freezing temperatures.
- Spring Preparation: As temperatures rise, the garden awakens.
- Soil Amendment: Top-dress beds with fresh compost.
- Pruning: Do any major dormant pruning on trees and shrubs.
- Tool Maintenance: Sharpen and oil all your garden tools for the coming season.
- Seed Starting: Begin planning and starting seeds indoors for early planting.
- Summer & Autumn Transitions:
- Summer: Focus on consistent watering, pest management, and harvesting. Keep an eye on nutrient levels for heavy feeders.
- Autumn: This is an excellent time for planting fall-friendly crops, dividing perennials, and cleaning up spent plants. Consider what kind of autumn foliage your garden might enjoy.
Conclusion
Mastering the art of gardening hinges significantly on the precision and quality of your garden tools. From detailed planting with a trusty dibber to meticulous pruning with sharp bypass shears, each specialized implement facilitates a level of care that transforms your efforts into tangible results. By making informed choices about your equipment and integrating eco-conscious practices, you're not just maintaining a garden; you're cultivating a thriving, sustainable ecosystem. Embrace the satisfaction that comes with well-executed gardening, knowing that every clean cut, precise seed placement, and thoughtful amendment contributes to the beauty and bounty around you.
Ready to elevate your gardening game? Invest in high-quality garden tools and embark on your next project with confidence and precision. Happy gardening!
FAQ
Q1: How often should I sharpen my bypass pruners?
A1: Sharpen your bypass pruners at least once per season, or more frequently if you notice cuts becoming ragged or if you're working with tougher woody stems. Clean them after every use to prevent sap buildup.
Q2: What's the most important garden tool for a beginner?
A2: A good quality, comfortable hand trowel and a pair of sharp bypass pruners are indispensable for beginners. They cover the most fundamental tasks: digging, planting, and basic maintenance.
Q3: Can I use household tools for gardening instead of specialized garden tools?
A3: While some household items might work in a pinch (e.g., a kitchen knife for cutting string), specialized garden tools are designed for durability, ergonomics, and effectiveness in soil and plant material, making them safer and more efficient.
Q4: How do I know what type of soil I have?
A4: The "jar test" can give you a rough idea: take a soil sample, put it in a jar with water, shake it, and let it settle. The layers (sand, silt, clay) will become visible. For precise data, a professional soil test kit is best.
Q5: What's the benefit of organic mulch over inorganic?
A5: Organic mulches (wood chips, straw, compost) decompose over time, enriching the soil with nutrients and improving its structure, while inorganic mulches (rubber, rock) primarily suppress weeds and retain moisture without adding soil benefits.
Q6: Are expensive garden tools always better?
A6: Not always, but typically you get what you pay for in terms of material quality, ergonomic design, and durability. Mid-range tools from reputable brands often offer the best value, combining performance with longevity.
Q7: How can I make my garden more attractive to pollinators?
A7: Plant a diverse range of native flowering plants that provide nectar and pollen throughout the growing season. Ensure a variety of flower shapes and colors. You can learn more from the RHS Plants for Pollinators initiative.
For more gardening inspiration and practical advice, explore these articles:
If you are looking to integrate the latest technology into your outdoor space, our guide on Smart Tech Garden Hacks provides innovative solutions to streamline your gardening tasks.
To bring privacy and natural beauty to your backyard, delve into ideas for creating a stunning Living Fence.
Discover how to cultivate vibrant landscapes suitable for autumn with our tips on Fire-Safe Autumn Planting Ideas to enhance both safety and aesthetics.
For those who enjoy harvesting from their own yard, our post on Edible Landscaping with Fall Crops offers excellent suggestions for growing delicious produce.
Transform your garden into a serene and restorative space by checking out our comprehensive guide on Autumn Wellness Garden Tips.


