
The Ultimate Guide: 7 Best Green Manures for Superior Soil Health
Are you looking to revolutionize your garden’s fertility, reduce your reliance on synthetic fertilizers, and cultivate thriving, resilient plants? Dive into the world of green manures cover crops soil health – a time-tested, eco-friendly method that nature herself endorses. By integrating these incredible plants into your gardening rotation, you’re not just growing crops; you’re actively regenerating the very foundation of your garden: its soil.
Unlike traditional fertilizers that offer a quick fix, green manures work holistically, improving soil structure, suppressing weeds, preventing erosion, and, crucially, adding vital organic matter and nutrients. This comprehensive guide will equip you with everything you need to know about harnessing the power of cover crops to achieve unparalleled soil health and vibrant garden yields. Prepare to transform your gardening practices and witness the magic of living soil firsthand.
[lwptoc]
Why Green Manures Matter Immensely for Your Garden
The concept of green manuring is deceptively simple yet profoundly impactful. At its core, it involves growing specific plants not for harvest, but for the invaluable benefits they provide to the soil when tilled in or left to decompose. This practice is a cornerstone of sustainable agriculture and organic gardening, offering a powerful alternative to chemical-intensive methods.
One of the primary reasons green manures are indispensable is their ability to significantly enhance soil structure. Their extensive root systems break up compacted soil, creating channels for air, water, and beneficial microorganisms to penetrate deeper. This improved aeration and drainage prevent waterlogging and encourage robust root development in subsequent crops, leading to healthier, more productive plants.
Furthermore, green manures are natural nutrient recyclers and creators. Leguminous cover crops, such as clover and vetch, form symbiotic relationships with nitrogen-fixing bacteria in their root nodules. These bacteria miraculously convert atmospheric nitrogen into a form usable by plants, effectively enriching your soil with a slow-release, organic nitrogen source. This reduces the need for synthetic nitrogen fertilizers, saving you money and protecting the environment from runoff pollution.
Beyond nutrient enhancement, green manures act as living mulches, suppressing weed growth by outcompeting them for resources and sunlight. This significantly cuts down on weeding chores, freeing up your valuable gardening time. Their dense canopy also protects the soil surface from the erosive forces of wind and rain, particularly during fallow periods, preventing topsoil loss and preserving valuable organic matter.
The decomposition of green manures after they are incorporated into the soil adds a wealth of organic matter. This organic matter is the lifeblood of healthy soil, improving its water-holding capacity, buffering against pH fluctuations, and providing a continuous food source for the vast array of soil microbes that drive nutrient cycling. A thriving microbial community is essential for a truly fertile and resilient garden ecosystem.
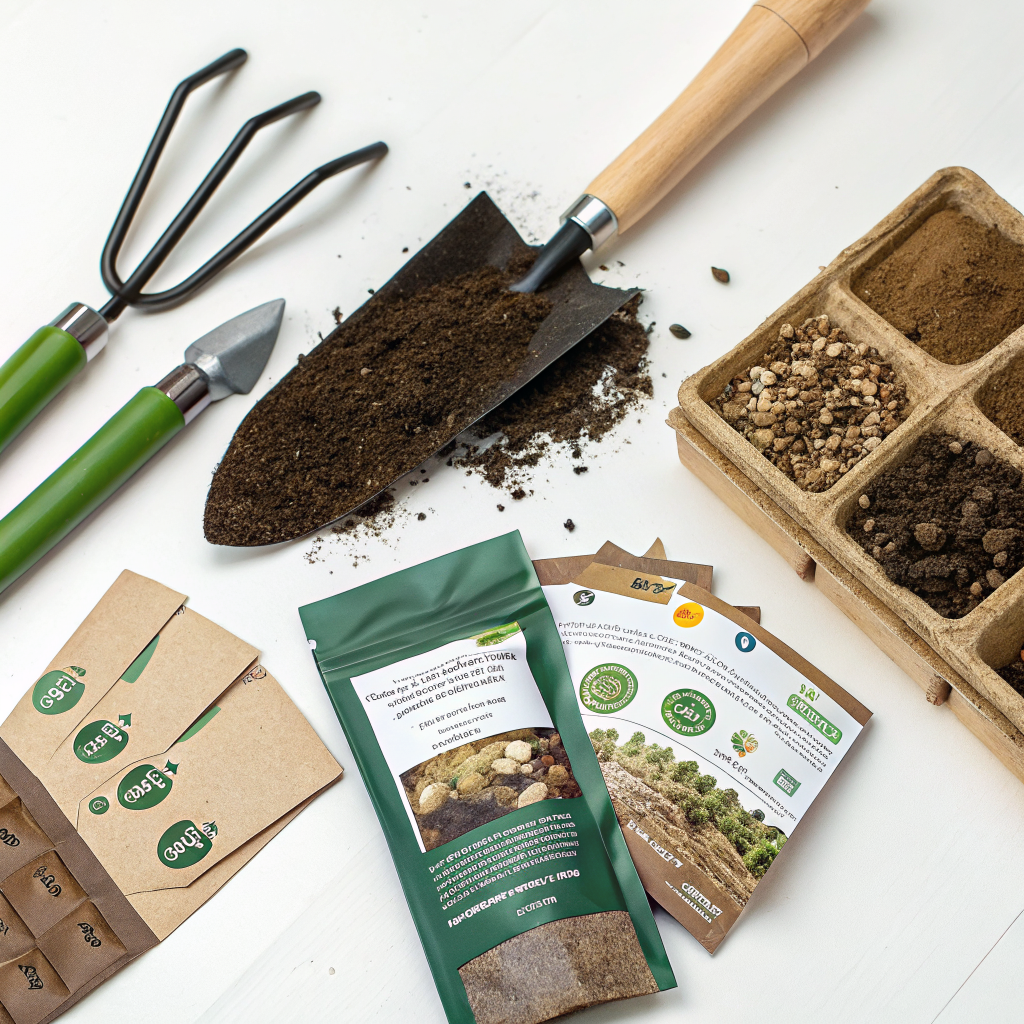
What You Need: Tools, Materials, and the Right Plants
Embarking on your green manuring journey is surprisingly straightforward, requiring minimal specialized equipment. The most crucial “material” is a well-chosen seed, suited to your climate, soil type, and gardening goals. Understanding what you need ensures a smooth and successful implementation of cover cropping.
Essential Tools:
- Spade or Fork: For incorporating the green manure into the soil if you choose to dig it in manually. A broadfork can also be an excellent tool for loosening soil without complete inversion.
- Hoe or Rake: To prepare the seedbed, lightly cover seeds, and manage any straggling weeds before planting.
- Hand Spreader (Optional): Useful for broadcasting seeds evenly over larger areas, though hand-broadcasting is perfectly effective for most garden sizes.
- Mower, Scythe, or Shears: To cut down the green manure before it sets seed, making it easier to incorporate or to allow it to decompose as a mulch.
- Watering Can or Hose: For initial watering to ensure good seed-to-soil contact and germination, especially in dry conditions.
Materials:
- High-Quality Green Manure Seeds: This is your most important purchase. Select seeds from reputable suppliers to ensure viability and purity. Consider organic or non-GMO options where possible.
- Compost or Well-Rotted Manure (Optional): A thin layer can be added to very poor soils before seeding green manure to give them a boost, especially if you’re trying to rapidly build organic matter.
The Right Plants: Choosing Your Green Manures
Selecting the appropriate green manure is vital for success. Different plants offer distinct benefits and thrive in different conditions. Here are some of the best categories and specific examples:
Legumes (Nitrogen Fixers):
These are stars for nitrogen enrichment. They form nodules on their roots that host nitrogen-fixing bacteria.
- Clover (Red, White, Crimson): Excellent for long-term coverages, particularly white clover. Red and crimson clover are great for overwintering and produce significant biomass. They improve soil structure and attract pollinators.
- Vetch (Hairy Vetch, Common Vetch): Very hardy, especially hairy vetch, which can overwinter in cold climates. Produces abundant biomass and fixes large amounts of nitrogen. Often grown with a cereal grain like rye for support.
- Fava Beans (Broad Beans): A good cool-season legume that adds substantial organic matter and nitrogen. The beans can also be harvested if desired before incorporation.
- Alfalfa: A deep-rooted perennial that excels at breaking up compacted soil and mining nutrients from deeper layers. Best for long-term soil improvement.
Grasses/Cereals (Biomass Builders & Erosion Control):
These grow quickly, produce a lot of organic matter, and have fibrous root systems that excel at preventing erosion and improving soil structure.
- Rye (Winter Rye): Extremely hardy, grows well in cool weather, and provides excellent erosion control. Produces a lot of biomass. Can be allelopathic, meaning it can suppress weeds but also temporarily inhibit the growth of some subsequent crops, so cut early.
- Oats: A fast-growing, cool-season annual. Less hardy than rye but produces good biomass and is easier to incorporate. Dies back in hard freezes, leaving soil protected.
- Buckwheat: A fantastic warm-season annual. Grows very quickly (can be ready to incorporate in 6-8 weeks) and helps suppress weeds. It’s excellent for attracting beneficial insects with its flowers.
- Wheat/Barley: Similar to rye and oats, offering good biomass and erosion control, often used as fall-sown cover crops.
Brassicas/Mustards (Biofumigants & Deep Taproots):
Some brassicas release compounds that can suppress soil-borne diseases and pests (biofumigation). They also have deep taproots that break up compaction.
- Mustard (e.g., Oriental Mustard, Yellow Mustard): Fast-growing and effective at suppressing nematodes and other soil pathogens through biofumigation properties. Needs to be chopped and incorporated quickly.
- Radishes (Oilseed Radish, Daikon Radish): Develop deep, thick taproots that powerfully break up compacted soil, creating pathways for air and water. Decomposes quickly when winter kills, leaving behind valuable organic matter.
Often, the best approach is to use a mix of green manures – for example, a legume with a cereal grain – to combine their benefits and create a more robust cover. Consider your climate, planting time, and the needs of your subsequent cash crop when making your selections. For more detailed information on specific plant varieties that thrive in different regions, consult resources like extension.umn.edu.
Step-by-Step Guide: Cultivating Your Soil with Green Manures
Implementing green manures into your garden rotation is a rewarding process that yields long-term benefits. Follow these steps to successfully integrate cover crops and boost your green manures cover crops soil health efforts.
Step 1: Planning and Site Preparation
Before you even sow a single seed, a little planning goes a long way. Assess your garden’s needs: Are you primarily aiming for nitrogen enrichment, weed suppression, or breaking up compaction? Choose your green manure species or a mix based on these goals, your climate, and the time of year you plan to plant. Clear the area of any existing weeds. Loosen the top inch or two of soil with a rake or hoe to create a fine, crumbly seedbed suitable for germination. You don’t need to deep till unless the area is severely compacted.
Step 2: Sowing the Seeds
Refer to your seed packet for specific sowing rates, as they vary greatly between species. Generally, green manure seeds are broadcast liberally over the prepared soil surface. For small areas, you can simply scatter them by hand. For larger beds, a hand-held seed spreader can ensure more even distribution. After broadcasting, lightly rake the seeds into the soil, aiming for a depth of about 1/4 to 1/2 inch. The goal is good seed-to-soil contact without burying them too deeply. Water the area thoroughly immediately after sowing to initiate germination.
Step 3: Nurturing Your Cover Crop
Once sown, green manures are relatively low-maintenance. Keep the soil consistently moist until germination occurs, which usually takes 7-14 days depending on the species and temperature. After that, most green manures are quite resilient and may only need watering during extended dry spells, especially during establishment. Monitor growth and ensure your cover crop is thriving. The main goal here is to allow the plants to establish a robust root system and produce significant above-ground biomass, without letting them go to seed.
Step 4: Terminating the Green Manure
This is a critical step, as timing is everything. Most green manures should be cut down or “terminated” before they set seed. Allowing them to go to seed can make them a weed problem in subsequent seasons. The ideal time is when they are actively growing and have produced a good amount of green leafy material, usually when about 50% of the plants begin to flower. You can use a mower, scythe, weed trimmer, or even garden shears for smaller patches. Cut the plants as close to the ground as possible. For perennial cover crops like clover or alfalfa, you might mow them several times throughout the growing season.
Step 5: Incorporating or Leaving as Mulch
After cutting, you have a few options for how to manage the plant material:
- Tilling In/Digging In: This is the traditional method. Chop the plant material into smaller pieces and then dig it into the top 6-12 inches of soil using a spade or tiller. This directly incorporates the organic matter and nutrients into the root zone. Allow at least 2-4 weeks after incorporation before planting your next crop to allow for initial decomposition and to avoid inhibiting the growth of young seedlings, especially if you used a large amount of green material.
- Chop and Drop (No-Till/Mulch): For no-till gardeners, simply leave the chopped green manure on the soil surface as a mulch. This protects the soil, conserves moisture, and slowly releases nutrients as it decomposes. You can then plant directly into this mulch by creating small pockets, or gently rake it aside. This method is excellent for continuous soil improvement and reducing soil disturbance.
- Composting: If you have an abundance of green manure and your compost piles can handle the volume, you can add the chopped material to your compost. This rapidly increases the organic matter content of your compost, which you can then return to the garden later.
Choose the method that best aligns with your gardening philosophy and time constraints. Regardless of the method, the benefits to your soil will be immense. Continuing this cycle will create a truly vibrant and fertile garden ecosystem, maximizing your green manures cover crops soil health.
Pro Tips and Common Mistakes to Avoid
While green manuring is relatively forgiving, a few expert tips can elevate your success, and being aware of common pitfalls can save you frustration. Mastering these nuances will ensure your green manures cover crops soil health efforts yield maximum returns.
Pro Tips for Green Manure Success:
- Mix it Up: Don’t stick to just one type. A blend of a legume (for nitrogen) and a cereal (for biomass and root structure) often provides the most comprehensive benefits. For example, hairy vetch paired with winter rye is a classic and powerful combination.
- Know Your Season: Different green manures thrive in different seasons. Winter rye and hairy vetch are excellent for overwintering, protecting soil through the cold months. Buckwheat and oats are fast-growing warm-season options perfect for short fallow periods.
- Timely Termination is Key: This cannot be stressed enough. Cut your green manure before it sets seed. If you wait too long, the plants become woody, decompose slower, and may become weedy. The ideal time is usually when they start to flower, indicating peak nutrient accumulation and tender plant tissue.
- Chop, Chop, Chop: When incorporating, the smaller the pieces of green manure, the faster they will decompose and release nutrients. Use a mower with a mulching blade or a sharp spade to chop the material finely before digging it in or leaving it as mulch.
- Allow for Decomposition Time: After incorporating green manure, it’s wise to wait 2-4 weeks before planting your next crop. This allows the initial decomposition process to complete, which can temporarily tie up nitrogen in the soil (nitrogen immobilization), and prevents allelopathic effects from certain cover crops (like rye) from harming young seedlings.
- Observe Your Soil: Pay attention to how your soil responds. Is it looser? Does it drain better? Are earthworms more plentiful? These are all signs of improving soil health. Adjust your green manure choices based on your observations.
- Utilize No-Till Methods: For minimal soil disturbance, consider the “chop and drop” method. Simply cut the green manure and leave it on the surface as mulch. Plant directly into the residue. This preserves soil structure and fosters a thriving soil food web.
Common Mistakes to Avoid:
- Planting Too Late/Too Early: Sowing green manure outside its ideal planting window can lead to poor establishment and less biomass production. Always check recommended planting times for your chosen species.
- Letting it Go to Seed: As mentioned, this is a major no-no. What was intended as soil enrichment can quickly become a persistent weed problem in your garden.
- Not Enough Biomass: If you terminate your green manure too early, before it has produced significant vegetative growth, you’ll miss out on a lot of the organic matter and nutrient benefits. Give it time to grow!
- Burying Too Deeply: When incorporating, don’t bury the green manure too deep. Most beneficial decomposition occurs in the upper layers of the soil where oxygen levels are higher. Aim for the top 6-12 inches.
- Planting Immediately After Incorporation: This can lead to issues with nitrogen tie-up and allelopathy. Always give the soil some time to process the newly added organic matter before introducing sensitive cash crops.
- Ignoring Soil pH: While many green manures are tolerant, extreme soil pH can hinder their growth and effectiveness, particularly for legumes and their nitrogen-fixing capabilities. Conduct a soil test to understand your baseline and amend if necessary.
- Using the Wrong Species for Your Climate: Attempting to grow a warm-season cover crop through a harsh winter, or vice-versa, will result in failure. Always choose species suited to your local climate zone.
By keeping these tips in mind and avoiding common missteps, you’ll consistently build incredibly fertile soil, enhancing your garden’s productivity and resilience for years to come. This commitment to healthy soil is the ultimate investment in your gardening future and a testament to truly sustainable practices. For more detailed insights into specific plant issues or regional challenges, check out resources like gardeningknowhow.com.
Eco-Friendly Variations for the Conscious Gardener
Beyond the standard practices, there are several eco-conscious approaches and variations to integrating green manures that align even more closely with sustainable gardening principles. These methods prioritize biodiversity, minimize disturbance, and maximize the long-term health of your garden ecosystem, truly embracing the spirit of green manures cover crops soil health.
- No-Till/Chop and Drop: This is arguably the most eco-friendly approach. Instead of digging or tilling in your green manure, simply cut it down at the base and leave the plant material as a thick mulch on the soil surface. This method has numerous benefits:
- Preserves Soil Structure: No tilling means soil aggregates remain intact, fostering better aeration, drainage, and water retention.
- Protects Soil Life: The vast network of fungi, bacteria, and other microorganisms in the soil is undisturbed, allowing them to flourish and continue their vital work of nutrient cycling.
- Reduces Erosion: The organic matter acts as a physical barrier against wind and rain.
- Continuous Organic Matter: As the mulch slowly breaks down, it constantly feeds the soil and adds humus, building long-term fertility.
- Less Labor: Eliminates the strenuous task of digging or tilling.
You can plant directly into pockets created in the mulch or gently move it aside to sow seeds.
- Undersowing and Living Mulches: This involves planting green manures alongside your main cash crops, rather than in rotation. For example, sowing white clover beneath tall-growing vegetables like corn or tomatoes.
- Benefits: Provides continuous weed suppression, reduces moisture evaporation, attracts beneficial insects, and provides a continuous slow release of nitrogen from the legumes.
- Considerations: Choose non-competitive species that won’t outcompete your cash crop for water or nutrients. Timing is crucial to establish the cover crop after the main crop is established but before it shades out the green manure too much.
- Biofumigant Crops: Certain brassicas like mustard, oilseed radish, or rapeseed can act as natural pesticides and fungicides. When chopped and quickly incorporated into the soil, they release compounds (isothiocyanates) that can suppress nematodes, weeds, and soilborne diseases.
- Benefits: A natural alternative to chemical fumigants, great for disease and pest management, and adds organic matter.
- Considerations: Requires rapid incorporation to be effective, and timing is crucial. Not all varieties are equally effective; research specific biofumigant varieties.
- Insectary and Pollinator Mixes: While all flowering green manures attract some pollinators, you can specifically choose mixes that are rich in flowers known to attract a wide range of beneficial insects (e.g., buckwheat, phacelia, crimson clover).
- Benefits: Enhances biodiversity, provides habitat and food for pollinators and predatory insects that control garden pests, and contributes to soil health.
- Considerations: Ensure these are terminated before they become woody or outcompete subsequent crops, unless you’re dedicating a space purely for beneficial insect habitat.
- Cover Cropping in Containers/Raised Beds: Don’t limit green manures to in-ground gardens. Small-scale plantings like white clover or annual rye can be grown in large containers or raised beds during dormant periods.
- Benefits: Prevents soil compaction in pots, adds organic matter, and provides nutrients to a confined soil space.
- Considerations: Choose smaller, less aggressive varieties. Ensure adequate drainage.
By exploring these eco-friendly variations, gardeners can move beyond simply adding nutrients and contribute to a more resilient, biodiverse, and truly sustainable garden ecosystem. These methods embody a deep respect for natural processes and amplify the inherent benefits of green manure cover crops for holistic soil health.
Seasonal Considerations for Maximizing Green Manure Benefits
The time of year you plant and terminate your green manures significantly impacts their effectiveness and suitability for your garden. Understanding seasonal dynamics is key to harnessing the full potential of green manures cover crops soil health.
Spring Plantings (March – May):
- Goal: Prepare soil for warm-season crops, add quick organic matter and nitrogen, suppress early weeds.
- Options:
- Peas (Field Peas): Fast-growing legume, good nitrogen fixer, can be incorporated in 6-8 weeks.
- Oats: Quick biomass, good weed suppression, winter-kills in most regions.
- Buckwheat: Extremely fast-growing (ready in 4-6 weeks), excellent for short windows between spring and summer crops, attracts pollinators.
- Crimson Clover: Beautiful, good nitrogen fixer, but can be slow to establish in cooler early spring.
- Timing: Plant as soon as the soil is workable. Terminate 3-4 weeks before planting your main summer crops.
Summer Plantings (June – August):
- Goal: Protect fallow beds from erosion, suppress weeds during summer, add fertility for fall planting or overwintering. Can be used in “relay cropping” after an early crop.
- Options:
- Buckwheat: The super-star of summer, quick turns, great for a mid-season break.
- Soybeans/Cowpeas: Legumes that thrive in heat, excellent nitrogen fixers, produce significant biomass.
- Sudangrass/Sorghum-Sudangrass Hybrids: Produce massive amounts of biomass rapidly, great for breaking up compaction. Can be allelopathic.
- Sunflower (as a cover crop): Deep-rooted, great for breaking compaction, provides huge biomass.
- Timing: Plant after spring crops are harvested, terminate before fall planting or allow to grow until frost/dieback.
Fall Plantings (September – November):
- Goal: Protect soil over winter, scavenge residual nutrients, add nitrogen, improve soil structure for spring, suppress spring weeds.
- Options:
- Winter Rye: The king of winter cover crops. Extremely hardy, prevents erosion, scavenges nitrogen, produces huge spring biomass.
- Hairy Vetch: Excellent nitrogen fixer, very cold hardy, often planted with winter rye for a synergistic effect.
- Winter Wheat/Barley: Similar to rye, good cold hardiness and biomass.
- Crimson Clover: Can overwinter in milder climates, beautiful blooms in spring, nitrogen fixer.
- Oilseed Radish/Daikon Radish: Deep taproots break compaction. Winter kills in most cold regions, leaving behind channels for spring roots.
- Timing: Plant before the first hard frost, ideally 4-6 weeks before to ensure good establishment. For winter-killing varieties like oats or oilseed radish, a later planting is acceptable as you want them to die and leave residue.
Winter Management (December – February):
- Goal: Protection and decomposition.
- Options:
- Overwintering Crops (Rye, Hairy Vetch): These will continue to grow slowly or go dormant and then vigorously resume growth in early spring.
- Winter-Killed Crops (Oats, Radish, Buckwheat): These will die back with hard freezes, leaving a protective mulch layer on the soil surface. This is particularly beneficial for easy spring planting, as no cutting or incorporation is needed.
- Timing: For overwintering crops, terminate in early spring (March-April) before they get too tall and woody, and well before spring planting.
By strategically choosing and timing your green manures, you can ensure continuous soil improvement throughout the entire year, optimizing your garden’s health and productivity. Every season presents a unique opportunity to build better soil with these invaluable allies. Regular assessment of your specific microclimate and soil conditions will further refine your seasonal green manure choices, leading to unparalleled green manures cover crops soil health.
Expert Resources for Deeper Learning
To further empower your journey into green manuring and enhance your understanding of sustainable gardening practices, we highly recommend consulting these reputable external resources. They offer scientific insights, practical advice, and region-specific guidance to deepen your expertise in green manures cover crops soil health.
- Gardening Know How: What Is Green Manure?
This article provides an excellent introduction to green manures, explaining their benefits and common types in an accessible manner for home gardeners. It’s a great starting point for understanding the fundamentals. They offer practical advice on choosing and integrating cover crops into various garden settings. - Royal Horticultural Society (RHS): Green Manures
The RHS offers a detailed guide specifically tailored for UK gardeners, but its principles are universally applicable. It covers different types of green manures, their benefits, and how to sow and manage them in various garden situations. Their detailed charts on sowing and digging in times are particularly useful. - University of Minnesota Extension: Cover Crops
University extension services are invaluable resources, providing research-backed information adapted for specific regional climates and soil types. The University of Minnesota Extension’s guide on cover crops offers in-depth scientific explanations, practical recommendations for different cover crop species, and advice on management for various agricultural and horticultural contexts.
Additionally, do explore these internal links to further broaden your gardening knowledge regarding sustainable practices and living soil:
- The Art of Composting: Transforming Waste into Garden Gold – Learn how to create your own nutrient-rich compost, complementing your green manure efforts for holistic soil fertility.
- Ultimate Guide to Worm Farming for Richer Garden Soil – Discover the wonders of vermicomposting and how earthworms can supercharge your soil’s health and structure.
- Build a Self-Watering Garden Bed – Explore innovative ways to manage water efficiently in your garden, a crucial aspect of overall plant and soil health.
By leveraging these expert insights, you’ll be well-equipped to make informed decisions and successfully integrate green manures into your gardening practices, fostering a truly thriving and sustainable garden ecosystem. Continuous learning is a hallmark of a truly successful gardener!
Conclusion: A Living Legacy for Your Garden
Embracing green manures is more than just a gardening technique; it’s a philosophy—a commitment to nurturing the very ecosystem that sustains your plants. By intentionally cultivating and incorporating these remarkable cover crops, you are actively participating in a regenerative cycle that builds a living, breathing, and incredibly fertile soil. This dedication to green manures cover crops soil health transforms your garden from a mere plot of land into a thriving, self-sustaining organism.
The benefits are manifold and long-lasting: reduced reliance on chemical inputs, enhanced soil structure, improved water retention, natural weed suppression, increased biodiversity, and robust, healthy plants that are more resistant to pests and diseases. Each season you sow a green manure, you are depositing organic matter and life into your soil, creating a legacy of fertility for future growing seasons. It’s an investment that pays dividends in vibrant harvests, flourishing flora, and a deep sense of connection to the natural world.
Whether you’re a seasoned gardener or just starting out, the simple act of integrating green manures will undoubtedly elevate your gardening experience. Start small, observe, and adapt. You’ll soon discover the profound satisfaction that comes from working with nature, rather than against it, to create a garden that is not only productive but also ecologically sound. Let your soil be your greatest asset, and watch as your garden flourishes beyond your wildest expectations, all thanks to the humble yet mighty green manure.
Frequently Asked Questions About Green Manures and Soil Health
<p><strong>Q1: How long does green manure take to decompose after being tilled in?</strong><br>
A1: Typically, green manure takes about 2-4 weeks to decompose sufficiently after being tilled in before you plant your next crop. This allows the fresh organic matter to begin breaking down and prevents issues like nitrogen tie-up or allelopathy from affecting young seedlings. The decomposition rate depends on the type of green manure (e.g., tender legumes decompose faster than woody rye stems), soil moisture, and temperature. Chopping the material finely before incorporation can speed up this process.</p>

<p><strong>Q2: Can I just leave green manure on the surface without tilling it in?</strong><br>
A2: Absolutely! This method, known as "chop and drop" or no-till cover cropping, is highly recommended for building soil health and is eco-friendly. By leaving the chopped green manure on the surface, it acts as a living mulch, suppressing weeds, conserving moisture, and slowly releasing nutrients as it decomposes. This method also preserves the soil's structure and protects the beneficial soil food web from disturbance. You can then plant directly into the residue by making small planting holes.</p>

<p><strong>Q3: Which green manure is best for clay soil?</strong><br>
A3: For heavy clay soils, you'll want green manures with strong, deep root systems that can penetrate and break up compaction, improving aeration and drainage. Good choices include deeply rooted legumes like <strong>Alfalfa</strong> or <strong>Hairy Vetch</strong>, and especially <strong>Oilseed Radishes</strong> or <strong>Daikon Radishes</strong>. These radishes develop thick taproots that powerfully disrupt compacted layers, leaving behind valuable channels when they decompose. Cereal grains like <strong>Winter Rye</strong> also produce extensive fibrous root systems that can help open up clay soil.</p>

<p><strong>Q4: Will green manure attract pests to my garden?</strong><br>
A4: Generally, green manures are more likely to attract beneficial insects (like pollinators and predatory insects) than pests, especially if you choose flowering varieties like buckwheat or crimson clover. However, there are some minor considerations:
<ul>
    <li>If allowed to go to seed, some green manures might become a weed problem, indirectly hosting pests. Always cut before seed set.</li>
    <li>Very dense, lush cover crops, especially if left un-terminated and allowed to become overgrown, could potentially provide temporary shelter for some pests. Proper management and timing of termination mitigate this risk.</li>
    <li>Certain brassica cover crops (like mustard) can act as biofumigants, actively deterring some soil-borne pests.</li>
</ul>
Overall, the benefits of green manures in promoting a healthy, balanced ecosystem that naturally deters pests far outweigh any minimal risks.</p>