The Ultimate Guide: 7 Steps to Build a Garden Potting Bench on a Budget (Under $40!)
Every gardener dreams of a dedicated space to nurture their green companions. A potting bench isn’t just a luxury; it’s a game-changer for efficiency, organization, and back-saving comfort. However, the price tag on pre-built units can often be a significant deterrent, making many aspiring plant parents put off this essential addition to their gardening arsenal. What if we told you that you could construct a sturdy, functional, and aesthetically pleasing garden potting bench for under $40, using readily available and often recycled materials?
This comprehensive guide will walk you through every step of creating your very own DIY potting station. We’ll focus on practical, budget-friendly solutions, ensuring that your journey to a more organized garden setup is both affordable and incredibly rewarding. Get ready to transform your gardening experience with a custom-built workspace that caters to your needs without breaking the bank. Let’s get building and discover how to build garden potting bench budget-style!
[lwptoc]
Why This Matters for Your Garden
A well-designed potting bench is more than just a surface; it’s the heart of your gardening operations, offering numerous benefits that extend beyond mere convenience. Firstly, it elevates your workspace, saving your back and knees from constant bending and kneeling on the ground. This ergonomic advantage alone can significantly increase your comfort and enjoyment, allowing you to spend more time happily tending to your plants.
Secondly, a dedicated bench brings unparalleled organization to your gardening tasks. No more scrambling for tools, bags of soil, or packets of seeds. With shelves, hooks, and a spacious worktop, everything you need is within arm’s reach, allowing for seamless transitions between tasks like potting, transplanting, and seed starting. This efficiency not only saves time but also reduces frustration, making your gardening sessions more pleasant and productive.
Furthermore, a potting bench helps contain the inevitable mess associated with working with soil and plant materials. Instead of scattering dirt all over your patio or garage floor, you can keep the mess centralized, making cleanup a breeze. Many designs even incorporate features like built-in bins or gravel trays to manage excess soil and water, further simplifying maintenance. It’s a foundational element for any serious or even casual gardener looking to elevate their practice.
What You Need: Tools & Materials (The Budget Breakdown)
The key to building a garden potting bench on a budget is intelligent material sourcing. We’ll primarily focus on using reclaimed lumber, repurposed pallets, or inexpensive common outdoor lumber. Remember, prices are estimates and can vary based on location and availability.
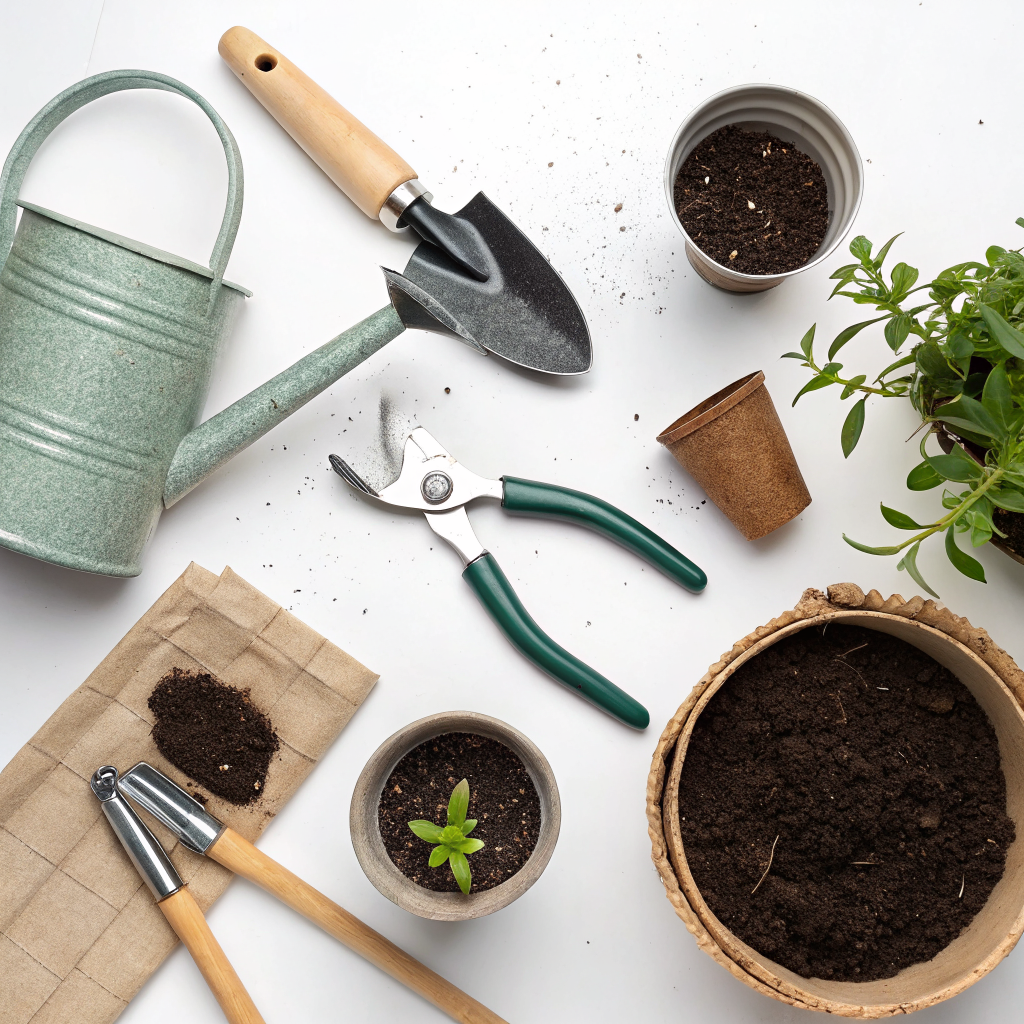
Essential Tools:
- Measuring Tape: For accurate cuts.
- Pencil: For marking measurements.
- Saw: A hand saw is fine for simple cuts, but a circular saw or miter saw will speed up the process and ensure straighter cuts.
- Drill/Driver: Essential for pre-drilling and driving screws.
- Wood Screws (Outdoor Rated): Various lengths (e.g., 2.5-inch for framing, 1.5-inch for surfaces). Look for galvanized or deck screws to prevent rust.
- Wood Glue (Optional but Recommended): Adds extra strength to joints.
- Sandpaper or Sander: To smooth rough edges and prevent splinters.
- Safety Glasses and Gloves: Always prioritize safety!
- Clamps (Optional): Helpful for holding pieces in place while assembling.
Budget-Friendly Materials (Aiming for Under $40 total):
Our primary strategy here is to leverage inexpensive and reclaimed wood. Look for sales, free sources, or cheap alternatives.
- Wood for Frame (Legs and Supports):
- Option 1 (Free/Cheapest): Reclaimed Pallets. You’ll need about 3-4 sturdy pallets. Disassembling them carefully yields excellent structural wood. Learn how to safely dismantle a pallet from our guide on recycling pallets for DIY projects.
- Option 2 (Low Cost): Common Pine/Fir Lumber. Look for 2x3s or 2x4s. You’ll need approximately:
- Four 8-foot 2x4s (for legs and main supports)
- Two 8-foot 2x3s or 2x4s (for shelf supports)
- Wood for Worktop and Shelves:
- Option 1 (Free/Cheapest): Reclaimed Pallet Slats. Use the wider planks from pallets, sanded well.
- Option 2 (Low Cost): Fence Pickets. Inexpensive and often available in bundles. You’ll need about 8-10 standard 6-foot dog-ear pickets.
- Option 3 (Slightly More Durable, Still Budget): Plywood Scraps or OSB. If you can find a half sheet of exterior grade plywood (1/2″ or 3/4″ thick) on sale or as a remnant, it makes an excellent work surface.
- Finishing Touches (Optional, but recommended for longevity):
- Exterior Paint or Stain/Sealer: Protects the wood from elements. Check out our recommendations for eco-friendly wood sealants.
- Hooks/Small Bins: For tool organization. Often found cheaply at dollar stores or salvaged.
- Small Caster Wheels (Optional): If you want a mobile bench, look for inexpensive ones on sale.
- Hardware Cloth/Mesh (Optional): For a custom sifting tray or shelf base.
Step-by-Step Guide: Building Your Potting Bench
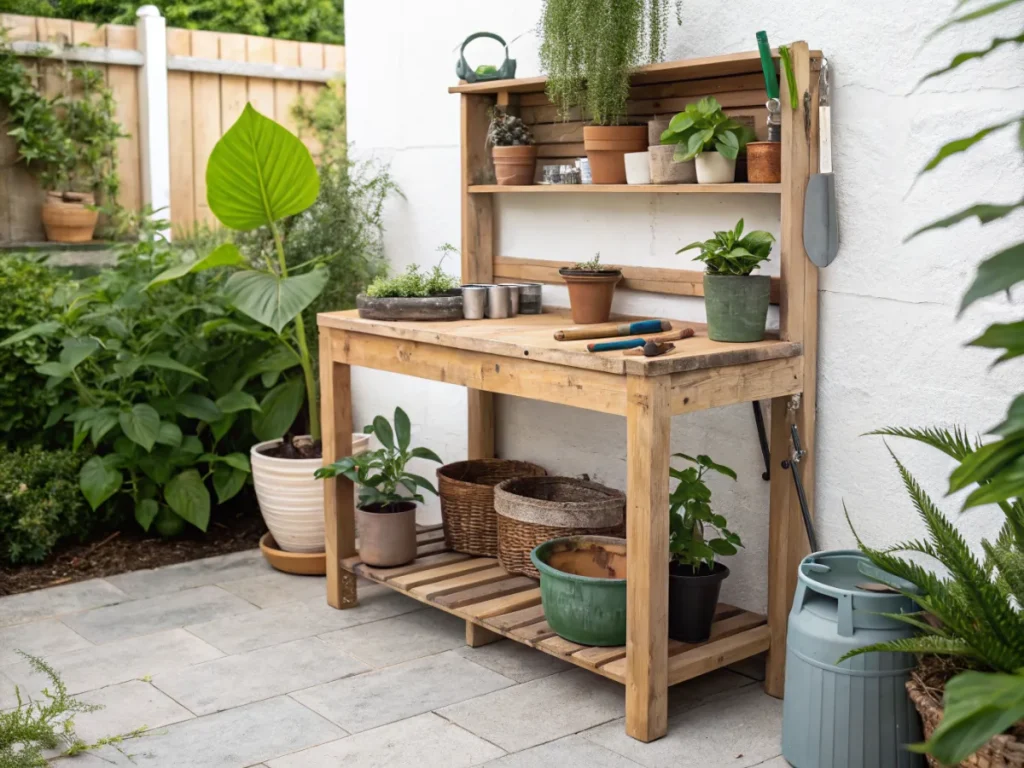
This guide assumes a basic potting bench design with a main work surface and a lower shelf. Adjust dimensions to suit your space and needs. Our example dimensions will be approximately 48 inches wide, 24 inches deep, and 36 inches high for the main work surface (a comfortable standing height for most people), plus an upper back shelf.
Step 1: Plan and Cut Your Lumber
Careful planning is crucial to minimize waste and ensure your bench fits your space. Sketch out your design and list all your cuts. For our example bench (approx. 48″ W x 24″ D x 36″ H work surface, with an 18″ high upper shelf), you will need:
- Legs (4 pieces): 2x4s, 54 inches long (This accounts for a 36″ high worktop plus an 18″ high back for the upper shelf).
- Front/Back Aprons (4 pieces): 2x4s, 45 inches long (This is for the main work surface and lower shelf fronts/backs, allowing for legs).
- Side Aprons (4 pieces): 2x4s, 21 inches long (For main work surface and lower shelf sides).
- Upper Shelf Supports (2 pieces): 2x4s or 2x3s, 21 inches long.
- Worktop Slats/Plywood: To cover a 48″ x 24″ area. If using slats, cut them to 48″ length.
- Lower Shelf Slats/Plywood: To cover a 48″ x 24″ area. If using slats, cut them to 48″ length.
- Upper Shelf Slats/Plywood: To cover a 48″ x 12″ (or desired depth) area. If using slats, cut them to 48″ length.
Measure twice, cut once! Sand all cut edges to remove splinters and prepare for assembly.
Step 2: Assemble the Side Frames (Legs and Aprons)
This method builds two ladder-like side frames first, which makes managing dimensions easier.
- Lay two of your 54-inch legs parallel on a flat surface, with the 4-inch faces up.
- Measure up from the bottom of each leg. Mark 6 inches for the bottom of the lower shelf apron, and 33 inches for the bottom of the main work surface apron.
- Attach two 21-inch side aprons between the legs at these marks, using wood glue (if desired) and two screws per joint. Ensure the aprons are flush with the leg’s outer edge. Pre-drill pilot holes to prevent splitting.
- Repeat this process for the other two legs and the remaining two 21-inch side aprons. You should now have two identical side frames.
Step 3: Connect the Side Frames with Front and Back Aprons
Now, we’ll create the main rectangular structure.
- Stand your two assembled side frames upright.
- Take two of your 45-inch front/back aprons. Attach one to the front, connecting the two side frames at the main work surface level. Ensure it’s flush with the top of the side aprons you already installed.
- Attach the second 45-inch apron to the back, at the same main work surface height. You should now have a sturdy rectangular box frame for your worktop.
- Repeat this for the lower shelf level, connecting the two remaining 45-inch aprons between the side frames.
- Double-check that all connections are square. Use additional screws for strength where necessary.
Step 4: Add the Worktop and Lower Shelf Surfaces
It’s time to add the functional surfaces.
- Worktop: If using slats, lay them across the top frame, spacing them evenly (about 1/4 inch gap for drainage is good). Secure each slat with two screws into the front and back aprons. If using plywood/OSB, simply lay it on top and secure it around the perimeter and into any central supports you might have added.
- Lower Shelf: Repeat the process for the lower shelf. This shelf is often exposed to more moisture, so consider slightly wider gaps between slats for better air circulation and drainage, especially if storing potted plants or bags of soil.
Step 5: Install the Upper Back Shelf
This optional but highly useful shelf provides additional storage for smaller tools, seed packets, or plant markers.
- Attach your two 21-inch upper shelf supports horizontally between the two extended back legs, at your desired height (e.g., 18 inches above the main worktop). Ensure they are level.
- Lay your upper shelf slats or plywood across these supports and secure them with screws.
Step 6: Finishing Touches and Customization
This is where your potting bench truly becomes your own!
- Sanding: Give the entire bench a thorough sanding, paying special attention to the worktop and anywhere you’ll be leaning or touching frequently. This prevents splinters and prepares the wood for finishing.
- Protection: Apply an exterior-grade paint, stain, or clear sealer. This is crucial for extending the life of your budget build, protecting it from moisture, UV rays, and rot. Allow adequate drying time between coats.
- Organization:
- Screw hooks into the sides or the upper back frame for hanging trowels, hand pruners, or gloves.
- Add small shelves or bins to the upper back for seed packets, labels, and small pots.
- Consider adding a magnetic strip for small metal tools.
- Mobility (Optional): If you want to move your bench easily, attach locking caster wheels to the bottom of the legs.
Congratulations! You’ve successfully built a garden potting bench budget-style, ready to tackle all your gardening needs.
Pro Tips and Common Mistakes
Pro Tips for Success:
- Use a Speed Square: This simple tool is invaluable for ensuring all your cuts and joints are perfectly square, leading to a much sturdier and more professional-looking bench.
- Pre-drill Pilot Holes: Especially when working with pallet wood or pine, always pre-drill pilot holes before driving screws to prevent the wood from splitting. Tailor hole size to your screws.
- Stagger Screws: When joining two pieces of wood, don’t put screws in a straight line. Stagger them slightly to create a stronger connection and reduce splitting.
- Waterproof Your Worktop: For even better durability and easier cleanup, consider lining your worktop with a heavy-duty plastic sheet or self-adhesive vinyl flooring remnant before securing your top surface. Some gardeners even use old kitchen counter sections.
- Consider Leg Depth: If the ground where your bench will sit is uneven, consider adding small plastic feet to the bottom of the legs or using shims to level it out. This also helps prevent the wood from wicking moisture from the ground.
Common Mistakes to Avoid:
- Skipping Weather Protection: This is arguably the biggest mistake. Untreated wood will rot, warp, and fall apart quickly outdoors. Don’t skip the paint, stain, or sealer.
- Neglecting Safety: Always wear safety glasses when cutting or drilling. Gloves can prevent splinters. Be mindful of your fingers and rotating blades.
- Not Measuring Accurately: “Eyeballing” measurements leads to wonky, unstable furniture. Take your time, measure carefully, and mark clearly.
- Over-tightening Screws: Especially with softer woods like pine or pallet wood, over-tightening can strip the screw hole or split the wood. Drive until snug, then stop.
- Ignoring Wood Condition: When using reclaimed wood, carefully inspect it for rot, significant cracks, or insect damage. Avoid wood that is structurally compromised.
- Insufficient Bracing: A sturdy bench needs good support. Don’t skimp on the aprons or cross-braces, especially for the lower shelf which often holds heavy bags of soil.
Eco-Friendly Variations
Building a garden potting bench on a budget often naturally leads to eco-friendly choices, as repurposing materials reduces waste. Here are some ways to enhance your bench’s green credentials:
- Maximize Reclaimed Materials: Beyond pallets, think about old wooden dressers, changing tables, or even large cabinets that can be partially deconstructed and reimagined. Old wooden doors can make excellent worktops.
- Rainwater Collection Integration: If your bench is near a downspout, consider adding a small rain barrel next to it. You can even design a small shelf to hold a watering can, making it easy to capture and use rainwater for your plants.
- Compost Bin Integration: Build a small, screened compost bin or bucket holder directly under an opening in your worktop. This allows you to easily sweep plant debris directly into a composting vessel, turning waste into valuable soil amendment.
- Grow Your Own: A small section of your upper shelf could be dedicated to sprouting seeds in biodegradable pots made from newspaper or toilet paper rolls.
- Sustainable Finish: Opt for low-VOC (Volatile Organic Compound) or natural wood finishes. Options include linseed oil, tung oil, or zero-VOC exterior paints. These are better for your health and the environment than traditional chemical-laden finishes.
- Upcycled Storage: Use old tin cans, plastic bottles (cut and sanded), or glass jars for tool organization instead of buying new containers.
Seasonal Considerations for Your Potting Bench
While your potting bench is a year-round asset, how you use and maintain it can vary with the seasons.
- Spring: This is primetime for your potting bench! Use it for seed starting, pricking out seedlings, and transplanting young plants into larger pots. Keep seed packets, plant labels, and small hand tools readily accessible.
- Summer: Continue with transplanting as your garden grows. Your bench is perfect for mixing custom soil blends for container plants or repotting root-bound specimens. Consider adding a small shade cloth over the bench if it’s in direct sun, protecting you and your delicate plants from scorching.
- Autumn: Ideal for dividing perennials, taking cuttings, and preparing bulbs for winter storage. It’s also a great time to clean up and organize your tools before the dormant season sets in.
- Winter: If you live in a climate with harsh winters, consider moving your potting bench under cover or covering it with a sturdy tarp to protect it from snow and ice. Use the bench for planning next year’s garden, cleaning and sharpening tools, or even starting a few cold-tolerant seeds indoors.
Regardless of the season, regular cleaning of your work surface prevents disease spread and keeps your bench tidy. A simple scrub-down with a stiff brush and water, followed by a light bleach solution if you’ve been dealing with diseased plants, is usually sufficient.
Expert Resources for Gardeners
To further enhance your gardening knowledge and find more inspiration, consider these valuable resources:
- Gardening Know How: An excellent platform offering a vast library of gardening articles, troubleshooting tips, and plant care information. Their website is a treasure trove of practical advice for gardeners of all levels.
- Royal Horticultural Society (RHS): A world-renowned gardening charity, the RHS provides authoritative information on plant cultivation, gardening techniques, and sustainable practices. Explore their resources for in-depth insights.
- University of Minnesota Extension: University extension offices are fantastic local resources for research-backed gardening advice tailored to specific regions. The University of Minnesota Extension’s gardening section, for example, offers reliable information on everything from soil health to pest management.
Conclusion
Building your own garden potting bench on a budget is an incredibly satisfying and rewarding DIY project that pays dividends in convenience, organization, and back-saving comfort for years to come. By thoughtfully sourcing materials, planning your cuts, and following basic construction steps, you can create a robust and personalized gardening hub without the hefty price tag.
This project is more than just about saving money; it’s about embracing sustainability, learning new skills, and tailoring a workspace perfectly suited to your gardening style. So, gather your tools, unleash your creativity, and get ready to transform your outdoor space with a functional, beautiful, and budget-friendly potting bench. Happy building, and even happier gardening!
FAQ: Your Potting Bench Questions Answered
A: A comfortable working height for the main surface is typically between 34-38 inches. This allows most individuals to stand comfortably without excessive bending. However, adjust this based on your own height for optimal ergonomics.
A: While you can, it’s strongly discouraged for outdoor use. Untreated wood will quickly degrade, rot, and warp when exposed to the elements. Always apply an exterior-grade paint, stain, or sealer to extend the life of your bench, especially when trying to build garden potting bench budget-consciously, as replacing it would be more expensive.
A: A smooth, non-porous surface is best. Consider using exterior-grade plywood sealed with multiple coats of paint or marine varnish. Alternatively, recess a plastic tub or old kitchen sink into the surface. Some gardeners use old linoleum or vinyl flooring remnants glued down.
A: Incorporate hooks on the sides for hanging tools, add small shelves or cubbies on the back for seed packets and gloves, or attach a magnetic strip for hand tools. You can also repurpose old containers like coffee cans or plastic bins for storing soil amendments and small items.


