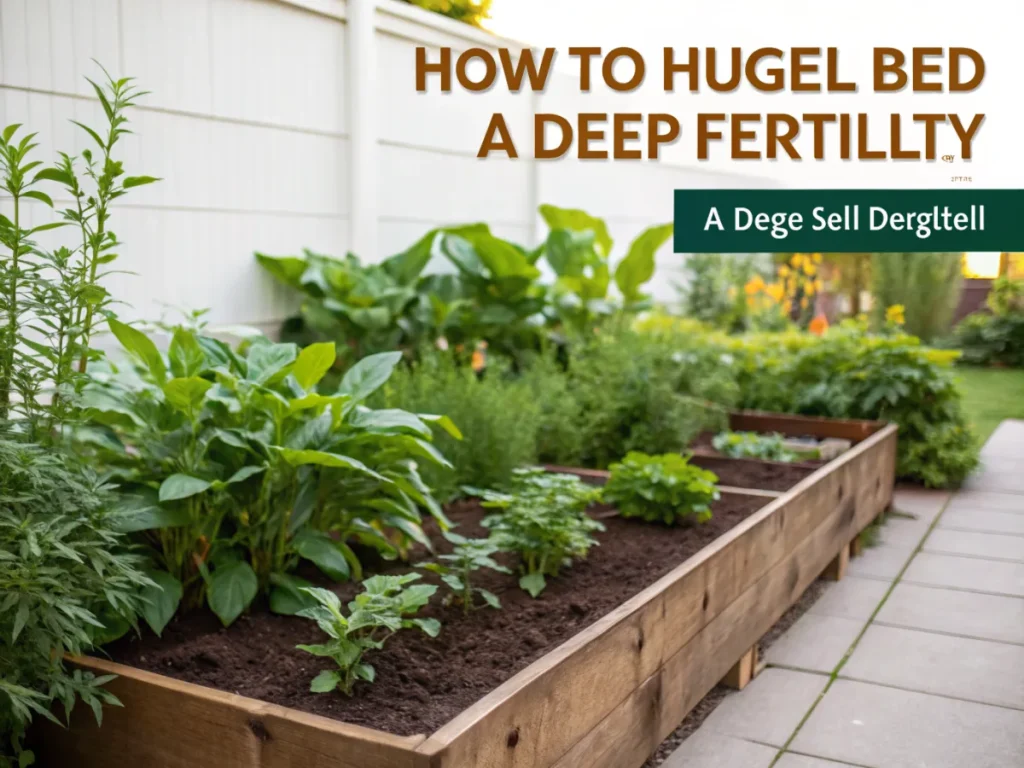
The Ultimate Guide: 7 Steps to Building a Hugel Bed for Deep Soil Fertility
Are you dreaming of a garden that thrives with minimal effort, boasting incredible yields and vibrant, healthy plants? Imagine a self-sustaining system that conserves water, builds soil, and requires less fertilizing over time. Enter the Hugel bed, a permaculture marvel that’s gaining immense popularity among gardeners, especially those focused on urban permaculture. This ancient German technique, meaning “hill mound” or “hill bed,” involves burying rotting wood and other organic matter to create a highly fertile, moisture-retentive raised garden bed. In this comprehensive guide, we’ll walk you through everything you need to know to construct your very own Hugel bed, unlocking a secret weapon for unparalleled deep soil fertility.
[lwptoc]
Why This Matters for Your Garden: Unlocking Nature’s Potential
The concept behind a Hugel bed is deceptively simple yet profoundly effective. By incorporating large quantities of decaying wood into the core of your raised bed, you’re tapping into a continuous, slow-release nutrient source that mimics natural forest ecosystems. As the wood breaks down, it enriches the soil with essential nutrients, creating a long-lasting, self-feeding system for your plants. This decomposition process also generates a gentle warmth as microbial activity ramps up, potentially extending your growing season, particularly in cooler climates.
Water retention is another paramount benefit of Hugel beds, especially crucial in urban environments where water conservation is key. The buried wood acts like a sponge, absorbing and holding vast amounts of water during rainfall or irrigation, then slowly releasing it back into the surrounding soil during dry spells. This significantly reduces the need for frequent watering, making your garden more resilient and efficient. It’s a game-changer for gardeners facing drought conditions or simply aiming to reduce their water footprint.
Beyond fertility and moisture, Hugel beds dramatically improve soil structure. The decaying wood creates air pockets and channels, fostering excellent drainage while preventing compaction, which is often a problem in traditional garden beds. This improved aeration is vital for healthy root development and the flourishing of beneficial microorganisms. Over time, the organic matter transforms into rich, dark humus, further enhancing soil tilth and microbial life.
Furthermore, the mounded design of Hugel beds increases the overall surface area available for planting, allowing you to grow more in a smaller footprint. This vertical gardening aspect is particularly appealing for urban gardeners or those with limited space. The varied slopes and microclimates on the mound can also benefit different plant species, allowing you to strategically place sun-loving plants on one side and shade-tolerant ones on another. By embracing the Hugel bed, you’re not just planting a garden; you’re cultivating a thriving, resilient ecosystem right in your backyard.
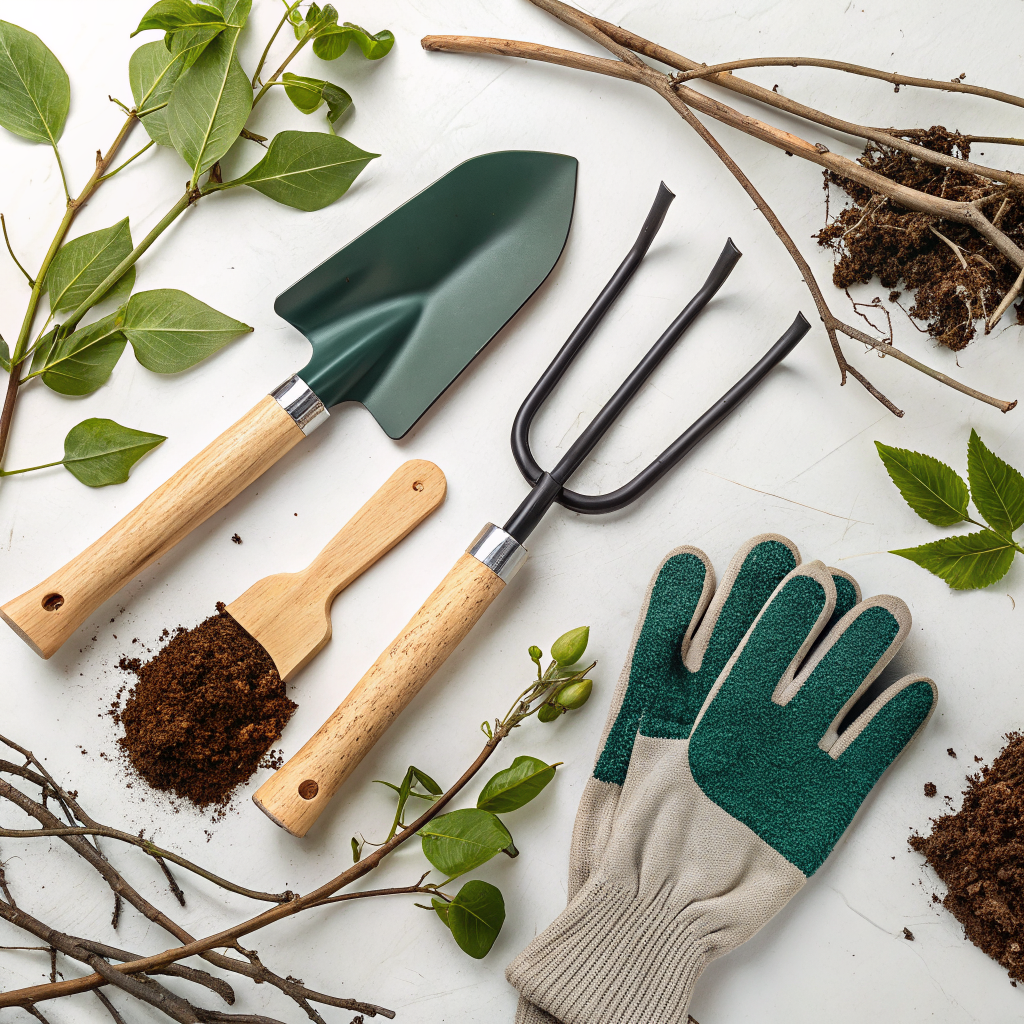
What You Need: Tools, Materials, and Plant Choices
Before you embark on your Hugel bed adventure, gathering the right tools and materials will ensure a smooth and successful build. Think of this as your ingredient list for a deeply fertile, self-watering garden.
Essential Tools:
- Shovel/Spade: For digging the trench and moving soil.
- Rake: For leveling and spreading layers.
- Wheelbarrow: Invaluable for transporting materials like wood, soil, and compost.
- Garden Fork: Useful for aerating and mixing organic matter.
- Gloves: Protect your hands from splinters and dirt.
- Watering Can or Hose: For wetting layers as you build.
- Measuring Tape/String (Optional): For marking out your bed’s dimensions.
Key Materials:
- Wood (The Core): This is the heart of your Hugel bed. Aim for logs, branches, and woody debris. Softwoods (like poplar, willow, alder, cottonwood) break down faster and provide nutrients quickly. Hardwoods (oak, maple, fruit tree wood) decompose slower but provide long-term fertility. Avoid black walnut (allelopathic) and treated lumber. Variability in sizes is good, from larger logs at the bottom to smaller branches and twigs.
- Twigs and Smaller Branches: To fill in gaps between larger logs.
- Coarse Organic Matter: Chopped straw, wood chips, leaves, old hay, untreated grass clippings. This helps fill gaps and adds more carbon.
- Soil/Clay (Optional but Recommended): A layer of inverted sod or clay at the bottom can help lock in moisture and nitrogen, preventing it from leaching away from the wood too quickly.
- Compost: Finished compost or well-rotted manure is crucial for a nutrient-rich start. This will be a significant layer.
- Topsoil: Good quality topsoil for the uppermost layer where your plants will initially root.
- Cardboard/Newspaper (Optional): Can be used as a weed barrier at the very bottom, if you’re building on grass or an area with persistent weeds. Ensure it’s untreated and remove any tape.
- Water: Lots of water to soak each layer as you build.
Plant Choices for Your Hugel Bed:
Almost anything can grow wonderfully in a Hugel bed, but some plants particularly thrive due to the enhanced moisture and fertility. Consider the initial “nitrogen immobilization” as the wood begins to break down – hungry nitrogen-fixers or heavy feeders are great choices. As the bed matures, its fertility will skyrocket.
- Year 1 (Nitrogen Demanding):
- Squash/Pumpkins: These heavy feeders love the deep fertility and moisture.
- Tomatoes/Peppers: Benefit from the warmth and rich soil.
- Potatoes: Can be good, but avoid planting directly on fresh wood as it can affect their growth – use a good layer of soil above.
- Cucumbers, Zucchini, Corn: All thrive in nutrient-rich soil.
- Subsequent Years (As Fertility Stabilizes):
- Root Crops: Carrots, radishes, beets will appreciate the fluffy, well-aerated soil.
- Leafy Greens: Lettuce, spinach, kale will flourish.
- Herbs: Most herbs will do exceptionally well.
- Berries/Small Shrubs: As the bed settles, you can even plant raspberries, blueberries (if acidic wood is used and soil pH is adjusted), or other small fruiting plants.
Remember to consider the sun exposure of your chosen site when planning your plant layout. The mound shape naturally creates different microclimates.
Step-by-Step Guide: Building Your Hugel Bed for Lifelong Fertility
Building a Hugel bed is a rewarding process that transforms waste into a thriving ecosystem. Follow these steps for a successful build.
Step 1: Choose Your Site and Dig a Trench
Selecting the right location is paramount. Choose a spot that receives at least 6-8 hours of direct sunlight for most vegetables. Ensure good air circulation, and ideally, choose a location that’s convenient for watering and harvesting. While not strictly necessary to dig deep, excavating a trench allows your Hugel bed to tap into more subsoil moisture and anchors it better. Dig a trench to your desired length and width (typically 3-6 feet wide) and about 1-2 feet deep. The excavated soil will be used later. If you’re building directly on grass or over weeds, consider laying down a thick layer of cardboard or newspaper first to suppress growth, thoroughly saturating it with water.
Step 2: Lay Down the Woody Core
This is where the magic begins. Start by placing your largest logs and branches at the bottom of the trench. Pack them in as tightly as possible, minimizing large air pockets. Think of it like building a natural jenga tower. Fill any significant gaps with smaller branches, twigs, and woody debris. The more varied the wood sizes, the better, as this creates a diverse environment for decomposition. Ensure you use a good variety of wood types, focusing on untreated logs only. As you lay each layer of wood, thoroughly soak it with water. This jumpstarts the decomposition process and ensures the wood is adequately hydrated to act as a sponge from the outset.
Step 3: Add Nitrogen-Rich and Coarse Organic Layers
Once your woody core is largely in place, it’s time to add nitrogen to balance the high carbon content of the wood. This prevents initial nitrogen “tie-up” while the wood begins to decompose. A layer of inverted sod, grass-side down, works wonderfully here, providing both nitrogen and a living barrier. If you don’t have sod, a generous layer of fresh grass clippings, straw mixed with fresh manure, or even kitchen scraps can be used. On top of this, add a layer of coarse organic materials like leaves, wood chips (untreated), straw, or old hay. These layers will help fill smaller gaps, retain moisture, and continue to build organic matter. Again, water each layer thoroughly as you build.
Step 4: Incorporate Compost and Topsoil
Now, it’s time for the nutrient powerhouses. Add a substantial layer of finished compost or well-rotted manure, ideally 6-12 inches thick. This provides immediate fertility for your plants and introduces a vibrant microbial community vital for decomposition. Spread it evenly over the previous layers, ensuring good contact. On top of the compost, add your good quality topsoil, which you ideally salvaged from your initial trench digging. If you need more, source it locally. This layer should be at least 6-12 inches deep, creating a comfortable environment for your plant’s initial root growth. Shape the mound as you go, aiming for a gently sloping hill. Ensure the sides are well-packed but not compacted.
Step 5: Final Shaping and Initial Watering
Once all your layers are in place, give your Hugel bed its final shape. Aim for a rounded, smooth mound. The final height of your Hugel bed can range from 2-6 feet, though most home gardeners find 3-4 feet to be manageable. The mound will settle over time as materials decompose, so account for some subsidence. After shaping, give the entire Hugel bed a very thorough watering. Soak it completely until water starts to seep from the base. This ensures all layers are properly hydrated and helps to settle the materials, minimizing large air pockets that could dry out roots. If possible, let the bed sit for a week or two after this initial soaking before planting, allowing it to settle further and initial decomposition to begin.
Step 6: Planting Your Hugel Bed
With your Hugel bed settled and saturated, it’s ready for planting! Start by planting on the top and sides of the mound. Given the initial nitrogen immobilization common with fresh wood, consider nitrogen-loving plants like squash, pumpkins, tomatoes, or corn for the first year. As the bed matures and the wood breaks down further, its fertility will increase dramatically, making it suitable for a wider variety of crops including root vegetables and leafy greens. Space your plants appropriately, remembering the increased surface area. Consider using the varying slopes for plants with different sun requirements or for companion planting strategies. For example, shade-loving herbs might thrive on the northern slope, while sun-guzzling tomatoes bask on the southern.
Step 7: Maintenance and Long-Term Care
While Hugel beds are designed to be low-maintenance, a little care goes a long way. Supplement with a layer of compost or mulch annually to replenish nutrients and suppress weeds. Keep the bed consistently moist, especially during dry spells and in its first year. The wood will become increasingly effective at holding water over time, but initial hydration is key. Observe your plants for any signs of nutrient deficiencies and amend as needed. As the bed settles, you might need to add more soil or compost to maintain the desired height. Over the years, your Hugel bed will become a powerhouse of fertility, a testament to the power of natural decomposition and a truly sustainable gardening solution. Expect exceptional yields and healthier plants year after year!
Pro Tips and Common Mistakes to Avoid
Even with a clear guide, a few insider tips can make your Hugel bed even more successful, and avoiding common pitfalls will save you headaches in the long run.
Pro Tips:
- Layering Density: Don’t just dump materials; try to interweave and layer them densely. This minimizes large air pockets that can dry out. Think of it as creating a complex, spongy matrix.
- Wetting Each Layer: This cannot be stressed enough. Saturating each layer with water as you build is crucial for jumpstarting decomposition and ensuring maximum water retention. It also helps settle the materials.
- Embrace Diversity: Use a variety of wood types and sizes, and a mix of green and brown organic matter. This botanical diversity fosters a healthier soil microbiome and a more balanced nutrient release.
- Consider Location: Place taller plants on the north side of the mound to avoid shading out shorter plants on the south side. Use the microclimates to your advantage.
- Plant Nitrogen Fixers: In the first year, consider planting legumes (beans, peas) around your heavy feeders. They are natural nitrogen fixers, helping to mitigate the initial nitrogen draw from the decomposing wood.
- Mulch Heavily: Once planted, apply a generous layer of mulch (straw, wood chips, shredded leaves) on top. This helps conserve moisture, regulate soil temperature, suppress weeds, and adds more organic matter as it breaks down. Learn more about the benefits of mulching on extension.umn.edu.
Common Mistakes to Avoid:
- Using Treated Lumber: Never use pressure-treated wood. It contains chemicals that are toxic to plants and soil life. Stick to untreated, natural wood.
- Using Allelopathic Wood: Avoid wood from Black Walnut trees (Juglans nigra) as they release juglone, a chemical that inhibits the growth of many plants.
- Not Watering Enough During Construction: Skimping on water during the building phase is a big mistake. Dry wood won’t decompose efficiently and won’t act as a water reservoir initially.
- Too Much Nitrogen Immobilization: If you use solely fresh, woody material and don’t add enough nitrogen-rich layers (like compost, manure, or fresh grass clippings), your plants may suffer from nitrogen deficiency in the first year as microbes consume available nitrogen to break down the carbon-rich wood. Balance is key.
- Building Too Steep: A really steep mound can lead to erosion and make watering difficult. Aim for gentle slopes that hold materials and moisture well.
- Planting Too Soon: While you can plant immediately after building, letting the bed settle for a week or two with a thorough initial watering allows the materials to compact slightly and the initial decomposition to begin, improving conditions for your plants.
- Ignoring Settling: Hugel beds will settle significantly, especially in the first year. Don’t be surprised or alarmed; it’s a natural part of the process. Simply top up with more compost or soil as needed.
Eco-Friendly Variations for the Conscious Gardener
The beauty of permaculture, and Hugel beds in particular, lies in their adaptability and ecological stewardship. There are several ways to enhance the eco-friendliness of your Hugel bed beyond the basic principles.
- Composting in Place: Integrate an active composting system directly into your Hugel bed. This could involve burying kitchen scraps beneath a layer of soil or creating a small “compost pocket” within the mound. This directly feeds your bed with rich nutrients and eliminates the need for an external compost pile.
- Rainwater Harvesting Integration: Design your Hugel bed to be part of a larger rainwater harvesting system. Position it to receive overflow from rain barrels or as a final infiltration point in a swale system. The bed’s excellent water retention will act as a natural reservoir. Consider directing your downspouts via a rain barrel technique to feed the Hugel bed directly.
- Mycoremediation: Introduce beneficial fungi (mycelium) to your woody core. You can do this by inoculating logs with mushroom spawn (e.g., Wine Cap mushrooms). As the fungi break down the wood, they create pathways for water and nutrients, enhance soil structure, and can even help remediate contaminated soil. Plus, you might get edible mushrooms!
- Biochar Inclusion: Incorporate biochar (pyrolyzed organic matter) into your soil layers, especially around the roots of your plants. Biochar is highly porous, dramatically increasing water and nutrient retention, and providing a long-term habitat for beneficial microbes.
- Native Plant Guilds: Instead of focusing solely on annual vegetables, consider establishing a perennial food forest guild on your Hugel bed. Plant native fruit trees (dwarf varieties), berry bushes, perennial herbs, and dynamic accumulators. This creates a self-sustaining system that requires less intervention over time and supports local biodiversity.
- Upcycled Materials: Beyond just wood, think about other organic “waste” you can source locally. Old cotton clothing (shredded), wool scraps, or even non-glossy paper products can be layered in (in moderation) to add more carbon and absorbency. Always ensure they are untreated and natural.
Seasonal Considerations for a Thriving Hugel Bed
While Hugel beds are robust, understanding their seasonal dynamics can significantly enhance your gardening success.
- Spring: Planning and Planting:
- Build: Early spring (after the last frost, or in milder climates, late winter) is an ideal time to build your Hugel bed. This allows the materials to settle and begin decomposing before the intense heat of summer.
- Planting: Use the spring to plant your heavy feeders or early season crops. Monitor temperatures, as the decomposition of the wood can generate a slight warmth, potentially giving you an early start.
- Watering: Ensure deep watering as plants establish, especially in the first year before the wood’s full sponge-like capacity is achieved.
- Summer: Growth and Moisture Management:
- Monitoring Moisture: This is where the Hugel bed truly shines. While less frequent, deep watering is still important during prolonged dry spells. The bed’s ability to retain moisture will significantly reduce your watering needs compared to traditional beds.
- Nutrient Observation: Observe plant vigor. If plants show signs of nutrient deficiency, a light side dressing of compost tea or liquid organic fertilizer can provide a boost.
- Mulch Refresh: Top up your mulch layer to combat high temperatures and conserve every drop of water.
- Autumn: Harvest, Rejuvenation, and Protection:
- Harvest: Enjoy the bounty from your Hugel bed.
- Top Dressing: After harvesting, apply a generous layer of fresh compost, well-rotted manure, and fallen leaves. This replenishes nutrients and adds to the organic matter that will break down over winter.
- Winter Cover: Consider planting a winter cover crop (e.g., clover, vetch) to protect the soil from erosion, suppress weeds, and fix nitrogen. Alternatively, a thick layer of straw or wood chips will serve as excellent winter protection and additional organic matter for the coming year. Read more about protecting your garden in winter on gardeningknowhow.com.
- Winter: Decomposition and Soil Building:
- Rest and Break Down: This is the crucial period when the buried wood truly undergoes significant decomposition. Microbial activity continues, albeit slower, enriching your soil.
- Planning: Use this time to plan your next season’s planting, considering crop rotation and companion planting for optimal yields.
- Wood Sourcing: Winter is an excellent time to collect fallen logs and branches for future Hugel beds if you have access to woodland.
Expert Resources for Deep Diving into Hugel Beds
To deepen your understanding and fine-tune your Hugel bed building skills, here are some excellent external resources:
- Permaculture Principles: For a foundational understanding of the philosophy behind Hugel beds and sustainable gardening, explore rhs.org.uk’s section on permaculture design. It provides a holistic view of integrating natural systems.
- Hugel Kultur Basics: Gardening Know How offers a beginner-friendly article on Hugel Kultur beds, covering the whys and hows in an accessible format.
- Advanced Hugel Bed Strategies: For those looking to optimize their Hugel beds or troubleshoot issues, the University of Minnesota Extension provides insights into raised beds, including Hugel beds, offering research-backed information.
These resources, combined with hands-on experience, will transform you into a Hugel bed master, ready to harness the power of deep soil fertility.
Conclusion: Embrace the Hugel Revolution
Building a Hugel bed is more than just constructing a raised garden; it’s an investment in the long-term health and productivity of your garden. By mimicking nature’s processes, you create a dynamic, self-fertilizing, and highly moisture-retentive system that far surpasses traditional gardening methods. You’ll significantly reduce your water consumption, minimize your reliance on external fertilizers, and enjoy healthier, more abundant harvests year after year. The initial effort yields dividends for decades, transforming your gardening experience into one of joyful abundance and profound connection to the earth.
Whether you’re a seasoned permaculturist or a curious beginner, the Hugel bed offers an accessible and incredibly powerful pathway to deep soil fertility and sustainable gardening. Embrace this ancient technique and watch your garden flourish like never before, becoming a vibrant testament to the power of working with nature, not against it. Your plants (and the planet) will thank you.
FAQ: Your Hugel Bed Questions Answered
1. How long does a Hugel bed last?
A well-built Hugel bed, especially one incorporating hardwood logs, can last for 20 years or even longer. Softwoods break down faster, providing quicker initial fertility, while hardwoods offer sustained, long-term benefits. The bed will naturally settle and become more fertile over time.
2. Do I need to fertilize a Hugel bed?
In its first year, especially if using a lot of fresh woody material, you may need to supplement with some nitrogen-rich organic fertilizer or compost to counteract initial nitrogen immobilization. However, after the first year, Hugel beds become largely self-fertilizing as the wood breaks down, continuously releasing nutrients. Annual compost top-dressing is always beneficial but often sufficient.
3. Can I build a Hugel bed in a ready-made raised bed frame?
Absolutely! You can use a raised bed frame (untreated wood, stone, or metal) to contain your Hugel layers. This can help with shaping and retaining the mound, especially if you prefer a more formal look. Just follow the same layering principles within the frame.
4. What’s the best time of year to build a Hugel bed?
Early spring or late autumn are generally considered the best times. Building in early spring allows the bed to settle and begin decomposition before the main growing season. Late autumn construction allows the bed to break down over winter, providing a head start for spring planting. However, you can technically build one at any time of year as long as the ground isn’t frozen.


