
The Ultimate 7-Step Guide to Collect and Recycle Rainwater for Your Garden
Imagine a garden that thrives on nature’s bounty, a lush oasis nourished by the very sky above. This isn’t a distant dream; it’s an achievable reality when you learn how to collect and recycle rainwater for your garden. This eco-conscious practice not only conserves a precious resource but also provides your plants with nutrient-rich, chemical-free water, all while often saving you money on your utility bills. Let’s dive deep into transforming your garden into a sustainable haven, one raindrop at a time.
[lwptoc]
Why Collecting and Recycling Rainwater Matters for Your Garden (and Your Wallet)
The benefits of rainwater harvesting extend far beyond simple water conservation. For starters, municipal tap water often contains chlorine, fluoride, and other chemicals used for purification. While safe for human consumption, these additives can be detrimental to delicate plant roots and beneficial soil microorganisms over time, inhibiting healthy growth.
Rainwater, on the other hand, is naturally soft and free of these chemicals, making it a superior choice for watering your plants. It also contains trace amounts of nitrogen, a vital nutrient that plants readily absorb, giving them a natural boost.
Beyond the biological advantages, there’s a significant financial incentive. Watering your garden, especially during dry spells or if you have a large landscape, can lead to substantial increases in your water bill. By utilizing free rainwater, you can drastically reduce your household water consumption and, consequently, your monthly expenses. This practice is particularly impactful in areas facing water restrictions or droughts, positioning you as a responsible steward of local resources.
Furthermore, collecting rainwater reduces runoff from your property. This helps to prevent soil erosion, minimizes the amount of pollutants entering local waterways, and reduces the strain on storm drainage systems. It’s a holistic approach to gardening that benefits not just your plants, but also the broader environment and local infrastructure. Embracing rainwater harvesting is a powerful step towards building a more resilient and sustainable home ecosystem.
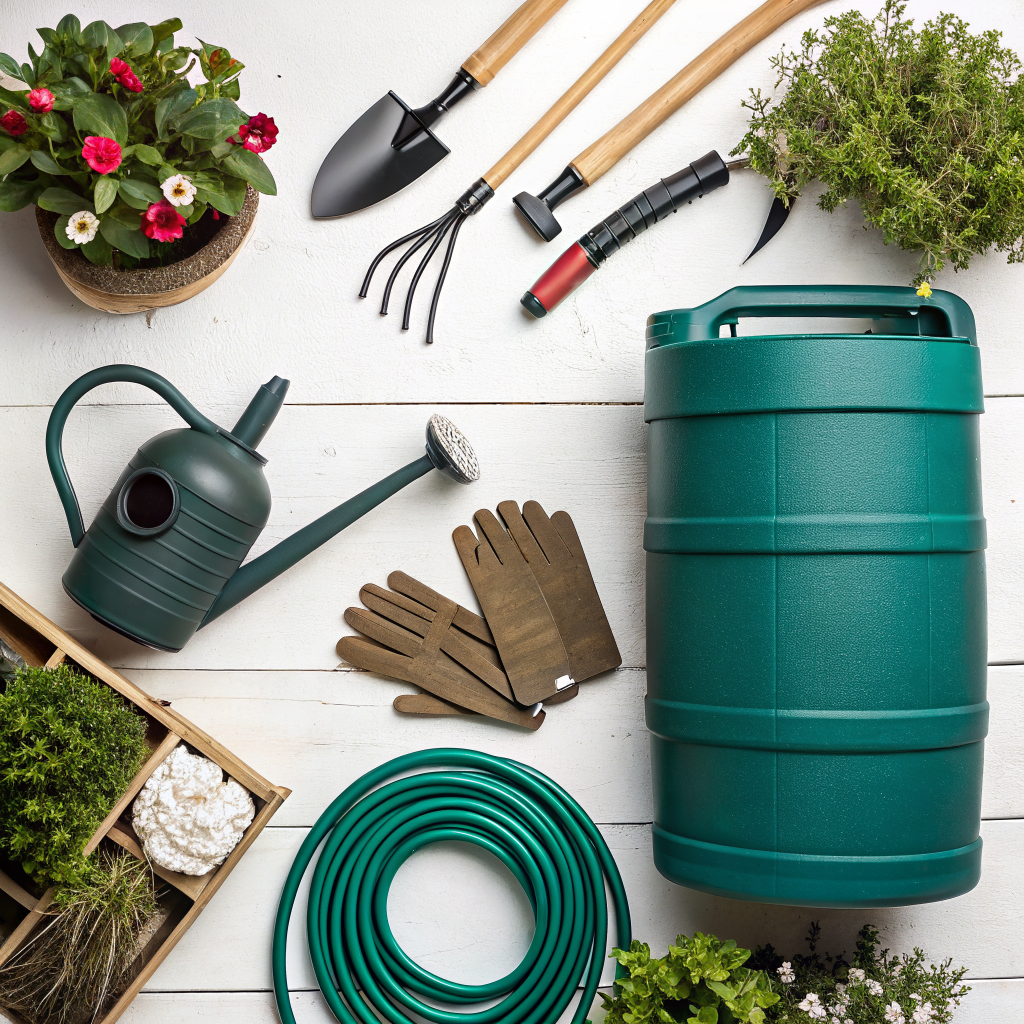
What You Need: Tools, Materials, and the Right Plants
Before you embark on your rainwater harvesting journey, gathering the necessary tools and materials is crucial. A well-prepared gardener is a successful gardener! Here’s a breakdown:
Essential Materials for Your Rainwater Collection System:
- Rain Barrel(s): This is your primary collection vessel. Choose barrels made of UV-resistant, food-grade plastic or repurposed food-grade containers. Sizes typically range from 50 to 100 gallons or more. Consider multiple barrels connected in series for greater capacity.
- Downspout Diverter: This essential component connects your downspout to your rain barrel, directing water while allowing excess to flow normally. Look for models with filters to keep debris out.
- Spigot/Hose Bib: Attached near the bottom of your rain barrel, this allows you to easily connect a hose or fill a watering can. Ensure it’s sturdy and leak-proof.
- Overflow Hose or Connector: For barrels that fill to capacity, an overflow mechanism is vital to prevent water from backing up or pooling around your foundation.
- Screen/Mesh Filter (for barrel opening): Even if your diverter has a filter, adding a fine mesh over the barrel opening further prevents mosquitoes from breeding and keeps leaves and debris out.
- Foundation/Stand for Rain Barrel: Your barrel will be very heavy when full (a 50-gallon barrel weighs over 400 pounds!). A sturdy, level stand made of concrete blocks, pavers, or a purpose-built stand is absolutely critical for stability and to allow gravity-fed water flow.
- Sealant/Teflon Tape: To ensure all connections are watertight.
Basic Tools You’ll Probably Need:
- Drill with various bit sizes (for spigot and overflow hose installation)
- Measuring tape
- Marker/pencil
- Utility knife or saw (for cutting downspout)
- Level
- Wrenches or pliers (for tightening connections)
- Safety glasses and gloves
Consider Your Plants:
While rainwater benefits all plants, some particularly thrive on its purity and neutral pH. Here are a few examples:
- Acid-loving plants: Azaleas, rhododendrons, blueberries, camellias, and ferns adore rainwater, as it won’t raise their soil pH like alkaline tap water can.
- Herbs: Many herbs, like basil, mint, and cilantro, grow more robustly with gentle, untreated water.
- Vegetables: Most vegetables will flourish, especially leafy greens like lettuce and spinach, which are sensitive to chlorine.
- Seedlings: Young plants and seedlings are very delicate, and rainwater provides the gentlest start.
Before starting, take a moment to assess your property. Where are your downspouts? Which areas of your garden need the most water? This will help you plan the optimal placement of your rain barrel system.
Step-by-Step Guide: Building Your Rainwater Collection System
Implementing a rainwater collection system is a rewarding DIY project. Follow these steps carefully to ensure a functional and efficient setup.
Step 1: Choose the Right Location
The ideal spot for your rain barrel is directly beneath a downspout from your roof, preferably near an area of your garden that frequently needs watering. Consider visibility; while some barrels are decorative, others might be best tucked away. Ensure the ground is level or can be leveled, and that there’s enough space for the barrel and its stand.
Step 2: Prepare the Site and Install the Stand
Once you’ve chosen your location, prepare the ground by leveling it. Dig down slightly if necessary, or build up with compacted gravel. Place your sturdy stand (concrete blocks, pavers, or a dedicated stand) at this spot. Remember, a full rain barrel is incredibly heavy, so stability is paramount. The stand also elevates the spigot, allowing gravity to assist in water flow when using a hose or watering can.
Step 3: Install the Downspout Diverter
This is often the most involved part. You’ll need to cut a section out of your existing downspout to insert the diverter. Measure carefully to ensure the diverter aligns with the inlet of your rain barrel. Many diverters come with templates or clear instructions. Use a utility knife or a saw to make clean cuts, then install the diverter according to the manufacturer’s directions, ensuring all connections are snug and sealed. If your diverter doesn’t have a built-in filter, add a piece of mesh screening inside the downspout opening that connects to the barrel to prevent large debris from entering.
Step 4: Connect the Rain Barrel
Position your rain barrel on the stand. Connect the diverter’s output hose to the inlet port of your rain barrel. Most rain barrels have a pre-drilled hole or a designated area for this connection. Ensure a tight, leak-proof seal, using sealant or Teflon tape if necessary. At this stage, also make sure a fine screen is covering the top opening of your barrel to prevent mosquitoes and debris from entering.
Step 5: Install the Spigot and Overflow Mechanism
Drill a hole near the bottom of your rain barrel (if one isn’t pre-drilled) large enough for your spigot. Install the spigot, using washers and sealant on both sides of the barrel wall to create a watertight seal. This will be your primary access point for the collected water. Next, install an overflow hose or connection near the top of the barrel. This hose should guide excess water away from your foundation and towards a garden bed or a French drain. If linking multiple barrels, connect them at this stage with a linking kit near the top of each barrel.
Step 6: Test Your System
Wait for the next rainfall, or if you’re eager, run water from a garden hose onto your roof and into the downspout. Check all connections for leaks, ensuring the diverter is working correctly and water is flowing into the barrel. Observe the overflow mechanism to confirm it’s redirecting excess water effectively. Make any necessary adjustments.
Step 7: Maintenance and Usage
Periodically inspect your system. Clean the downspout diverter’s filter and the barrel’s screen to prevent clogs. At least once a year, especially before winter (if you experience freezing temperatures), drain and clean your rain barrel to remove any sediment. Store the barrel indoors or protect it from freezing to prevent cracking. Use the collected water for watering your plants, cleaning tools, or even for pet water – but remember, it’s not for human consumption without proper filtration and purification.
For more advanced DIY projects around your home, check out these creative construction and DIY tips on our site.
Pro Tips and Common Mistakes to Avoid
Making your rainwater harvesting system truly effective often comes down to little details. Here are some seasoned tips and pitfalls to steer clear of:
Pro Tips for Maximum Efficiency:
- Maximize Collection Area: If your garden is large or you experience dry spells, consider adding additional rain barrels to other downspouts, or connecting multiple barrels in a series to increase your storage capacity. The more roof area you can capture, the better.
- Elevate for Pressure: The higher your rain barrel stand, the better the water pressure you’ll get from your spigot. This is particularly useful if you plan to attach a hose to reach further areas of your garden.
- Install a First Flush Diverter: The first few minutes of rainfall after a dry spell often wash the most accumulated debris (leaves, pollen, bird droppings) from your roof. A first-flush diverter (sold separately or DIYable) diverts this initial contaminated water away, ensuring cleaner water enters your main storage barrel.
- Consider a Pump: For larger gardens or if you want to use a sprinkler system with your collected water, a small submersible pump placed inside the barrel can provide necessary pressure.
- Insulate in Cold Climates: If you plan to use your barrel into colder months and experience light freezes, insulating the barrel could prevent ice damage, though for severe winters, draining and storing is best.
- Landscape with Purpose: Direct your overflow hose towards plants that thrive on extra moisture or into a rain garden. This utilizes every drop and prevents water from pooling unproductively.
Common Mistakes to Avoid:
- Poor Foundation: This is a big one. Placing a heavy barrel on an unstable or uneven surface is a recipe for disaster. A full 50-gallon barrel can weigh over 400 pounds – it needs a rock-solid, level base.
- No Overflow Management: If your barrel fills up without an overflow hose, water will back up the downspout or spill over, potentially causing foundation damage or creating mosquito breeding grounds. Always have a plan for excess water.
- Forgetting Screens/Filters: A lack of adequate screening means leaves, twigs, and other debris will clog your spigot and create an environment for mosquito larvae. A fine mesh screen on the top opening and a filter in the diverter are non-negotiable.
- Using Non-Food-Grade Barrels for Potable Use: While perfectly fine for garden use, do not use barrels that previously held chemicals for potable water. Even for gardening, avoid barrels that held toxic substances. Always opt for food-grade, even for your plants.
- Ignoring Winterization: In regions with freezing temperatures, a full rain barrel will crack as the water expands when it freezes. Always drain, disconnect, and ideally store your barrel to prevent irreparable damage.
- Insufficient Capacity: One small barrel for a large garden in a dry climate might not provide enough water to make a significant difference. Assess your watering needs and typical rainfall patterns.
- No Mosquito Prevention: Standing water is a mosquito magnet. Ensure all openings are screened. If you still see larvae, consider adding mosquito dunks (Bacillus thuringiensis israelensis – BTI) which are safe for plants, pets, and wildlife.
By heeding these tips and avoiding common pitfalls, your rainwater collection system will serve your garden faithfully for years to come.
Eco-Friendly Variations for Advanced Recycling
Once you’ve mastered the basic rain barrel, there are several ways to expand and enhance your rainwater recycling efforts, making your garden even more sustainable.
Connecting Multiple Barrels
The simplest and most common upgrade is to link several rain barrels together. This significantly increases your storage capacity without needing a single, massive barrel. You can connect them in a series using specialized linking kits or PVC piping near the top of each barrel. When one barrel is full, water flows into the next, ensuring maximum collection.
Underground Storage Cisterns
For serious gardeners or those with larger properties, an underground cistern is the ultimate rainwater harvesting solution. These large tanks (often hundreds or thousands of gallons) are buried beneath the ground, connected to your downspouts via pipes. They offer massive storage capacity, keep water cool and out of sight, and can be paired with pumps for comprehensive irrigation systems. While a more significant investment and excavation project, they provide unparalleled water independence. Explore options for cisterns and other water-wise solutions at sustainable home and green living resources.
Rain Gardens
A rain garden is a depressed area in your landscape designed to capture, filter, and slowly absorb rainwater runoff from impervious surfaces like roofs, driveways, and patios. Instead of directing all overflow from your rain barrel into the storm sewer, you can channel it into a beautifully planted rain garden. These gardens are typically planted with native, water-loving plants that can tolerate both wet and dry conditions. They effectively reduce stormwater runoff, filter pollutants, and recharge groundwater, creating a thriving habitat for local wildlife.
Greywater Recycling Integration
While not strictly rainwater, integrating a greywater recycling system can further reduce your garden’s reliance on fresh water. Greywater is gently used water from sinks, showers, and washing machines (excluding toilet water or water from food preparation or diaper wash). After minimal filtering, this water can be directed to irrigate non-edible plants in your garden, effectively giving water a second life. This advanced hack requires careful planning and adherence to local regulations, but it represents a powerful step towards a truly regenerative water system.
Passive Harvesting Techniques
Beyond barrels and cisterns, consider more passive ways to capture and direct rainwater. Creating swales (shallow ditches on contour) or berms in your garden can slow down runoff, allowing water to infiltrate the soil rather than escaping your property. Keyhole gardens and wicking beds are also designed to maximize water retention and minimize evaporation. These methods work in conjunction with your active collection system, ensuring that every drop of rain nurtures your landscape.
Remember, each of these variations requires careful planning, and sometimes, professional installation or adherence to local building codes. Always research thoroughly to understand the best fit for your climate, property, and local regulations. For more eco-friendly innovations, check out our insights on new software and green technologies that enhance your home.
Seasonal Considerations for Rainwater Collection
Your rainwater collection system’s effectiveness and longevity depend heavily on how you manage it through the seasons.
Spring: Setup and Readiness
As winter fades, spring is the ideal time to set up or reactivate your rainwater harvesting system. Thaw any frozen components, reconnect downspout diverters, and check for any winter damage to your barrel or connections. This is also the time to thoroughly clean out any sediment that may have accumulated over the colder months. Ensure screens are in place and free of debris, ready to capture spring showers for your emerging garden.
Summer: Peak Usage and Maintenance
Summer is typically when your garden demands the most water, making it the peak season for using your collected rainwater. Regularly check your barrel levels. If rainfall is scarce, consider supplementing with tap water or adjust your watering schedule. Monitor your screens and filters for clogs from leaves, pollen, and insect activity. Emptying and refilling the barrel regularly helps keep the water fresh and prevents stagnation, though collected rainwater for plants generally remains viable for weeks when covered.
Autumn: Preparations for Winter
As leaves fall, your system will be prone to clogging. Clean your roof gutters and downspouts frequently. As temperatures drop and the threat of freezing approaches, it’s crucial to prepare your system for winter. In regions with mild winters, you might continue collecting, but in areas with hard freezes, you must disconnect and drain your rain barrel. Water expands when it freezes, which can crack and destroy even the sturdiest barrel. Store barrels indoors or turn them upside down to keep them dry and protect them from expanding ice.
Winter: Dormancy and Protection
In most cold climates, your rainwater collection system will be dormant during winter. Ensure all water is drained from the barrel, spigots, and hoses. Disconnect the downspout diverter and allow the downspout to flow normally to prevent ice buildup. Clean and store any hoses. If you can’t move your barrel indoors, ensure the spigot is left open and the barrel is elevated and covered to minimize water accumulation and crack risk, although complete draining is best. Use this time for planning any system upgrades or repairs for the coming spring.
Adapting your rainwater collection strategy to the rhythm of the seasons ensures that your system remains efficient, functional, and durable, providing you with a continuous supply of nature’s best for your garden.
Expert Resources for Advanced Rainwater Harvesting
While this guide provides a comprehensive overview, the world of rainwater harvesting is vast and continually evolving. For deeper dives and more specialized information, here are three highly reputable external resources:
-
Gardening Know How: Gardening Know How – Rain Barrel Gardening
This site offers a wealth of practical advice for gardeners of all levels. Their sections on rain barrel gardening delve into topics like installation, maintenance, and the specific benefits for various plant types. It’s an excellent resource for troubleshooting and getting detailed tips tailored for garden applications. -
Royal Horticultural Society (RHS): RHS – Water Harvesting
The RHS is a globally respected authority on horticulture. Their sustainable gardening section, specifically on water harvesting, provides scientifically sound information on various collection methods, water quality, and integration into larger garden design schemes. It covers techniques from simple barrels to more complex water management systems. -
University of Minnesota Extension: University of Minnesota Extension – Rainwater Harvesting for Homeowners
University extension programs are fantastic sources of research-backed, unbiased information. The UMN Extension’s guide offers detailed technical specifications, safety considerations, and practical advice on sizing and installing rainwater harvesting systems. It’s particularly useful for understanding the engineering aspects and regulatory considerations.
These resources offer additional layers of detail, regional considerations, and advanced techniques that can help you optimize your rainwater harvesting system for maximum efficiency and sustainability.
Conclusion: A Sustainable Future for Your Garden
Embracing rainwater collection and recycling for your garden is more than just a passing trend; it’s a fundamental shift towards a more sustainable and resilient lifestyle. By harnessing the power of nature’s purest water source, you empower your plants to thrive, reduce your environmental footprint, and make a tangible difference in conserving our precious water resources. From the simple installation of a single rain barrel to the grandeur of a comprehensive cistern system, every drop collected is a step towards a healthier, more vibrant garden and a more sustainable planet. Start today, and watch your garden flourish with the gifts from above.
Frequently Asked Questions About Rainwater Harvesting
Q1: Is rainwater safe for all plants?
A1: Yes, rainwater is generally excellent for all plants. It’s naturally soft, chlorine-free, and contains beneficial trace nutrients, making it superior to many municipal tap water sources. The only exception would be if your roof material is made of a toxic substance (e.g., old asphalt shingles with asbestos, though modern shingles are safe) or if your air quality is exceptionally poor, though for most residential applications, it’s perfectly fine.
Q2: How much water can I actually collect?
A2: The amount of water you can collect depends on your roof size and local rainfall. A good rule of thumb is that for every inch of rain on a 1,000 square foot roof, approximately 600 gallons of water can be collected. You can calculate your potential yield by multiplying your roof’s catchment area (in square feet) by the average annual rainfall (in inches) by 0.6.
Q3: How do I prevent mosquitoes from breeding in my rain barrel?
A3: The most crucial step is to ensure all openings, especially the top lid and any overflow points, are completely sealed with fine mesh screens (no larger than 1/16 inch). Regularly check these screens for gaps or damage. If you do find larvae, you can use mosquito dunks (which contain BTI, a natural larvicide that’s harmless to plants, pets, and beneficial insects) or simply empty and clean your barrel periodically.
Q4: Can I drink the rainwater I collect?
A4: No, collected rainwater from a roof should not be consumed directly without proper filtration and purification. While it’s great for plants, it can contain bacteria, dust, and other contaminants from your roof surface. For potable use, a multi-stage filtration and sterilization system is required, which is beyond the scope of a typical garden rain barrel setup.


