The Ultimate Guide: 10 Steps to Grow Food on a North-Facing Balcony
Living in an urban environment often means making the most of limited space, and for many, that includes a balcony. But what if your precious outdoor nook faces north, leaving it shrouded in shade for much of the day? Don’t despair! Growing food on a north-facing balcony is not only possible but can be incredibly rewarding, transforming an underutilized space into a thriving, edible oasis. This comprehensive guide will equip you with the knowledge and techniques to cultivate a surprisingly bountiful harvest even with limited sunlight.
[lwptoc]
Many urban dwellers assume that a north-facing aspect is a death sentence for edible gardening. On the contrary, while it presents unique challenges, it also opens up an exciting world of shade-loving edibles that thrive in indirect light. Embracing urban permaculture principles, we’ll explore how to work with nature, not against it, to create a productive and sustainable balcony garden.
Why This Matters for Your Urban Edible Garden
Maximizing every inch of available space is crucial in urban permaculture. A north-facing balcony, often seen as a liability, can become an incredible asset for growing specific types of food. This approach not only provides fresh, organic produce right at your doorstep but also contributes to food security and reduces your carbon footprint.
Beyond the practical benefits, cultivating a garden, even a small balcony one, fosters a connection with nature and promotes well-being. It’s an exercise in patience, observation, and understanding the subtle needs of plants. For city dwellers, this slice of green can be a much-needed escape and a source of immense satisfaction.

What You Need: Tools, Materials, and the Right Plants
Success begins with careful planning and selecting the right equipment and plant varieties. You don’t need a massive investment to get started, but a few key items will make a significant difference. Choosing plants suited to low light conditions is paramount for your north-facing balcony.
Essential Tools and Materials:
- Containers: A variety of sizes and materials. Fabric grow bags, terracotta pots, plastic planters with drainage holes, and even repurposed containers like buckets or milk jugs (with drainage added) work well. Deeper pots are generally better for root vegetables.
- Potting Mix: High-quality, well-draining potting mix is crucial. Look for mixes specifically designed for containers, often containing perlite or vermiculite to improve aeration and drainage. Avoid using garden soil, which can compact in pots.
- Watering Can or Hose with a Gentle Sprayer: Essential for consistent moisture. Consider a self-watering planter system for busy individuals or prolonged absences.
- Hand Trowel and Pruners: For planting, transplanting, and light maintenance.
- Organic Fertilizer: Liquid feeds or slow-release granular organic fertilizers to replenish nutrients throughout the growing season. Compost tea is an excellent homemade option.
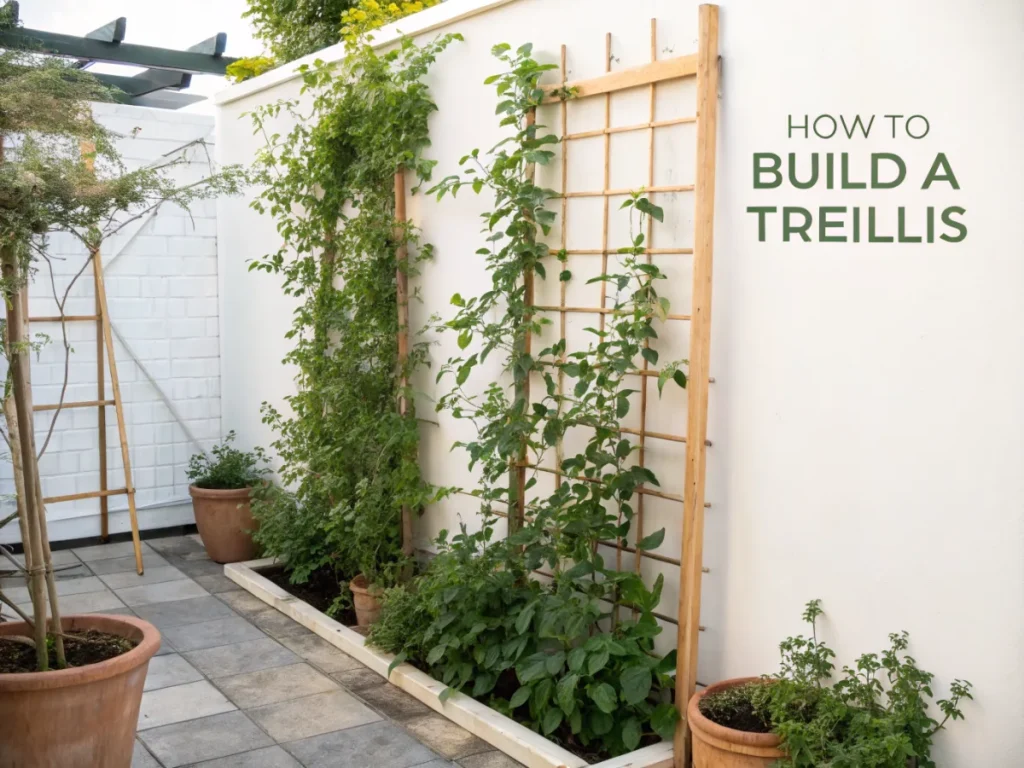
- Trellises or Stakes: For vertical growing, especially for vining plants or taller herbs. These maximize space and sunlight exposure.
- Mirrors or Light Reflectors (Optional but Recommended): Strategically placed mirrors or white reflective surfaces can bounce scarce sunlight onto your plants, significantly improving light penetration.
- Shelving Units or Vertical Planters: To optimize vertical space on your balcony. Tiered planters are fantastic for small areas.
Best Plants for a North-Facing Balcony (Focus Keyword: grow food north facing balcony):
The key to success is embracing the shade, not fighting it. Many delicious edibles actually prefer dappled light or require less direct sun than their sun-loving counterparts.
- Leafy Greens:
- Lettuce (Loose-leaf varieties): ‘Black Seed Simpson’, ‘Buttercrunch’, ‘Red Sails’ thrive in partial shade.
- Spinach: Grows exceptionally well in cooler temperatures and low light.
- Swiss Chard: Beautiful and productive, tolerates more shade than many greens.
- Kale: ‘Lacinato’ (Dinosaur kale) and ‘Red Russian’ are surprisingly resilient in shade.
- Arugula: Quick-growing and adds a peppery kick to salads.
- Mustard Greens: Similar to arugula, tolerates shade and offers a zesty flavor.
- Herbs: Many herbs flourish in partial shade, especially those native to woodland understories.
- Mint: Spreads readily, so pot it separately! Loves consistent moisture.
- Parsley: Flat-leaf and curly varieties do well.
- Cilantro/Coriander: Can bolt quickly in full sun, so shade helps prolong its harvest.
- Chives: Easy to grow and adds a mild onion flavor.
- Lemon Balm: Aromatic and thrives in partial shade.
- Oregano and Marjoram: Can tolerate light shade, though full sun yields more intense flavor.
- Thyme: Some varieties perform better in partial shade than others.
- Root Vegetables (with caveats): These need decent soil depth and consistent moisture.
- Radishes: Quick-growing and tolerate some shade, though they might be smaller.
- Carrots (Short varieties): ‘Danvers Half Long’ or ‘Paris Market’ can work in deeper containers, but expect smaller roots.
- Potatoes (Container varieties): Grow in large grow bags; new potatoes can be harvested.
- Other Edibles:
- Bush Beans: Some varieties, especially dwarf bush types, can produce reasonable yields in partial shade.
- Strawberries (Alpine varieties): Smaller berries but flavorful and tolerate more shade than their larger cousins.
- Rhubarb: Needs a very large, deep container and can tolerate significant shade.
- Small Tomatillos: While needing more light than leafy greens, some varieties can produce in 4-5 hours of indirect light.
Step-by-Step Guide to Growing Food on a North-Facing Balcony
Transforming your shaded balcony into a productive garden is a process of thoughtful design and diligent care. Here’s how to get started:
Step 1: Assess Your Balcony’s Light Conditions
Before buying any plants, spend a full day observing your balcony. How many hours of direct sunlight (if any) does it receive? What about bright, indirect light? This crucial first step will help you select the most appropriate plants. A shaded microclimate could still have bright ambient light, which is different from deep shade.
Use a compass to confirm the north direction. Note any obstructions like other buildings or trees that might further reduce light. On average, a “north-facing balcony” will receive 2-4 hours of indirect light per day, with very little to no direct sun. Even this limited light is precious.
Step 2: Choose the Right Containers and Layout
Select containers appropriate for the plants you wish to grow, ensuring superior drainage. For leafy greens and herbs, pots 6-8 inches deep are often sufficient. Root vegetables will need at least 10-12 inches of depth. Consider using fabric grow bags, which offer excellent aeration and drainage for a healthy root system. These are also lightweight and easy to move.
Optimize space with vertical gardening solutions like tiered planters, wall-mounted pocket organizers, or shelving units. Place taller plants at the back and shorter ones toward the front to minimize shading each other. Consider using reflective surfaces, such as mirrors or white paint, on the wall behind your plants to bounce light back onto the leaves and increase overall illumination. You can learn more about vertical farming techniques here.
Step 3: Prepare Your Soil
Good soil is the foundation of a healthy garden. Use a high-quality potting mix that is lightweight, well-draining, and rich in organic matter. Avoid using heavy garden soil, which compacts easily in containers and can stifle root growth. You can augment your potting mix with compost to improve nutrient content and water retention.
Ensure all your containers have adequate drainage holes to prevent waterlogging, which is detrimental to root health. A layer of gravel or broken pot shards at the bottom is often recommended, but a good potting mix should drain well on its own.
Step 4: Select and Plant Your Shade-Loving Edibles
Based on your light assessment (Step 1), choose plants from the list of shade-tolerant edibles provided above. Opt for healthy seedlings from a reputable nursery or start seeds indoors for best results. When planting, gently remove the plant from its nursery pot, loosen any circling roots, and place it in the prepared container. Fill with potting mix, leaving about an inch of space from the rim.
Water thoroughly after planting until water drains from the bottom of the pot. Consider companion planting for natural pest control and improved growth. For example, mint and lettuce grow well together.
Step 5: Watering and Feeding for Optimal Growth
Consistent watering is crucial for container plants, as they dry out faster than garden beds. Check the soil moisture daily by sticking your finger about an inch deep. If it feels dry, water until it drains from the bottom. Avoid overwatering, which can lead to root rot, especially in cooler, shadier conditions where evaporation is slower.
Since nutrients leach out with watering, feed your plants regularly with an organic liquid fertilizer, compost tea, or slow-release granular organic fertilizer. Follow the product instructions for frequency and dilution. Generally, leafy greens benefit from nitrogen-rich feeds. Explore more about smart irrigation systems that can help maintain consistent moisture.
Step 6: Pest Management and Maintenance
Even in the shade, pests can be a problem. Regularly inspect your plants for signs of aphids, slugs, or other common garden pests. Address issues promptly with organic solutions like neem oil, insecticidal soap, or by manually removing pests. Healthy plants are more resilient to pest attacks.
Prune regularly to remove yellowing leaves, promote new growth, and maintain plant shape. Pinch back herbs to encourage bushier growth. Harvesting leafy greens frequently (using the “cut and come again” method) will also stimulate continuous production.
Step 7: Harvest Your Bounty
Harvesting frequently encourages more yield. For leafy greens, pick the outer leaves, allowing the inner leaves to continue growing. For herbs, snip off what you need, leaving enough foliage for the plant to recover. Enjoy your fresh produce and celebrate the success of your north-facing balcony garden!
Pro Tips and Common Mistakes for Your North-Facing Balcony
Even with the right plants and techniques, certain nuances can make a big difference. Avoiding common pitfalls will ensure a more successful and less frustrating gardening experience.
Pro Tips:
- Maximize Reflective Surfaces: Paint walls behind plants white or attach reflective foils. Even aluminium foil can work in a pinch. This can significantly increase the effective light available to your plants.
- Rotate Containers: If you have any areas that get even a little more light, rotate your containers every few days. This ensures all sides of the plant get some exposure.
- Vertical Gardening is Your Friend: Use wall space! Hanging planters, vertical grow bags, and multi-tiered shelves are essential for maximizing the yield from a small footprint on a north-facing balcony.
- Consider Grow Lights: For truly deep shade or extremely limited light, a small, inexpensive LED grow light can supplement natural light for specific plants, especially during germination or early growth stages. This is a common indoor hydroponics technique.
- Embrace Microclimates: Notice if certain spots on your balcony are slightly brighter or more sheltered. Use these to your advantage for plants with slightly different needs.
Common Mistakes to Avoid:
- Planting Sun-Loving Varieties: This is the biggest mistake. Tomatoes, peppers, and most beans simply won’t thrive in deep shade, leading to disappointment. Stick to the shade-tolerant list.
- Overwatering: In shadier, cooler conditions, soil doesn’t dry out as quickly. Overwatering leads to root rot and fungal diseases. Always check soil moisture before watering.
- Neglecting Drainage: Poor drainage is a death sentence for container plants. Ensure all pots have holes and aren’t sitting in standing water.
- Forgetting to Fertilize: Container plants quickly deplete nutrients from their limited soil volume. Regular feeding with organic fertilizers is vital.
- Ignoring Pests: Pests can multiply quickly. Early detection and organic intervention are key to preventing infestations.
Eco-Friendly Variations for Your Green Oasis
Incorporating eco-conscious practices enhances the sustainability of your north-facing balcony garden, aligning with urban permaculture principles.
- Composting: Start a small worm farm (vermicompost bin) for kitchen scraps. The “worm tea” is an excellent liquid fertilizer for your balcony plants, and the castings enrich your potting mix.
- Rainwater Harvesting: Set up a small system to collect rainwater from a balcony overhang or drainpipe. Rainwater is free of chlorine and other chemicals found in tap water, making it better for your plants.
- DIY Self-Watering Systems: Create self-watering containers from repurposed plastic bottles or buckets. This conserves water and reduces watering frequency.
- Seed Saving: Save seeds from your favorite open-pollinated varieties. This reduces costs and preserves biodiversity.
- Repurposed Containers: Give new life to old tires, plastic bottles, or wooden pallets as planters. Ensure they are food-safe and have proper drainage.
- Organic Pest Control: Rely on companion planting, beneficial insects (attracted by specific flowers), and homemade sprays (garlic, chili, soap) instead of synthetic pesticides.
Seasonal Considerations for a Year-Round Harvest
While a north-facing balcony inherently faces light limitations, you can still plan for seasonal productivity. Adjust your planting schedule and plant choices to make the most of varying light conditions throughout the year.
Spring:
This is prime time for most leafy greens, radishes, and many herbs. The increasing light and moderate temperatures are ideal. Start seeds indoors if your balcony is still too cold or dark. Plant successive crops every few weeks for a continuous harvest.
Summer:
Even a north-facing balcony can experience higher indirect light during the peak summer months. This might be when you can attempt quick-growing bush beans or perhaps alpine strawberries. Be vigilant with watering, as even indirect sun can lead to quicker drying, but avoid overwatering in deep shade. Consider adding reflective materials to maximize any fleeting direct sun or diffuse light.
Autumn:
As temperatures cool and daylight hours shorten, autumn is another excellent season for leafy greens like spinach, kale, and Swiss chard, which sweeten up with a touch of frost. Root vegetables like carrots and radishes can also continue to grow. Plant hardy herbs that can withstand cooler weather.
Winter:
For most northern climates, winter on a north-facing balcony means very little growth. However, extremely hardy greens like certain varieties of kale or collards might survive with protection (e.g., a mini hoop house or cloche). Herbs like parsley and chives can sometimes overwinter. Consider bringing some potted herbs indoors to a brightly lit window for fresh winter greens. If winter is mild, some growth may occur, albeit slowly.
Expert Resources for Further Learning
Deepen your gardening knowledge with these trusted resources. They offer extensive information on various aspects of gardening, perfect for both beginners and experienced growers.
- For comprehensive plant care guides and troubleshooting, visit Gardening Know How. They have an extensive database covering almost any plant you can imagine.
- Discover detailed horticultural advice and plant selection tools on the Royal Horticultural Society (RHS) website. Their plant finder is invaluable.
- Explore research-based gardening information from University of Minnesota Extension, providing science-backed advice on sustainable practices.
Conclusion: Your North-Facing Balcony, A Verdant Possibility
Growing food on a north-facing balcony is not just a dream; it’s an achievable and deeply satisfying reality. By understanding the unique light conditions, selecting the right plants, and applying smart urban permaculture techniques, you can transform a neglected space into a productive mini-farm.
Embrace the shade, learn from your plants, and enjoy the fresh, organic flavors of your own homegrown edibles. Your north-facing balcony can become a testament to resilience, resourcefulness, and the enduring power of green living in the heart of the city. Happy growing!
Frequently Asked Questions (FAQ)
Q1: What is the absolute best plant for a north-facing balcony?
A1: Generally, loose-leaf lettuces, spinach, and Swiss chard are among the easiest and most productive plants for a north-facing balcony. Many varieties of mint and parsley also thrive in these conditions.
Q2: How much light is considered “north-facing balcony” light?
A2: A north-facing balcony typically receives 2-4 hours of indirect, ambient light, possibly with some very brief periods of direct sun early or late in the day during summer. It’s usually characterized by a lack of direct midday sun.
Q3: Can I grow tomatoes on a north-facing balcony?
A3: It is highly unlikely that true tomatoes will produce a significant, if any, harvest on a north-facing balcony. They are sun-loving plants that require at least 6-8 hours of direct sunlight. You might get some small, sparse fruit on very specific micro-dwarf varieties if you have exceptional ambient brightness and reflective surfaces, but it’s generally not recommended.
Q4: How can I improve light on a very dark north-facing balcony?
A4: The most effective ways are using reflective surfaces (white paint, mirrors, reflective foils) on walls and railings to bounce light onto plants. Vertical tiered planters can also help lift plants higher to catch more ambient light. For extremely dark areas, a small supplementary LED grow light might be considered for specific plants.