The Ultimate 7-Step Guide to Growing Container Tomatoes for Beginners
Dreaming of fresh, sun-ripened tomatoes, even if you only have a small balcony or patio? Growing tomatoes in containers is not only possible but incredibly rewarding. This comprehensive guide is specifically designed for beginners, offering a clear, step-by-step path to success, ensuring you harvest juicy, flavorful tomatoes right from your doorstep. Say goodbye to bland grocery store tomatoes and hello to homegrown deliciousness!
[lwptoc]
Container gardening provides an accessible entry point into the world of growing your own food, and tomatoes are a fantastic choice to start with. They are relatively forgiving, produce abundant yields, and offer an unparalleled taste experience compared to their commercially grown counterparts. Even if you’ve never touched dirt before, you’ll find that with the right guidance, fresh tomatoes are well within your reach.
Why Growing Container Tomatoes Matters for Your Garden (and Plate!)
Choosing to grow tomatoes in containers offers a myriad of benefits, making it an excellent option for gardeners of all experience levels, especially those with limited space. Firstly, it provides incredible flexibility; you can move your plants to optimize sunlight exposure throughout the day, protecting them from harsh weather or pests. This mobility is a game-changer for urban gardeners or anyone with a small yard, balcony, or even just a sunny windowsill.
Beyond space constraints, container gardening often leads to fewer soil-borne diseases. Since you’re using fresh, sterile potting mix for each season, you significantly reduce the risk of pathogens that can build up in garden beds over time. This controlled environment also makes it easier to manage pests, as you can isolate affected plants or move them away from infestations.
The satisfaction of eating a tomato you’ve grown yourself is truly unmatched. The flavor, texture, and aroma of a homegrown tomato far surpass anything you can buy in a supermarket, which are often picked green and ripened artificially. You’ll be providing your family with fresh, nutrient-rich produce, free from unknown chemicals often found on conventionally grown fruits.
Finally, container tomatoes are perfect for observing and learning about plant growth cycles up close. Their accessibility means you can easily monitor their progress, identify problems early, and connect more deeply with the natural world around you. It’s a wonderful educational experience for children and adults alike, fostering a greater appreciation for where our food comes from.
What You Need: Essential Tools, Materials, and Plant Choices
Before you dive in, gathering the right supplies is crucial for setting yourself up for success. Don’t worry, you don’t need a professional garden shed full of tools; a few key items will get you started on your container tomato journey. The right choices now will save you headaches later.
1. The Right Container
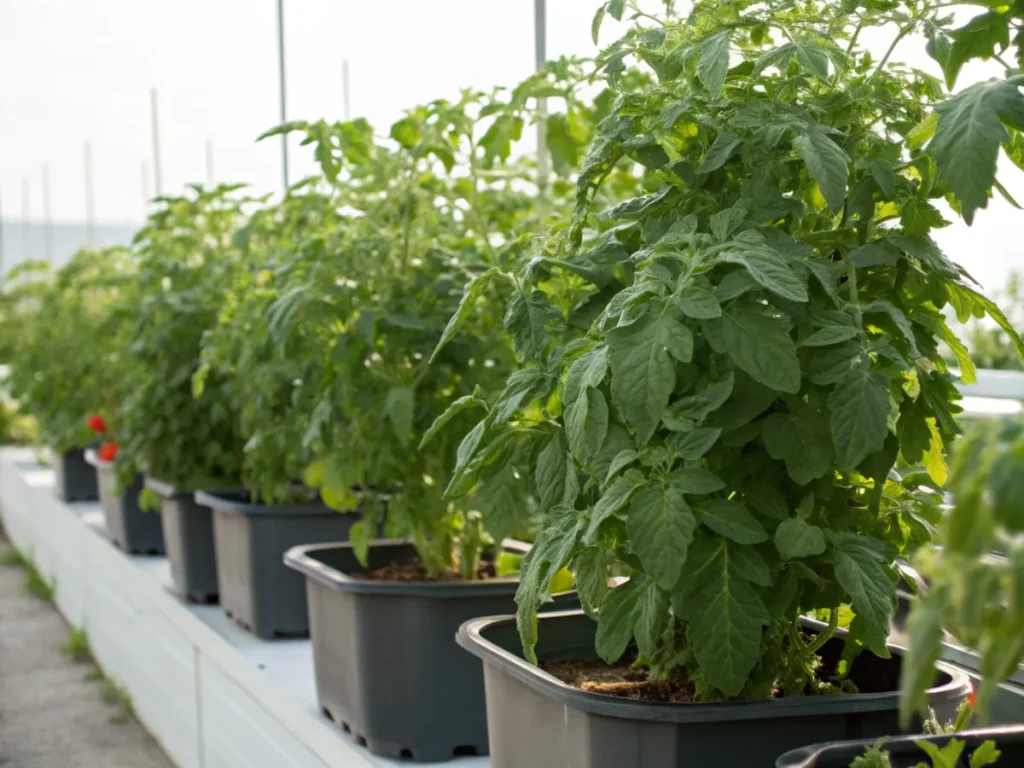
- Size Matters: This is arguably the most important decision. Tomatoes are heavy feeders and drinkers. For determinate (bush) varieties, a container of at least 5-gallon capacity (18-20 liters) is recommended. For indeterminate (vining) varieties, which grow much larger, aim for a 10-20 gallon container (38-75 liters) or half whiskey barrels. The bigger, the better, to allow for extensive root development.
- Material: Terracotta pots look lovely but can dry out quickly, requiring more frequent watering. Plastic pots retain moisture better. Fabric grow bags are excellent for aeration, preventing root circling, and regulating temperature; they are also lightweight and easy to store. Ensure your chosen container has ample drainage holes at the bottom to prevent waterlogging, which can lead to root rot.
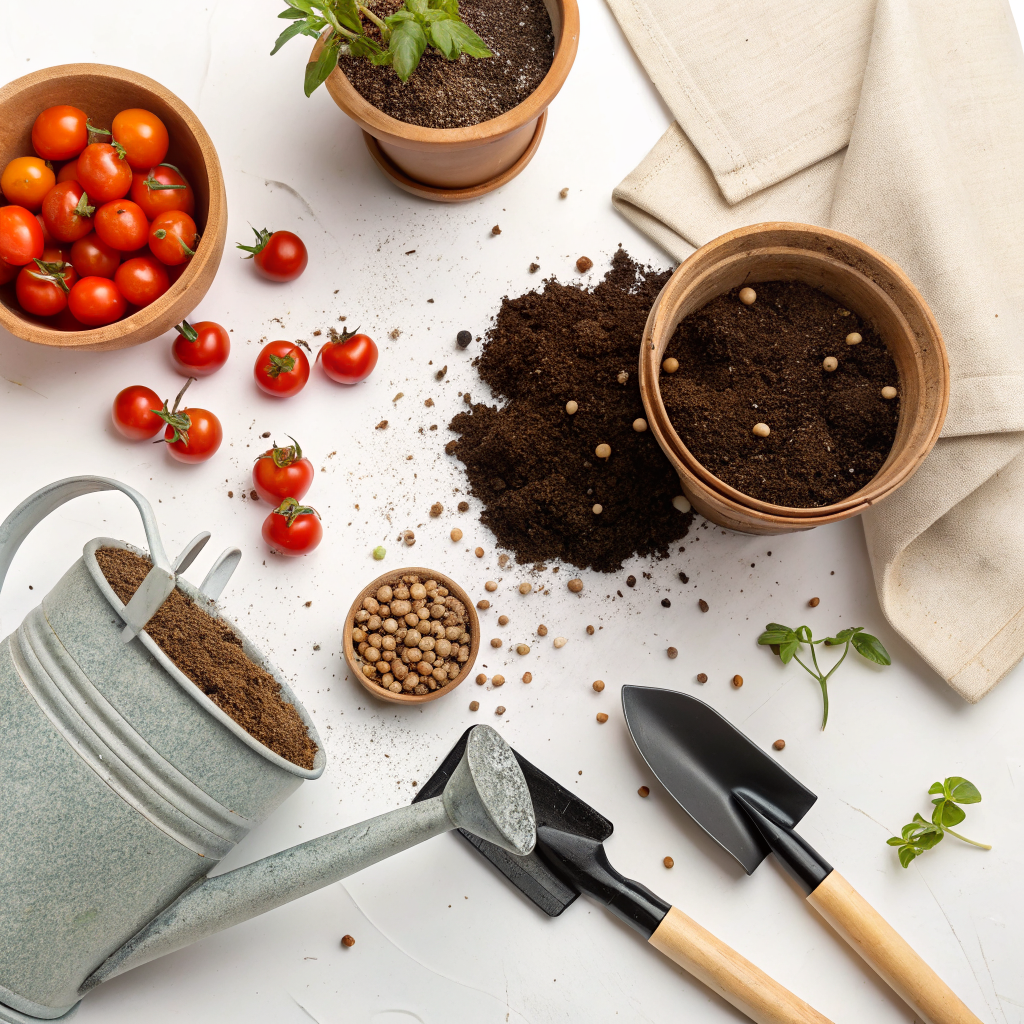
2. High-Quality Potting Mix
- Not Garden Soil: Never use garden soil in containers! It’s too dense, compacts easily, and can introduce pests and diseases.
- Choose Wisely: Opt for a high-quality potting mix specifically designed for containers or raised beds. Look for mixes that are lightweight, well-draining, and rich in organic matter. Many good brands include perlite or vermiculite for drainage and aeration, and some even have slow-release fertilizers.
3. Tomato Varieties for Containers
- Determinate (Bush) Varieties: These varieties grow to a pre-determined size, produce their fruit all at once, and then decline. They are ideal for containers due to their more compact growth habit. Examples include ‘Celebrity’, ‘Roma’, ‘Patio Princess’, ‘Bush Early Girl’, and ‘Tiny Tim’ (cherry variety).
- Indeterminate (Vining) Varieties: These varieties continue to grow, flower, and produce fruit throughout the entire growing season until frost. While they require larger containers and more support, varieties like ‘Sungold’ (cherry), ‘Early Girl’, ‘Big Beef’, or ‘San Marzano’ can thrive in large pots with adequate care. Beginners might want to start with determinate types.
- Disease Resistance: When selecting your plants or seeds, look for varieties marked with letters like ‘VFN T A’ indicating resistance to Verticillium wilt, Fusarium wilt (races 1 and 2), Nematodes, Tobacco Mosaic Virus, and Alternaria Stem Canker. This adds another layer of success.
4. Support Systems
- Essential for Most: Even determinate varieties benefit from support, and it’s absolutely crucial for indeterminate types.
- Options: Tomato cages (ensure they are sturdy and tall enough, at least 3-5 feet), stakes (bamboo or sturdy wood), or trellises are all viable options. Install support at the time of planting to avoid disturbing roots later.
5. Watering Can or Hose
- Consistent Moisture: Tomatoes are thirsty plants, especially in containers. A good watering can with a gentle shower head or a hose with a spray nozzle is essential.
6. Fertilizer
- Nutrient Boost: Your potting mix will provide initial nutrients, but tomatoes are heavy feeders. You’ll need a balanced liquid fertilizer (like 5-10-5 or 5-10-10) or an organic option once the plant starts setting fruit.
7. Pruning Shears/Bypass Clippers (Optional but Recommended)
- Clean Cuts: For pruning suckers and diseased foliage.
Step-by-Step Guide: Planting Your Container Tomatoes
Now that you have all your supplies, let’s get your tomato plants into their new homes! Follow these steps carefully to give your plants the best possible start.
Step 1: Choose the Right Location
Tomatoes are sun worshipers. They need at least 6-8 hours of direct sunlight per day to produce well. Ideally, aim for 8+ hours. Observe your chosen spot throughout the day to ensure it receives adequate sun exposure. A south-facing balcony or patio is often ideal. Remember that container plants can be moved if needed.
Step 2: Prepare Your Container
If you’re reusing a container, make sure to clean it thoroughly with a diluted bleach solution (1 part bleach to 9 parts water) to kill any lingering pathogens, then rinse well. Place a layer of newspaper or a coffee filter over the drainage holes before adding soil; this prevents soil from washing out but still allows water to drain. Fill your container about two-thirds full with your high-quality potting mix.
Step 3: Plant Your Tomato Seedling
Tomato plants are unique in their ability to grow roots from their stems. This means you can plant them deeper than they were in their nursery pot. Gently remove the seedling from its nursery container, being careful not to damage the roots. Pinch off any leaves on the lower stem that would be buried in the soil. Dig a hole in the center of your potting mix, deep enough to bury about two-thirds of the plant’s stem. Place the seedling in the hole, fill with soil, and gently firm the soil around the base of the plant. This deep planting encourages a stronger, more extensive root system.
Step 4: Provide Immediate Support
Once planted, immediately install your chosen support system (cage, stake, or trellis). Placing it at planting time prevents root damage that can occur if you try to add it later. Gently guide the main stem of the plant to the support and loosely tie it if using a stake or trellis. As the plant grows, continue to tie it to the support as needed.
Step 5: Initial Watering and Mulching
After planting, water your tomato plant thoroughly until water drains from the bottom of the container. This helps settle the soil around the roots. You might need to add a bit more potting mix if the soil level sinks significantly. Consider applying a 1-2 inch layer of organic mulch (like straw, shredded leaves, or wood chips) on top of the soil. Mulch helps retain moisture, regulate soil temperature, suppress weeds, and adds organic matter as it breaks down. Keep the mulch a few inches away from the plant stem to prevent rot.
Pro Tips for Thriving Container Tomatoes and Common Mistakes to Avoid
Moving beyond the basics, these pro tips will help you maximize your harvest and avoid common pitfalls often encountered by beginner gardeners. A little extra attention goes a long way with container tomatoes.
1. Consistent Watering is Key
Container plants dry out faster than in-ground plants. Check the soil moisture daily, especially during hot, dry weather. Stick your finger about an inch or two into the soil; if it feels dry, it’s time to water. Water deeply until you see water draining from the bottom. Avoid erratic watering (drying out completely then drenching), which can lead to blossom end rot and fruit splitting. Automatic drip irrigation systems can be a lifesaver for container gardens.
2. Fertilize Regularly
Tomatoes are hungry! Your potting mix’s initial nutrients will deplete within a few weeks. Start fertilizing once the plant begins to set fruit. Use a balanced liquid fertilizer (e.g., 5-10-5 or 5-10-10) every 1-2 weeks, following the product’s instructions. Alternatively, you can use organic options like fish emulsion or compost tea. Too much nitrogen (the first number in the NPK ratio) can lead to lush foliage but fewer fruits, so aim for a balanced or slightly higher potassium and phosphorus blend.
3. Pruning for Health and Yield
Pruning suckers (the small shoots that grow in the crotch between the main stem and a leaf branch) is generally recommended for indeterminate varieties to direct the plant’s energy into fruit production rather than excessive foliage. For determinate varieties, occasional removal of diseased or yellowing lower leaves is usually sufficient. Always use clean shears for pruning. You can learn more about specific pruning techniques on Gardening Know How.
4. Monitor for Pests and Diseases
Regularly inspect your plants for signs of pests (aphids, hornworms, spider mites) or diseases (blight, powdery mildew). Early detection is critical. Hand-pick larger pests, or use organic pest control methods like neem oil or insecticidal soap if infestations occur. Ensure good air circulation by spacing plants appropriately and pruning lower leaves to prevent fungal issues. For more detailed information on identifying and treating plant problems, explore resources like RHS.org.uk.
5. Harvest at the Right Time
Harvest tomatoes when they are fully colored but still firm. Gently twist or cut the fruit from the vine, leaving a little bit of the stem attached. Picking regularly encourages the plant to produce more. Store ripe tomatoes at room temperature, not in the refrigerator, to preserve their flavor and texture.
Common Mistakes to Avoid:
- Under-sizing Containers: Leads to stunted growth, poor yield, and frequent watering headaches. Always go bigger than you think you need.
- Using Garden Soil: Causes compaction, poor drainage, and potential disease. Stick with quality potting mix.
- Inconsistent Watering: The number one cause of blossom end rot and cracked fruits. Maintain even moisture.
- Forgetting to Fertilize: Containers leach nutrients faster. Your plants will starve without supplemental feeding.
- Lack of Support: Leads to broken branches, damaged fruit, and sprawling plants that are harder to manage.
- Ignoring Pests/Diseases: A small problem can quickly become a big one if not addressed early.
Eco-Friendly Variations for a Sustainable Harvest
Incorporating eco-conscious practices into your container tomato growing not only benefits the environment but can also lead to healthier, more resilient plants. Embrace these sustainable approaches for a truly green thumb experience.
Compost Tea: Instead of relying solely on synthetic fertilizers, make your own nutrient-rich compost tea. Steep finished compost in water for a day or two, then strain and use the liquid to water your plants. It provides a gentle, slow-release feeding and enhances soil microbiology. This is a fantastic way to recycle kitchen and garden waste into valuable plant food, as discussed on nouvelles-technologie.com’s guide to compost benefits.
Rainwater Harvesting: Collect rainwater in barrels or buckets to water your plants. Rainwater is free of chlorine and other chemicals found in tap water, which can be beneficial for plant health. It’s also an excellent way to conserve municipal water resources.
DIY Potting Mixes: While commercial potting mixes are convenient, you can create your own by combining coco coir or peat moss, perlite or vermiculite, and a good quality compost. This allows you to control the ingredients, avoid questionable additives, and potentially save money. Ensure your components are sustainably sourced.
Companion Planting: While space is limited in containers, you can still strategically plant small companions. Marigolds (Tagetes spp.) can deter nematodes and other pests when planted at the base of your tomato container. Basil, another excellent companion, is thought to improve tomato flavor and deter hornworms and flies. Consider a small basil plant in the same large container or in a small pot next to the tomato.
Repurposed Containers: Get creative with your containers! Old five-gallon buckets (drill drainage holes!), laundry baskets lined with fabric, or even sturdy produce crates can be upcycled into excellent tomato homes. This reduces waste and adds unique character to your garden. Think about the tips for maximizing small garden spaces when considering these options.
Integrated Pest Management (IPM): Focus on prevention rather than chemical treatments. Encourage beneficial insects (like ladybugs and lacewings that eat aphids) by avoiding broad-spectrum pesticides. Use physical barriers, hand-picking, and organic sprays as a last resort. This holistic approach is better for your plants, your health, and the local ecosystem.
Seed Starting: Instead of buying seedlings every year, try starting your tomatoes from seed. This gives you access to a wider variety of heirloom and open-pollinated options, promoting biodiversity. It’s also more cost-effective and gives you complete control from the very beginning. Learn more about seed starting with guides like those found on nouvelles-technologie.com on indoor seed starting.
Seasonal Considerations for Year-Round Enjoyment (in Suitable Climates)
Tomato growing is largely dictated by your local climate, but understanding seasonal effects can extend your harvest or prepare you for the next growing cycle. While tomatoes are typically summer crops, careful planning can make the most of your container setup.
Spring: This is the time for planting! After your last frost date, and once night temperatures consistently stay above 50°F (10°C), you can safely transplant your seedlings outdoors. Acclimate them gradually to outdoor conditions (hardening off) over a week or two before final placement. Ensure your supports are ready and watering begins consistently.
Summer: Peak growing season. This is when your full attention to watering, fertilizing, and pest monitoring is most crucial. Sunlight is abundant, and plants grow rapidly. Protect plants from extreme heat (above 90°F / 32°C) by moving them to a location with afternoon shade or providing temporary shade cloth, as high temperatures can prevent fruit set. Continue to prune suckers and tie up indeterminate varieties. Harvesting will begin!
Autumn: As temperatures begin to cool, fruit production might slow down. Continue watering and feeding as long as the plants are producing. Before the first hard frost, you can pick any remaining green tomatoes. These can ripen indoors on a counter or in a paper bag. Some gardeners even bring entire determinate plants indoors to a sunny window to extend the harvest a bit longer, although this requires careful pest management.
Winter: For most regions, winter is a dormant period. Clean out your containers, dispose of spent plants (compost if healthy), and sterilize your pots. Store them away for the next season. If you live in a frost-free climate, you might be able to grow tomatoes year-round, rotating varieties to avoid nutrient depletion and disease buildup in the soil over many seasons. Regularly replacing potting mix or heavily amending it with fresh compost is essential for continuous growing.
Expert Resources and Further Learning
To deepen your understanding and troubleshoot any specific challenges, consulting reputable gardening resources is invaluable. Here are some excellent external links recommended for container tomato beginners:
- Gardening Know How – Container Grown Tomatoes: A fantastic all-around resource for practical gardening advice, covering a wide array of topics for both beginners and experienced gardeners.
- Royal Horticultural Society (RHS) – Grow Your Own Tomatoes: The RHS offers authoritative advice on plant cultivation, with detailed guides on various crops and gardening techniques, perfect for a deeper dive into tomato care.
- University of Minnesota Extension – Growing Tomatoes: University extension services provide science-based information relevant to local climates and conditions, offering reliable, research-backed guidance on gardening practices.
Conclusion: Enjoy the Fruits of Your Labor!
Growing tomatoes in containers is an incredibly rewarding experience that brings fresh, delicious produce right to your home, regardless of whether you have a sprawling garden or just a small sunny spot. By following these beginner-friendly steps, choosing the right varieties and supplies, and consistently providing care, you’ll be well on your way to a bountiful harvest.
Remember that gardening is a journey of continuous learning. Don’t be discouraged by minor setbacks; every year offers new opportunities to refine your skills and experiment with different techniques. The joy of plucking a warm, ripe tomato directly from your own plant, bursting with flavor, makes every effort worthwhile. So, roll up your sleeves, get your hands dirty, and prepare to savor the unparalleled taste of your homegrown container tomatoes. Happy gardening!
Frequently Asked Questions about Container Tomatoes for Beginners
<h4>Q1: My tomato leaves are turning yellow. What's wrong?</h4>
<p>A: Yellowing leaves can indicate several issues. Lower leaves turning yellow often points to a nitrogen deficiency (needs fertilizer) or simply older leaves dying off. If yellowing is widespread and accompanied by wilting, it could be overwatering (root rot) or underwatering. Check soil moisture first, then consider a balanced fertilizer. Fungal diseases can also cause yellowing; look for spots or patterns. Ensure good air circulation and avoid overhead watering.</p>

<h4>Q2: Why are my tomato flowers falling off, and no fruit is setting?</h4>
<p>A: This is commonly called "blossom drop." The most frequent culprits are extreme temperatures (too hot, above 90°F / 32°C, or too cold, below 55°F / 13°C), irregular watering, or a lack of pollination. Ensure consistent moisture, provide afternoon shade during heatwaves, and consider gently shaking the plant or using an electric toothbrush on flowers to aid pollen dispersal, especially if you lack natural pollinators.</p>

<h4>Q3: How often should I water my container tomatoes?</h4>
<p>A: There's no one-size-fits-all answer, as it depends on container size, weather, and plant size. As a rule of thumb, check your plants daily. Stick your finger 1-2 inches into the soil. If it feels dry, water thoroughly until water drains from the bottom. In hot, sunny weather, you might need to water twice a day. The key is consistency; avoid letting the soil dry out completely or stay constantly soggy.</p>

<h4>Q4: Can I grow different tomato varieties in the same container?</h4>
<p>A: While technically possible, it's generally not recommended for beginners or for maximizing yield. Different varieties have different growth habits (bushy vs. vining) and nutrient requirements. Putting two plants in one large container can lead to competition for nutrients, water, and space, often resulting in reduced yield and health for both. It's best to give each tomato plant its own appropriately sized container for optimal growth.</p>


