Ultimate Guide: Hot Compost in Just 18 Days
Are you eager to superpower your garden with nutrient-rich compost but don’t want to wait months or even years? Good news! Achieving finished, healthy compost in a mere hot compost 18 days is not a myth; it’s an achievable goal with the right approach. This comprehensive guide will reveal the secrets to rapid composting, transforming your kitchen scraps and yard waste into gardener’s gold in under three weeks. Get ready to revolutionize your composting game and provide your plants with the vibrant fertility they deserve!
[lwptoc]
Why Rapid Composting Matters for Your Garden and the Planet
Beyond the sheer satisfaction of creating something valuable from waste, hot composting offers significant benefits. For your garden, it delivers immediate access to high-quality soil amendment, boosting soil structure, water retention, and microbial activity. This translates to healthier, more robust plants, increased yields, and a reduced need for artificial fertilizers.
From an ecological perspective, diverting organic waste from landfills is crucial. When organic matter decomposes anaerobically in landfills, it produces methane, a potent greenhouse gas. Hot composting, being an aerobic process, significantly reduces methane emissions, making it an environmentally responsible choice. Furthermore, it closes the loop in your garden’s ecosystem, recycling valuable nutrients naturally.
Imagine the convenience of having a fresh batch of compost ready for spring planting, mid-season boosts, or fall soil enrichment, all without the long waiting periods associated with traditional cold composting. This speed allows for continuous composting cycles, ensuring a steady supply of this indispensable soil amendment whenever your garden demands it.
What You Need: Tools, Materials, and the Right Mindset
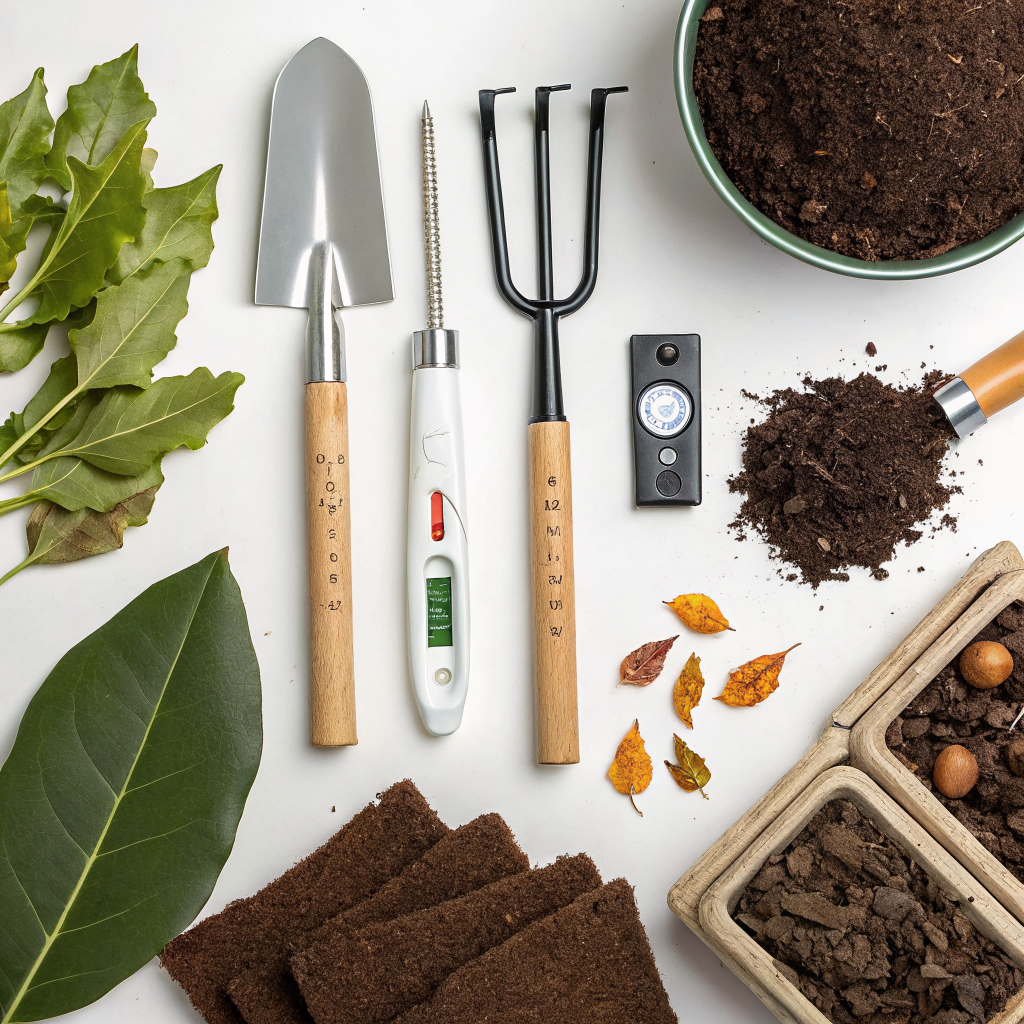
Successful hot compost 18 days relies on having the right equipment and understanding the fundamental principles. You don’t need highly specialized tools, but a few key items will make the process much smoother and more efficient. Gathering your materials beforehand is vital for a quick start.
- A Well-Ventilated Compost Bin or Pile Space: A minimum size of 3x3x3 feet (1 cubic meter) is ideal for generating and retaining heat. Tumblers can work, but a traditional pile or a sturdy three-sided bin often performs better for true hot composting due to better mass retention.
- Source of “Greens” (Nitrogen-Rich Materials): These are moist, fresh, and provide the fuel for microbial activity. Examples include fresh grass clippings, kitchen scraps (fruit and vegetable peels, coffee grounds, tea bags), fresh weeds (seed-free), and manure (chicken, horse, rabbit).
- Source of “Browns” (Carbon-Rich Materials): These provide structure and energy for microorganisms. Examples include dry leaves, shredded cardboard/paper (non-glossy, non-colored), straw, wood chips, and small twigs.
- Water Source: A hosepipe or watering can is essential to maintain the correct moisture level, which should be like a wrung-out sponge.
- Compost Thermometer: Absolutely critical for monitoring the internal temperature of your pile. Look for one with a long probe (12-24 inches) to reach the center of the pile effectively.
- Pitchfork or Aerating Tool: For turning and mixing the pile regularly, which is key for aeration and even decomposition.
- Gloves: For hygiene and comfort when handling materials.
- Shredder/Chipper (Optional but Recommended): For breaking down larger materials, which significantly speeds up decomposition. Smaller pieces provide more surface area for microbes to work on.
- A Positive, Proactive Attitude: Hot composting is an active process. You’ll need to commit to monitoring and turning the pile consistently.
Understanding the “greens” to “browns” ratio is paramount. A good starting point is roughly 2 parts browns to 1 part greens by volume, or even 1:1 for very nitrogen-rich greens like fresh grass. However, the exact ratio often needs adjustment based on the specific materials you have available and the heat generated.
Step-by-Step Guide: How to Achieve Hot Compost in Just 18 Days
Ready to embark on your rapid composting journey? Follow these steps diligently, and you’ll be sifting through beautiful, dark compost in no time. Precision and consistency are your best friends here.
Step 1: Gather and Prepare Your Materials
This initial phase is crucial for setting the stage for rapid decomposition. Collect all your greens and browns before you start building your pile. Chop or shred all materials into small pieces, ideally 1-2 inches (2.5-5 cm). Smaller pieces offer more surface area for decomposers, vastly accelerating the process. For instance, instead of whole banana peels, cut them into small chunks. Shred autumn leaves and cardboard.
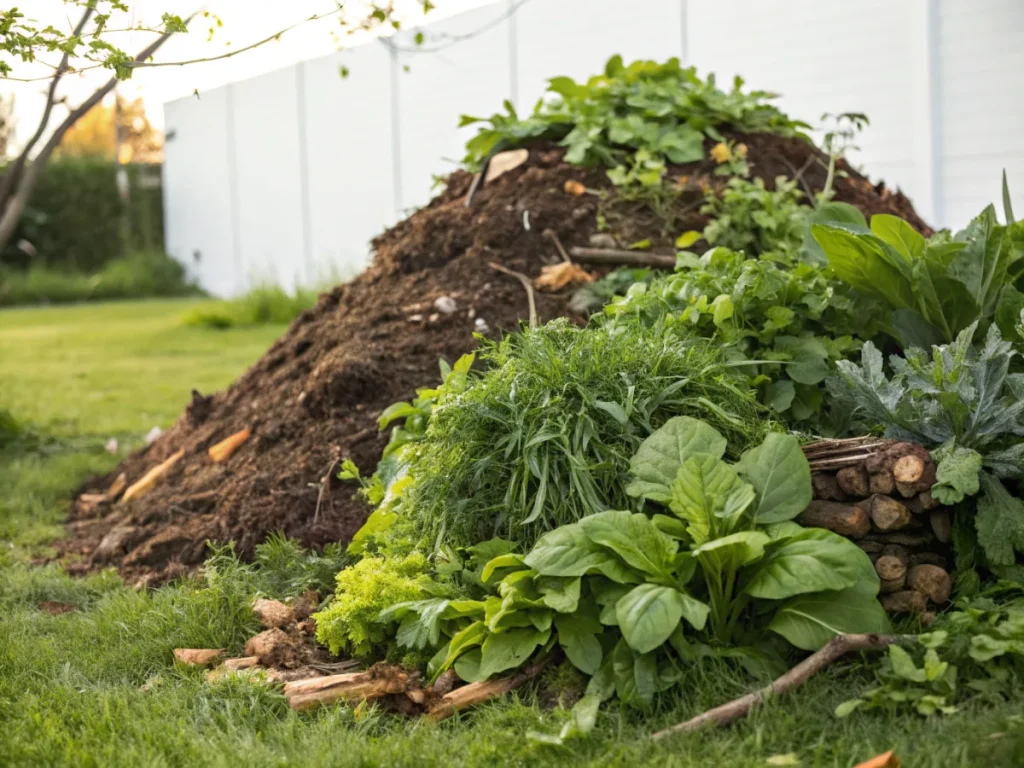
Step 2: Build Your Pile with the Right Layers and Moisture
Creating an optimally sized pile is non-negotiable for hot composting. Aim for at least 3x3x3 feet (1 cubic meter) to ensure sufficient mass for heat retention. Build your pile in layers, alternating between greens and browns. Start with a base of coarser brown material to aid air circulation. Each layer should be relatively thin, allowing for good mixing. As you build, thoroughly moisten each layer with water until it’s damp, like a wrung-out sponge, but not waterlogged. Too much water will create anaerobic conditions; too little will slow decomposition.
Pro Tip: Consider adding a handful of finished compost or a shovel-full of garden soil to each layer. This introduces a diverse community of beneficial microbes that jumpstart the decomposition process.
Step 3: Monitor and Achieve the Target Temperature (Days 1-4)
After building your pile, decomposition will begin, and the temperature should start to rise within 24-48 hours. Insert your compost thermometer into the center of the pile. Your goal is to reach an internal temperature between 130°F and 160°F (55°C and 70°C). This temperature range is critical for rapidly breaking down organic matter, killing weed seeds, and eliminating most pathogens. Check the temperature daily. If it doesn’t heat up, you might need more nitrogen (add greens) or more moisture. If it gets too hot (above 170°F/77°C), it can kill beneficial microbes; in this case, turn the pile immediately to cool it down.
Step 4: Turn Your Pile Religiously (Every 2-3 Days)
This is arguably the most critical step for rapid hot composting. Once your pile reaches its peak temperature (130-160°F), you must turn it every 2-3 days for the next 14-16 days. Turning accomplishes two things: it aerates the pile, providing much-needed oxygen for the aerobic bacteria, and it redistributes the cooler outer material to the hot center, ensuring all parts of the pile decompose evenly. It’s a workout, but essential! Use your pitchfork to completely mix the pile, ensuring the interior material comes to the outside and vice-versa. During turning, check the moisture content and add water if necessary.
For more insights on efficient composting methods, you can visit this article on efficient composting methods.
Step 5: Maintain and Observe for Maturity (Day 18)
After approximately 6-8 turns over 18 days, you should notice a significant change. The pile will have shrunk considerably, lost its strong odors (it might smell earthy), and the original materials will be largely unrecognizable. The temperature will also stop rising quickly after turning, indicating that the most readily available nutrients have been consumed by the microbes. At this point, your compost is likely mature. It should be dark brown, crumbly, and smell like fresh earth. If there are still a few larger pieces, you can sift them out and return them to the next batch of compost.
Pro Tips and Common Mistakes to Avoid
Even with the right steps, a few nuances can make or break your rapid composting efforts. Heed these pro tips and learn from common errors.
Pro Tips:
- Consistent Shredding: The smaller the pieces, the faster they break down. Invest time in shredding or chopping all materials.
- Layering for Success: Don’t just dump materials in; build your pile in alternating layers of browns and greens for optimal initial mixing.
- Water is Key: Always check moisture during turning. If it’s too dry, decomposition grinds to a halt. If too wet, it goes anaerobic.
- Use a Compost Activator (Optional): Commercially available compost activators or a handful of fresh finished compost or even horse/chicken manure can provide a microbial boost.
- Location, Location, Location: Place your pile in a spot that’s easily accessible and not too exposed to scorching sun or heavy winds, which can dry it out.
- Listen to Your Pile: A hot, active pile might emit steam when turned, a good sign! If it smells putrid, it’s too wet or lacks oxygen.
Common Mistakes and How to Fix Them:
- Pile Too Small: A small pile won’t generate or retain enough heat. Solution: Add more materials to reach the minimum 3x3x3 ft size.
- Incorrect Carbon-Nitrogen Ratio:
- Too Many Browns: Pile won’t heat up. Solution: Add more nitrogen-rich greens and turn the pile.
- Too Many Greens: Pile might become putrid and slimy due to anaerobic conditions. Solution: Add dry, carbon-rich browns (shredded cardboard, dry leaves) and turn thoroughly.
- Insufficient Moisture: Pile is dry and decomposition is slow. Solution: Add water while turning until it’s damp like a wrung-out sponge.
- Lack of Aeration/Turning: Pile becomes dense and anaerobic, leading to foul smells and slow breakdown. Solution: Turn the pile regularly and diligently, ensuring good oxygen flow.
- Adding Prohibited Materials:
- Meat, Dairy, Oily Foods: Attract pests and cause foul odors. Solution: Remove these immediately and avoid adding them to your hot compost pile.
- Diseased Plants: Can spread pathogens to your garden. Solution: Do not compost; dispose of separately.
- Weeds with Seeds (unless very hot): Can spread weeds. Solution: Only add them if you are confident your pile consistently reaches high temperatures (above 140°F/60°C) to kill seeds, otherwise avoid.
Eco-Friendly Variations and Enhancements
Beyond the standard hot composting method, there are ways to make your process even more sustainable and efficient.
- Worm Composting (Vermicomposting) for Kitchen Scraps: While not a hot composting method itself, vermicomposting is an excellent complementary system for handling kitchen scraps year-round, especially those not ideal for a hot pile (like limited amounts of citrus or onions). The ‘worm castings’ are an incredibly rich soil amendment. Learn more about it at Worm Composting Benefits.
- Biochar Integration: Incorporating biochar (a form of charcoal used as a soil amendment) into your compost pile can enhance microbial activity, improving nutrient retention in the finished product. Biochar also provides a stable structure in your soil for centuries.
- Comfrey and Bocking 14: Planting comfrey near your compost bin can provide a continuous supply of nutrient-rich ‘greens’ to boost your pile. Comfrey is a dynamic accumulator, drawing up nutrients from deep in the soil. The Bocking 14 variety is sterile, so it won’t spread aggressively.
- Rainwater Harvesting: Set up a rain barrel near your compost area to collect water for moistening your pile. This conserves tap water and uses a natural, free resource.
Seasonal Considerations for Your Hot Composter
The time of year influences hot composting, primarily due to ambient temperatures and material availability. Adjusting your strategy provides consistent results.
- Spring: Abundant with fresh grass clippings and garden clean-up waste (greens). Be mindful not to add too much wet material at once; balance with dry leaves saved from autumn or shredded cardboard. The warming weather helps the pile heat up.
- Summer: Ideal conditions for hot composting! High ambient temperatures often help maintain pile heat. Grass clippings and vegetable garden waste are plentiful. Just remember to keep the pile adequately moist, as evaporation rates are higher.
- Autumn: A goldmine for “browns” with falling leaves. Stockpile these by bagging them for use throughout the year. Garden clean-ups also provide ample material. The cooler temperatures mean you might need a slightly larger pile or more frequent turning to maintain optimal heat.
- Winter: Hot composting can be challenging but not impossible in cold climates. Build a larger pile to retain heat, or insulate your bin. Materials might freeze, slowing decomposition. Focus on adding high-nitrogen materials and consistent turning. Many choose to cold compost during winter and save hot composting for warmer months.
Even if you cannot maintain the optimal 18-day cycle during colder months, keeping your compost pile active means less work come spring. Find more gardening tips for different seasons at Gardening Tips for Every Season.
Expert Resources for Advanced Composting
To deepen your understanding and troubleshoot advanced issues, these external resources offer a wealth of information from horticultural experts:
- Gardening Know How: An excellent resource for practical gardening advice, including in-depth articles on various composting methods and problem-solving Gardening Know How – Hot Composting.
- Royal Horticultural Society (RHS): The RHS provides science-backed information on all aspects of gardening and composting. Their guides are invaluable for understanding the biological processes involved RHS – Composting Guide.
- University of Minnesota Extension: University extension services often offer region-specific advice and research-based knowledge on composting for home gardeners University of Minnesota Extension – Composting.
Conclusion: Your Journey to Speedy, Sustainable Soil Enrichment
Mastering hot compost 18 days is a rewarding endeavor that transforms your gardening practices. It’s an active, engaging process that puts you in direct control of creating a powerful soil amendment. By consistently preparing your materials, building a balanced pile, meticulously monitoring temperatures, and turning with dedication, you unlock the secret to rapid decomposition. Not only will your garden thrive with an endless supply of nutrient-rich compost, but you’ll also contribute significantly to reducing waste and promoting a healthier planet.
Embrace the challenge, enjoy the process, and soon you’ll be celebrating the incredible transformation of organic waste into gardener’s gold. Happy composting!
FAQ: Hot Composting in 18 Days
Q1: What’s the biggest challenge in achieving hot compost in 18 days?
A1: The biggest challenge is consistently maintaining the optimal temperature range (130-160°F or 55-70°C) and sticking to the rigorous turning schedule every 2-3 days. This commitment ensures proper aeration and even decomposition throughout the pile.
<h4>Q2: Can I hot compost in a small backyard?</h4>
<p>A2: While a 3x3x3 ft pile is ideal, you can hot compost in a smaller space, but it might require more attentiveness. Tumblers can work, but for true hot composting, the mass of a larger pile helps retain heat better. Adapting your materials to be very finely shredded and turning more frequently can help in confined spaces.</p>

<h4>Q3: What if my compost pile doesn't heat up?</h4>
<p>A3: If your pile doesn't heat up, it's usually due to too many browns, too little moisture, or insufficient size. Add more nitrogen-rich greens (like fresh grass clippings), moisten the pile thoroughly (like a wrung-out sponge), and ensure your pile is at least 3x3x3 feet, then turn it to mix everything.</p>

<h4>Q4: How do I know when the compost is "finished" for an 18-day cycle?</h4>
<p>A4: After 18 days and consistent turning, finished compost will be dark brown, crumbly, and have a pleasant earthy smell. The original materials will be largely unrecognizable, and the pile's temperature will no longer quickly rebound after turning, indicating that the active decomposition phase is complete.</p>


