
The Ultimate Guide to Making Biochar at Home for Superior Soil Health
Are you looking for a truly transformative, eco-friendly hack to revolutionize your garden? Imagine a soil amendment that not only boosts plant growth and water retention but also actively sequesters carbon from the atmosphere. This isn’t a futuristic fantasy; it’s biochar, and you can learn to make biochar at home for phenomenal soil health right in your backyard!
Biochar, a highly porous, charcoal-like substance, has been used for centuries by indigenous communities, most notably in the Amazonian ‘Terra Preta’ soils, renowned for their incredible fertility. By converting organic waste into this ‘black gold’ through a process called pyrolysis, gardeners can mimic these ancient practices and unlock a host of benefits for their plants, soil, and the planet. This comprehensive guide will walk you through everything you need to know, from understanding the science to mastering the DIY production process.
[lwptoc]
Why This Matters for Your Garden: Unlocking the Power of Biochar
Embracing the practice of making biochar at home for soil health is more than just a gardening trend; it’s a strategic move towards sustainable land management. The benefits extend far beyond a single growing season, offering long-term improvements to your garden’s ecosystem.
Enhanced Soil Fertility: Biochar acts like a microscopic condominium for beneficial soil microbes, creating a sheltered and nutrient-rich environment where they can thrive. These microbes are essential for breaking down organic matter, cycling nutrients, and making them available to your plants. Over time, biochar literally builds the fertility of your soil, reducing the need for synthetic fertilizers.
Improved Water Retention: The incredibly porous structure of biochar allows it to hold significant amounts of water, acting like a sponge within your soil. This is particularly advantageous in drier climates or during drought conditions, as it reduces irrigation needs and prevents precious water from quickly leaching away. Plants experience less water stress, leading to more robust growth.
Better Nutrient Retention: Biochar possesses a high cation exchange capacity (CEC), meaning it can effectively bind and hold onto essential plant nutrients like nitrogen, phosphorus, and potassium. Instead of these nutrients washing away with rain or irrigation, biochar keeps them within the root zone, making them available to plants over an extended period. This ‘slow-release’ effect ensures a steady supply of food for your garden.
pH Buffering: Biochar can help to stabilize soil pH, making it more resilient to fluctuations. For soils that are either too acidic or too alkaline, biochar can gradually help to bring the pH closer to an optimal range for most plants. This creates a more hospitable environment for root development and nutrient uptake.
Reduced Leaching and Runoff: By improving water and nutrient retention, biochar significantly discourages the leaching of precious resources into groundwater and surface runoff. This not only keeps valuable nutrients in your garden but also helps protect local waterways from nutrient pollution, making your gardening practices more environmentally responsible.
Carbon Sequestration: This is arguably one of the most powerful environmental benefits. Biochar is essentially stable carbon. When you make biochar at home, you are converting organic waste, which would otherwise decompose and release carbon dioxide into the atmosphere, into a stable form that can remain in the soil for hundreds, even thousands, of years. This process actively removes carbon from the atmosphere, contributing to climate change mitigation. It’s a tangible way for individual gardeners to make a positive impact.
Pest and Disease Resistance: While not a direct pesticide, healthier plants grown in biochar-amended soil are generally more resilient to pests and diseases. The improved nutrient uptake and microbial activity strengthen the plant’s natural defenses, leading to a more vigorous and disease-resistant garden.
Waste Diversion: Using garden waste, fallen branches, and other biomass to create biochar reduces the amount of material sent to landfills or burned in open piles (which often releases harmful emissions). It’s a fantastic way to close the loop on garden waste, turning what might be considered trash into a valuable resource.
By understanding these multifaceted advantages, you can appreciate why integrating biochar into your gardening routine by learning to make biochar at home for soil health is such a worthwhile endeavor. It harmonizes ecological principles with practical gardening benefits, creating a truly sustainable and productive growing space.
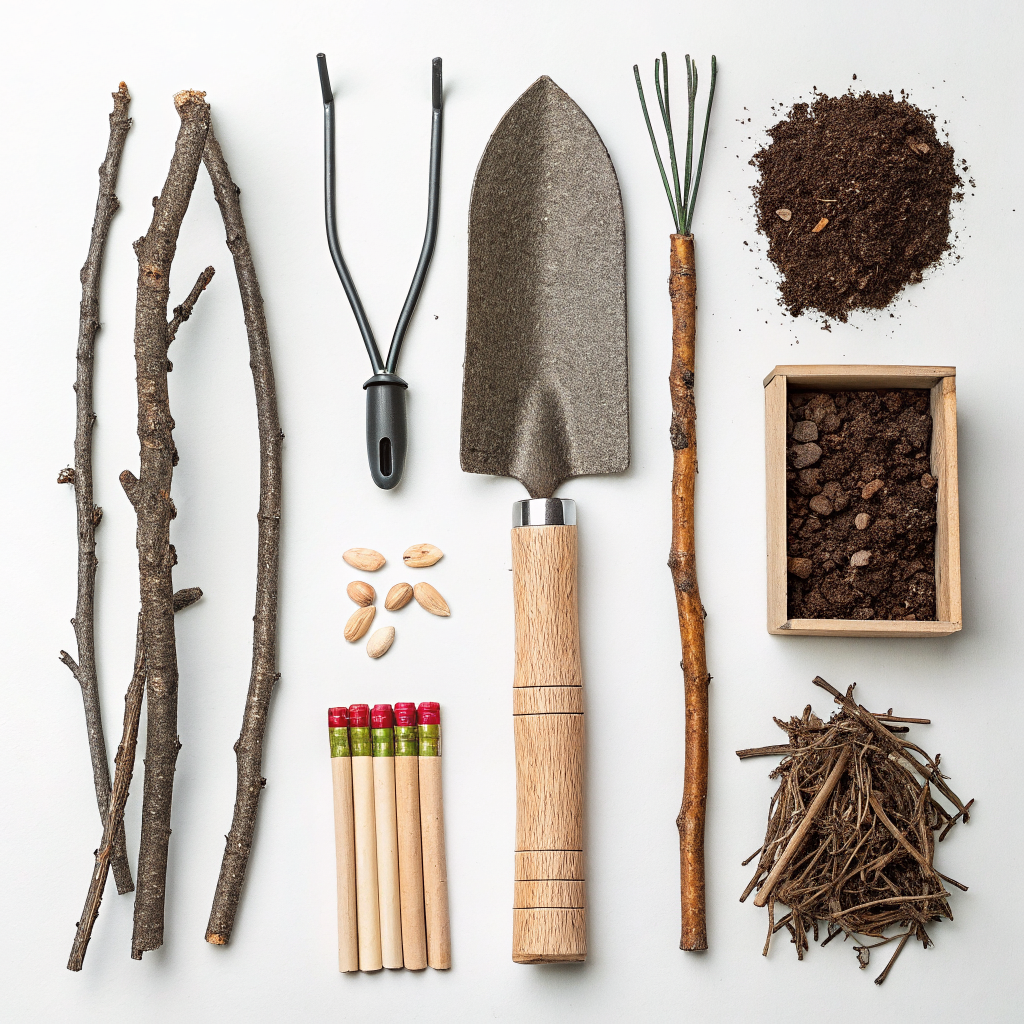
What You Need: Tools and Materials for DIY Biochar Production
Making biochar at home doesn’t require highly specialized or expensive equipment. With a few common items, you can create a safe and effective pyrolysis setup. The key is to create a low-oxygen environment to char the organic material, rather than burning it to ash. Here’s a breakdown:
Essential Tools:
- Metal Barrel (55-gallon): This will be your primary pyrolysis chamber. Look for one that’s clean and hasn’t contained toxic chemicals. A tight-fitting lid is crucial.
- Smaller Metal Barrel or Steel Pipe (optional but recommended): This will be placed inside the larger barrel to create the ‘flame cap’ effect. A 30-gallon barrel or a large diameter steel pipe (e.g., 6-8 inches) works well.
- Drill with Metal Drill Bits: You’ll need to drill air holes in strategic places.
- Shovel/Trowel: For loading feedstock and spreading biochar.
- Heat-Resistant Gloves: Safety first! Handling hot materials requires proper protection.
- Water Source (Hose/Bucket): Absolutely critical for quenching the biochar and extinguishing any remaining flames.
- Safety Glasses: Protect your eyes from sparks and dust.
- Metal Rake/Pitchfork: For managing the feedstock and fire.
- A well-ventilated outdoor area: Away from flammable structures, dry grass, or anything that could catch fire.
Feedstock (What to Turn Into Biochar):
The beauty of making biochar at home is that you can utilize readily available organic material from your garden or local environment. The ideal feedstock is dry, woody, and relatively uniform in size.
- Wood Scraps: Untreated lumber scraps, old fence posts, broken tree branches. Avoid treated wood as it can release toxic chemicals.
- Garden Waste: Prunings from shrubs and trees, corn stalks, sunflower stalks. Ensure they are dry.
- Bamboo: Excellent biochar feedstock, chars quickly.
- Nut Shells: Walnut, pecan, and other nut shells work well.
- Hardwood Chips/Pellets: If you have access to clean, untreated hardwood chips, they are ideal.
What to AVOID:
- Treated Wood: Leaches harmful chemicals.
- Painted/Stained Wood: Releases toxins.
- Plastics, Rubbers, Metals: Do not pyrolyze these.
- Green/Wet Material: Produces a lot of smoke and poor biochar. Dry your feedstock thoroughly.
- Soft, leafy greens: These mostly turn to ash rather than char.
Optional but Recommended Additions:
- Thermometer (Pit/Smoker): To monitor temperatures, though not strictly necessary for a basic build.
- “Biochar Activator” (Compost tea, worm castings, liquid fertilizer): After making raw biochar, it’s crucial to ‘charge’ or ‘activate’ it before adding it to your soil. This fills its pores with nutrients and beneficial microbes. More on this later.
By carefully selecting your materials and ensuring you have the necessary safety equipment, you’ll be well-prepared to make biochar at home effectively and safely.
Step-by-Step Guide: Making Biochar Using the “Flame Cap” or “Top Lit Updraft” (TLUD) Method
The “flame cap” or TLUD method is widely regarded as one of the most efficient and cleanest ways to make biochar at home. It allows for a relatively smoke-free burn and produces high-quality biochar. This method uses a larger container with a smaller one inside, or a cleverly designed airflow system.
Step 1: Prepare Your Equipment and Workspace
- Find a Safe Location: Choose an open, outdoor area, preferably on bare earth or concrete, far from buildings, dry vegetation, and anything flammable.
- Gather Your Tools: Have your metal barrels, drill, safety gear, fire poker, and water source ready.
- Drill Air Holes (for a simple barrel-in-barrel setup):
- For the outer (larger) barrel: Drill several 1/2-inch to 1-inch holes around the bottom rim (for primary airflow) and also around the top rim (for secondary air to burn off smoke).
- For the inner (smaller) barrel/pipe: If using a small barrel, drill a few 1/2-inch holes near the bottom for initial air intake. If using a pipe, ensure it’s open at both ends.
- Set Up Your Pyrolysis Unit: Place the larger barrel on a few bricks or blocks to allow air circulation underneath for the bottom holes. If using a smaller barrel inside, place it centrally within the larger barrel, propped up slightly if it’s not already on legs, or ensure airflow to its bottom.
This careful preparation is crucial for a successful and safe charring process when you make biochar at home.
Step 2: Load Your Feedstock
- Cut and Dry Feedstock: Ensure your woody biomass is dry and cut into manageable pieces (generally no longer than 6-12 inches, and not too thick) that will fit into your inner chamber (or larger barrel if doing a simple open burn). Smaller, more uniform pieces char more evenly.
- Load the Inner Chamber (TLUD style): If using the barrel-in-barrel method or a proper TLUD, loosely pack your dry woody feedstock into the inner barrel or central chamber. Don’t pack it too tightly, as some airflow is needed. Leave about 4-6 inches from the top rim.
- Load for Open Kiln (Alternative): If you’re doing a simpler, open-top kiln in a single barrel, simply layer your feedstock, leaving space for air and ignition. This method tends to produce more smoke initially but is still effective.
Proper loading ensures efficient pyrolysis and good quality biochar.
Step 3: Ignite and Manage the Burn
- Ignite the Top: For the TLUD/flame cap method, light a small fire on TOP of the feedstock within the inner chamber. Use some kindling, paper, or natural fire starters. The fire will slowly burn downwards.
- Monitor the Flame Cap: Once the fire is established, it should produce a relatively clear, horizontal flame cap across the top of the feedstock. This flame cap burns off the volatile gases released from the charring wood below, which is why this method is so efficient and low-smoke.
- Add Outer Fuel (for barrel-in-barrel/flame cap): In a barrel-in-barrel system, you also build a fire in the outer barrel around the inner one. This fire heats the inner barrel, promoting pyrolysis, and also helps to burn off any smoke escaping from the inner chamber.
- Maintain Heat and Airflow: The goal is to sustain a hot, relatively smoke-free burn. Adjust bottom air vents if necessary. If you see thick white or yellow smoke, it means incomplete combustion, and you need more heat/air to that area. Clear, faint blue smoke is acceptable, indicating volatile gases are burning.
This is the most critical stage for making high-quality biochar at home with minimal emissions.
Step 4: Monitor Charring and Carbonization
- Observe the Pyrolysis: As the fire progresses downwards (in a TLUD) or as the wood heats up and chars (in an open kiln), you’ll see the wood turn black and develop a crackling sound. This is the carbonization process.
- Recognize When It’s Ready: For a TLUD, you’ll know it’s nearly done when the flames start to diminish significantly, and you see bright red glowing embers rather than active flames throughout the material. For an open kiln, most of the material should be uniformly black, though some pieces might still be smoldering.
- Timing: Depending on the size of your feedstock and the efficiency of your burn, this process can take anywhere from 1 to 4 hours. Do not rush it.
Patience at this stage is key to achieving uniformly charred material.
Step 5: Quenching and Cooling
- Extinguish Completely: Once your feedstock is fully charred (black and brittle, no woody structure remaining on the inside), it’s time to quench it. The goal is to stop the burn immediately to prevent it from turning into ash.
- Use Plenty of Water: Liberally douse the biochar with water until all glowing embers are extinguished and steam production ceases. Ensure every piece is completely wet. You can often hear a sizzling sound as the water hits the hot char.
- Ensure No Hot Spots: Stir the quenched biochar with a metal rake or shovel to expose any hidden hot spots and douse them again. It’s vital there are no remaining embers to prevent self-ignition later.
- Cool Down: Allow the quenched biochar to cool completely before handling. Spread it out if necessary to speed cooling.
Thorough quenching is paramount to preserve the biochar structure and prevent uncontrolled burning.
Step 6: “Charging” or Activating Your Biochar
Raw biochar is like an empty apartment building; it has lots of rooms (pores) but no tenants (nutrients/microbes). Adding it directly to soil can sometimes temporarily absorb existing soil nutrients. It’s crucial to ‘charge’ or ‘activate’ your biochar before incorporation.
Methods for Charging Biochar:
- Compost Pile Integration: The easiest and most effective method. Mix your biochar into an active compost pile. The biochar will soak up nutrients and beneficial microbes as the compost breaks down. Let it sit in the compost for at least a few weeks, or even months, before using. This is highly recommended. For more details on composting, check out “Compost Pile Tips for Beginners” on our site.
- Liquid Fertilizer Soak: Soak the biochar in a diluted liquid organic fertilizer, fish emulsion, or compost tea for 24-48 hours. Ensure the biochar is fully submerged and agitated occasionally.
- Urine Dilution: Dilute urine (1 part urine to 10 parts water) is an excellent source of nitrogen. Soak the biochar in this solution for a few days (wear gloves!).
- Worm Bin Addition: Mix biochar into your worm bin. The worms will naturally populate it with microbes and cast nutrients. Learn more about vermicomposting with “Vermicompost Essentials: Your Guide to Worm Farming”.
Only after charging is your homemade biochar ready to unleash its full potential in your garden. This step is critical for successful long-term soil improvement.
Step 7: Incorporating Biochar into Your Soil
Once charged, your biochar is ready to be a powerhouse for your garden! Remember, a little goes a long way. Biochar is a long-term amendment, not a quick fix.
- New Garden Beds: When creating new beds, incorporate biochar into the top 6-12 inches of soil. A common recommendation is 5-10% biochar by volume, meaning for every 10 gallons of soil, add 0.5 to 1 gallon of charged biochar.
- Existing Gardens:
- Broadcasting and Tilling: Spread a thin layer (1/4 to 1/2 inch) over the soil surface and gently rake or till it into the top few inches.
- Hole Amendment: When planting new trees, shrubs, or perennials, mix a handful or two of charged biochar into the backfill soil for the planting hole.
- Potting Mixes: Add 5-10% charged biochar to your homemade potting mixes or commercial mixes for enhanced water and nutrient retention.
- Top Dressing: For established plants, you can gently scratch a small amount of charged biochar into the soil around the base of the plant.
The goal is to evenly distribute the biochar to maximize its contact with roots and soil particles. Integrating it slowly and thoroughly will yield the best results for your make biochar home soil health efforts.
Pro Tips and Common Mistakes When You Make Biochar at Home
Making biochar at home is a rewarding process, but a few insights and warnings can ensure better results and greater safety.
Pro Tips:
- Dry Feedstock is Key: The drier your biomass, the less smoke you’ll produce and the more efficient your charring process will be. Green, wet material largely steams rather than chars.
- Uniform Size Matters: While not strictly necessary, having feedstock pieces of similar size promotes more even charring.
- Listen to the Fire: A hot, efficient burn in a TLUD often has a distinct roaring or ‘jet engine’ sound, indicating good secondary combustion of gases.
- The Crushing Test: Good biochar should be black throughout, fragile, and crumble easily when squeezed, but it shouldn’t turn to dust. If it’s still brown inside or soft, it’s undercooked. If it turns to fine ash, it’s overcooked.
- Think Small Batches: Start with smaller batches to get a feel for the process before scaling up. This minimizes waste and helps you learn.
- Location, Location, Location: Always set up your pyrolysis unit in a safe, open, and clear area. Consider prevailing winds.
- Long-Term Investment: Remember that biochar’s benefits accrue over time. Don’t expect immediate miracles, but understand you’re building long-term soil health.
Common Mistakes to Avoid:
- Burning to Ash: The biggest mistake! Biochar is charcoal, not ash. Ash has very different properties and little to no benefit compared to biochar. Over-burning means you missed the “char” stage.
- Using Wet Feedstock: Causes excessive smoke, inefficient charring, and poor-quality biochar.
- Insufficient Quenching: If not fully quenched, biochar can reignite later, which is a fire hazard. Ensure it’s completely cold before storing.
- Not Charging the Biochar: Applying raw biochar to soil can temporarily tie up nutrients. Always charge it first to fill its pores with beneficial microbes and nutrients.
- Ignoring Safety Precautions: Working with fire requires constant vigilance. Having water, a fire extinguisher, and proper PPE (gloves, safety glasses) is non-negotiable.
- Too Much Smoke: While some smoke is inevitable, excessive thick, white, or yellow smoke indicates incomplete combustion. Adjust airflow or heat. Excessive smoke means you’re releasing unburned carbon and pollutants.
- Incorrect Feedstock: Using treated wood, plastics, or other synthetic materials will create toxic biochar and release dangerous fumes. Stick to clean, organic, untreated biomass. For more on sustainable practices, consider reading “Eco-Friendly Garden Hacks” on our site.
By keeping these tips in mind and actively avoiding common pitfalls, you will significantly improve your success in making biochar at home, leading to healthier soil and a more sustainable garden.
Eco-Friendly Variations and Enhancements
While the standard TLUD method for making biochar at home is inherently eco-friendly, there are ways to further enhance its sustainability and efficiency.
- Retort Kilns: For those serious about consistency and minimizing emissions, a true retort kiln captures and burns off volatile gases more completely than open-flame methods. This can be more complex DIY, but worth exploring for larger-scale production.
- Integrated Biochar Systems: Some advanced setups integrate biochar production with other systems, like heating water or providing heat for greenhouses. This uses the waste heat from pyrolysis, further increasing efficiency.
- Community Biochar Projects: Consider organizing with neighbors or community gardens to pool resources and create a larger, more efficient biochar production unit. This can be a great way to manage local biomass waste collectively.
- Feedstock Diversity: Experiment with various clean, local biomass sources. Different feedstocks can result in biochar with slightly different properties. For instance, bamboo biochar tends to be very porous.
- Biological Activation Boost: Beyond basic charging, consider inoculating your charged biochar with specific beneficial microbes, such as mycorrhizal fungi, which can further enhance plant root growth and nutrient uptake.
These variations push the boundaries of how we can make biochar at home, making it even more integrated into a circular and sustainable small-scale economy.
Seasonal Considerations for Biochar Production
The time of year you choose to make biochar at home can significantly impact the practicality and efficiency of the process.
- Autumn/Winter: This is often the ideal time. After significant pruning and leaf fall, you’ll have an abundance of woody feedstock. The cooler, often damp, weather reduces fire risk compared to hot, dry summers. However, ensure your feedstock is thoroughly dried before charring. You can dry it in a shed or under a tarp for several weeks.
- Spring: As gardens awaken, there might be some prunings, but generally less woody waste than autumn. Spring can still be a good time, especially during dry spells.
- Summer: This is generally the riskiest time due to heat, dry conditions, and potential for wildfires. If you must produce biochar in summer, be extremely cautious, have ample water on hand, and avoid windy days. Your feedstock will likely be very dry, making for an efficient burn.
Regardless of the season, prioritizing safety and ensuring dry feedstock are paramount. Preparing your feedstock well in advance allows you to make biochar at home efficiently when conditions are most favorable.
Expert Resources for Deeper Learning
To further your understanding and refine your biochar production and application techniques, we recommend exploring these reputable external resources:
- Gardening Know How: An excellent online resource for a wide range of gardening topics, often covering sustainable practices and innovative soil amendments. Visit Gardening Know How
- Royal Horticultural Society (RHS): A world-leading gardening charity providing extensive, evidence-based advice on all aspects of horticulture, including soil health and organic methods. Explore the RHS Website
- University of Minnesota Extension: University extension offices are fantastic sources of research-backed information on agriculture, horticulture, and environmental stewardship, often with practical guides for home gardeners. Check out UMN Extension
These resources offer a wealth of information that complements the practical knowledge you gain from making biochar at home.
Conclusion: Empowering Your Garden with Homemade Biochar
You’ve now embarked on a journey to truly transform your garden by learning how to make biochar at home for superior soil health. This isn’t just about amending your soil; it’s about embracing a cycle of sustainability, taking what would be waste and turning it into a powerful, long-term asset for your plants and the planet.
From improving water and nutrient retention to fostering a thriving microbial ecosystem and actively sequestering carbon, the benefits of biochar are profound and far-reaching. While the initial setup requires attention to detail and safety, the satisfaction of producing your own ‘black gold’ and witnessing its positive impact on your garden is incredibly rewarding.
So, gather your materials, prioritize safety, and get ready to experience the magic of biochar. Your plants, your soil, and the environment will thank you for taking this empowering step towards a more resilient and productive garden. Happy charring!
Frequently Asked Questions About Making Biochar at Home
Q1: Is making biochar at home safe?
A1: Yes, if proper safety precautions are followed. Always operate in a well-ventilated outdoor area, away from flammable materials. Have a reliable water source or fire extinguisher readily available. Wear heat-resistant gloves and safety glasses. Never leave the pyrolysis unit unattended. The biggest risk is uncontrolled fire, so vigilance is key.
<p><strong>Q2: How much biochar should I add to my garden soil?</strong></p>
<p>A2: A common recommendation is to incorporate biochar at a rate of 5-10% by volume. For general garden beds, this often translates to a layer 1/4 to 1/2 inch thick worked into the top 6-12 inches of soil. For potted plants, 5-10% of the total potting mix volume is suitable. Because biochar lasts for centuries, you don't need to add large amounts frequently. Once every few years is often sufficient after the initial application.</p>

<p><strong>Q3: Can I use any type of wood or plant material to make biochar?</strong></p>
<p>A3: You should use clean, untreated, dry woody biomass. This includes tree prunings, untreated wood scraps, bamboo, corn stalks, and other fibrous plant materials. <em>Absolutely avoid</em> treated wood (e.g., pressure-treated lumber), painted wood, plastics, rubber, or any synthetic materials, as these can release toxic fumes and create harmful contaminants in your biochar. Soft, leafy greens are also not ideal as they tend to turn to ash rather than stable char.</p>

<p><strong>Q4: Why do I need to "charge" or "activate" biochar before putting it in my garden?</strong></p>
<p>A4: Raw biochar is very porous and acts like a blank slate. If added directly to soil, its empty pores can temporarily absorb existing soil nutrients and even beneficial microbes, potentially leading to a temporary nutrient drain for your plants. Charging biochar involves soaking it in nutrient-rich liquids (like compost tea, liquid fertilizer, or diluted urine) or mixing it into an active compost pile. This fills its pores with nutrients and desirable microbes, turning it into an immediate benefit for your soil rather than a temporary draw.</p>


