The Ultimate Guide to Brewing Nutrient-Rich Liquid Fertilizer from Nettles: 10 Steps to Garden Gold
Welcome, fellow gardeners and eco-conscious enthusiasts! Are you looking for a sustainable, cost-effective, and remarkably powerful way to boost your garden's health and vitality? Look no further than the humble stinging nettle (Urtica dioica). Often dismissed as a pesky weed, this plant is an unsung hero, brimming with essential nutrients that can transform your soil and feed your plants. Crafting your own homemade liquid fertilizer nettles brew is a time-honored practice, and in this comprehensive guide, we'll walk you through every step of turning these prickly greens into gardening gold. Get ready to embrace an age-old organic gardening hack that will make your plants thrive!
[lwptoc]
Why This Matters for Your Garden: Unlocking the Power of Nettle Fertilizer
In a world increasingly focused on sustainable living and natural solutions, discovering ways to enrich our gardens without relying on synthetic chemicals is paramount. Nettle fertilizer isn't just an alternative; it's a superior choice for many reasons. Its primary superpower lies in its incredibly high nitrogen content, a vital nutrient for lush, leafy growth, vibrant green foliage, and robust stems. Think of it as a natural, slow-release green growth booster.
Beyond nitrogen, nettles are packed with a surprising array of micronutrients. They contain significant amounts of iron, magnesium, calcium, and potassium, all of which are crucial for overall plant health, flowering, fruiting, and disease resistance. This comprehensive nutrient profile means your plants receive a balanced meal, not just a shot of one particular element. Regular application of nettle fertilizer can lead to stronger root systems, increased chlorophyll production, and a greater resilience to pests and diseases, fostering a truly thriving ecosystem beneath your hands.
Furthermore, making your own fertilizer from nettles is incredibly cost-effective. Nettles grow wild in many regions, often considered a nuisance. By harvesting them, you're not only getting free fertilizer but also managing a common garden weed – a true win-win for your wallet and your garden's aesthetics. It’s a testament to the fact that some of the best solutions are often found right under our noses, or in this case, stinging under our gloves. This eco-friendly approach reduces your carbon footprint, minimizes reliance on manufactured products, and deeply connects you with the natural cycles of your garden.
What You’ll Need: Gathering Your Tools, Materials, and Plants
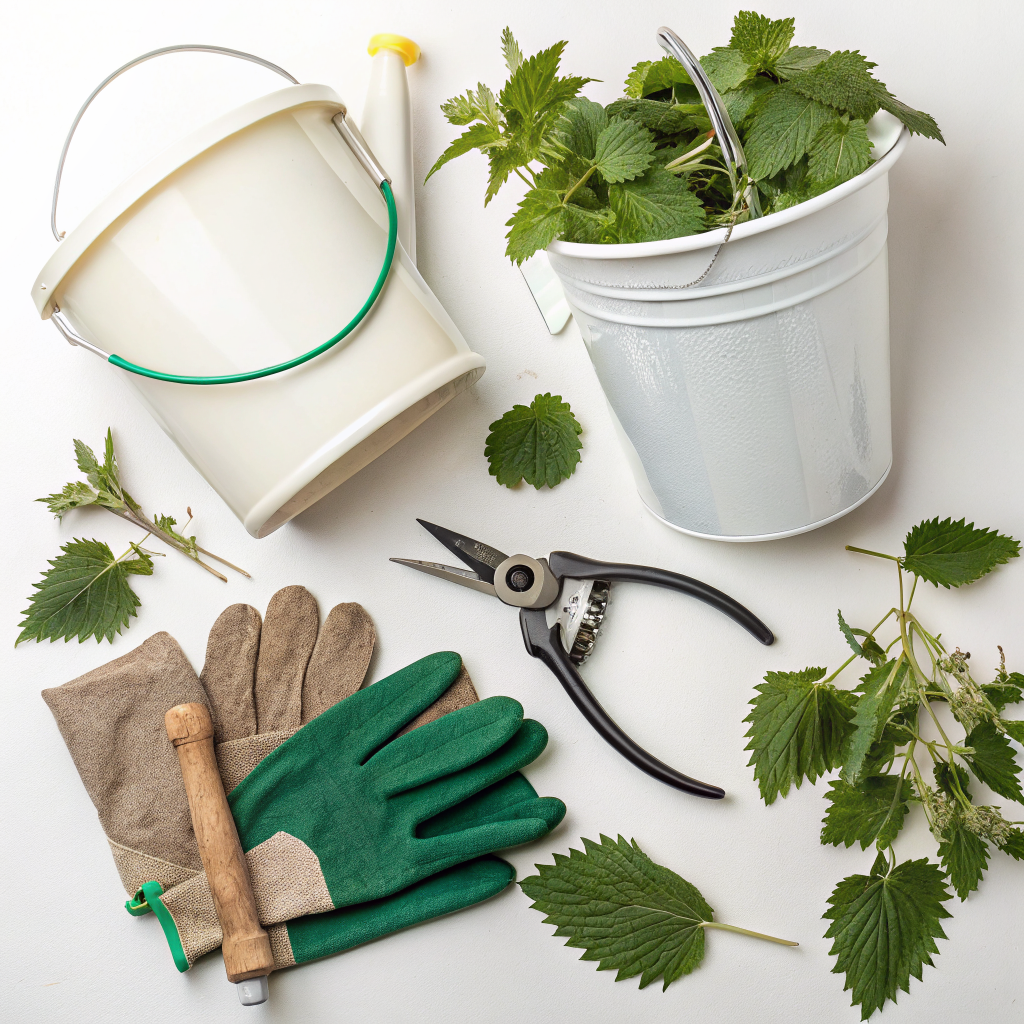
Before you embark on your nettle brewing adventure, it's essential to gather all the necessary tools and materials. Preparation is key to a smooth and successful process. Don't worry, most of these items are readily available or might even be in your shed already!
First and foremost, you'll need a good supply of nettles. Aim for young, tender plants before they go to seed, as these tend to have a higher concentration of nutrients. Always wear thick gardening gloves and long sleeves when harvesting to protect yourself from their notorious sting. A pair of sharp secateurs or scissors will make harvesting much easier and more efficient. Collect a substantial amount – a large bucket full, loosely packed, is a good starting point.
Next, you'll need a suitable container for brewing your fertilizer. Plastic buckets, old dustbins, or large barrels are ideal. The size depends on how much fertilizer you want to make, but make sure it has a lid, as this brew can become quite aromatic! Avoid using metal containers, as the organic acids released during fermentation can react with the metal. You'll also need a large stick or stirrer to mix the nettle solution periodically.
Finally, access to water is crucial. Rainwater is always preferred as it's free of chlorine and other chemicals found in tap water, which can potentially harm beneficial microbes in your brew. However, if rainwater isn't an option, tap water left to sit for 24 hours to de-chlorinate will suffice. A strainer or cheesecloth will be needed later to separate the liquid from the solid nettle matter. A funnel and old plastic bottles or jugs will be useful for storing the finished product.
Step-by-Step Guide: Brewing Your Nettle Elixir
Now for the exciting part – turning those prickly plants into potent plant food! Follow these steps carefully to ensure a successful brew.
Step 1: Harvest Your Nettles Safely and Strategically
The first and most critical step is harvesting. Choose a patch of nettles that hasn’t been sprayed with herbicides or pesticides and is away from busy roads. Focus on young, vibrant plants, ideally before they develop visible flower heads or go to seed. These younger plants are more succulent and contain a higher concentration of valuable nutrients. Wear heavy-duty gloves, long sleeves, and even eye protection. Use sharp secateurs or a sickle to cut the nettles near the base of the plant, leaving the roots intact for regrowth. Aim to fill a large bucket or trug. Remember, the more nettles you have, the stronger your brew will be. A good ratio is generally 1kg of nettles to 10 litres of water, but don’t fret if your measurements aren’t precise.
Step 2: Prepare Your Brewing Container
Select a non-metallic container for your brew. A large plastic bucket with a lid, an old plastic dustbin, or even a specialized fermentation crock works perfectly. Critically, avoid metal containers, as the acidic nature of the fermenting nettle solution can react with and corrode metal, potentially introducing harmful substances into your fertilizer and weakening the container. Ensure your container is clean to prevent the introduction of unwanted bacteria or molds. The lid is essential to contain the strong odor that will develop during fermentation and to keep out rain or debris.
Step 3: Chop and Pack the Nettles
Once harvested, loosely chop the nettles into smaller pieces, roughly 3-6 inches (7-15 cm) long. This increases the surface area, allowing for a more efficient release of nutrients during the decomposition process. Don’t worry about chopping them too finely; a rough chop is sufficient. Pack the chopped nettles into your chosen container. Don’t compact them too much; leave some space for water and air circulation. Aim to fill the container about two-thirds to three-quarters full with chopped nettles.
Step 4: Add Water and Cover
Carefully pour water over the nettles until they are completely submerged and the container is nearly full, leaving a few inches of headspace at the top. As mentioned earlier, rainwater is ideal, but de-chlorinated tap water is a good alternative. Ensure all the nettle material is underwater to promote anaerobic decomposition and prevent rotting. Once the container is filled, securely place the lid on top. This is crucial for two reasons: it reduces the release of pungent odors and prevents dilution by rainwater, as well as keeping curious critters out.
Step 5: Let the Fermentation Begin!
Now, the waiting game begins. Place your covered container in a warm, out-of-the-way spot in your garden. A sunny corner or greenhouse bench is perfect, as warmth accelerates the fermentation process. Over the next few days to weeks, you’ll notice bubbles forming, indicating that decomposition is underway. This is the good bacteria breaking down the organic matter and releasing the nutrients. Stir the mixture with your stick every few days to ensure even decomposition and to release any trapped gases. The brew will develop a strong, distinct odor – this is normal and a sign that it’s working! Expect to let it ferment for 2-4 weeks, depending on the temperature.
Step 6: Strain and Dilute
Once the bubbling subsides and the liquid turns dark brownish-black, your nettle fertilizer is ready. Carefully strain the liquid from the solid nettle matter. You can use a coarse strainer, a piece of old netting, or cheesecloth for this. Don’t discard the solid nettle sludge; it’s an excellent addition to your compost heap, adding a boost of nutrients back into your compost cycle. The strained liquid is your concentrated nettle fertilizer. This concentrated ‘tea’ needs to be diluted before use. A general dilution ratio is 1 part nettle concentrate to 10 parts water, or even 1:20 for young seedlings or sensitive plants.
Step 7: Store Your Liquid Gold
Store the diluted or undiluted liquid fertilizer in clearly labeled, airtight plastic bottles or jugs. Keep them in a cool, dark place, away from direct sunlight. Stored properly, nettle fertilizer can last for several months. Just be aware that any residual fermentation might cause pressure to build up, so occasionally ‘burp’ the containers by briefly loosening the caps to release gas. This ensures the containers don’t swell or burst.
Step 8: Apply to Your Plants
Now for the rewarding part! Use your diluted nettle fertilizer as a soil drench around the base of your plants. It’s particularly beneficial for leafy greens, brassicas, tomatoes, and other hungry crops that require a lot of nitrogen for vigorous growth. Avoid applying it directly to leaves, especially on hot, sunny days, as this can cause leaf scorch. You can also use a very diluted solution (1:20 or more) as a foliar spray early in the morning or late in the evening for a quick nutrient boost, but always test on a small area first.
Pro Tips and Common Mistakes to Avoid
To ensure your liquid fertilizer nettles brewing experience is a success, here are some invaluable tips and common pitfalls to steer clear of.
One common mistake is not diluting the concentrate enough. Too strong a solution can burn your plants, especially young seedlings. Always err on the side of caution and dilute more if unsure. Another tip is to consistently stir your brew every few days; this prevents mold growth on the surface and ensures an even breakdown of plant material. Keep your container covered tightly to minimize odor and prevent pests like flies from laying eggs.
Consider the "Stomach Test": If the smell of your brew makes you recoil, it's probably too strong to use undiluted. Trust your senses. If you're sensitive to the smell, try adding a handful of comfrey leaves to the brew along with the nettles. Comfrey is another excellent fertilizer source, rich in potassium, and can help to temper the pungent aroma of pure nettle tea. For long-term storage, ensure bottles are clean and consider dating them.
Don't use nettles that have gone to seed, as these might spread unwanted nettles in your garden. Also, avoid using nettles from areas treated with chemicals. If you harvest nettles, leave some behind to ensure continuity for local wildlife and for future harvests. Finally, remember that nettle fertilizer is primarily a nitrogen booster. For a more balanced feed, especially for flowering and fruiting plants, consider using it in conjunction with other homemade fertilizers or composting. For example, a banana peel tea is rich in potassium.
Eco-Friendly Variations: Beyond Basic Nettle Tea
While pure nettle fertilizer is amazing, you can enhance its capabilities and nutrient profile by adding other readily available, eco-friendly ingredients. These variations allow you to tailor your fertilizer to specific plant needs or to utilize other "weeds" often found in your garden.
One popular variation is to combine nettles with comfrey. Comfrey (Symphytum officinale) is a "dynamic accumulator" renowned for its high potassium content, which is fantastic for flowering plants, fruit development, and overall plant health. A mix of 50% nettles and 50% comfrey creates a truly balanced, all-purpose fertilizer. Simply chop and combine both plants in your brewing container and proceed as usual.
Another option is to add seaweed, if you live near the coast. Seaweed is a treasure trove of trace minerals, growth hormones, and beneficial bacteria. Fresh seaweed, rinsed of salt, can be added to your nettle brew for an extra nutrient kick. Alternatively, you can collect and dry seaweed, then crumble it into the mix. This adds a wide spectrum of micronutrients that nettles alone might lack. For a boost in phosphorus, which is essential for root development and flowering, consider adding a handful of rock phosphate to your brew, though this isn't a "free" addition.
Finally, for a quick and less pungent version, you can make a "quick nettle soak." Instead of a long fermentation, simply soak nettles in water for 24-48 hours. This extracts some nutrients and provides a milder, less smelly liquid feed, suitable for more frequent application, though it won't be as potent as the fully fermented version. Always keep experimentation in mind; your garden will tell you what it likes best! Check out this article on homemade pest control solutions for more natural gardening tips.
Seasonal Considerations: Timing Your Nettle Brews
The timing of your nettle fertilizer production and application can significantly impact its effectiveness. Understanding seasonal rhythms helps you maximize the benefits for your garden.
Spring is arguably the best time to start your first batch of liquid fertilizer nettles. Nettle plants are young, tender, and bursting with nutrients after their winter dormancy. This early spring brew is perfect for giving young seedlings and emerging perennials a vital nitrogen boost, encouraging lush, strong growth as the gardening season kicks off. A springtime application helps establish robust plants that are better equipped to handle summer stresses.
Throughout the growing season, you can continue to harvest nettles – they are prolific growers! Make smaller batches every few weeks as needed. Regular applications every 2-4 weeks during the active growing phase of your plants will keep them well-fed and thriving. For summer crops like tomatoes, peppers, and squash, consistent feeding with nitrogen-rich nettle tea supports continuous fruiting and leafy canopy development. Avoid harvesting nettles that are starting to flower or go to seed later in the season, as their nutrient content begins to diminish at that stage, and you risk spreading unwanted seeds.
As autumn approaches, the need for high-nitrogen fertilizer decreases for many plants, especially those preparing for dormancy. However, an autumn application can still be beneficial for certain crops, such as fall brassicas, or to enrich the soil for next spring's planting. You might also want to brew a large batch in late summer to store for early spring application the following year, ensuring you have a supply ready when fresh nettles are not yet abundant. For winter, your nettle plants will largely die back, so fresh harvests won't be feasible, making stored fertilizer or composting the primary options. Consider enriching your garden further with smart irrigation systems to pair with your organic feeding regimen.
Expert Resources for Deeper Learning (External Links)
While this guide provides a comprehensive overview, there's always more to learn and explore in the world of organic gardening. These expert resources offer additional insights and scientific backing for the benefits of natural plant feeds.
For a broader understanding of different types of homemade fertilizers and their benefits, including various plant "teas," visit the well-established "Gardening Know How" website. Their article on Homemade Fertilizer Information provides a great comparative view of different organic solutions. This site offers practical advice for gardeners of all levels. Understanding the role of various nutrients is key to successful organic gardening.
The Royal Horticultural Society (RHS) is a leading gardening charity, and their resources are exceptionally reliable. For information on nutrient deficiencies and how different elements like nitrogen contribute to plant health, explore their comprehensive guide on Nutrient Deficiencies in Plants. This will help you identify if your plants specifically need a nitrogen boost, which nettle tea excels at providing. It's an invaluable resource for diagnosing and addressing plant health issues.
Finally, for in-depth, research-backed information on sustainable gardening practices and soil health, university extension programs are outstanding. The University of Minnesota Extension offers a wealth of knowledge, and their publication on Soil Fertility and Nutrient Management provides scientific insights into maintaining healthy soil ecosystems, which nettle fertilizer significantly contributes to. This resource delves into the deeper science behind nutrient cycling and soil biology. For more innovative garden tips, check out DIY vertical garden systems on our site.
Conclusion: Embrace the Nettle, Cultivate Your Garden
You've now mastered the art of creating your own powerful, free, and incredibly effective liquid fertilizer nettles brew. By following these steps, you're not just making plant food; you're actively participating in a sustainable, circular gardening economy, turning what some consider a nuisance into a valuable asset. This eco-friendly hack empowers you to take control of your garden's nutrition, reducing reliance on external inputs and fostering a healthier, more vibrant ecosystem.
The benefits extend beyond your flourishing plants. You're reducing waste, saving money, and deepening your connection with the natural world around you. So, don your gloves, head out to your garden or a nearby wild patch, and start brewing your liquid gold. Your plants will thank you with abundant growth, lush foliage, and bountiful harvests. Embrace the sting, for within it lies the secret to a thriving, verdant garden!
FAQ: Your Nettle Fertilizer Questions Answered
Q1: Will nettle fertilizer smell bad?
A1: Yes, it will develop a strong, pungent odor due to the fermentation process. This is normal and a sign it’s working. Always keep the container tightly covered and place it in an out-of-the-way spot in your garden to minimize odor dispersal.
Q2: How often should I apply nettle fertilizer?
A2: For most vigorously growing plants during their active growth phase, an application every 2-4 weeks is beneficial. For young seedlings or more sensitive plants, apply less frequently (e.g., once a month) or use a more diluted solution (1:20).
Q3: Can I use nettle fertilizer on all plants?
A3: Nettle fertilizer is high in nitrogen, making it excellent for leafy greens, brassicas, root vegetables, and hungry fruiting plants like tomatoes and peppers. However, avoid using it on plants that prefer low-nitrogen soil, such as beans and peas (legumes), which fix their own nitrogen. For flowering plants, consider balancing it with a potassium-rich feed like comfrey tea for better blooms.
Q4: What should I do with the leftover nettle sludge after straining?
A4: Don’t waste it! The leftover solid nettle material is an excellent addition to your compost heap. It will further decompose and release its remaining nutrients, enriching your compost and ultimately your garden soil.