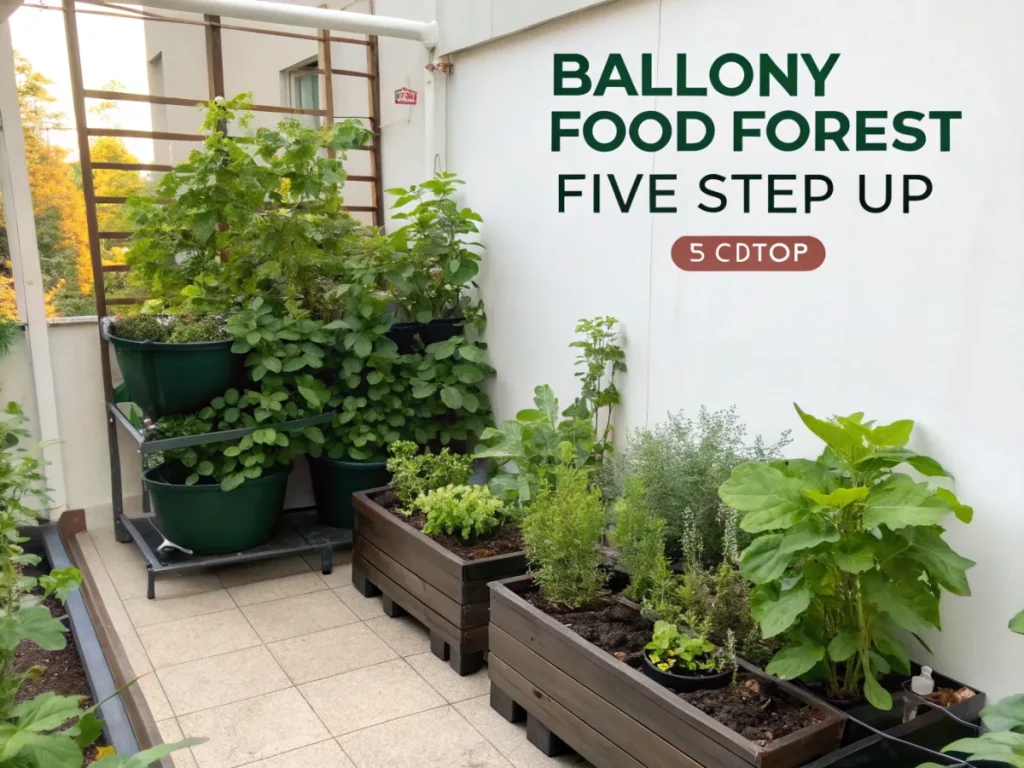
The Ultimate Guide: How to Set Up a Balcony Food Forest in 5 Steps
Dreaming of fresh, homegrown produce but only have a small balcony? Think again! Transforming your urban outdoor space into a thriving, multi-layered ecosystem is not only possible but incredibly rewarding. This comprehensive guide will walk you through the exciting journey of creating your very own balcony food forest setup, allowing you to harvest delicious fruits, vegetables, and herbs right outside your door.
[lwptoc]
Why This Matters for Your Urban Garden
In the bustling concrete jungles of today, reconnecting with nature and understanding where our food comes from has become more important than ever. A balcony food forest setup isn’t just about growing plants; it’s about cultivating a sustainable, resilient, and beautiful micro-ecosystem right where you live. This approach, inspired by permaculture principles, aims to mimic the natural layers of a forest, maximizing productivity in a small space.
Imagine stepping outside to pick sun-ripened tomatoes, fragrant basil, crisp lettuce, and even plump strawberries, all from your balcony. Beyond the sheer joy of fresh, organic produce, a food forest contributes to urban biodiversity, provides a cooling effect, and offers a peaceful green sanctuary in an otherwise gray environment. It’s a powerful statement against food miles and a step towards food self-sufficiency, even on a small scale.
Note: A balcony food forest isn’t just for growing food; it’s an aesthetic enhancement and a personal oasis. The diverse plant life can attract beneficial insects, creating a more balanced mini-ecosystem.
What You Need: Tools, Materials, and Plants for Your Balcony Food Forest
Before you dive into planting, gathering the right tools and materials is crucial for a successful balcony food forest setup. Think of this as your pre-flight checklist for a green adventure.
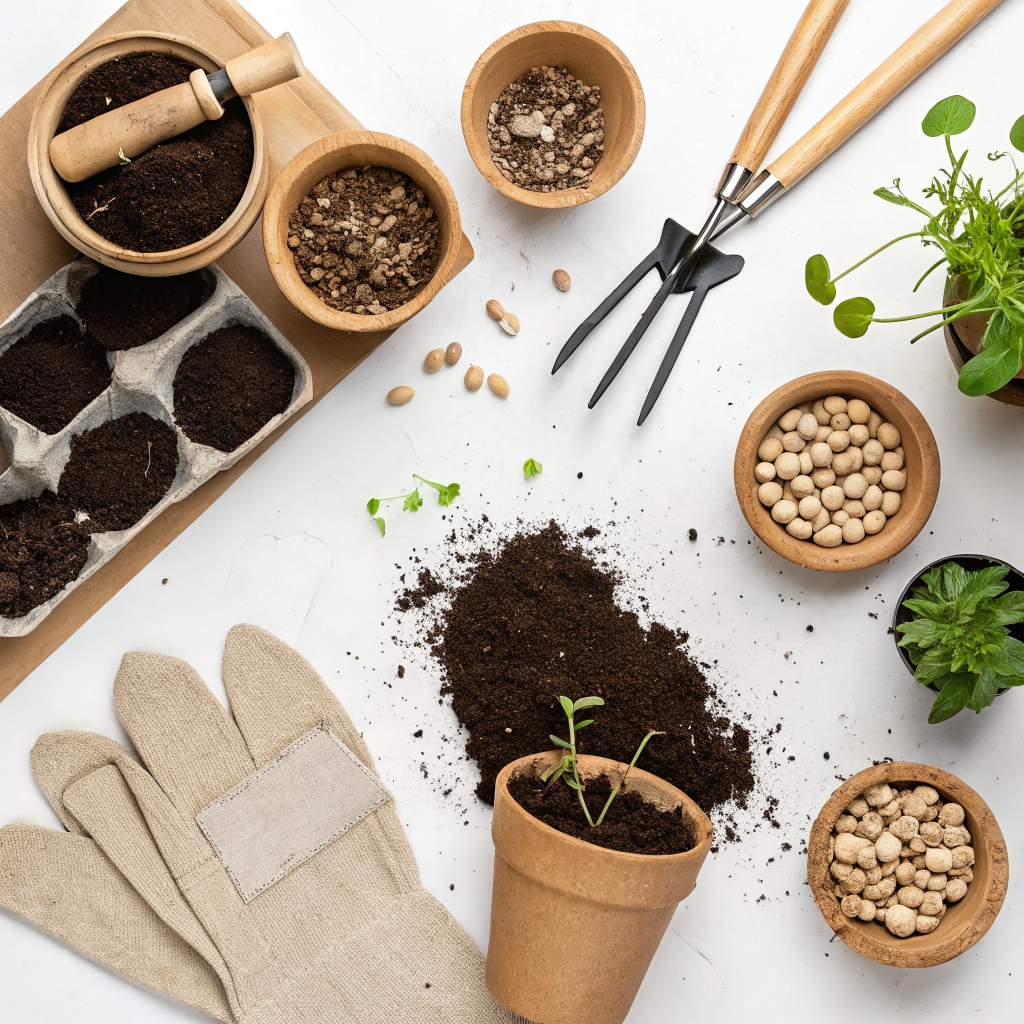
Essential Tools:
- Gloves: Protect your hands from dirt, thorns, and potential irritants.
- Small Trowel and Hand Fork: Perfect for digging, planting, and aerating soil in containers.
- Pruning Shears/Snips: For harvesting, trimming, and light pruning to encourage growth.
- Watering Can or Hose with a Gentle Sprayer: Consistent and appropriate watering is key.
- Measuring Tape: To plan your layout and ensure adequate space for containers.
- Sturdy Step Stool or Ladder: Especially useful if you plan to incorporate vertical growing elements.
Key Materials:
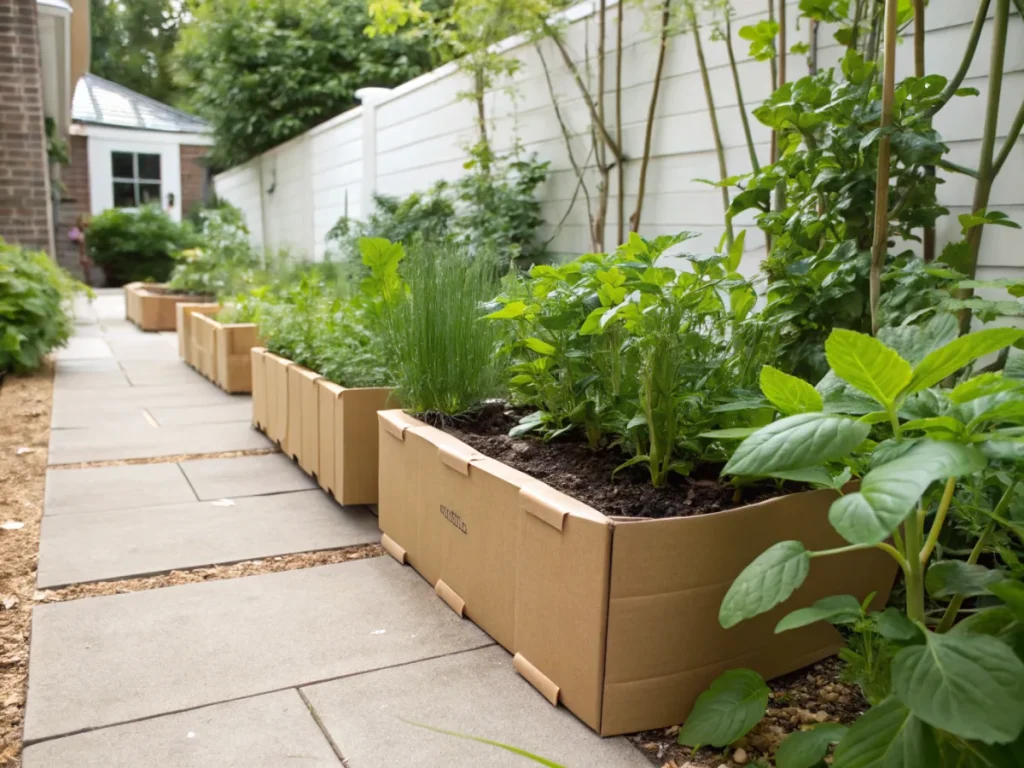
- Containers of Varying Sizes: This is fundamental to layering. Think large tubs for shrubs/small trees, medium pots for herbs/vining plants, and smaller ones for groundcovers. Look for materials like terracotta, fabric grow bags, or recycled plastic for durability and good drainage.
- High-Quality Potting Mix: This is a non-negotiable. Choose an organic, well-draining potting mix specifically designed for containers. Amend it with compost for extra nutrients and water retention.
- Drainage Material (Optional but Recommended): A layer of gravel, broken pottery, or volcanic rock at the bottom of larger pots can improve drainage, preventing root rot.
- Organic Fertilizers/Compost: Balcony plants in containers need regular feeding as nutrients leach out quicker. Liquid feeds, compost tea, or slow-release organic fertilizers are excellent choices.
- Stakes, Trellis, or Cages: For supporting climbing plants (e.g., tomatoes, cucumbers) and providing vertical structure.
- Mulch: A layer of straw, wood chips, or shredded leaves on top of your soil helps conserve moisture, regulate soil temperature, and suppress weeds.
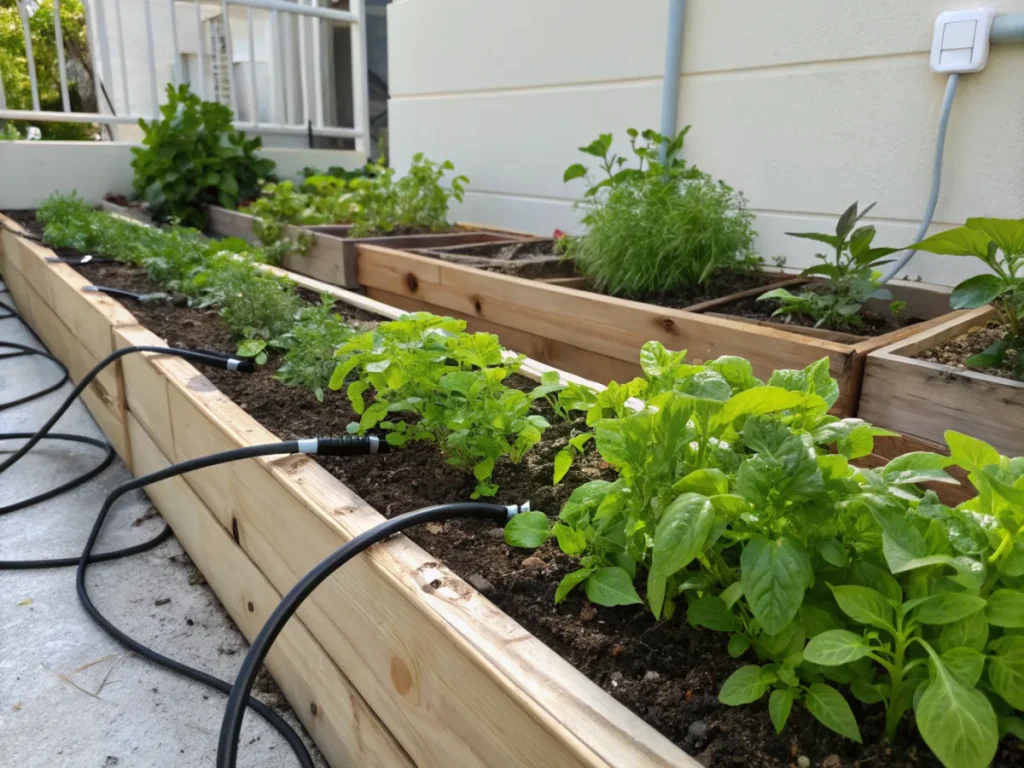
- Watering System (Optional): For busy urban dwellers, a drip irrigation system or self-watering pots can be a game-changer for consistency.
- Shelving/Vertical Planters: To maximize vertical space on your balcony garden design.
Recommended Plants for a Balcony Food Forest Layers:
The beauty of a food forest lies in its layers. Here’s how you can replicate them on your balcony, choosing dwarf varieties where possible:
- Canopy Layer (Small Fruiting Trees/Shrubs):
- Dwarf Citrus (Lemon, Lime, Kumquat)
- Dwarf Fig (e.g., ‘Brown Turkey’)
- Blueberry bushes (require acidic soil)
- Gooseberry or Currant bushes (shrub layer, often can be trained)
- Understory Layer (Taller Herbs, Bushy Veggies):
- Tomatoes (Determinate/Bush varieties for pots)
- Peppers (Bell, Chili)
- Eggplant
- Swiss Chard, Kale
- Rosemary, Thyme (bushier types)
- Herbaceous Layer (Smaller Herbs, Leafy Greens):
- Basil, Mint, Oregano, Cilantro
- Lettuce, Spinach
- Radishes, Carrots (shorter varieties in deeper pots)
- Strawberries (excellent ground cover/edging)
- Groundcover Layer (Trailing Plants, Low Sowers):
- Nasturtiums (edible flowers and leaves)
- Creeping Thyme
- Microgreens (can be rotated easily)
- Alpine Strawberries
- Rhizosphere/Root Layer (Root Vegetables):
- Radishes, Carrots (short varieties)
- Potato (grow bags are ideal for potatoes)
- Garlic, Onions (can be interplanted)
- Vertical/Climber Layer (Vining Plants):
- Cucumber (bush or dwarf varieties, trained on a trellis)
- Malabar Spinach
- Runner Beans or Bush Beans
- Small Gourds (e.g., patio pumpkins, trained)
Consider your balcony’s sunlight exposure, wind protection, and climate when selecting plants. Opt for varieties known to perform well in containers.
How to Set Up a Balcony Food Forest in 5 Steps
Now that you have your vision and your supplies, let’s get our hands dirty! Follow these five essential steps to bring your balcony food forest setup to life.
Step 1: Assess Your Balcony and Plan Your Layout
Before buying a single plant, understand your space. Observe your balcony throughout the day: how much direct sunlight does it receive? North, South, East, or West-facing? This dictates your plant choices. Consider prevailing winds and potential shelter from walls or railings, as strong winds can damage plants and dry out soil quickly.
Measure your balcony and sketch out a layout. Identify areas for taller plants and containers, remembering access for watering and harvesting. Plan for vertical space using shelving, hanging planters, or trellises. Think about drainage – where will excess water go? Ensure your balcony can support the weight of multiple heavy pots filled with soil and water; if unsure, consult your building manager.
Step 2: Select Your Containers and Prepare Your Soil
Choosing the right containers is paramount for a balcony food forest. Select diverse sizes to accommodate different plant layers. Larger pots are ideal for canopy plants (dwarf trees), while medium pots suit understory vegetables, and smaller pots or hanging baskets are perfect for herbs and groundcovers. Ensure every container has drainage holes to prevent waterlogging.
Invest in high-quality, organic potting mix. This is not garden soil! Potting mix is lighter, offers better drainage, and is formulated for container growth. You can enhance it with compost to boost nutrients and microbial activity. Fill your containers, leaving a few inches from the rim to prevent spillover during watering. If using drainage material at the bottom, add it before the potting mix.
Step 3: Choose and Arrange Your Plants in Layers
This is where the food forest concept comes to life. Select dwarf and compact varieties suitable for containers. Start with your canopy layer – the tallest plants, like a dwarf citrus or fig, typically placed in the largest containers. Position these at the back or corners of your balcony, where they won’t shade out too many other plants.
Next, introduce your understory layer, such as tomatoes or peppers, in medium-sized pots around the canopy plants. Then, fill in with your herbaceous layer – leafy greens, culinary herbs, and strawberries. Use vertical space for climbing plants like beans or cucumbers, training them up trellises. Don’t forget your groundcover plants in smaller pots or trailing over edges, and consider root vegetables in deeper containers for the rhizosphere layer. Aim for plant combinations that benefit each other (companion planting) and attract pollinators.
Step 4: Plant, Water, and Mulch
Carefully transplant your chosen plants into their designated containers. Gently loosen the root ball if it’s circling, then place the plant at the same depth it was in its original pot. Backfill with potting mix, gently firming the soil around the base of the plant. Water thoroughly immediately after planting until water drains from the bottom.
Once planted and watered, apply a layer of organic mulch (straw, aged wood chips, or shredded leaves) to the surface of the soil in each container. Mulch is a superhero for container gardens: it significantly reduces water evaporation, keeps soil temperatures more consistent, and suppresses weeds. It also adds a finished, aesthetic touch to your balcony food forest setup.
Step 5: Ongoing Care: Feed, Prune, and Harvest
Your food forest is a living, breathing system that needs regular attention. Container plants require more frequent watering than in-ground plants; check soil moisture daily, especially during hot weather. Fertilize regularly with organic liquid feeds or slow-release granular fertilizers, as nutrients can leach out quickly from pots. Follow product instructions carefully to avoid over-fertilizing.
Prune your plants to encourage bushy growth, improve air circulation, and direct energy towards fruit production. Harvest regularly to signal to the plant to produce more. Monitor for pests and diseases, opting for organic pest control methods like neem oil or insecticidal soap. Rotate crops if possible to maintain soil health, and replenish potting mix components like compost annually. Consistency in care will ensure a bountiful and beautiful balcony food forest.
Pro Tips and Common Mistakes for Your Balcony Food Forest
Setting up a balcony food forest is an exciting endeavor, but a few insights can make your journey smoother and more successful. Likewise, being aware of common pitfalls can save you time and frustration.
Pro Tips:
- Start Small, Scale Up: Don’t try to plant everything at once. Begin with a few key layers and expand as you gain confidence and experience. This allows you to learn what works best on your particular balcony.
- Embrace Companion Planting: Research plant combinations that benefit each other. For example, nasturtiums can deter pests from other plants, and basil can improve the flavor of tomatoes. This natural synergy enhances the health and productivity of your food forest.
- Utilize Self-Watering Planters: For busy schedules or simply to reduce daily watering chores, self-watering planters or drip irrigation systems are excellent investments. They ensure consistent moisture, which is crucial for container plants.
- Compost On-Site: If space allows, a small worm farm or a bokashi composting system can turn kitchen scraps into nutrient-rich compost and compost tea for your plants, reducing waste and providing free fertilizer.
- Rotate Crops (Even in Pots): While challenging in a small space, try to avoid planting the same type of crop in the same pot year after year. This helps prevent nutrient depletion and suppresses specific soil-borne pests and diseases. If rotation isn’t feasible, replenish and refresh the potting mix generously each season.
- Mind the Weight: Always be aware of the weight capacity of your balcony. Water-soaked soil in large containers can be very heavy. Distribute weight evenly and, if concerned, consult a structural engineer or your landlord.
- Vertical is Your Friend: Beyond trellises, consider wall-mounted planters, vertical garden systems, and hanging baskets. Every inch of vertical space is a prime growing opportunity.
Common Mistakes to Avoid:
- Using Garden Soil in Containers: As mentioned, garden soil compacts easily in pots, leading to poor drainage and suffocated roots. Always use a high-quality potting mix.
- Insufficient Drainage: Containers without proper drainage holes will lead to waterlogged soil and root rot, quickly killing your plants. Ensure all pots have holes and consider adding a drainage layer.
- Underestimating Sunlight Needs: Plants need light! Putting sun-loving plants in a shady spot (or vice-versa) will lead to poor growth and yield. Observe your balcony’s sun exposure throughout the day before planting.
- Neglecting Fertilization: Nutrients in potting mix are depleted faster than in garden soil. Regular feeding with organic fertilizers is essential for healthy, productive plants.
- Overwatering or Underwatering: Both extremes are detrimental. Stick your finger into the soil; if the top inch or two feels dry, it’s time to water. Consistency is key.
- Ignoring Pest and Disease Early On: Small issues can quickly become big problems in a contained environment. Regularly inspect your plants and address any signs of pests or disease immediately with organic solutions.
- Not Planning for Growth: Plants grow! What looks like ample space today might be overcrowded in a few months. Plan for mature plant sizes and give them room to thrive.
- Forgetting Mulch: Skipping mulch means more frequent watering, faster nutrient loss, and hotter soil temperatures – all disadvantages for container plants.
Note: Patience is a virtue in gardening. Some plants take longer to establish, and you’ll learn through trial and error. Every season offers new lessons and opportunities for improvement in your balcony food forest setup.
Eco-Friendly Variations for Your Balcony Food Forest
Embracing an eco-conscious approach enhances the sustainability and benefits of your balcony food forest. These variations reduce waste, conserve resources, and promote a healthier environment.
- Rainwater Harvesting: Install a small rain barrel or redirect gutter spouts (if applicable and allowed) to collect rainwater. Rainwater is non-chlorinated and excellent for plants. Even a small bucket can collect enough for limited watering needs.
- DIY Composting: Start a small vermicomposting (worm farm) or bokashi composting system directly on your balcony. This turns kitchen scraps into nutrient-rich fertilizer, reducing landfill waste and providing a free, powerful soil amendment. Learn more about composting for beginners.
- Recycled/Upcycled Containers: Instead of buying new, repurpose food-grade buckets, old tires (check for leaching concerns), wooden crates, or even sturdy laundry baskets (with added drainage) for planters. Just ensure they are safe for food contact if you’re growing edibles.
- Native Plant Integration (where appropriate): If space allows, consider integrating a small native plant that provides ecological benefits (e.g., attracting pollinators) without competing significantly with your food crops. Research local native plants suitable for containers.
- Natural Pest Control: Focus on preventative measures like companion planting, maintaining plant health, and introducing beneficial insects (e.g., lacewings, ladybugs, if practical). Avoid chemical pesticides entirely, opting for organic solutions like neem oil or insecticidal soaps only when necessary.
- Homemade Fertilizers: Explore making your own plant feeds from comfrey leaves, nettles, or even banana peels steeped in water. These natural concoctions provide a nutrient boost without relying on store-bought products.
- Solar-Powered Lighting/Drip Systems: If you use any supplemental lighting or irrigation systems, consider solar-powered versions to reduce your electricity consumption.
- Seed Saving: For open-pollinated varieties, learn to collect and save seeds from your most successful plants. This reduces costs, increases self-sufficiency, and allows you to select for plants best adapted to your specific balcony environment.
Seasonal Considerations for Your Balcony Food Forest
A balcony food forest, like any garden, is subject to the rhythm of the seasons. Adapting your practices will ensure year-round productivity and plant health.
- Spring:
- Planting: This is the prime planting season. Start seeds indoors for warm-season crops (tomatoes, peppers) a few weeks before the last frost. Plant cool-season crops (lettuce, spinach, radishes) directly outdoors when temperatures allow.
- Preparation: Refresh potting mix in existing containers. Fertilize established perennial plants.
- Harvest: Early spring greens, radishes.
- Summer:
- Watering: The most crucial task. Water frequently, often daily, sometimes twice a day during heatwaves. Mulch is your best friend.
- Feeding: Regular feeding becomes even more important as plants are actively growing and fruiting.
- Support: Provide stakes and trellises for vining plants as they grow rapidly.
- Harvest: Peak season for most fruits, vegetables, and herbs. Harvest regularly to encourage more production.
- Pest Watch: Be vigilant for pests and diseases, which can proliferate in hot, humid conditions.
- Autumn:
- Harvest: Continue harvesting warm-season crops until the first frost.
- Planting: Plant cool-season crops for a fall harvest (kale, Swiss chard, some lettuces). Consider garlic or overwintering onions.
- Winter Prep: Bring tender perennials indoors or provide frost protection (covers, blankets) for plants that can survive mild winters.
- Clean-up: Remove spent annuals, compost plant debris, and clean containers.
- Winter:
- Protection: For areas with freezing temperatures, protect outdoor plants with frost blankets or move them to a more sheltered spot. Bring tropical herbs and dwarf citrus indoors if possible.
- Reduced Watering: Plants require much less water in winter. Check soil moisture before watering to prevent root rot.
- Limited Growth: Growth will slow significantly. You might still be able to harvest cold-hardy greens or fresh herbs from indoors. Consider growing microgreens on a windowsill.
- Maintenance: Clean and store tools. Plan for next season’s garden.
Note: Understanding your local climate and specific microclimate on your balcony is key. Microclimates can make a significant difference in how plants perform.
Expert Resources for Further Learning
To deepen your understanding and fine-tune your balcony food forest setup, here are some invaluable resources from gardening experts:
- Gardening Know How: Container Gardening Tips – An extensive resource for all things container gardening, including soil, watering, and plant selection.
- Royal Horticultural Society (RHS): Urban Gardening Guides – Offers expert advice on gardening in small spaces, including balconies, with a focus on sustainable practices.
- University of Minnesota Extension: Container Gardening Basics – Provides research-backed information on soil, nutrients, and water management for container plants.
- Permaculture Principles: Explore core permaculture concepts to understand the philosophy behind food forests.
- Local Nurseries and Garden Centers: Your local experts can offer invaluable advice on plants that thrive in your specific climate zone and recommend suitable local varieties.
- Online Gardening Communities: Engage with other urban gardeners on forums and social media groups to share tips, troubleshoot problems, and celebrate successes.
- Books on Small-Space Gardening: Many excellent books are dedicated to container gardening, vertical gardening, and urban permaculture, offering detailed guidance and inspiration.
Conclusion
Creating a balcony food forest setup is more than just a gardening project; it’s an empowering journey into urban self-sufficiency, ecological awareness, and culinary delight. By thoughtfully planning, selecting appropriate plants and materials, and committing to consistent care, you can transform even the smallest balcony into a vibrant, productive, and beautiful green oasis. Embrace the layers, learn from your experiences, and savor the unparalleled joy of harvesting fresh food from your very own compact ecosystem. Your urban space is bursting with potential – unlock it and watch your balcony transform into a bountiful haven!
Frequently Asked Questions About Balcony Food Forests
Q1: How much sun does a balcony food forest need?
A1: Ideally, most edible plants thrive with at least 6-8 hours of direct sunlight per day. However, you can adapt your plant selection to your balcony’s sun exposure. Leafy greens like lettuce and spinach can tolerate partial shade (4-6 hours), while fruiting plants like tomatoes and peppers need full sun (8+ hours). Assess your balcony’s sun patterns carefully before choosing plants.
Q2: Can I grow a balcony food forest in a cold climate?
A2: Yes, with adaptations! In cold climates, focus on cold-hardy varieties, extend your growing season with cloches or cold frames, and be prepared to bring tender perennials (like dwarf citrus) indoors during winter. Fabric grow bags can be insulated, and mulching heavily helps protect roots from freezing. You might also focus more on seasonal annuals and root vegetables.
Q3: What are the best containers for a balcony food forest?
A3: The best containers have good drainage and are appropriately sized for the plants they hold. Fabric grow bags are excellent for aeration and preventing root circling. Terracotta pots look lovely but dry out quickly. Plastic pots are lightweight and retain moisture well. Upcycled food-grade containers can also be great, ensuring they are clean and have drainage holes. Use a variety of sizes to create dynamic layers.
Q4: How do I manage pests organically in a small balcony food forest?
A4: Organic pest management starts with prevention. Foster healthy soil and robust plants, as these are more resistant to pests. Employ companion planting (e.g., nasturtiums to deter aphids, marigolds). Regularly inspect your plants and handpick any visible pests. For persistent issues, use organic solutions like insecticidal soap, neem oil, or introduce beneficial insects (if practical and allowed). Attracting pollinators like bees can also create a more balanced ecosystem that naturally keeps pest populations in check.