12 Essential Steps to Supercharge Your Plants with Mycorrhizal Fungi
Imagine a hidden network beneath your garden, tirelessly working to feed your plants, protect them from stress, and unlock nutrients previously beyond their reach. This isn’t science fiction; it’s the miraculous reality of mycorrhizal fungi. These microscopic helpers form a symbiotic relationship with plant roots, acting as an extended root system that dramatically enhances your plants’ health, vigor, and productivity. Embracing mycorrhizal fungi is a game-changer for gardeners looking to cultivate healthier, more resilient plants with less effort and fewer synthetic inputs. Get ready to embark on a journey into the fascinating world beneath your soil and discover how to harness the power of these incredible organisms to truly supercharge your garden.
[lwptoc]
Why This Matters for Your Garden
For too long, gardeners have focused solely on the visible aspects of plant care: watering, fertilizing, and pruning. However, the true foundation of plant health lies beneath the soil, within a complex ecosystem teeming with life. Mycorrhizal fungi are key players in this underground drama, forming crucial partnerships that benefit both the fungi and the plant.
Studies have shown that plants inoculated with mycorrhizal fungi exhibit increased drought resistance, improved nutrient uptake (especially phosphorus and nitrogen), and enhanced protection against soil-borne diseases. This translates directly to bigger yields, more vibrant blooms, and an overall more robust garden that can withstand environmental stresses. By fostering these fungal networks, you are essentially giving your plants a powerful, self-sustaining support system, reducing your reliance on chemical fertilizers and pesticides. It’s gardening smarter, not harder, and aligning with nature’s intelligent design.
What You Need to Get Started
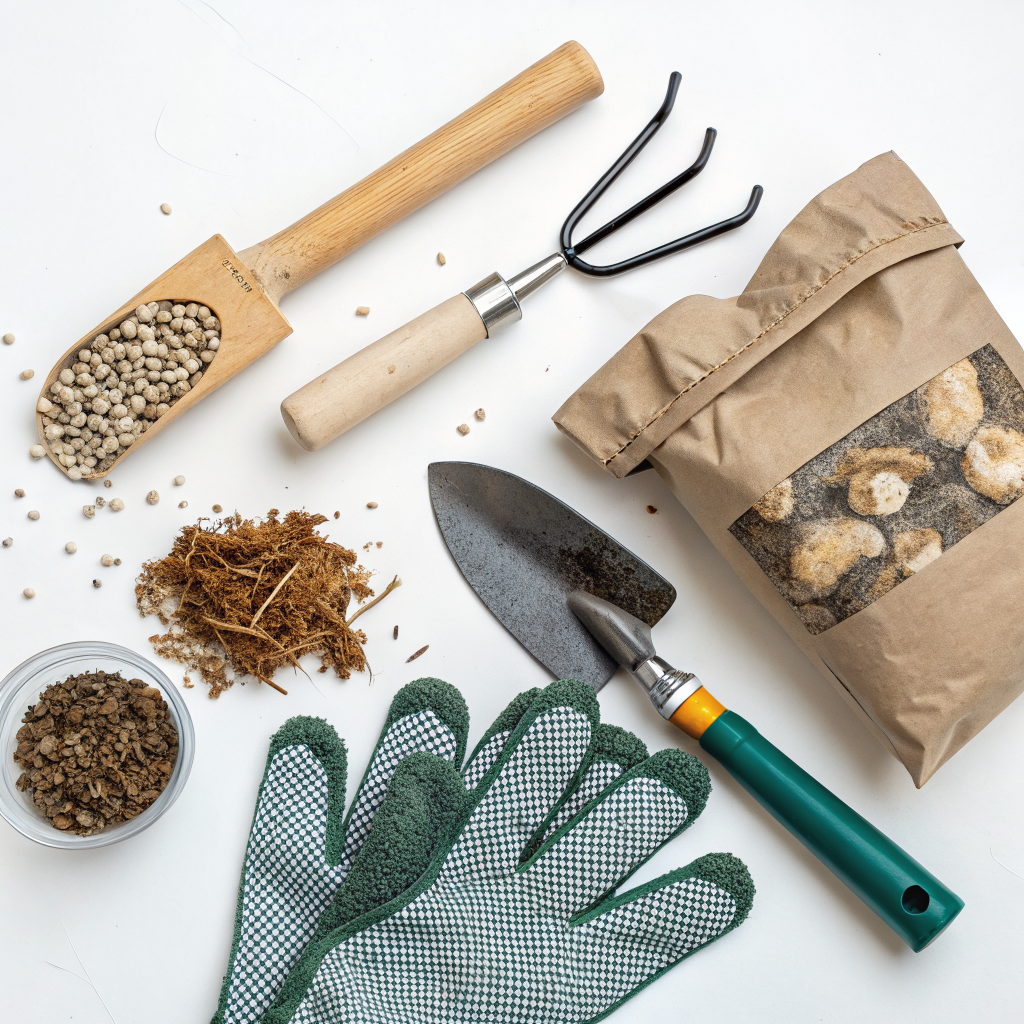
Successfully integrating mycorrhizal fungi into your garden doesn’t require a lot of specialized equipment. The key is to have the right product and understand how to apply it effectively. Here’s a rundown of what you’ll need:
- Mycorrhizal Fungi Inoculant: This is the most crucial item. Look for products containing a diverse blend of endomycorrhizal and ectomycorrhizal spores, as different plant types benefit from different fungi. Granular, powder, or liquid formulations are available.
- Watering Can or Sprayer: For mixing liquid inoculants and ensuring even distribution.
- Trowel or Small Shovel: For planting and creating direct contact with roots.
- Gloves: To protect your hands, though mycorrhizal fungi are generally safe.
- Healthy Soil: While fungi improve soil, starting with decent soil helps. Avoid heavily disturbed or sterilized soils if possible.
- Your Plants: Seedlings, transplants, seeds, or established plants are all suitable candidates. Most common garden plants (vegetables, flowers, shrubs, trees) form mycorrhizal associations. Exceptions include brassicas (cabbage, broccoli, etc.) and some aquatic plants.
Step-by-Step Guide: How to Apply Mycorrhizal Fungi
Integrating mycorrhizal fungi into your garden is a straightforward process once you understand the basic principles. The goal is always to bring the fungal spores into direct contact with the plant’s root system. Here are the steps:
Step 1: Choose the Right Inoculant
There are many mycorrhizal products on the market. Read labels carefully to ensure you’re getting a broad spectrum of species, often listed as “spores per gram” or “colony forming units (CFU).” Some products are specifically for endomycorrhizal plants (most vegetables, flowers, grasses) and others for ectomycorrhizal plants (most trees and shrubs). A product with both types is usually best for a diverse garden. Consider a reputable brand for consistent quality. Learning about the different types can enhance your understanding; for more detail, check out this great explanation of mycorrhizae types from Gardening Know How.
Step 2: Prepare Your Planting Area or Plants
Whether you’re planting seeds, seedlings, or treating established plants, some preparation is needed. For new plantings, have your beds ready with good organic matter. For existing plants, you might need to gently expose some roots or create holes around the root zone. Ensure your soil isn’t waterlogged, as this can hinder fungal establishment.
Step 3: Direct Application to Seeds
For seeds, inoculating is simple. Moisten the seeds slightly, then gently roll them in a powder inoculant. The goal is to get a thin coating of spores on the seed surface. Plant immediately after coating. This is an excellent way to give young plants a head start.
Step 4: Application for Seedlings and Transplants
This is one of the most effective methods. When transplanting, whether from a nursery pot or your own seed trays, sprinkle a small amount of granular or powdered inoculant directly onto the root ball. Ensure the spores make direct contact with the roots. Alternatively, create a slurry by mixing powder with water and dip the roots into it just before planting. Position the plant in the hole, ensuring the inoculated roots are well covered with soil.
Step 5: Application for Established Plants
For existing plants, you’ll need to get the inoculant to the root zone. For smaller plants, you can gently scrape away the topsoil around the base to expose some feeder roots, apply the inoculant, and then re-cover with soil. For larger plants, use a dibber or crowbar to create several holes (4-6 inches deep) around the drip line, fill these holes with granular inoculant, and then water thoroughly. This method brings the fungi directly where they can interact with the roots. Understanding living soil principles further enhances this process.
Step 6: Mixing with Potting Mix or Garden Soil
If you’re preparing a new batch of potting mix for containers or amending a raised bed, you can proactively mix the granular inoculant directly into the soil. Follow the product’s recommended ratios. This ensures even distribution and colonization as soon as roots develop. This is particularly beneficial for starting seedlings in pots.
Step 7: Water In Thoroughly
After applying the inoculant, always water the area thoroughly. This helps settle the spores into the soil and brings them into closer contact with the roots, initiating the colonization process. Be careful not to wash away the granules or powder from exposed roots.
Step 8: Avoid High-Phosphorus Fertilizers Initially
Mycorrhizal fungi are most beneficial when plants need help accessing nutrients, especially phosphorus. High levels of soluble phosphorus in the early stages can hinder the establishment of the fungal relationship. Once the symbiosis is established, plants can better utilize all available nutrients. Consider natural soil amendments for a balanced approach; making your own compost is a fantastic way to do this.
Step 9: Maintain Healthy Soil Practices
To encourage a thriving mycorrhizal network, continue with good soil stewardship. This includes minimizing soil disturbance, maintaining a consistent layer of organic mulch, and avoiding synthetic fungicides, which can harm beneficial fungi. A healthy soil ecosystem encourages robust fungal growth.
Step 10: Patience is Key
The establishment of mycorrhizal networks isn’t an overnight phenomenon. It takes time for the fungi to colonize the roots and for the benefits to become fully apparent. Expect to see noticeable improvements in plant health, drought resistance, and nutrient efficiency over weeks or months, especially in challenging growing conditions. For more on soil health, the Royal Horticultural Society provides excellent resources.
Step 11: Re-apply as Needed
While established fungi are persistent, re-application might be beneficial after significant soil disturbance or in very depleted soils. For annual crops, a yearly application at planting is ideal. For long-lived perennials, trees, and shrubs, one good initial inoculation may suffice for many years, provided soil health is maintained.
Step 12: Monitor and Observe
Pay attention to your plants. You should observe increased vigor, better resistance to transplant shock, and improved growth compared to uninoculated plants. This observational data will reinforce the effectiveness of using mycorrhizal fungi in your garden. Document your findings to track improvements.
Pro Tips and Common Mistakes
Maximizing the benefits of mycorrhizal fungi often comes down to understanding small nuances and avoiding common pitfalls. Here are some seasoned gardener tips and warnings:
Pro Tips:
- Combine with Compost: Mycorrhizal fungi thrive in organic-rich environments. Incorporating high-quality compost or other organic matter into your soil prior to application creates an ideal habitat for these beneficial organisms. Compost also provides a slow release of nutrients, further supporting the fungal network.
- Focus on Root Contact: The absolute most critical factor is direct contact between the fungal spores and the plant roots. Don’t just sprinkle inoculant on the soil surface; get it right where the roots are or will be. This direct contact initiates the symbiotic relationship more quickly and effectively.
- Water Smartly: After application, water deeply but avoid overwatering, as constantly saturated soil can inhibit fungal growth. Consistent, moderate moisture is ideal for establishment and ongoing fungal health.
- Use for Stress Reduction: Mycorrhizal fungi are particularly beneficial during periods of plant stress, such as transplanting, drought, or nutrient deficiencies. Proactive inoculation can arm your plants against these challenges before they arise.
- Consider Live Plant Inoculation: For best results with established plants, consider using liquid drench applications or creating holes around the root zone to introduce granules, ensuring the fungi reach active root tips.
- Batch Treatment: If you’re starting a large number of seeds or seedlings, prepare a batch solution (liquid inoculant) or a batch dusting station for seeds to efficiently inoculate multiple items at once.
Common Mistakes to Avoid:
- Using Fungicides: This is a big one! Many systemic and broad-spectrum fungicides can kill beneficial mycorrhizal fungi. Avoid applying these chemicals near inoculated plants, especially during the establishment phase. Opt for organic pest and disease control methods where possible.
- Applying High Soluble Phosphorus: While phosphorus is essential for plants, excessive amounts of readily available soluble phosphorus, particularly from synthetic fertilizers, can inhibit mycorrhizal formation. Plants that easily access phosphorus may not form the symbiosis. Aim for balanced soil nutrition and let the fungi do their job.
- Soil Disruption: Tilling or excessive digging can disrupt the delicate fungal hyphae networks that mycorrhizal fungi create. Practice no-till or minimum-till gardening to preserve these vital underground connections.
- Incorrect Application: Simply broadcasting spores on top of the soil without ensuring root contact is largely ineffective. The spores need to be placed directly where the roots can access them to begin colonization.
- Expired Product: Mycorrhizal inoculants contain live spores. Check the expiration date. Over time, viability can decrease, rendering the product less effective. Store inoculants in a cool, dry place away from direct sunlight.
- Expecting Instant Results: Mycorrhizal colonization takes time. Don’t expect to see dramatic changes overnight. The benefits accumulate over weeks and months as the fungal network expands and strengthens.
Eco-Friendly Variations
The very act of using mycorrhizal fungi is inherently eco-friendly, as it promotes natural biological processes and reduces reliance on synthetic inputs. However, there are ways to further enhance the ecological benefits:
- Source Local or Organic Inoculants: If possible, choose inoculants from suppliers who prioritize sustainable practices or offer certified organic products. This ensures the production process aligns with your eco-conscious gardening philosophy.
- Maintain a Living Soil: Beyond just applying fungi, strive to create a ‘living soil’ ecosystem. This involves consistent mulching with organic materials, minimizing disturbance, growing cover crops, and avoiding synthetic chemicals. A diverse soil microbiome naturally supports mycorrhizal networks.
- Compost Tea and Worm Castings: Supplementing with compost tea or worm castings can introduce other beneficial microbes and nutrients that work synergistically with mycorrhizal fungi. These additions create a more robust and resilient soil food web.
- Rainwater Harvesting: Using collected rainwater for watering helps avoid introducing potentially harmful chemicals (like chlorine) found in tap water, which can sometimes negatively impact soil microbes.
- Native Plant Focus: When possible, use mycorrhizal fungi with native plants. These plants are often better adapted to local soil conditions and can form strong, beneficial relationships with local fungal populations, enhancing ecosystem resilience.
Seasonal Considerations
The time of year you apply mycorrhizal fungi can influence their effectiveness, primarily due to temperature, moisture, and plant activity levels.
- Spring: This is an ideal time for inoculation, especially when starting seeds or transplanting seedlings. As soil temperatures rise and plants begin active growth, the fungi have optimal conditions to establish symbiotic relationships with developing roots. Spring planting allows the fungi to support plants throughout their main growing season.
- Summer: While challenging due to heat and potential drought, inoculating during summer can still be effective, especially for new plantings or established plants experiencing stress. Ensure consistent moisture after application to aid establishment. Avoid applying during extreme heatwaves.
- Autumn: A great time for inoculating new fall plantings, such as trees, shrubs, or cool-season vegetables. The cooler temperatures and increased moisture can foster excellent fungal establishment before winter dormancy. Established plants can also benefit, allowing fungi to colonize roots before the plant goes dormant.
- Winter: Generally not recommended for active application in regions with frozen ground or very cold temperatures, as plant growth is minimal and fungal activity is low. However, if planting in a greenhouse or temperate climate where soil remains workable, principles for active growth periods apply. For overwintering perennials, a fall application prepares them for spring growth.
The main takeaway is to apply when plants are actively growing or just about to begin their growth cycle, ensuring the fungi can quickly connect with new root development. Consistent moisture and appropriate soil temperatures are key for colonization success.
Expert Resources for Further Learning
Delving deeper into the science and application of mycorrhizal fungi can further enhance your gardening success. Here are some reputable external resources:
- For a comprehensive overview of mycorrhizal relationships and their benefits, visit Gardening Know How’s Mycorrhizae Explained. This article provides a solid introduction to the concept and types of mycorrhizal fungi.
- The Royal Horticultural Society (RHS) offers valuable insights into mycorrhizal fungi, including how they function and their importance for garden health. Their resources are often backed by extensive research.
- For practical advice specifically geared toward extension services, the University of Minnesota Extension provides an excellent guide on mycorrhizal fungi, often translating scientific research into actionable gardening tips.
These resources offer a wealth of information to deepen your understanding and help you make informed decisions about incorporating these beneficial organisms into your garden strategy.
Conclusion
Embracing mycorrhizal fungi is more than just another gardening trick; it’s a fundamental shift towards a more sustainable, resilient, and naturally productive garden. By fostering these incredible symbiotic relationships beneath the soil, you empower your plants to access nutrients and water more efficiently, withstand environmental stresses, and thrive with less intervention from you. It’s an investment in the long-term health of your soil and the vitality of your plants.
From stronger seedlings to more abundant harvests and vibrant blooms, the benefits of introducing mycorrhizal fungi are profound and far-reaching. By following these practical steps and incorporating the pro tips, you’re not just growing plants – you’re cultivating a thriving, interconnected ecosystem that works tirelessly to supercharge your garden. Start today, and watch your plants flourish like never before, supported by the microscopic magic beneath their roots.
FAQ: Mycorrhizal Fungi
A1: Most common garden plants benefit significantly, including nearly all vegetables (except brassicas like cabbage, broccoli, and kale), fruit trees, berry bushes, flowering plants, roses, and many trees and shrubs. Conifers and broadleaf trees typically form ectomycorrhizal relationships, while most other plants form endomycorrhizal relationships. A broad-spectrum inoculant addresses both.
A2: While using a little extra inoculant is generally not harmful, it’s usually unnecessary and won’t significantly increase benefits beyond the recommended dosage. The fungi need host roots to colonize; simply adding more spores to vast amounts of soil without root contact is wasteful. Follow package instructions for optimal results and cost-effectiveness.
A3: Colonization can begin within a few days to a few weeks, depending on soil conditions, plant type, and fungi species. Visible benefits like increased plant vigor or drought resistance may take several weeks to a few months to become fully apparent as the fungal network expands and integrates with the plant’s root system.
A4: Absolutely! Plants in containers often face more nutrient and water stress than those in the ground. Mycorrhizal fungi can be incredibly beneficial in pots, helping plants efficiently utilize limited resources and reducing the need for frequent fertilization. Ensure direct root contact when adding to potting mixes or transplanting.