Introduction
Did you know that conventional tillage can lead to a 50-70% reduction in soil organic matter over decades, dramatically impacting your garden's health and productivity? If you're looking for a greener, more sustainable way to grow, engaging in eco gardening by implementing no-till soil practices is one of the most impactful decisions you can make. This approach focuses on disturbing the soil as little as possible, mimicking natural ecosystems to foster a thriving subterranean world. By adopting these methods, you can significantly improve soil structure, water retention, and nutrient cycling, creating a robust foundation for your plants with less effort. Let's delve into embracing a gardening style that benefits both your harvest and the planet.
Table of Contents
- Introduction
- Materials & Tools Needed
- Project Time
- Step-by-Step Instructions
- Maintenance & Care Tips
- Eco-Friendly Alternatives
- Design & Styling Ideas
- Common Mistakes to Avoid
- Storage & Seasonal Tips
- Conclusion
- FAQ
Materials & Tools Needed
Cultivating a resilient garden through regenerative techniques, like no-till, requires a thoughtful selection of inputs. The beauty lies in leveraging natural elements to build living, breathing soil.
- Cardboard (untreated, brown): A humble but mighty weed suppressor. Seek out large, flat sheets with no glossy finishes or tape. Imagine creating a dark, suffocating blanket for persistent weeds.
- Compost (rich, dark, and earthy-smelling): High-quality, finished compost is the heart of your no-till system. It's teeming with beneficial microbes and essential nutrients. Look for a crumbly texture and a sweet, forest-floor aroma.
- Alternative: Locally sourced aged manure (from grass-fed animals, ideally) or leaf mold, both wonderfully rich in organic matter.
- Mulch (straw, shredded leaves, wood chips): A generous, protective layer that insulates the soil, retains moisture, and suppresses weeds. Straw offers a golden-hued, airy blanket, while shredded leaves decompose beautifully, adding dark organic richness. Wood chips provide a coarser, more robust covering.
- Alternative: Pine needles for acid-loving plants, or a living mulch of low-growing cover crops.
- Broadfork (heavy-duty, with sharp tines): This essential tool aerates deeply without inverting soil layers. Feel its sturdy weight in your hands, ready to gently penetrate compacted earth.
- Alternative: A digging fork, used with caution to avoid excessive disturbance.
- Hand Trowel & Weeding Fork (sharp, comfortable grips): For precise planting and targeted weed removal, these are your delicate extensions. Picture the cool metal against your palm, ready for intricate work.
- Watering Can or Hose with a gentle spray nozzle (for nurturing): Deliver vital hydration without washing away precious topsoil. A slow, steady stream mimics a soft rain.
- Seeds or Seedlings (your chosen plants): The vibrant future of your garden. Select varieties that will thrive in your soil conditions and climate.
- Wheelbarrow or Garden Cart (sturdy, capacious): For effortlessly transporting large volumes of compost and mulch. Feel the satisfying rumble of a full load.
Project Time
Adopting no-till methods streamlines many traditional gardening tasks, offering surprising efficiency over time.
- Preparation time: 2-4 hours (for initial site clear-out and gathering materials)
- Build/plant time: 4-8 hours (depending on garden size and layering method)
- Total duration: 6-12 hours for initial setup. Subsequent planting and maintenance are typically much faster.
This setup is estimated to be 40% faster than preparing a new bed using traditional double-digging methods, which often involve arduous soil turning and amendment integration. It also requires significantly less long-term effort in weeding.
Step-by-Step Instructions
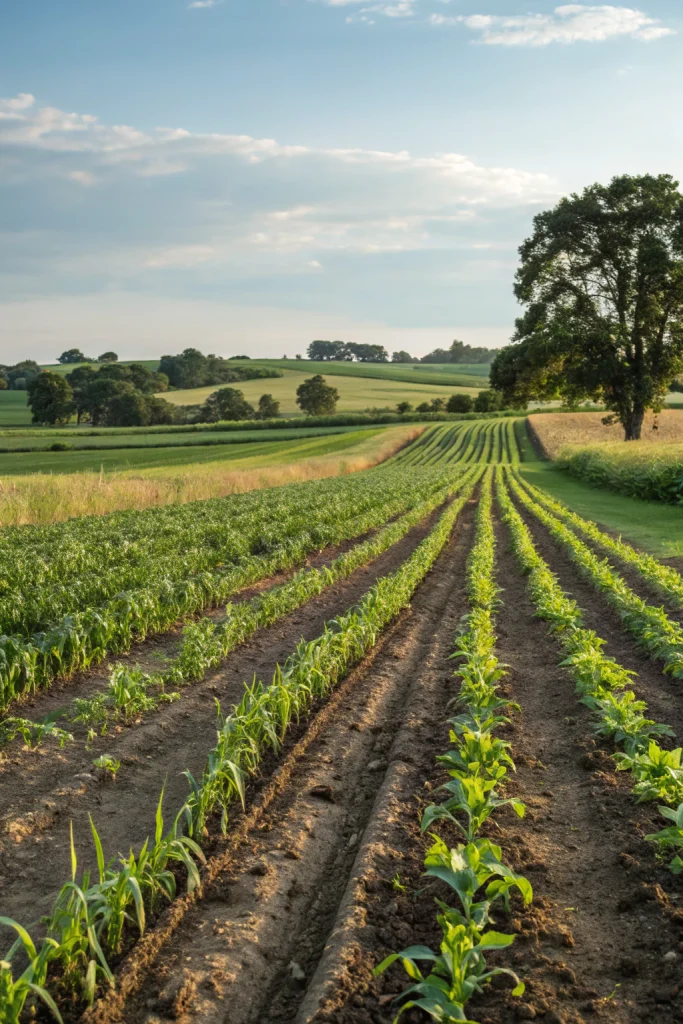
Embarking on eco gardening with no-till practices establishes a foundation for enduring soil health and vibrant plant growth. Follow these steps to create your undisturbed garden.
Step 1: Site Preparation
Begin by defining the area for your no-till bed. If you have existing weeds or lawn, there's no need for arduous digging.
- Practical Tip: For stubborn perennial weeds, consider solarization for a few weeks prior by covering the area with clear plastic sheeting to weaken them before applying cardboard.
Step 2: Laying Down Your Base Layers
Cover the designated area with a thick layer of untreated cardboard, overlapping the edges by at least 6 inches to block out light completely. This smothers existing vegetation.
- Practical Tip: Wet the cardboard thoroughly as you lay it down to help it stay in place and begin the decomposition process. This is crucial for successful weed suppression and initial moisture retention.
Step 3: Adding Organic Material
Pile a generous 4-6 inch layer of high-quality compost or aged manure directly on top of the wetted cardboard. This becomes your nutrient-rich planting medium.
- Practical Tip: Aim for diverse organic matter by mixing in some leaf mold or well-aged wood chips (for paths, not directly in planting zones) to encourage a broader spectrum of soil microbes and fungi.
Step 4: Planting Your Garden
Create small pockets or holes in the compost layer, just large enough for your seeds or seedlings, taking care not to significantly disturb the cardboard layer beneath.
- Practical Tip: When planting seedlings, gently tease out any encircling roots to encourage outward growth into the new compost. For seeds, follow spacing guidelines and ensure good seed-to-soil contact.
Step 5: Consistent Mulching
Immediately after planting, apply a 2-4 inch layer of organic mulch (straw, shredded leaves, or wood chips) over the entire bed, right up to the base of your plants.
- Practical Tip: Replenish your mulch layer annually, or whenever it thins, to maintain weed suppression, consistent soil moisture, and continuous organic matter input. This ongoing practice is a cornerstone of no-till success.
Maintenance & Care Tips
Consistent care ensures your no-till ecosystem thrives, making your eco gardening efforts truly rewarding.
- Watering: No-till beds retain moisture significantly better than tilled beds. Monitor soil moisture by sticking your finger an inch or two into the soil. Water deeply when the top inch or two feels dry. Studies show that mulched no-till systems can reduce water evaporation by up to 25-30% compared to bare soil, meaning less frequent watering is often needed. Consider drip irrigation or soaker hoses for efficient delivery directly to the root zone.
- Pruning: Follow standard pruning guidelines for your specific plants. In a no-till system, pruned plant matter (leaves, small stems) can often be chopped and dropped directly onto the soil surface around the plants, contributing to the organic matter layer.
- Soil: The beauty of no-till is that the soil truly takes care of itself. Avoid walking on beds to prevent compaction. Regular applications of organic mulch and compost will continually feed the microbial life below. Over time, expect soil aggregation to improve, leading to better aeration and drainage naturally. Don't dig or invert soil layers; if aeration is needed, use a broadfork to gently lift the soil without mixing.
- Schedule:
- Spring: Lightly top-dress with a thin layer (1-2 inches) of fresh compost, then refresh mulch. Plant seeds and seedlings.
- Summer: Monitor watering, spot-weed any persistent intruders, and harvest. Apply a fresh layer of mulch if needed, particularly during hot, dry spells.
- Autumn: Clear spent annuals (chop and drop if healthy), plant cover crops or fall vegetables, and apply a thick, protective layer (3-4 inches) of leaves or straw for winter insulation.
- Winter: Mostly passive, observing the garden. Plan for the next season. The mulched surface will protect the soil life from harsh conditions.
Eco-Friendly Alternatives
Embracing a truly sustainable eco gardening approach involves looking for environmentally sound solutions at every turn.
- Recycled Materials: Instead of new raised bed kits, consider upcycling old timber palettes, reclaimed bricks, or even large, sturdy tires (check for potential leaching if growing edibles directly within) to define your garden edges. Repurpose old plastic bottles as cloches to protect young seedlings from early frosts. Shattered ceramic pots can be used as decorative mulch or drainage layers in containers.
- Organic Inputs: Beyond standard compost, explore making your own worm castings (vermicompost) for a nutrient powerhouse, or brew compost tea to deliver beneficial microbes directly to your plants and soil. Collect rainwater in barrels for chemical-free irrigation. For natural pest control, cultivate beneficial insects by planting flowering herbs and native wild blooms, reducing the need for synthetic pesticides.
- Low-Water Options: Integrate drought-tolerant native plants into your no-till beds. These plants are often better adapted to local conditions and require less supplemental water once established. Consider xeriscaping principles in dryer regions. Group plants with similar water needs together to optimize irrigation. A thick mulch layer, as integral to no-till, is inherently a low-water strategy, drastically reducing evaporative loss.
Design & Styling Ideas
No-till doesn't mean sacrificing aesthetics; in fact, it often enhances the natural beauty of a garden, aligning perfectly with creative eco gardening principles.
- Layered Look with Purpose: Embrace the multi-layered visual of your no-till bed. Start with the ground-hugging mulch, then staggered heights of edibles, and finally, taller flowering plants or small shrubs. This creates visual depth and also supports a biodiverse ecosystem. Imagine a tapestry of textures and shades.
- "Edible Forest Garden" Style: Design your no-till space to mimic the structure of a natural forest. Incorporate fruit trees, berry bushes, perennial herbs, and ground covers in a polyculture system. This not only looks lush and abundant but also maximizes productivity in a small footprint. Think of layers: canopy, understory, shrub layer, herbaceous layer, groundcover, and root vegetables.
- Curved Beds and Paths: Break away from rigid straight lines. Organic, flowing curves for your no-till beds and mulched pathways offer a softer, more inviting aesthetic. The mulch paths keep your feet clean and add to the overall organic matter over time.
- Integrated Hardscaping with Natural Materials: Use locally sourced river stones, repurposed logs, or even packed straw bales (which will decompose over time, adding to the soil) to define bed edges or create small seating areas within your no-till landscape. This connects your garden design to its natural surroundings.
- Living Borders and Green Walls: Frame your no-till beds with living borders of pollinator-attracting native plants or low, edible herbs. Consider a small vertical no-till garden against a fence for herbs or greens, adding another dimension of texture and usability. For more on vertical gardening, explore our guide on Vertical Autumn Garden.
Common Mistakes to Avoid
While no-till gardening is highly forgiving, steering clear of these common pitfalls ensures a smoother, more successful eco gardening journey.
- Insufficient Cardboard Layer: A common error is using too thin a layer of cardboard or not overlapping it enough. This leads to persistent weeds poking through within weeks.
- Prevention: Use unprinted, un-taped corrugated cardboard. Lay down at least two layers, overlapping each piece by a minimum of 6 inches on all sides. Thoroughly moisten it to help it conform to the ground and deter weeds.
- Not Enough Organic Matter: Skimping on the initial compost layer can starve your plants and the soil ecosystem alike.
- Prevention: Aim for a substantial initial layer of 4-6 inches of high-quality, finished compost. Think of it as jump-starting your soil's nutritional engine. Regular top-dressing is also key.
- Walking on Beds: Compacting the soil with your weight negates the primary benefit of no-till – maintaining soil structure and aeration.
- Prevention: Design your garden with clearly defined pathways between your beds. Make beds narrow enough (typically no more than 3-4 feet wide) so you can reach the center comfortably from the path.
- Planting too Soon After Cardboard: While cardboard is a great weed barrier, it takes time to break down and integrate. Planting immediately into thin compost on fresh cardboard can lead to poor plant establishment.
- Prevention: Allow at least a couple of weeks, or ideally a month, after laying cardboard and compost, especially if starting from scratch. This allows initial decomposition and microbial activity to begin.
- Ignoring Soil pH: Even in rich no-till soil, pH imbalances can occur and hinder nutrient uptake.
- Prevention: Conduct a soil test every 1-2 years. While no-till improves buffering capacity, extreme pH issues might require targeted, gentle amendments like wood ash (to raise pH) or elemental sulfur (to lower pH), applied sparingly to the surface.
- Assuming "No Weeding": While greatly reduced, no-till isn't entirely weed-free. Aggressive perennial weeds might poke through.
- Prevention: Address any emerging weeds promptly by pulling them gently by hand, avoiding disturbance to the surrounding soil. The consistent mulch layer will be your best defense against most annual weeds. The University of Minnesota Extension provides excellent resources on managing garden weeds.
Storage & Seasonal Tips
Successfully practicing eco gardening year-round involves smart storage and proactive preparation for seasonal changes, especially with no-till methods.
- Tool Storage: Keep your broadfork, trowels, and weeding forks clean, dry, and sharp. Store them in a designated, sheltered area like a shed or garage to prevent rust and extend their lifespan. Hanging tools can save space and make them easily accessible.
- Tip: Lightly oil metal parts of tools like your broadfork before winter storage to prevent corrosion.
- Plant Protection:
- Frost Protection: For sensitive late-season crops or early spring plantings, have frost cloths or old sheets ready. Drape them over plants when frost is predicted, ensuring they don't directly touch the foliage. A homemade DIY cold frame can also extend your growing season sustainably.
- Winter Dormancy: For perennial herbs and vegetables, a generous layer of straw or shredded leaves (an additional 4-6 inches) applied in late autumn provides excellent insulation, protecting roots from extreme cold and minimizing soil heaving.
- Season Prep:
- Autumn: This is a crucial time for no-till gardeners. Collect fallen leaves enthusiastically—they're free organic matter! Shred them with a lawnmower and pile them directly onto your beds as winter mulch. Plant cover crops like clover or winter rye in empty spaces to protect soil, add nutrients, and suppress weeds.
- Spring: As temperatures rise, the winter mulch will begin to break down. Gently push aside some mulch to allow the sun to warm the soil before planting. Top-dress with compost before adding new plants.
- Summer: Keep an eye on your mulch layer, especially in hot, dry climates. Replenish as needed to maintain moisture and keep soil temperatures stable. This proactive mulching is a core tenet of effective eco gardening.
Conclusion
Embracing no-till soil practices is more than just a gardening technique; it's a philosophy that champions the intricate life beneath our feet. By minimizing disturbance and consistently feeding the soil with organic matter, we set the stage for a healthier, more resilient ecosystem. Your eco gardening efforts will not only reward you with bountiful harvests but also contribute to a more sustainable planet, conserving water, reducing erosion, and fostering invaluable biodiversity. It's time to put away the tiller, nurture your soil, and watch your garden flourish in harmony with nature. Start small, observe, and enjoy the incredible benefits this powerful method brings – your soil, your plants, and the environment will thank you.
FAQ
Q1: Is no-till gardening suitable for all types of soil?
A1: Yes, no-till is beneficial for almost all soil types. It especially improves heavy clay soils by enhancing drainage and light, sandy soils by improving water retention and nutrient holding capacity.
Q2: How long does it take to see results from no-till practices?
A2: You can see immediate benefits in weed suppression and moisture retention. Improved soil structure and increased yields typically become noticeable within 1-3 seasons, as the microbial life and organic matter build up.
Q3: Can I convert an existing garden bed to no-till?
A3: Absolutely! You can start by laying cardboard over existing weeds (or solarizing them first), adding compost, and then mulching. Existing plants can often be left in place or carefully transplanted into the new layers.
Q4: What about compacted soil? Do I need to loosen it first?
A4: If your soil is severely compacted, a one-time use of a broadfork can be beneficial to gently aerate without inverting the soil. After this initial intervention, rely on organic matter and natural processes to maintain aeration.
Q5: Will no-till gardening attract pests?
A5: A healthy no-till ecosystem, rich in biodiversity, tends to attract beneficial insects that prey on pests, often leading to fewer pest problems over time. The thick mulch layer can deter some surface-dwelling pests while providing habitat for others, so continuous observation is key.
Q6: Do I still need to fertilize in a no-till system?
A6: Regular top-dressing with quality compost provides most of the nutrients your plants will need. A soil test will indicate if specific nutrient deficiencies exist, which can then be addressed with organic amendments.
Q7: How deep should my compost layer be in a no-till bed?
A7: An initial layer of 4-6 inches of compost is ideal. After that, a yearly top-dressing of 1-3 inches helps maintain fertility and organic matter levels, continuously feeding your soil.
For more insights into creating a thriving outdoor space, explore our ideas on Edible Landscaping with Fall Crops. If you're pondering how to make your backyard an inviting retreat, consider our suggestions for an Outdoor Living Backyard Seating Glow-Up. To enhance your plant arrangements, be sure to check out our tips on Texture-Heavy Planting. And to keep abreast of gardening innovations, dive into the upcoming Gardening Hacks 2025. For practical details on plant care, the Royal Horticultural Society provides extensive advice on various gardening topics.


