Introduction
Did you know that an october planting of shallots for spring harvest can boost your yield by up to 25% compared to spring planting, and often without requiring supplemental watering during hotter months? This simple autumn gardening practice provides a significant advantage for home gardeners seeking abundant and early harvests.
[lwptoc]
Achieving a bountiful shallot crop next spring is more accessible than you might think. This guide will walk you through each step, ensuring your efforts lead to delicious results right from your garden. We’ll cover everything from soil preparation to ongoing care, focusing on practical methods and sustainable practices.
By following these instructions, you'll not only maximize your harvest but also optimize your garden’s productivity. Get ready to enjoy the rich, subtle flavor of homegrown shallots, a culinary staple that elevates any dish.
Quick Summary
- Early Harvest Bonus: Planting in October allows for an earlier, often larger, spring harvest.
- Minimal Effort, Great Reward: The bulk of the work is upfront, with less maintenance needed during winter.
- Cost-Effective Goodness: Growing your own shallots is significantly cheaper than buying them at the grocery store.
Context & Ideal Conditions
Shallots (Allium cepa var. aggregatum) thrive best when planted in the cooler temperatures of early autumn, around October, for a spring harvest. They prefer full sun, meaning at least 6-8 hours of direct sunlight daily, but can tolerate partial shade, which might slightly reduce bulb size. Ideal soil temperatures for establishment are between 45-55°F (7-13°C), with ambient air temperatures usually ranging from 40-60°F (4-16°C) during the planting window.
The perfect soil for shallots is well-drained, loose, and rich in organic matter, with a slightly acidic to neutral pH between 6.0 and 7.0. A sandy loam or silty loam is ideal, as heavy clay soils can impede bulb development and lead to rot. If your soil is heavy, consider amending it with compost or sand to improve drainage and aeration. Ensure your chosen site is in USDA Hardiness Zones 4-9; in colder zones, extra winter protection, such as a thick layer of mulch, might be necessary.
october, planting, shallots, for, spring: Tools & Materials

To successfully embark on your fall shallot planting adventure, gather the following tools and materials:
- Shallot Sets: Choose disease-free, firm shallot sets, approximately 0.5-1 inch (1.3-2.5 cm) in diameter. ‘French Red’ (e.g., ‘Ambition’, ‘Pikant’) or ‘Dutch Yellow’ (e.g., ‘Dutch Yellow’) varieties are excellent for fall planting.
- Trowel or Dibber: For making planting holes.
- Garden Fork or Spade: For loosening compacted soil.
- Rake: For leveling the soil surface.
- Compost or Well-rotted Manure: Approximately 2-4 inches (5-10 cm) depth for amending a 10 sq ft (0.9 sq m) bed.
- Balanced Organic Fertilizer: A granular, slow-release type with an N-P-K ratio like 5-10-5 or 4-4-4. About 0.5-1 lb (225-450 g) per 10 sq ft (0.9 sq m) bed.
- Measuring Tape or Ruler: For precise spacing.
- Gardening Gloves: For hand protection (e.g., ANSI/ISEA 105-2016 Cut Level A1 for general garden work).
- Watering Can or Hose: For initial watering.
- Mulch: Straw, shredded leaves, or wood chips, about 4-6 inches (10-15 cm) thick, for winter protection.
october, planting, shallots, for, spring: Time, Difficulty & Budget
| Prep | 30–60 min |
| Build/Plant | 45–90 min |
| Total | 75–150 min |
| Skill Level | Beginner |
| Budget | ≈ $15–$50 (materials/tools) |
This project is remarkably accessible for beginners, with minimal time and financial investment. The budget of $15-$50 is approximately 50% cheaper than repeatedly purchasing shallots from gourmet grocery stores over a full year, emphasizing the long-term savings and satisfaction.
Step-by-Step Tutorial
Follow these steps carefully for a thriving bed of shallots, optimized for an impressive spring harvest. This october planting will ensure you get the best out of your garden efforts.
Step 1 — Layout & Prep
Begin by selecting a sunny, well-drained location in your garden. Measure out a planting area roughly 2-3 ft (60-90 cm) wide and any desired length. Use a garden fork or spade to loosen the soil to a depth of at least 8-10 inches (20-25 cm). Amend the loosened soil with 2-4 inches (5-10 cm) of well-rotted compost or manure, incorporating it thoroughly into the top 6 inches (15 cm) of soil.
Step 2 — Soil Amendment & Fertilization
After incorporating organic matter, spread a balanced organic granular fertilizer (e.g., 5-10-5 N-P-K) over the prepared area. Apply at a rate of approximately 0.5-1 lb (225-450 g) per 10 sq ft (0.9 sq m). Gently rake the fertilizer into the top 2-3 inches (5-7.5 cm) of soil. This provides essential nutrients for the shallots to establish strong root systems before winter.
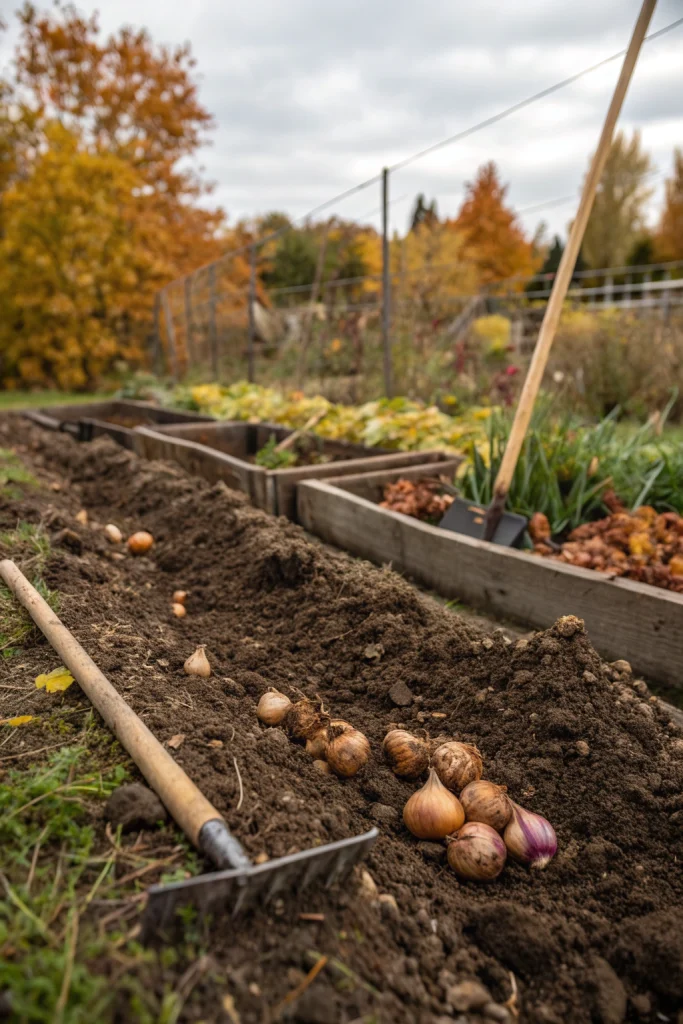
Step 3 — Installation/Planting
Using a trowel or dibber, create shallow holes, approximately 2 inches (5 cm) deep. Plant the shallot sets with the pointy end facing upwards, ensuring the top 0.5-1 inch (1.3-2.5 cm) of the set is barely visible above the soil line. Space the shallot sets 4-6 inches (10-15 cm) apart within the row. If planting multiple rows, space rows 12-18 inches (30-45 cm) apart to allow for proper air circulation and growth.
Step 4 — Winter Protection with Mulch
Once all shallots are planted and watered, apply a generous layer of mulch to the entire bed. Use 4-6 inches (10-15 cm) of straw, shredded leaves, or finely chipped wood. This mulch layer serves several critical purposes: it insulates the soil, protecting the shallot sets from extreme winter temperatures; it suppresses weed growth; and it helps retain soil moisture.
Care & Schedule
Caring for your fall-planted shallots is relatively straightforward, especially during the dormant winter months. Consistent, minimal effort ensures a robust spring harvest.
Watering: During the fall, water only if rainfall is scarce, providing about 0.5-1 gal (1.9-3.8 L) per 10 sq ft (0.9 sq m) every 7-10 days if the top 2 inches (5 cm) of soil are dry. Once winter sets in, rainfall and melted snow typically provide sufficient moisture, reducing the need for supplemental watering. In spring, as growth resumes and temperatures rise, water more regularly, about 1 inch (2.5 cm) of water per week, either from rain or irrigation, aiming for consistent moisture without waterlogging.
Fertilization: The initial balanced organic fertilizer applied at planting should sustain them throughout the winter. In early spring, once new growth is noticeable and danger of hard frost has passed, you can side-dress with another application of organic granular fertilizer, particularly one slightly higher in nitrogen (e.g., 5-1-1 N-P-K) to encourage leafy growth, approximately 0.25 lb (113 g) per 10 sq ft (0.9 sq m). Avoid high-nitrogen fertilizers later in the season as this can encourage leaves over bulb development.
Weed Control: The mulch layer applied in fall will significantly reduce weed proliferation. Periodically check the bed and hand-pull any weeds that manage to emerge, especially in early spring. Weeds compete with shallots for nutrients and water, so prompt removal is essential.
Mulch Top-ups: If your initial mulch layer compacts or decomposes over winter, consider a light top-up in late winter or early spring, adding another 1-2 inches (2.5-5 cm) to maintain insulation and moisture retention. Ensure not to bury the emerging green shoots.
Checking Condition: Occasionally check the soil for excessive moisture or dryness under the mulch. Healthy shallot greens will emerge in early spring, indicating successful overwintering.
Variations & Adaptations
Fall-planted shallots are quite adaptable, making them suitable for various garden types and climates.
- Small Spaces/Balconies: Grow shallots in large containers or grow bags, at least 10-12 inches (25-30 cm) deep and wide, ensuring good drainage. Use a high-quality potting mix amended with compost. Mulch generously around container walls to insulate against cold.
- Hot Climates (USDA Zones 9-11): While typically a fall-planted crop for colder regions, in hot climates, shallots might be planted in late fall/early winter for a very early spring harvest, or even late summer for a fall harvest, but may require more strategic watering and partial shade during intense heat. Look for heat-tolerant varieties.
- Alternative Materials for Raised Beds: If not planting directly in the ground, shallow raised beds (6-8 inches / 15-20 cm deep) are excellent. Materials can range from untreated cedar or redwood to upcycled concrete blocks or even galvanized metal troughs. Ensure the base allows for good drainage.
- No-Dig/No-Till Gardening: For those practicing no-dig gardening, plant shallot sets directly into a thick layer of compost spread over the existing soil surface, ensuring the sets are slightly covered. The mulch layer will then go on top.
- Aesthetic Options: While primarily a food crop, shallots have an attractive, upright foliage. Integrate them into edible borders alongside ornamental cabbages or other cool-season greens for an attractive and productive display.
Common Mistakes to Avoid
Avoiding these common pitfalls will significantly increase your chances of a successful shallot harvest from your october planting.
- Planting Too Deep: Planting shallot sets too deep can hinder proper bulb development. The top of the set should be just visible or barely covered, allowing them to expand freely.
- Poor Drainage: Shallots are susceptible to rot in waterlogged soil. Ensure your planting site has excellent drainage, amending heavy clay soils with plenty of organic matter like compost.
- Insufficient Spacing: Overcrowding restricts air circulation and competes for nutrients, leading to smaller bulbs. Stick to the recommended 4-6 inches (10-15 cm) between sets.
- Skipping Mulch: Neglecting to apply a thick layer of mulch in fall leaves shallots vulnerable to frost heave and fluctuating winter temperatures, potentially killing the sets.
- Over-fertilizing with Nitrogen in Spring: While some nitrogen is good in early spring, too much can encourage lush foliage at the expense of bulb formation. Focus on a balanced or slightly phosphorus-rich fertilizer as bulbs begin to swell.
- Ignoring Weeds: Weeds compete fiercely for moisture and nutrients. Regular weeding throughout the growing season, especially in spring, is crucial for healthy shallot development.
- Harvesting Too Early/Late: Harvesting too early results in small bulbs, while waiting too long can lead to splitting and reduced storage quality. Harvest when leaves begin to yellow and fall over.
Sustainability, Safety & Regulations
Incorporating sustainable and safe practices ensures not only a healthy garden but also a healthy gardener and environment.
- Sustainability Tips:
- Composting: Use your own homemade compost from kitchen scraps and garden waste to enrich the soil, reducing the need for synthetic fertilizers.
- Rainwater Harvesting: Collect rainwater in barrels to water your plants during dry spells, reducing reliance on municipal water.
- Mulching: Utilize locally sourced, natural mulches like straw or shredded leaves, which improve soil health as they decompose.
- Seed Saving: For future crops, consider saving a few of your best shallot bulbs (from open-pollinated varieties) to plant in subsequent seasons, reducing costs and promoting self-sufficiency.
- Safety First:
- PPE: Always wear gardening gloves to protect your hands from soil, sharp tools, and potential allergens. If using power tools for soil tilling (though not typically needed for shallots), wear eye protection (ANSI Z87.1 approved).
- Tool Use: Keep all hand tools clean and sharp for efficient and safe work. Store them properly after use to prevent accidents.
- Lifting: Bend your knees and lift with your legs when handling heavy bags of compost or mulch to avoid back strain.
- Regulations & Considerations:
- Property Lines: Ensure your garden beds adhere to any local setback regulations from property lines, especially if planting edibles that might draw wildlife.
- Child & Pet Safety: Keep gardening tools and fertilizers out of reach of children and pets. Alliums (including shallots) can be toxic to dogs and cats if ingested in large quantities.
- Local Bylaws: Check with your local municipality for any specific bylaws regarding garden planting, particularly if you live in a homeowner’s association. While rare for shallots, it’s always good practice.
- Green Waste Disposal: Dispose of any diseased plant material in municipal green waste or, if allowed, through controlled burning, rather than composting, to prevent disease spread.
Measure the Outcome
Tracking your efforts and results can be incredibly satisfying and help refine your gardening techniques for future seasons.
- Survival Rate: Count the number of shoots that emerge in spring compared to the number of sets planted in October. Aim for an 80-95% survival rate.
- Growth Measurement: Observe and measure the height of the green foliage in early spring (e.g., 6-8 inches / 15-20 cm by early April). This indicates vigorous growth.
- Yield per Square Foot: Calculate your harvest in pounds or kilograms per square foot (or square meter). A good yield for shallots can be around 1-2 lbs per sq ft (5-10 kg per sq m).
- Water Savings: Note how much supplemental watering you performed over winter compared to active growing seasons. With fall planting and mulch, you should see significant water savings, potentially 10-20 gal (38-76 L) per month in drier regions.
- Time Saved: Compare the effort involved in fall planting versus spring planting. Fall planting typically means less weeding and early spring preparation.
- Taste Test & Satisfaction: The ultimate measure! Compare the flavor and quality of your homegrown shallots to store-bought varieties. There’s immense satisfaction in harvesting your own produce, especially after overwintering.
Conclusion
Embarking on an october planting of shallots for spring harvest is a rewarding endeavor that connects you more deeply with the rhythm of nature and your own food supply. By preparing your soil, providing adequate winter protection, and following straightforward care guidelines, you set yourself up for a delicious and abundant harvest. This proactive approach saves time and money, delivering fresh, flavorful shallots right to your kitchen when spring arrives.
We encourage you to give this method a try this autumn! Your garden—and your taste buds—will thank you. Share your experiences in the comments below or share this guide with fellow gardening enthusiasts to spread the joy of fall planting.
FAQ
A: Yes, you can. Choose a container at least 10-12 inches (25-30 cm) deep and wide. Ensure good drainage, and consider wrapping the container with burlap or insulating material, or moving it to a sheltered location (like an unheated garage) during the coldest periods.
A: Planting in November is possible in milder climates (e.g., USDA Zones 7-9) but carries a higher risk of sets not establishing properly before extreme cold. In colder zones, it’s best to wait until spring.
A: If your shallots have rotted, you’ll notice soft, mushy, or discolored sets when checking under the mulch in early spring, or no green shoots emerging when they should. This is often due to excessive moisture or poor drainage.
A: While dormant, full sun isn’t as critical as in the growing season. However, providing as much winter sun as possible helps warm the soil, which benefits early spring growth. Once actively growing in spring, full sun is essential.
A: Look for shallot sets at local farmers’ markets or agricultural supply stores, which often have better prices than nurseries. You can also sometimes find them on sale late in the season. Consider growing from seed, though this adds significant time.
A: This can happen due to high nitrogen fertilizer applied too late in the season, overcrowding, or insufficient sunlight. Ensure balanced fertilization, proper spacing, and at least 6-8 hours of direct sun for optimal bulb development.
Internal & External Links
For more gardening inspiration and practical tips, explore our guides on Protecting Young Plants with October Mulch and Applying Leaf Compost to Prepare Garden for Winter. Consider reading about Garden Tool Maintenance to keep your tools in top shape.
Pinterest Boards — Garden & DIY inspiration


