Introduction
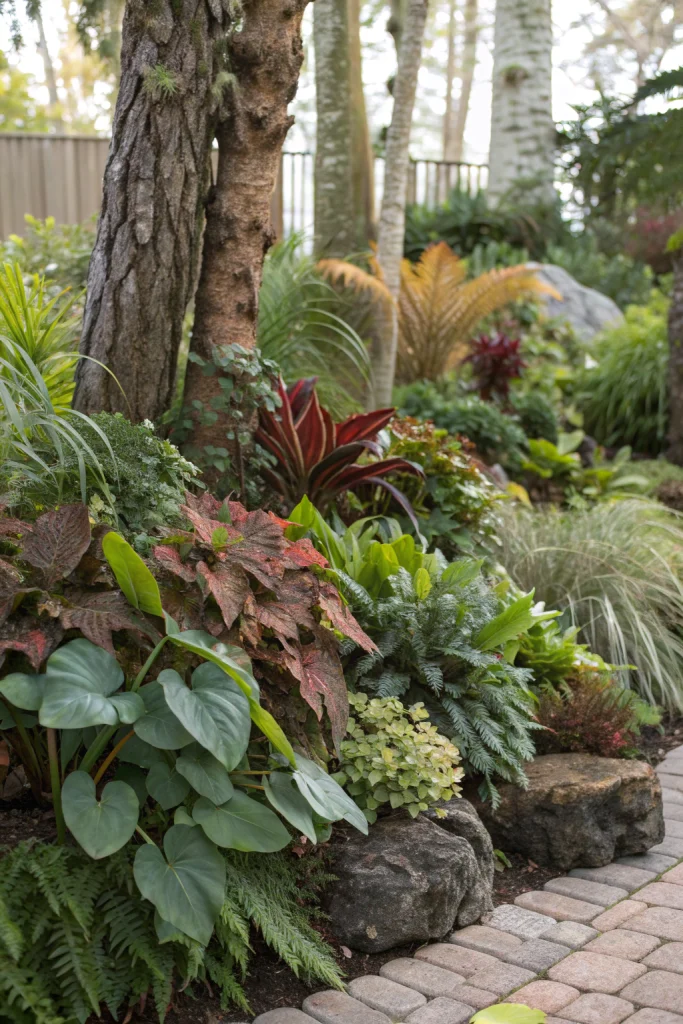
Are you looking to elevate your garden's aesthetic beyond just color, aiming for a sensory experience that captivates year-round? Many gardeners overlook the profound impact of varied forms and surfaces, with only about 30% actively integrating them into their garden schemes according to recent surveys. This article delves into the art of creating eye-catching, touch-inviting, and utterly dynamic displays through plant design that emphasizes diverse textures. By strategically combining plants with contrasting leaf shapes, stem structures, and flower forms, you can craft a garden that offers depth, visual interest, and a unique character, transforming a flat landscape into a vibrant, multi-dimensional haven. Let's explore how to weave together nature's exquisite tapestry of textures.
Table of Contents
- Materials & Tools Needed
- Project Time
- Step-by-Step Instructions
- Maintenance & Care Tips
- Eco-Friendly Alternatives
- Design & Styling Ideas
- Common Mistakes to Avoid
- Storage & Seasonal Tips
- Conclusion
- FAQ
Materials & Tools Needed
To begin your journey into creating a visually rich garden, gathering the right components is key. Focus on quality materials that will support healthy plant growth and tools that make the process enjoyable and efficient.
- Diverse Plant Selection: Seek out plants with a range of leaf forms (finely dissected ferns, bold hostas, spiky yuccas), stem structures (smooth bamboo, gnarled branches, columnar sedum), and captivating blooms (delicate cosmos, feathery astilbe, robust coneflowers). Consider plants that offer both visual and tactile appeal – think fuzzy Lamb’s Ear or the glossy sheen of a rhododendron leaf.
- Alternatives: Explore native plants that are inherently suited to your local climate and soil, often providing unique textures not found in common nursery selections. Consult resources like the USDA Plant Materials program for region-specific recommendations.
- Quality Potting Mix/Soil Amendment: A well-draining, nutrient-rich base is crucial. Look for organic compost, aged manure, or a balanced potting mix.
- Alternatives: Craft your own compost using kitchen scraps and yard waste for a sustainable, nutrient-dense boost.
- Gardening Trowel: A sturdy, comfortable tool for digging individual planting holes.
- Alternatives: A compact spade for larger transplants, or even a robust hand fork for loosening stubborn soil.
- Gardening Gloves: Protect your hands from thorns, soil, and potential irritants. Opt for durable, breathable materials.
- Alternatives: Gauntlet-style gloves for extra forearm protection, or thinner, tactile gloves for delicate tasks.
- Watering Can or Hose with Gentle Sprayer: For initial watering to settle the soil around new plants.
- Alternatives: A rainwater collection barrel for an eco-friendly irrigation source.
- Mulch (Organic or Inorganic): Shredded bark, wood chips, pine straw, or decorative gravel to retain moisture, suppress weeds, and add another layer of texture.
- Alternatives: Composted leaves, straw, or even repurposed cardboard (covered with a thin layer of soil) for excellent weed suppression and moisture retention.
- Pruning Shears/Snips: For light trimming, shaping, and removing dead or damaged foliage.
- Alternatives: Sharp kitchen scissors for delicate snips, or a small utility knife for tougher stems.
- Measuring Tape/Yardstick: For precise plant spacing according to their mature size.
- Alternatives: Use visual estimation or string to mark out boundaries and spacing.
- Garden Stakes and Twine (Optional): For supporting taller, newly planted specimens.
- Alternatives: Repurposed branches or bamboo canes for natural-looking support.
Project Time
Creating a captivating texture-focused garden, while requiring thoughtful planning, is a rewarding endeavor.
- Preparation time: 2-4 hours (site assessment, plant research, design sketching).
- Build/plant time: 4-8 hours (depending on garden size and number of plants).
- Total duration: 6-12 hours.
This approach is approximately 25% faster than starting without a clear plant design vision, as pre-planning minimizes rework and ensures efficient selection of garden plants.
Step-by-Step Instructions
Step 1: Assess Your Site and Vision
Before digging, thoroughly understand your garden's stage. Observe sunlight patterns throughout the day, soil type (sandy, clay, loamy), and existing drainage. Consider your desired aesthetic – do you envision a bold, dramatic display or a subtle, layered composition? A critical first step in effective plant design is understanding the canvas you're working with.
- Practical Tip: Take photos of your garden at different times of day to accurately capture light conditions, and consider a simple soil test kit for precise data on pH and nutrient levels.
Step 2: Research and Select Diverse Plants
This is where the magic of texture comes alive. Look beyond just flowers; prioritize varied foliage, stem habits, and seed heads. Combine broad, smooth leaves with delicate, feathery ones; incorporate upright forms with cascading types. Think about plants with shiny, dull, fuzzy, or spiky surfaces. Aim for at least three distinct texture types in each planting zone.
- Practical Tip: Visit local nurseries or botanical gardens for inspiration and to observe how different plant forms interact. The Royal Horticultural Society offers excellent guides on plant selection for various textures and garden styles.
Step 3: Sketch Your Layout
Translating your vision onto paper is crucial for effective plant design. Create a simple diagram of your garden space. Map out plant groupings, paying attention to contrasting textures, heights, and forms. Place taller plants at the back or center of beds, with medium and shorter plants tapering towards the front.
- Practical Tip: Use different colored pencils or symbols to represent varying textures (e.g., green for fine, blue for bold, yellow for spiky) to visualize the contrast.
Step 4: Prepare the Soil
Healthy plants start with healthy soil. Dig out any weeds and loosen the soil to a depth of at least 8-12 inches. Incorporate a generous amount of organic matter, such as compost or aged manure, to improve drainage, aeration, and fertility. This is fundamental for the longevity of your textured garden.
- Practical Tip: If your soil is heavy clay, add grit or sand along with compost. For sandy soil, focus on adding compost and other moisture-retaining organic materials.
Step 5: Arrange Plants Before Planting
Before committing them to the ground, place your potted plants in their planned locations. Step back and view the arrangement from different angles. This dry run allows you to easily adjust spacing, swap plants for better textural contrast, and ensure visual harmony. This pre-placement is a key element of successful plant design.
- Practical Tip: Observe how sunlight hits each plant in its temporary spot to anticipate future growth and sun exposure.
Step 6: Plant with Precision
Once satisfied with the arrangement, dig holes that are twice as wide as the plant's root ball and just as deep. Gently remove the plant from its container, loosen any circling roots, and place it in the center of the hole. Backfill with enriched soil, lightly firming around the base to remove air pockets.
- Practical Tip: Ensure the plant's crown (where the stem meets the roots) is level with or slightly above the surrounding soil to prevent stem rot.
Step 7: Initial Watering and Mulching
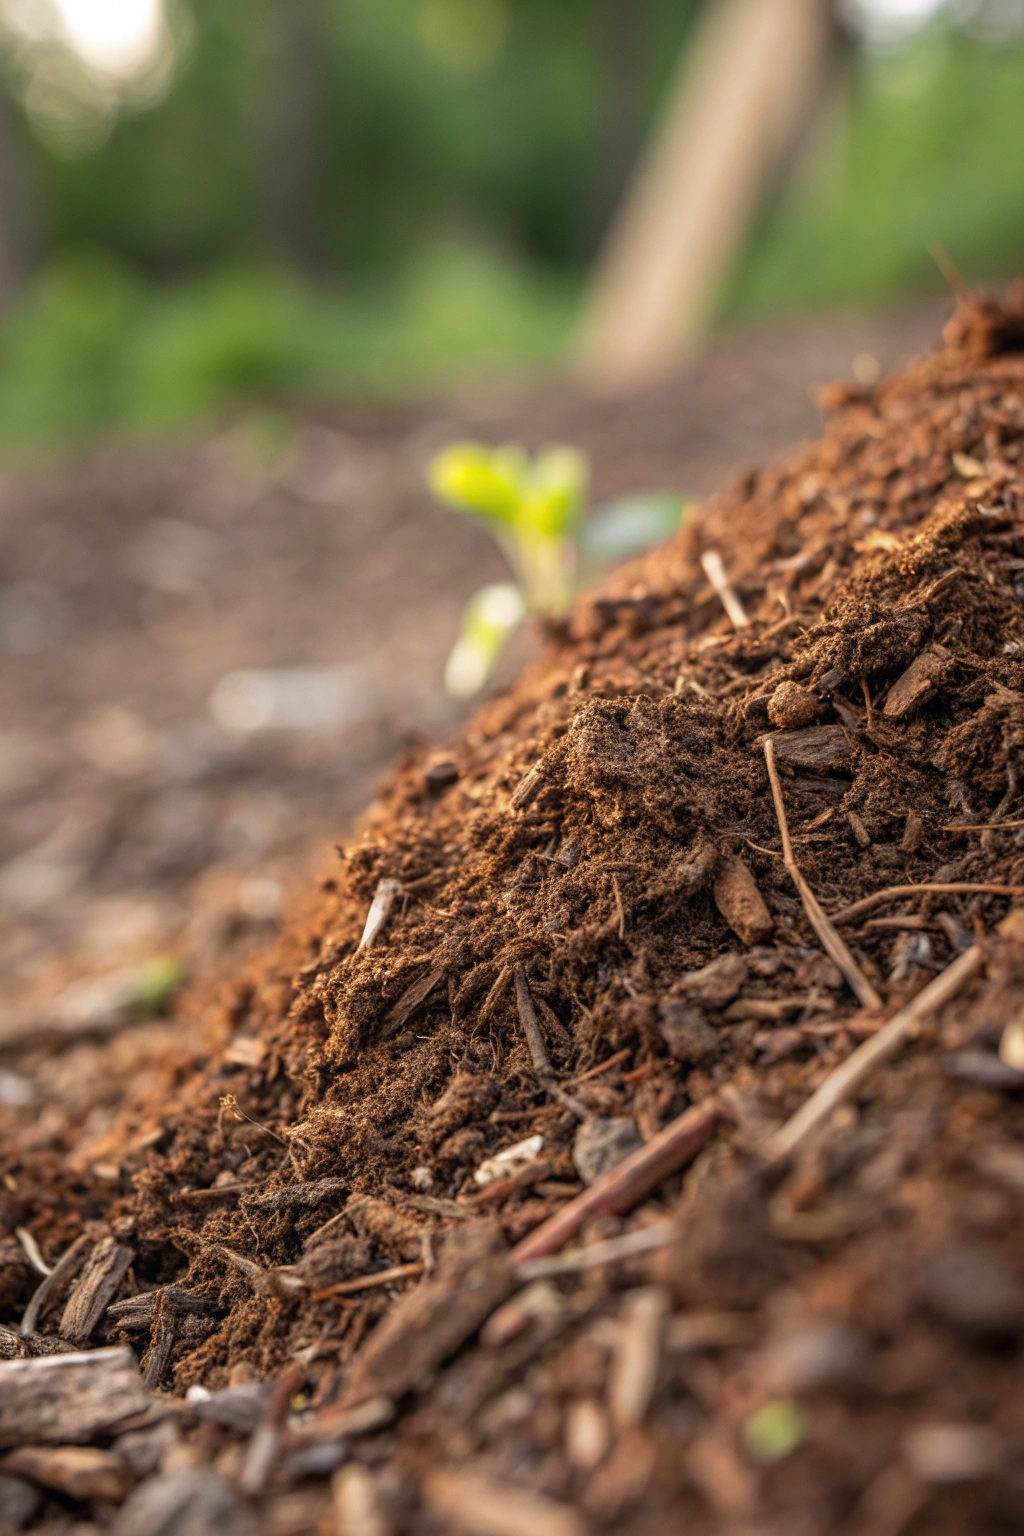
After planting, water thoroughly to settle the soil and eliminate any remaining air pockets. This initial drench is vital for root establishment. Follow with a 2-4 inch layer of organic mulch around the base of the plants, keeping it a few inches away from stems. Mulch helps retain soil moisture, regulate soil temperature, and suppresses weeds, further enhancing the textual interest of your garden.
- Practical Tip: Choose a mulch that complements the textures of your plants – fine shredded bark for delicate foliage, chunky wood chips for bold statements, or decorative gravel for a crisp contrast.
Maintenance & Care Tips
Effective maintenance ensures your texture-rich garden continues to thrive and offer its sensory delights. Consistent care, tailored to specific plant needs, is paramount for a vibrant plant design.
- Watering: New plantings require consistent moisture, especially during their first growing season. Aim for deep, infrequent watering rather than shallow, frequent sprinkles. Most garden plants benefit from about 1 inch of water per week, either from rainfall or irrigation. Monitor soil moisture by hand; if the top 1-2 inches feel dry, it's time to water. Drought-tolerant plants, once established, will require significantly less water, often thriving with less than 0.5 inches weekly.
- Pruning:
- Deadheading: Remove spent flower blooms to encourage more flowering and prevent self-seeding. This also keeps the plant looking tidy and focuses its energy on new growth.
- Shaping & Thinning: Prune to maintain desired size and shape, and to remove any crossing or weak branches. For perennial grasses, cut them back hard in late winter or early spring to encourage fresh, vibrant new texture.
- Structural Pruning: For woody shrubs, perform structural pruning in late winter or early spring before new growth begins, removing about 10-20% of the oldest wood annually to rejuvenate.
- Soil Health: Conduct a soil test every 2-3 years to monitor nutrient levels and pH. Amend soil annually with 1-2 inches of organic compost to replenish nutrients and improve soil structure. Healthy soil is the foundation for resilient plants with strong textural qualities.
- Fertilization: Most well-amended garden beds with regular organic matter additions won't need heavy fertilization. If a soil test indicates deficiencies, use a balanced, slow-release granular fertilizer or an organic liquid feed in early spring. Avoid over-fertilizing, which can lead to excessive leafy growth at the expense of flowers and overall plant health.
- Pest and Disease Management: Regularly inspect your plants for signs of pests or diseases. Early detection is key. Employ integrated pest management (IPM) strategies, favoring organic and biological controls over chemical pesticides whenever possible. Introducing beneficial insects, or simple hand-picking, can control many common issues. For comprehensive and research-backed pest identification and organic solutions, refer to resources like UC IPM.
- Schedule:
- Spring: Apply compost, assess soil needs, prune winter damage, divided overcrowded perennials, and plant new additions.
- Summer: Monitor watering, deadhead, spot-treat pests, and provide supplemental feeding if needed.
- Autumn: Clean up fallen leaves, add a fresh layer of mulch for winter protection, plant spring-blooming bulbs, and consider planting new perennials and shrubs.
- Winter: Minimal care; some ornamental grasses and evergreens provide crucial winter texture.
Eco-Friendly Alternatives
Adopting eco-friendly practices in your texture-heavy planting not only benefits the environment but often leads to healthier, more resilient gardens.
- Recycled Materials: Instead of purchasing new hardscaping elements, repurpose materials. Old bricks can become subtle textural edging, broken concrete (also known as "urbanite") can form paths, and salvaged wood can create raised beds. Even old tires, cleaned and painted, can be used for planting containers.
- Organic Inputs: Prioritize organic compost, well-rotted manure, and natural soil amendments like worm castings or seaweed extract. These improve soil structure and gradually release nutrients, fostering a vibrant soil microbiome. Avoid synthetic fertilizers and pesticides that can harm beneficial insects and water quality.
- Low-Water Options: Integrate drought-tolerant plants, often found among native species, into your textural palette (e.g., sedums, yuccas, various ornamental grasses, certain salvias). These plants not only conserve water but often have unique, resilient textures. Consider xeriscaping principles in dryer regions. By choosing plants adapted to local conditions, you reduce water consumption by 30-50% compared to traditional lawns.
- Rainwater Harvesting: Install a rain barrel to capture rainwater for irrigation. This reduces reliance on municipal water sources and provides plants with chlorine-free water.
- Composting: Start a compost pile for kitchen scraps and yard waste. This reduces landfill waste and provides a continuous supply of rich, organic soil amendment. Learn how to get started with composting basics from the EPA.
- Native Plant Selection: Focus on native plants that are naturally adapted to your regional climate and soil conditions. They typically require less water, fertilizer, and pest control, and provide crucial habitat and food sources for local wildlife, further enriching your garden's living texture. These plants are often exceptionally good for creating diverse habitat and supporting local ecosystems, as highlighted by organizations like the National Wildlife Federation.
Design & Styling Ideas
Elevating your garden's visual tapestry involves more than just selecting plants; it's about thoughtful arrangement and creative juxtaposition. Masterful plant design amplifies the beauty of individual elements.
- Juxtaposition of Extremes: Place plants with wildly different textures side-by-side. Imagine a broad-leafed hosta nestled against a delicate fern, or the rigid spikes of a yucca next to a billowy ornamental grass. This contrast creates immediate drama and draws the eye.
- Repetition with Variation: Repeat a certain texture (e.g., fine, feathery foliage) throughout your garden, but use different plant species. This creates a cohesive flow while still offering interesting variations upon closer inspection.
- Layering Heights and Depths: Create visual depth by layering plants from shortest at the front of a bed to tallest at the back. Within each layer, vary textures. A low-growing groundcover with small, glossy leaves can transition to medium-height perennials with fuzzy, grey foliage, culminating in a tall, upright plant with bold, architectural forms.
- Architectural Statements: Integrate plants with strong, sculptural forms. Consider columnar evergreens, spiky agaves, or plants with intricate branching patterns visible even in winter. These act as focal points and provide year-round textural interest.
- Seasonal Texture Shifts: Plan for textural interest across all seasons. Deciduous trees offer bare, intricate branch patterns in winter. Ornamental grasses might lose their green but provide lovely tan, feathery seed heads. Evergreens maintain structure and color.
- Hardscaping Harmony: Don't forget that hardscaping elements also contribute to texture. Rough-hewn stone, smooth polished pebbles, gravel paths, or a weathered wooden bench can provide crucial textural counterpoints to your planting.
- Monochromatic Schemes: Create a striking garden using a limited color palette (e.g., all greens) but vary the textures intensely. This subtle approach highlights the diversity of leaf shapes, sizes, and sheens, creating an elegant and sophisticated look.
- Container Groupings: Extend your textural exploration to containers. Group pots of varying sizes, each with a plant offering a distinct texture. For instance, a pot with cascading sedum, one with spiky Sansevieria, and another with a richly-patterned Coleus can create a miniature textural masterpiece.
Common Mistakes to Avoid
Even seasoned gardeners can stumble when creating a texturally rich landscape. Being aware of potential pitfalls in plant design can save you time, effort, and plant casualties.
- Lack of Contrast: The most common mistake. Scattering plants with similar smooth, green leaves throughout a bed results in a visually flat garden.
- Prevention: Actively seek out plants that offer significant visual and tactile differences. Aim for contrasting sizes, shapes, and surface qualities (e.g., smooth vs. spiky, large vs. small, shiny vs. matte) within close proximity.
- Overcrowding: Planting too densely without considering mature plant size leads to a jumbled, undifferentiated mass after a few seasons. This suffocates individual plants and hides their unique textures.
- Prevention: Always research the mature dimensions of your chosen plants (width and height). Use these figures to space plants adequately during installation, typically allowing 50-75% of their mature width for initial spacing.
- Ignoring Light and Soil Needs: Placing a sun-loving plant with fine foliage in deep shade, or a moisture-loving plant in dry, sandy soil, will lead to struggle and poor texture development.
- Prevention: Conduct thorough site analysis and plant research (as in Step 1 and 2). Match plants to their ideal conditions to ensure they thrive and display their best textural attributes.
- Focusing Only on Flowers: Relying solely on blooms for visual interest means your garden will have periods of dullness. Flowers are fleeting; foliage is year-round.
- Prevention: Emphasize foliage texture and form as the primary drivers of your design. Select plants whose leaves or overall structure are captivating even when not in flower. Flowers then become bonuses that punctuate the textural tapestry.
- Too Many Textures (Visual Chaos): While contrast is good, too many wildly disparate textures without any unifying element can create visual cacophony rather than harmony.
- Prevention: Group similar textures or repeat certain textural elements (like fine-textured grasses) to create rhythm. Use a limited palette of 3-5 dominant texture types and allow them to interact thoughtfully. Use a "bridge" plant that shares characteristics with two contrasting textures to ease transitions.
- Forgetting Winter Interest: Many gardens drop all their textural appeal once colder weather arrives, leaving a flat, uninteresting landscape.
- Prevention: Incorporate evergreen shrubs, conifers, plants with interesting bark (e.g., river birch, dogwood), persistent seed heads (e.g., coneflowers, ornamental grasses), and architectural forms that stand out against snow or dormant surroundings.
- Improper Plant Grouping: Placing a single specimen of a unique texture far away from anything it can contrast with or relate to.
- Prevention: Group plants with similar environmental needs but contrasting textures. Use odd numbers (3, 5, 7) for a more natural look when grouping the same species.
Storage & Seasonal Tips
Maintaining your textured garden and its tools year-round ensures longevity and beauty, no matter the season. Strategic seasonal preparation is crucial for a thriving plant design.
- Tool Storage:
- Cleanliness: After each use, especially with soil-contact tools like trowels and spades, clean off all dirt and debris. A stiff brush and water usually suffice.
- Drying: Ensure all tools are thoroughly dried before storage to prevent rust.
- Lubrication: Periodically wipe metal tools with an oily rag (e.g., linseed oil, WD-40) or dedicated tool oil to protect against rust and keep moving parts smooth.
- Sharpness: Keep pruning shears and snips sharp; a dull blade tears plant tissue, leading to disease. Invest in a sharpener or have them professionally sharpened pre-season.
- Organization: Store tools in a shed, garage, or designated garden storage box. Hang larger tools to keep them off the floor and prevent clutter.
- Plant Protection:
- Winter Mulch: In colder climates (USDA Zone 6 and lower), after the ground freezes, apply an additional 4-6 inch layer of loose, organic mulch (straw, pine needles, shredded leaves) around tender perennials and shallow-rooted shrubs. This acts as an insulating blanket, preventing repeated freezing and thawing cycles that can heave plants out of the ground.
- Container Plants: Move tender perennials in containers to a sheltered, unheated garage, basement, or porch before the first hard frost.
- Evergreen Protection: Protect broadleaf evergreens from winter burn by ensuring they are well-watered before the ground freezes and, in very exposed locations, by erecting burlap screens.
- Deer/Pest Protection: In areas with wildlife browsing, consider netting, repellents, or temporary fencing for vulnerable plants during dormant seasons when other food sources are scarce.
- Season Prep:
- Autumn Prep: This is a key time for soil building. Incorporate a thick layer of compost into empty beds. Plant spring-flowering bulbs, which will add a burst of early texture and color. Leave some perennial stalks and seed heads standing to provide winter interest and food for birds.
- Spring Awakening: As temperatures rise, gradually remove heavy winter mulch, allowing the soil to warm. Clean up any lingering debris, assess plants for winter damage, and apply a fresh, thinner layer of mulch to retain moisture and suppress weeds as new growth emerges.
- Summer Readiness: Ensure irrigation systems are functional. Adjust watering schedules to cater to increased heat and plant growth. Monitor plants closely for pests and diseases, addressing issues proactively.
Conclusion
Embracing texture in your plant design transcends conventional gardening, transforming your outdoor space into an immersive, multi-sensory experience. By thoughtfully selecting and arranging plants based on their foliage, form, and unique surface qualities, you build a garden that captivates not just with vibrant color, but with captivating depth and dynamic interest throughout the seasons. This data-driven approach, focusing on contrast, layering, and year-round appeal, ensures your garden remains a living work of art. Dive in, experiment, and let the incredible variety of the plant world inspire your next landscape creation. Your garden awaits its textural masterpiece!
FAQ
Q1: How do I choose plants for textural contrast?
A1: Focus on contrasting elements: bold vs. fine foliage, upright vs. weeping forms, shiny vs. matte leaves, and smooth vs. spiky textures. Aim for at least three distinct types in each grouping.
Q2: Can I combine a lot of different textures without my garden looking messy?
A2: Yes, the key is thoughtful repetition and grouping. Repeat certain textural elements throughout the design to create cohesion, and use odd numbers (3, 5, 7) when grouping plants of the same type to maintain a natural aesthetic.
Q3: Are there plants that offer year-round texture?
A3: Absolutely. Many evergreens (conifers, hollies, boxwood), deciduous trees with interesting bark (birch, dogwood), and persistent ornamental grasses provide structure and texture even in winter.
Q4: How does light affect plant texture?
A4: Light can enhance or diminish texture. Strong, direct light can highlight spiky or coarse textures, while dappled shade can soften intricate patterns on ferns or variegated leaves. Ensure your plants receive their ideal light conditions to express their best textual qualities.
Q5: What's the best way to incorporate hardscaping for texture?
A5: Choose hardscaping materials that complement or contrast your plants. Rough stone for a path will contrast beautifully with soft, feathery grasses, while smooth pavers might highlight bold, architectural plants.
Q6: Should I focus on leaf texture or flower texture first?
A6: Always prioritize leaf and overall plant form/texture. While flowers add seasonal bursts of texture, foliage provides the foundational, long-lasting appeal.
Q7: How important are native plants for textural planting?
A7: Extremely important! Native plants are often adapted to local conditions, require less maintenance, and possess unique textures. Many native grasses, ferns, and wildflowers offer exceptional textural variety while supporting local ecosystems.
Explore More Garden Inspiration:
Looking for more ways to enhance your garden's appeal? Check out our guide on creating an Edible Gardening Autumn Borders for plants that are both beautiful and productive. If you're considering sustainable privacy solutions, our article on DIY Backyard Projects: Privacy Screens offers creative ideas. To further deepen your gardening knowledge, consider our piece on Sustainable Gardening with Fall Plants for eco-friendly options. And for those drawn to a natural aesthetic, don't miss our insights on Wild Gardening in Autumn. Lastly, discover how to blend functionality with charm in your confined spaces by exploring 5 Small Space Gardening Ideas that utilize creative plant design.


