Pollinator Pockets & Wild Meadows
Introduction
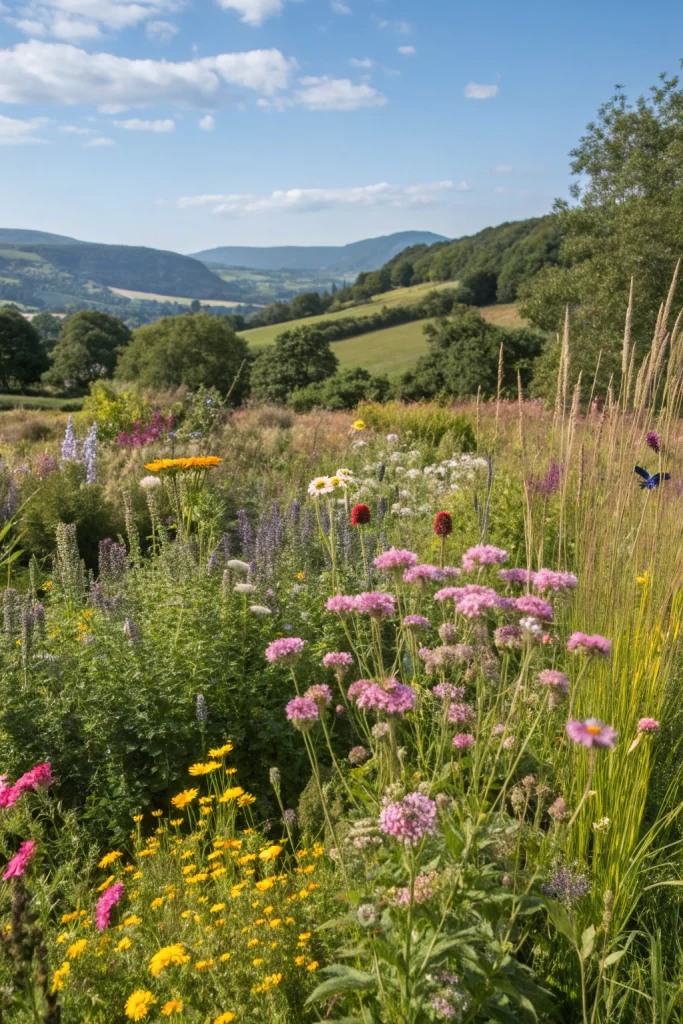
Did you know that pollinator populations have plummeted by an average of 30% in recent decades, primarily due to habitat loss and pesticide use? If you're looking to make a tangible difference right in your own backyard while simultaneously enhancing its beauty and resilience, then embracing sustainable gardening through the creation of a wild meadow or a series of pollinator pockets is a profoundly impactful project. This guide will walk you through transforming any space, large or small, into a vibrant ecological haven bursting with life, color, and fragrance. It's an investment in biodiversity and a commitment to nurturing nature, requiring minimal long-term effort for maximum environmental return.
Table of Contents
- Introduction
- Materials & Tools Needed
- Project Time
- Step-by-Step Instructions
- Maintenance & Care Tips
- Eco-Friendly Alternatives
- Design & Styling Ideas
- Common Mistakes to Avoid
- Storage & Seasonal Tips
- Conclusion
- FAQ
Materials & Tools Needed
Creating a thriving pollinator haven doesn't require an arsenal of specialized equipment. Instead, focus on quality basics and thoughtful choices for your seeds and plants.
- Shovel or Spade: A sturdy spade with a good grip is essential for breaking ground and turning soil. Consider a sharp, stainless steel blade for easier digging.
- Rake: A bow rake for leveling soil and a leaf rake for clearing debris will be invaluable. Feel the smooth, cool wood handle as you prepare the bed.
- Trowel: For precise planting of plugs or smaller seeds. A comfortable ergonomic handle will make detailed work a pleasure.
- Garden Hoe: For weeding and breaking up small clumps of soil, especially effective for broad areas. The satisfying thwack as it cuts through weeds is surprisingly cathartic.
- Wheelbarrow or Garden Cart: To transport soil amendments, removed debris, and even tools. A well-balanced cart makes heavy loads feel lighter.
- Gardening Gloves: To protect your hands from thorns, blisters, and soil. Choose breathable, flexible gloves that allow for dexterity.
- Native Wildflower Seed Mix: Select a mix specific to your local ecoregion, ensuring it supports indigenous pollinators. Imagine a cascade of diverse textures and hues.
- Alternative: Individual seed packets of native annuals, biennials, and perennials for a curated bloom sequence. Think of delicate blue flax, robust purple coneflower, and cheerful black-eyed Susans.
- Native Plant Plugs (Optional): For instant impact and more rapid establishment of certain species. These young plants bring immediate structure to your budding meadow.
- Alternative: Locally sourced perennial plants from a native plant nursery, ensuring genetic diversity and resilience.
- Compost or Organic Matter: Well-rotted compost or aged manure to enrich your soil. This dark, earthy material carries the promise of future abundance.
- Alternative: Leaf mold or finely shredded bark for soil improvement and moisture retention.
- Watering Can or Hose with a Gentle Sprayer: For initial watering and ongoing hydration as plants establish. A soft mist mimicking natural rain is ideal for young seedlings.
- Mulch (Optional): Straw, wood chips, or shredded leaves to suppress weeds and retain moisture around established plants. This protective blanket keeps soil temperatures steady.
- Alternative: Pine needles for slightly acid-loving native species.
- Measuring Tape or Garden String: For defining your planting area. Visualize the flowing shapes of your future meadow with clear boundaries.
Project Time
The beauty of creating a wild meadow or pollinator pocket lies in its relatively straightforward process, though patience is key for long-term rewards.
- Preparation time: 2-4 hours (for a 100 sq ft area, clearing and basic soil amendment)
- Build/Plant time: 1-3 hours (depending on whether you're sowing seeds or planting plugs)
- Total duration (initial active work): 3-7 hours
This typically means you can sow a 100 sq ft pollinator patch about 40% faster than laying a new lawn, which often involves extensive rototilling, leveling, and ongoing maintenance.
Step-by-Step Instructions
Transforming a patch of your garden into a buzzing oasis is a rewarding journey. Follow these steps for successful sustainable gardening.
Step 1: Site Selection and Preparation
Choose a location that receives at least 6 hours of direct sunlight daily. Good drainage is crucial for most wildflowers.
Practical Tip: Observe your chosen spot throughout the day to confirm sun exposure. Avoid areas prone to standing water after rain.
Step 2: Soil Amendment
Remove any existing turf, weeds, and debris. For lawns, cut the grass very short, then use a shovel to carefully remove sod in sections, exposing the bare soil beneath. Once cleared, lightly loosen the top 6-8 inches of soil and incorporate a 1-2 inch layer of compost or other organic matter. This improves soil structure and nutrient availability without over-enriching, which can favor weeds over wildflowers.
Practical Tip: Perform a simple soil test to understand your soil's pH and nutrient levels; this informs optimal plant selection. You can find basic kits at garden centers or send samples to your local extension office.
Step 3: Seed Selection and Sowing
Select a native wildflower seed mix appropriate for your USDA hardiness zone and soil type. For even distribution, mix your seeds with sand or fine sawdust at a 1:10 ratio. Spread the mixture evenly over the prepared soil, aiming for about 10-20 seeds per square foot. Gently rake the seeds into the top 1/4 inch of soil, or simply walk over the area to ensure good seed-to-soil contact. For specific guidance on native plant selection, consult resources like the Xerces Society which offers regional guides for pollinator conservation.
Practical Tip: Sowing in late fall or early spring often yields the best results as natural stratification (cold, moist period) helps break seed dormancy.
Step 4: Initial Care and Watering
Water the newly sown area thoroughly with a fine spray, ensuring the top inch of soil remains consistently moist but not waterlogged. Continue this gentle watering daily for the first 2-4 weeks, or until seedlings are well-established and showing true leaves.
Practical Tip: A sprinkler system on a fine mist setting can be ideal for large areas, mimicking light rain and preventing seed displacement.
Step 5: Monitoring and Weed Management
During the first year, diligent weeding is critical. Young wildflowers can be easily outcompeted by aggressive weeds. Identify and remove any non-desired plants by hand, being careful not to disturb the emerging seedlings. As your meadow matures, the dense growth of wildflowers will naturally suppress many weeds.
Practical Tip: Learn to identify common weed seedlings versus wildflower seedlings in your area; a good plant identification app or field guide can be invaluable.
Maintenance & Care Tips
The beauty of a wild meadow or pollinator pocket is its low-maintenance nature once established, but a little care goes a long way, especially in the initial stages of this effort in sustainable gardening.
- Watering: After establishment (typically 6-8 weeks from sowing), most native wildflowers are remarkably drought-tolerant. They generally require minimal, if any, supplemental watering, thriving on natural rainfall. However, during prolonged dry spells (more than two weeks without significant rain), a deep watering once a week in the early morning can be beneficial, especially for younger plants. Aim for 1 inch of water penetration.
- Pruning/Mowing:
- First Year: If weeds become overwhelming, a high mow (set mower blade to 6-8 inches) can help suppress annual weeds without harming slower-growing perennial wildflowers. Do this once or twice in the first year if needed.
- Subsequent Years: Allow plants to stand through winter to provide habitat and food for wildlife. In late winter or early spring (February-April, before new growth begins), mow the entire area to a height of 4-6 inches (or about 10-15 cm). This cutting stimulates new growth and prevents woody species from taking over. Leave the clippings on the ground to return nutrients to the soil.
- Soil: Given the initial soil amendments, your meadow typically won't require additional fertilization. Native plants are adapted to local soil conditions and often prefer lean soils, which discourage aggressive weeds and competitive non-native species. Over-fertilization can reduce flowering and promote unwanted green growth.
- Schedule:
- Spring: Mid-spring, before new growth really takes off, is an ideal time for your annual mow.
- Summer: Enjoy the blooms! Minimal intervention, mainly hand-weeding any particularly persistent non-native invaders.
- Autumn: Allow seed heads to remain for birds and structural interest through winter. Resist the urge to "tidy up" too much.
- Winter: Provide crucial overwintering habitat for insects and small mammals.
- Pest & Disease Management: Native plants are generally more resistant to local pests and diseases. If issues arise, focus on biological controls (e.g., introducing beneficial insects) or organic, least-toxic solutions. Chemical pesticides should be strictly avoided in a pollinator garden, as they harm the very creatures you're trying to attract. Data from the RHS Plants for Pollinators initiative consistently shows the detrimental effect of broad-spectrum pesticides on insect populations.
Eco-Friendly Alternatives
Adopting truly sustainable gardening means looking beyond just plant choices and considering all aspects of your project.
- Recycled Materials: Instead of purchasing new edging, consider repurposing old bricks, stones, or even fallen branches to define your pollinator pocket. Pallets can be deconstructed to create raised beds if a wild meadow isn't feasible for ground planting. Old tires, painted vibrant colors, can make excellent individual pollinator planters.
- Organic Inputs: Always opt for certified organic compost and soil amendments. Explore making your own compost from kitchen scraps and garden waste; the EPA provides excellent Composting Basics resources. For pest control, instead of synthetic pesticides, encourage beneficial insects like ladybugs and predatory wasps, or use natural deterrents like neem oil or insecticidal soap if absolutely necessary.
- Low-Water Options: By focusing exclusively on native plants adapted to your regional climate, your water consumption will naturally be minimized. Once established, native meadows are incredibly resilient to drought. Consider collecting rainwater in a rain barrel to use for initial watering or during unusually dry periods for any less-established plants. This reduces reliance on municipal water sources and saves money.
- Upcycled Enhancements: Old bird baths can be cleaned and repurposed as shallow water sources for bees and butterflies (add pebbles for landing spots). Broken pottery can become stepping stones or decorative accents within your meadow.
Design & Styling Ideas
Even with the wild appeal of a meadow, thoughtful design can elevate its aesthetic and ecological function.
- Layered Heights: Plan for varying plant heights to create visual depth and provide diverse niches for insects. Place taller plants like native grasses and coneflowers at the back or center, medium-height flora like bee balm and phlox in the middle, and lower growers such as wild strawberry or native sedges at the front.
- Color Blocks and Drifts: While a true meadow is a mix, you can strategically plant larger drifts of certain species for a more impactful, cohesive visual. Imagine a wave of purple salvias flowing into a sea of yellow coreopsis.
- Incorporate Structure: Don't be afraid to add non-plant elements. A rustic bench nestled at the edge invites contemplation, a small stone bird bath offers a vital water source, or a log pile provides shelter for ground-nesting bees and other beneficial insects. These elements create focal points and enhance functionality.
- Pathways: Even in a small pollinator pocket, a winding grass or wood chip pathway can invite exploration, allowing you to get up close to the buzzing activity without disturbing the plants.
- Season-Long Blooms: Design your meadow to have continuous blooms from early spring to late fall. This supports pollinators throughout their active seasons. For instance, early spring ephemerals, summer mainstays, and late-season asters and goldenrods. A good reference for local seasonal bloomers can be found via the USDA Forest Service, which offers information on native plants.
- Consider Adjacent Plantings: If your wild meadow abuts a more formal garden area, consider a transition zone with plants that bridge the two styles, like ornamental grasses or cultivated native cultivars, to create a harmonious flow.
Common Mistakes to Avoid
Even with the best intentions for sustainable gardening, some pitfalls can hinder your pollinator pocket's success. Awareness is your best defense.
- Over-fertilizing: While it might seem counter-intuitive, adding too much rich compost or synthetic fertilizer can actually be detrimental. Native wildflowers are often adapted to lean soils; excessive nutrients can encourage aggressive weeds (which thrive on rich soil) and lead to lush foliage at the expense of flowers, reducing their appeal to pollinators.
- Prevention: Stick to minimal organic matter (a thin layer of compost) during initial soil preparation and avoid supplemental feeding.
- Using Non-Native or Invasive Seeds: Many "wildflower mixes" on the market contain non-native or even invasive species that can outcompete desirable native plants, creating monocultures that offer limited ecological value.
- Prevention: Always choose seed mixes specifically labeled "native to your region" or source individual native seeds from reputable local suppliers. Consult a local botanical garden or extension office for recommended species.
- Insufficient Soil Preparation: Simply scattering seeds on top of existing turf or hard ground will likely lead to failure. Weed competition and lack of seed-to-soil contact are significant barriers.
- Prevention: Thoroughly clear the area of existing vegetation and loosen the topsoil as described in Step 2. Even minimal effort here pays huge dividends.
- Inconsistent Watering during Establishment: Young seedlings are vulnerable and need consistent moisture to germinate and grow strong root systems. Letting them dry out completely in the first few weeks can kill them.
- Prevention: Maintain consistent soil moisture (damp like a wrung-out sponge) for the critical establishment phase (2-4 weeks after sowing).
- Mowing Too Early or Too Often in the First Year: Mowing during peak flowering periods or too low can prevent plants from setting seed and maturing, hindering the meadow's establishment.
- Prevention: If mowing is absolutely necessary for weed control in the first year, set your mower blade to at least 6-8 inches high and only do so once or twice before plants initiate flowering. After the first year, only mow in late winter/early spring.
- Ignoring Weeds in the First Year: The first year is crucial for wildflower establishment. Persistent weeds can quickly choke out delicate seedlings.
- Prevention: Be diligent with hand-weeding, especially for aggressive perennial weeds. Learn to distinguish desirable seedlings from unwanted invaders.
Storage & Seasonal Tips
Optimizing your approach to tools and plants throughout the year ensures longevity for both your equipment and your thriving ecosystem.
- Tool Storage:
- Cleanliness is Key: After each use, clean soil and debris off your shovel, rake, and trowel. A stiff brush and water will suffice. Dry thoroughly to prevent rust.
- Sharpening: Keep cutting tools like hoes and pruning shears sharp. A sharp tool works more efficiently and is safer to use.
- Organization: Store tools in a dry area, ideally hanging them to keep them off the ground and easily accessible. A tool rack or pegboard can significantly extend their life. For winter, consider applying a thin layer of oil (like linseed oil) to metal parts of hoes and spades to prevent corrosion.
- Plant Protection:
- Winter Rest: For established wild meadows, minimal winter protection is needed. The standing plant material provides crucial insulation and habitat for overwintering insects (like native bees in hollow stems) and food for birds. Resist the urge to cut everything back to "tidy up" until late winter or early spring.
- Young Plants: If you've planted perennial plugs late in the season, a light layer of straw mulch around them before the first hard freeze can offer extra insulation and prevent frost heave.
- Season Prep:
- Spring Awakening: This is the ideal time for your annual low mow (if desired) to clear old growth and stimulate new plant emergence. Assess your meadow for any bare spots and consider scattering additional seeds if needed.
- Summer Bloom: Your role is primarily observation and enjoyment! Keep an eye on any aggressive weeds that might emerge and remove them promptly.
- Autumn Prep: Allow plants to go to seed naturally. This provides food for birds and ensures future generations of wildflowers. Resist cutting back until late winter. This is also a good time to amend peripheral areas with compost if you plan to expand your meadow next year.
Conclusion
Creating a wild meadow or pollinator pocket is more than just a gardening project; it's a powerful act of sustainable gardening that directly addresses declining biodiversity and supports critical ecosystems. By nurturing these vibrant spaces, you're not only enhancing the beauty of your property but also providing essential food and habitat for pollinators, birds, and other beneficial wildlife. This rewarding endeavor offers a profound connection to nature, transforming your garden into a dynamic, living tapestry that evolves with the seasons. Step up, get your hands dirty, and join the movement to rewild our landscapes, one pollinator pocket at a time. Your actions today will sow the seeds for a healthier, more beautiful tomorrow.
FAQ
Q1: How do I choose the right native seeds for my area?
A1: Research your local ecoregion and consult native plant nurseries, university extension offices (like the University of Minnesota Extension, which offers regional plant lists), or conservation organizations for species recommendations specific to your climate and soil type.
Q2: Can I start a pollinator pocket in a small urban space?
A2: Absolutely! Pollinator pockets can be as small as a window box or a single potted container. Focus on native flowering plants that suit your space and provide consistent blooms.
Q3: How long does it take for a wild meadow to establish?
A3: Most wild meadows take 1-3 years to fully establish. The first year focuses on germination and seedling growth, the second sees more abundant flowering, and by the third year, it should be a thriving, self-sustaining ecosystem.
Q4: Will a wild meadow attract unwanted pests?
A4: While some insects might be drawn to the increased biodiversity, a healthy ecosystem, particularly one focusing on native species, tends to balance itself. Beneficial insects (predators and parasitoids) are attracted to meadows and help keep pest populations in check.
Q5: What if I have existing weeds? How do I properly clear them?
A5: For stubborn weeds, solarization (covering the area with clear plastic for 6-8 weeks during hot weather) or repeated shallow cultivation (hoeing every few weeks) can be effective. Avoid harsh chemical herbicides.
Q6: Do I need to fertilize my wildflower meadow?
A6: Generally, no. Native wildflowers typically thrive in lean soils and over-fertilizing can lead to excessive leafy growth, fewer flowers, and can encourage weed dominance.
For more gardening inspiration, explore creating a tranquil wellness garden space. If you're looking for clever ways to extend your growing season, check out our guide on building a DIY cold frame in 7 steps. You can also elevate your outdoor areas with inviting seating ideas and a backyard seating glow-up. To enhance your garden's visual appeal, discover the charm of texture-heavy planting. And if you're keen on sustainable growth for fall, learn about native drought-tolerant plants that thrive in cooler weather.


