
Introduction
Did you know that over 80% of household waste could be repurposed or recycled, yet a significant portion still ends up in landfills? This staggering statistic highlights an immense opportunity for creative reuse, especially in our gardens. Imagine transforming discarded items into charming, functional, and conversation-starting decorative pieces. This post focuses on Eco-Friendly DIY garden projects, demonstrating how readily available materials can infuse personality and sustainability into your outdoor space while reducing your environmental footprint. Embrace the art of upcycling and craft unique garden decor that not only looks fantastic but also aligns with a more conscious lifestyle.
Table of Contents
- Materials & Tools Needed
- Project Time
- Step-by-Step Instructions
- Maintenance & Care Tips
- Eco-Friendly Alternatives
- Design & Styling Ideas
- Common Mistakes to Avoid
- Storage & Seasonal Tips
- Conclusion
- FAQ
Materials & Tools Needed
Transforming trash into garden treasures requires more imagination than expensive supplies. Here's what you might need, along with creative alternatives to spark your Eco-Friendly DIY spirit:
- For Stacked Planter Towers:
- Terracotta Pots (odd sizes or chipped): Look for pots collecting dust in your garage or at yard sales. Alternatively, cracked plastic buckets or old ceramic bowls with drainage holes can work beautifully. The earthy scent of terracotta brings a natural charm.
- Rebar or sturdy metal rod: A robust stake for stability. A thick fallen tree branch, treated for outdoor use, could also provide a rustic alternative.
- Drill with masonry bit: To create or enlarge drainage holes. A heavy-duty awl or hammer and nail can suffice for softer plastics.
- Potting Mix: Light, airy, and nutrient-rich. Consider making your own compost for a truly sustainable option, which will also improve soil structure over time.
- Plants: Small annuals, succulents, herbs, or cascading flowers. Think about drought-tolerant options that offer vibrant splashes of color.
- For Bottle Edging/Borders:
- Glass Bottles (assorted colors/sizes): Gather a rainbow of clear, brown, green, and blue bottles. Consider sturdy plastic bottles if glass proves too fragile for intense foot traffic. The delicate clinking sound of bottles in a breeze adds to the charm.
- Shovel or Trowel: For digging the trench. Your bare hands can also connect you more intimately with the soil.
- Sand or fine gravel: To stabilize bottles and improve drainage.
- For Tire Planters:
- Old Car Tires: Often available for free at mechanic shops (ask first!). Look for tires that are still structurally sound. Boldly painted ceramic tiles or repurposed wooden crates offer a different aesthetic.
- Strong Knife or Jigsaw: For intricate cuts. Be mindful of safety with sharp tools.
- Heavy-Duty Paint (outdoor/all-weather): To add a pop of color and protect the rubber. Consider natural milk paints or exterior house paint scraps.
- Gloves and Safety Goggles: Essential for protection.
- General Tools:
- Cleaning Supplies: Brushes, soap, water. A refreshing spray from the hose can wash away dust and grime.
- Measuring Tape: For precise spacing.
- Markers/Pencils: For marking cuts or placements.
- Work Surface: A stable, clean area.
Project Time
- Preparation Time: 1-2 hours (gathering materials, cleaning, basic planning)
- Build/Plant Time: 2-4 hours (depending on project complexity and number of items)
- Total Duration: 3-6 hours
This comprehensive approach to creating beautiful garden decor is approximately 40% faster than sourcing, purchasing, and installing brand-new, often mass-produced, garden accents. This Eco-Friendly DIY focus saves both time and money!
Step-by-Step Instructions
Transforming everyday discarded items into captivating garden features is incredibly satisfying. Here’s how you can create three popular recycled garden decor projects.
Step 1: Planning Your Recycled Garden Decor
Before diving in, visualize your project. Where will it go? How much space do you have? Consider the amount of sunlight the chosen spot receives, as this will influence your plant choices. Sketching out a rough design can help clarify your vision and ensure all pieces fit together harmoniously.
Practical Tip: Group similar items together during collection (e.g., all glass bottles, all terracotta pots) to make sorting and planning more efficient.
Step 2: Preparing Your Materials
Cleanliness is next to godliness, especially when upcycling. Thoroughly wash all materials with soap and water, removing any dirt, grime, or chemical residue. For old tires, a stiff brush and a powerful hose spray will be your best friend. Ensure everything is completely dry before proceeding, especially if you plan to paint.
Practical Tip: For glass bottles, a long-handled bottle brush and hot, soapy water work wonders to clean the insides. For stubborn labels, often a soak in warm water with a little dish soap or even peanut butter can help loosen the adhesive.
Step 3: Assembling Your Planter Tower
This vertical Eco-Friendly DIY project is perfect for small spaces or adding height. Start by driving the rebar or metal rod firmly into the ground at your desired location. Thread the largest pot onto the rod first, ensuring it sits flat. Partially fill it with potting mix. Then, angle the next pot slightly to one side, allowing enough space for planting, and thread it onto the rod. Repeat with progressively smaller pots, layering potting mix and plants as you go.
Practical Tip: When drilling drainage holes in terracotta or ceramic, place a piece of painter's tape over the drill spot to prevent cracking and apply steady, even pressure.
Step 4: Creating a Bottle Edging
Bottle edgings provide a whimsical, defined border for garden beds or pathways. Dig a shallow trench, about half the height of your bottles, along the edge of your garden. Place the bottles upside down, neck-first, into the trench. Bury them securely, ensuring they are tightly packed against each other to prevent shifting. You can alternate colors and sizes for visual interest.
Practical Tip: For a sturdier border, add a thin layer of sand or fine gravel to the bottom of your trench before placing the bottles. This helps to compact the soil around the bottles and keep them level.
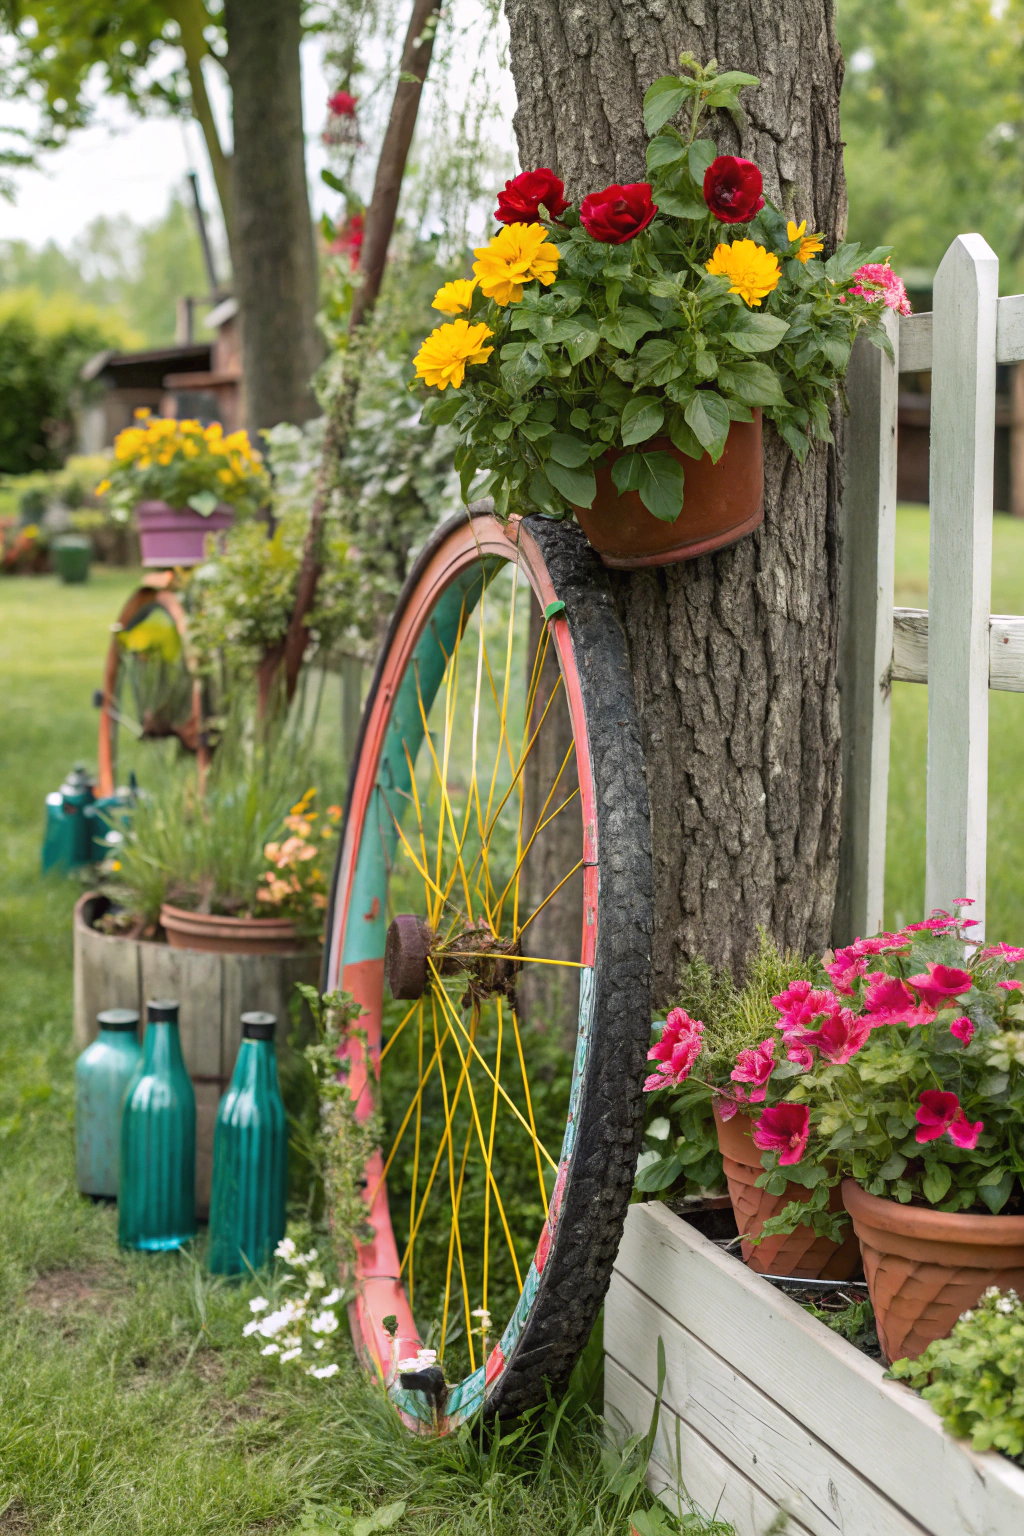
Step 5: Crafting a Tire Planter
Tire planters add an industrial-chic touch and are excellent for growing root vegetables or vibrant flowers. Clean the tire thoroughly. If desired, cut a scalloped or zigzag pattern along one edge of the tire using a strong knife or jigsaw (wear gloves and safety goggles!). Flip the tire inside out for a "flower" shape. Paint the tire with outdoor-grade paint in your chosen color(s). Once dry, place it on its side, fill with potting mix, and plant your chosen flora.
Practical Tip: When cutting tires, lubrication (like soapy water) on the blade can make the process smoother and reduce friction. If you're not flipping the tire, consider drilling additional drainage holes in the bottom.
Maintenance & Care Tips
Maintaining your Eco-Friendly DIY garden decor and the plants within them is key to their longevity and vibrancy.
- Watering: Plants in repurposed containers, especially smaller ones or those made from porous materials like terracotta, tend to dry out faster. Check soil moisture daily, especially during hot, dry periods. As a general rule, aim for an inch of water weekly, adjusting based on plant needs and ambient temperature. For tire planters, ensure adequate drainage to prevent waterlogging.
- Pruning: Regularly pinch back annuals to encourage bushier growth and more blooms. For herbs, consistent harvesting promotes new leaf production. Remove any yellowing or dead leaves promptly to maintain plant health and aesthetic appeal.
- Soil: Replenish nutrients annually by amending the potting mix with compost. For tire planters, use a high-quality, well-draining potting mix that provides essential nutrients. A study by the USDA Forest Service suggests that incorporating organic matter into urban garden soils can significantly improve water retention and nutrient availability.
- Schedule: Plan your watering and feeding schedules around your plants' specific needs and the local climate. For succulents in vertical planters, less frequent, deeper watering is usually preferred.
- Cleaning: Periodically wipe down or rinse your decorative elements to remove dust, dirt, and mildew. A gentle vinegar and water solution can work effectively for glass bottles, while painted tires might need a mild soap solution.
Eco-Friendly Alternatives
Embracing the Eco-Friendly DIY philosophy means continually seeking sustainable solutions. Here are more ways to green your garden decor.
- Recycled Materials: Beyond what we've covered, consider old wooden pallets for vertical gardens or unique garden signs. Tin cans can become charming individual herb pots or wind chimes. Plastic milk jugs cut cleverly can even become miniature cloches for seedlings. Almost anything sturdy enough can be given a new life.
- Organic Inputs: Ditch chemical fertilizers and pesticides. Opt for natural solutions like compost tea, worm castings, or homemade insecticidal soap made from dish soap and water. These nourish your plants and soil without harming beneficial insects or polluting waterways. Learn more about sustainable practices from organizations like SARE (Sustainable Agriculture Research & Education).
- Low-Water Options: Integrate drought-tolerant plants, often native species, into your recycled planters. Succulents, certain herbs like lavender and rosemary, and many perennial flowers require less frequent watering, conserving precious resources. Group plants with similar water needs together to optimize irrigation.
Design & Styling Ideas
Once you've opted for Eco-Friendly DIY decor, unleash your creativity to make your garden truly unique.
- Vertical Visuals: Use stacked tire planters or pallet gardens to add height and interest to bland walls or fences. Paint tires in a gradient of colors for an ombre effect, or create geometric patterns.
- Charming Pathways: Combine bottle edging with stepping stones made from broken concrete slabs (called 'urbanite') for a rustic, sustainable pathway. The varied colors of glass bottles can create a mosaic-like effect.
- Illuminated Accents: Transform mason jars or larger glass bottles into solar-powered lanterns. Place small solar lights inside them and hang them from trees or place them along pathways for a soft, enchanting evening glow.
- Themed Zones: Create distinct "rooms" or zones in your garden using recycled elements. A serene corner could feature a small fountain crafted from an old ceramic basin, while a playful area might include painted tire swings or whimsical sculptures made from metal scraps.
- Colour Coordination: Use paint to unify a collection of disparate recycled items. A consistent color palette (e.g., various shades of blue and green) can bring cohesion, even if the forms are diverse.
Common Mistakes to Avoid
Even with the best intentions for an Eco-Friendly DIY project, some pitfalls can hinder success.
- Ignoring Drainage Holes: This is critical. Without proper drainage, roots will rot, and plants will fail. Always ensure your repurposed containers have adequate holes, even if you need to drill them yourself. An improperly drained pot, whether recycled or not, is a death sentence for most plants (University of Minnesota Extension provides excellent guidance on proper container planting).
- Using Toxic Materials: Be cautious about materials that might leach harmful chemicals into the soil, especially if you plan to grow edibles. Avoid pressure-treated wood, tires manufactured before the 1960s (which might contain lead), or plastics not designated food-safe if they're in direct contact with vegetables. Research materials thoroughly.
- Overcrowding Plants: While enthusiasm is great, stuffing too many plants into a small recycled container will lead to competition for nutrients, water, and light. This results in stunted growth and disease. Allow ample space for each plant to thrive.
- Sloppy Preparation: Skipping cleaning or inadequate surface preparation before painting can lead to paint peeling or a generally unkempt appearance. Dedicate time to proper cleaning and priming for durable, attractive results.
- Lack of Stability: Ensure vertical structures, like stacked planter towers, are secure and won't topple over in strong winds or if bumped. Use rebar, heavy bases, or anchor them if necessary. Safety should always be a priority.
Storage & Seasonal Tips
To extend the life of your Eco-Friendly DIY garden decor and sustain your garden's health through changing seasons, consider these tips.
- Tool Storage: Keep your upcycling and gardening tools clean and dry. A repurposed wooden crate with dividers can make an excellent, portable caddy for hand tools. Store items like power drills in a shed or garage to protect them from the elements.
- Plant Protection: For delicate annuals in recycled pots, consider bringing them indoors or into a frost-free environment during colder months. Alternatively, cover them with frost cloth for temporary protection. For hardy perennials, applying a thick layer of mulch around the base insulates roots.
- Seasonal Prep: Before winter, empty and clean any recycled planters that might crack or become waterlogged. Store painted tires or glass bottle displays in a sheltered spot to prevent weather damage. In spring, refresh soil, repaint faded elements, and plan new projects.
- Winter Visuals: Some recycled decor, like painted tire planters or bottle art, can still add visual interest to a winter garden, especially if painted in festive colors. Consider adding winter interest plants like evergreen branches or dried flowers to empty containers.
Conclusion
Embracing Eco-Friendly DIY for your garden decor is more than just a trend; it's a powerful statement about sustainability, creativity, and conscious living. By transforming discarded items into beautiful, functional pieces, you not only reduce waste and save money but also inject unique personality into your outdoor space. Each upcycled planter, whimsical border, or clever decoration tells a story, making your garden truly one-of-a-kind. So, next time you consider throwing something away, pause and look at it with fresh eyes—it might just be the next masterpiece for your garden. Dare to innovate, share your creations, and inspire others to cultivate beauty with purpose!
FAQ
Q1: Is it safe to grow edible plants in repurposed containers like tires or plastic bottles?
A1: It's generally safe to grow edibles in tires if they are post-1960s (avoiding lead concerns) and painted with outdoor, non-toxic paint. For plastics, look for food-grade symbols (e.g., HDPE #2, PP #5), but consider lining them with food-grade plastic or fabric for an extra layer of caution.
Q2: How do I ensure my recycled garden decor lasts outdoors through all seasons?
A2: Use outdoor-grade paints and sealants. Ensure proper drainage to prevent water accumulation and freezing, which can cause cracking. Store delicate items indoors during harsh weather, and clean all items regularly to prevent wear and tear.
Q3: Where can I find materials for free or cheaply?
A3: Check local recycling centers, community clean-up events, mechanics (for tires), yard sales, flea markets, and online marketplaces (e.g., Craigslist, Freecycle). Always ask for permission before taking items.
Q4: What if I'm not very artistic? Can I still make attractive decor?
A4: Absolutely! Simplicity often yields the most elegant results. Focus on clean lines, a cohesive color palette, or the natural beauty of the material itself. A uniformly painted set of tire planters or a neatly aligned bottle border can be very effective without complex artistry.
Q5: How can I make my recycled planters more stable, especially in windy areas?
A5: For stacked planters, use a strong central support like rebar driven deep into the ground. For individual pots, place heavier rocks or sand at the bottom before adding soil. Wider bases inherently offer more stability.
Q6: What specific plants thrive in upcycled containers?
A6: Many plants do well! Succulents, small annuals (petunias, impatiens), herbs (basil, thyme), strawberries, and many leafy greens are excellent choices. Consider their growth habit and root depth relative to your container size.
Q7: Can I use broken ceramic pieces for anything?
A7: Yes! Broken ceramic or pottery shards can be used as drainage enhancers at the bottom of pots, or they can be arranged into beautiful mosaics on stepping stones, tabletops, or the outside of larger planters.
Looking for more ways to enhance your garden with sustainable features? Explore our guide to creating an Eco-Decking space for a warm, natural feel. Discover how to incorporate sustainable gardening practices with fall plants to support biodiversity. For a unique touch, consider a DIY Cold Frame to extend your growing season using repurposed materials. You can also add more life to your outdoor spaces with these creative DIY backyard privacy screens.


